
-
Welcome to Talking Time's third iteration! If you would like to register for an account, or have already registered but have not yet been confirmed, please read the following:
- The CAPTCHA key's answer is "Percy"
- Once you've completed the registration process please email us from the email you used for registration at percyreghelper@gmail.com and include the username you used for registration
Once you have completed these steps, Moderation Staff will be able to get your account approved.
Fresh. Let's Play Jimmy and the Pulsating Mass!
Back to Let's Play
< 1 2 3 4 5 6 7 8 9 10 11 12 13 >
< 1 2 3 4 5 6 7 8 9 10 11 12 13 >
|
#121
 11-06-2019, 03:06 PM
|
||||||||||||||||
|
||||||||||||||||
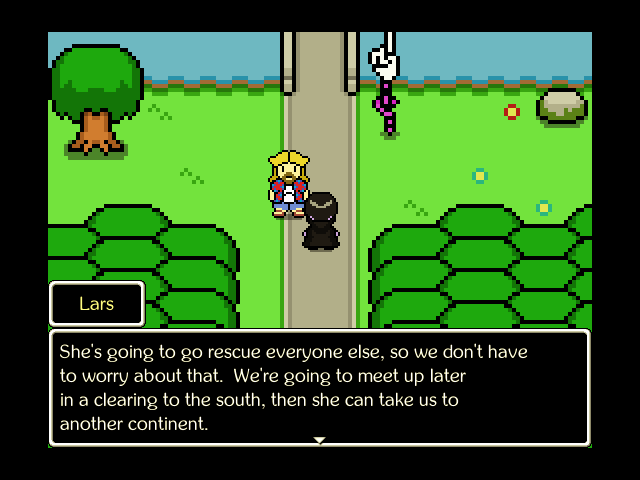 The dragon heads off again, and we're free to continue our adventure with both Helga and Lars on deck!  Quote:
 Another one of these weird things. We're gonna extend this update a little more, just enough to see what these are for and get through the last of King's March.  With the princesses rescued, we're free to travel to any part of King's March, so we'll go access the Clubhouse now. High time we did, anyway.  SHAAAAAPES  Hey, another temple.  Quote:
 All those shape statues we've seen with weird markings on them? Yeah! Those are clues for this puzzle! Interacting with the statues in here causes them to chime, but they don't do anything else that we can tell for now.  Eastern King's March is super short, as are all of the branches of King's March, which is why I'm cool with continuing the update through here.  Let's just mosey on over here...  Another clue, eh? All right then.  Music: Battle in the Fire Tornado Quote:
Quote:
 Music: Let's Color Today Finally, we can access the Clubhouse. We can also mess with Dark Dungeon, that's the cave off to the right, but that will wait for another day.  Music: Oh-So-Cool Castle Even the Clubhouse feels older.  Quote:
 Music: Beep Beep Boop Village RIGHT NEVER MIND  Music: Oh-So-Cool Castle Quote:
Quote:
 Quote:
 Quote:
 Quote:
 Music: Quest for the Journey Enough of that, we've got another island to explore!  HI GOOD DOAG  Quote:
 In addition to the usual consumables, they also sell Nutrition Cubes, Super Choco-Cola, and Fire Alarms: Quote:
 Rubik will also helpfully point you in the direction of the Clubhouse, and it's a good idea to heed their advice before going further down King's March. |

|
#122
11-06-2019, 03:07 PM
|
||||
|
||||
 Now Jimmy can Rampage!  More clues.  I'm going this waaaay!  The last temple. This must be James Temple.  Unlike the others, this place is in ruin, and no sages tend it or tell us about it. We can at least infer that the King ordered this one built first.  If there was a puzzle within, it's long since been lost to time. All we have to do is move some rocks out of the way.  Quote:
 Right, let's blow this POP-STAND.  Music But we don't get to leave yet, do we.  Not if Chancellor Pulsating Mass has anything to say about it.  Music: Skin Thieves (8-bit) Quote:
Music: A Cocoon Throbbing in a Dead Man's Mouth (8-bit) The final boss of Everchip is Chancellor Pulsating Mass, and as his boast indicates, his moveset changes depending on what form Jimmy takes, usually to counterplay it somewhat. Each form has two regular moves and one telegraphed move. Here's a list, as well as my personal rating for how manageable each form is. Don't assume that any given form makes the fight easy, I still lost this one once, but knowing what you're up against is pretty handy here, there's some real sucker punches buried in that list. I sure as hell didn't have the list memorized when I played.
Because Chancellor Pulsating Mass will change his moveset with your form, counterplay by switching forms becomes a lot harder, and it's often advisable to just learn what he can do for the form you prefer, and play to counter it. This works for basically every form except normal Jimmy (even Happy Little Sunflower can be viable since we just got a Vaccine and we have Helga). It's also worth noting that at around 50% health, Chancellor Pulsating Mass will Mind Control one of your party members every four turns. This can be broken via Startle, as before, so either use the Red-Billed Squawker well or pick up some Roman Candles from the Funhouse in Ashby's. It's also worth noting that your best damage output, at this stage of the game, is for Lars to use a Counter Stance on the same turn Chancellor Pulsating Mass goes for a rampage. I find that Red-Billed Squawker has the most generally tolerable moveset that includes the rampage, so that plus Annoying Squawk makes it my go-to for this fight, although I'll also use Revolting Blob for the attrition fairly often.  Music: Skin Thieves (8-bit) Quote:
 Music For the moment, at least, we've defeated the Pulsating Mass.  Music: Quest for the Journey Before we leave King's March, someone else calls to us.  Quote:
 Thanks for the apology. Maybe get Princess Stinkweed a better bed.  Music: Let's Color Today Okay, enough of this for now. We can meet the dragon here to progress to the next continent, and by golly, that's what we'll do! Next Time: Fresh air. Perfect view. A girl could build a nest in a place like this. |

|
#125
11-07-2019, 05:57 PM
|
||||||||||
|
||||||||||
 Music: Beep Beep Boop Village Once you defeat Chancellor Pulsating Mass, Kingland becomes safe to return to. There's also a few services that have opened up here, but right now I'm only going to deal with one of them...  Namely, Aurora's shop, which sells tracks exclusive to the Everchip region.  None of these are found in toyboxes like the rest, so that's a little annoying. I don't feel like shelling out for them either. Maybe later when we have virtually infinite money as tends to happen.  Quote:
 Quote:
 Music: Oh-So-Cool Castle Quote:
Quote:
 Music: Let's Color Today We'll very briefly pop by Dark Dungeon.  Music: Quest for the Journey So, the basics. Dark Dungeon as a concept is basically "what if Mario Party had a Pit of 100 Trials". Each of its hundred floors has a bunch of spaces that you move around on by rolling a six-sided die. What's more, Jimmy will be locked into a random form every time he moves to a new floor, including his default Jimmy form. You can find items to even the odds, and traps that can put a real stick in your spokes, and also Dungeon Points you can cash in with Chuff here, and some very unique treasures. 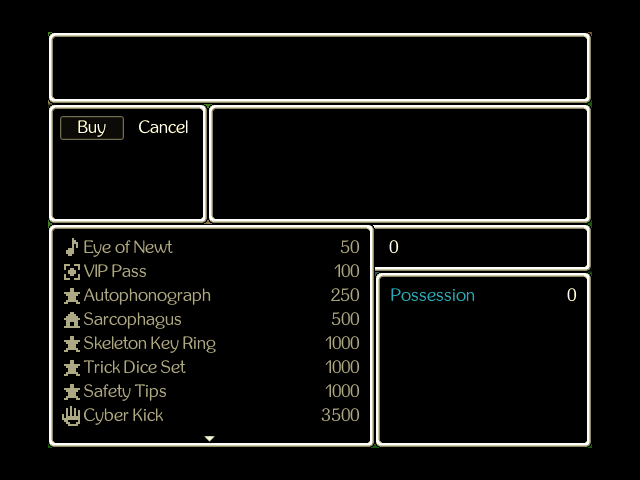 And I mean unique in a good way. There's items you can use to make Dark Dungeon easier, but there's also powerful equipment that opens up more unconventional roles for your party. I'll do some dives into Dark Dungeon every so often, as it's a very nice way to shore up levels if you're struggling (which is starting to be a thing for me), but I'm not covering the gear you can get here for one simple reason: Chuff's stock and the rare items you can find within Dark Dungeon itself have heavy spoilers for party members. If I do get anything from here that our current party can make use of, I'll mention it for that update, and if I've picked up gear that can be used by a new recruit, I'll throw that in their equipment breakdown.  The information terminal over here not only contains a list of the unique treasure available (every 5 floors has one exclusive to that area) but pointers about the mechanics of Dark Dungeon. Note that escaping Dark Dungeon is not on your own terms! In order to exit, you either have to find and use a Ladder item, or get wiped in a fight. And, of course, getting wiped in a fight means you take no Dungeon Points back, and if you aren't doing that what even is the point? Fortunately, you don't have to do all 100 floors in one go: whenever you use a ladder, you open a shortcut every tenth floor you've visited. The encounters scale up, too, with the lower floors having fights on par with postgame.  The upshot of all of this is that while I will become very familiar with this skull-laden archway, the actual details will be left out until I get something worth detailing.  There's still two treasures somewhere in King's March, but I've combed over the entire area and am virtually certain they're stuck in Mulgren Temple.  Again, these weird monuments are the clues we need. I'm leaving the mystery alive for now because I keep forgetting the clues and don't want to pull up the answers I want to give you all opportunities to solve it!  Music: Let's Color Today All right, that's enough for now. We'll be back pretty soon, but I need to get some stuff done on the next island first.  Music: Quest for the Journey Right, let's move.  And we're off!  Music: Air Spirals We're so high up now that the clouds are below us!  Thanks, dragon. Take it easy. 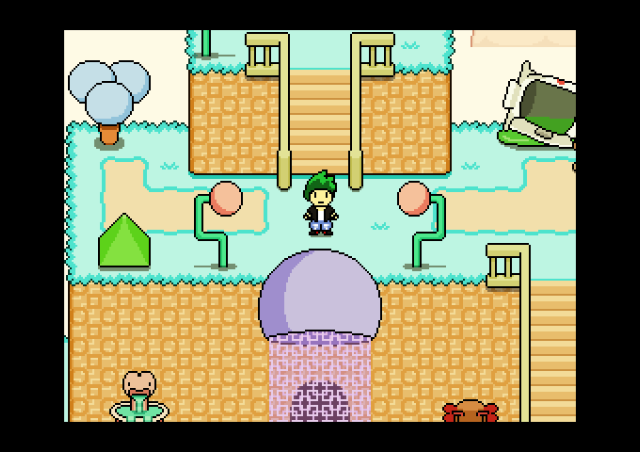 We've landed in Sacred Lantern, a monastic village perched atop the island of Secret Meridian. And that's another Iron Flamingo pod, so if we're fortunate, Andrew should be just around the corner.  All the monks of Sacred Lantern are named and shaped after numbers.  As usual, we're not the first ones here.  As usual, Ms. Robin has new stock for a new area.
Quote:
 The rest of The Petty Thugs are here, but they're focused on dealing with their own problems rather than us. Good place for it, too.  Quote:
 Music: An Open Window To nobody's surprise, Helga is the first to react. |
|
#126
11-07-2019, 05:59 PM
|
|||||||||||||||||||
|
|||||||||||||||||||
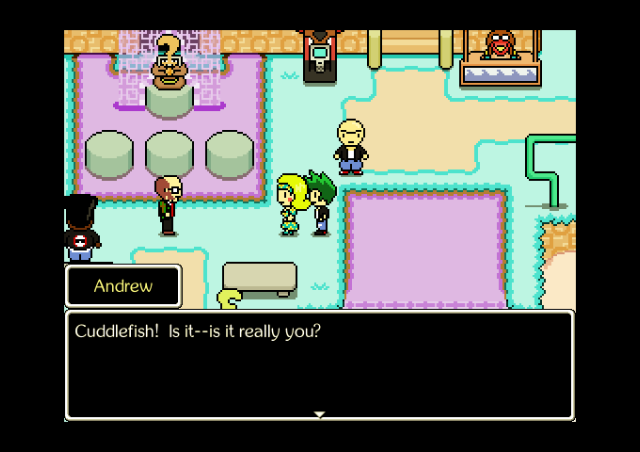 Hi nerd dad.  Quote:
 Quote:
 Music: Skin Thieves Quote:
 Music: Air Spirals Quote:
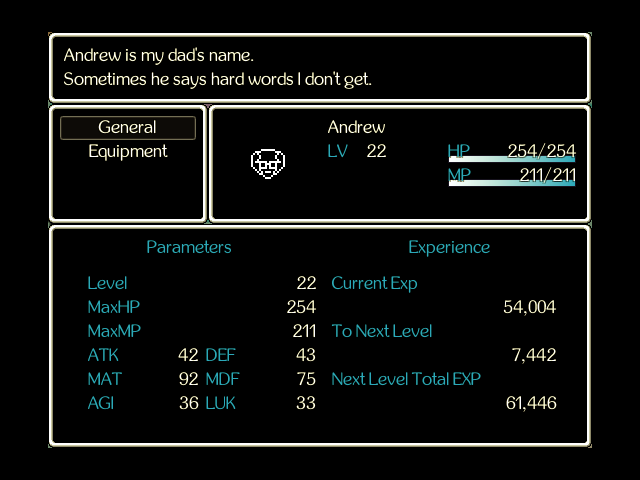 In any event, we have a full party once again! This is the main reason why I held off on backtracking shenanigans until now: with Andrew on our team, we now have a replacement damage dealer ever since Buck got hauled off to parts unknown. Andrew boasts ridiculously good MAT and not-inconsiderable MP, MDF, and LUK, in traditional mage fashion. And, as you might expect, his other stats are very much on the weak side. Nerd dad is not a brawler and cannot take hits, and he's not especially fast either, but he packs a hell of a kick and won't have to be shy about holding back in fights.  This is especially true when you factor in his Erudite personality. All that reading tends to leave one spry enough in wit that you're never at a loss for ideas. 3% MP regen isn't much, but it goes a long way considering Andrew's generous MP pool. He begins play with a Worn Scroll (+8 ATK/+30 MAT): Quote:
Quote:
 Andrew's field of expertise may be paleontology, but he's got enough of a command of several branches of Science to give him a fearsome repertoire of moves in fights. Several lategame strategies for spike damage have Andrew as a core component. Quote:
Quote:
Quote:
Quote:
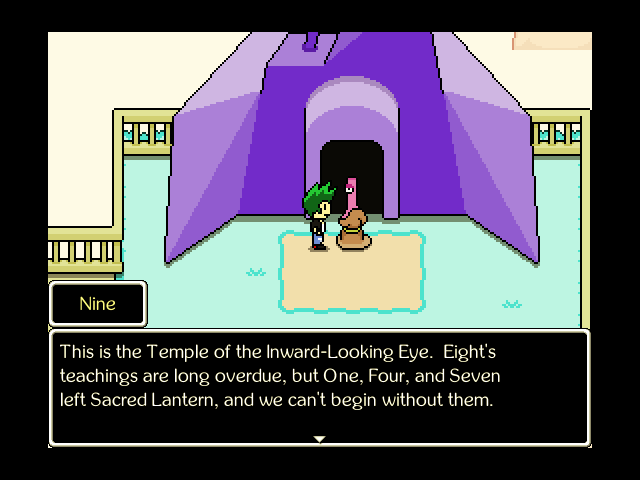 Anyway, there's two temples in Sacred Lantern. In order to access the Temple of the Inward-Looking Eye, we have to find a few monks that have been wandering the world. It will be a decent chunk of time before that happens.  Quote:
 Quote:
 Which, by the way, we'll be tackling this update, of course.  Quote:
 Anyway, hope you guys like MAD LORE  Music: Divine Integration Welcome to the Temple of Sight.  As Five said, this area has encounters, and should be considered a full dungeon.  We're getting a whopping eight toybox reading here, but I remain unsure if that's due solely to the Temple of Sight. Legato still has eight as well, remember.  Music: Interstellar Field Trip Quote:
The one on the left can either attack or talk about something really boring, causing one party member to go to Sleep. If another enemy (like the other half of the equation) calculates with it, it'll next turn talk about something REALLY boring, putting the entire party to Sleep. 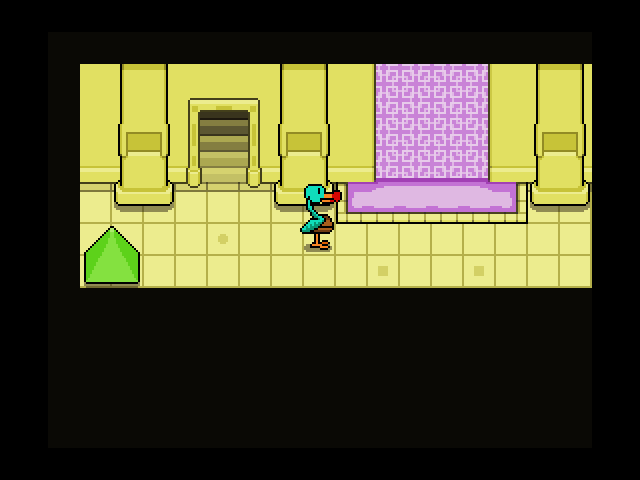 Music: Divine Integration This dungeon's pretty linear, but there are some optional treasures guarded by some tricky puzzles.  Music: Interstellar Field Trip Quote:
Quote:
 Music: Divine Integration Before long, we arrive at a mural.  Quote:
 Quote:
 HALLWAYS ARE BORING LORE IS AWESOME  Music: Interstellar Field Trip Quote:
|
|
#127
11-07-2019, 06:00 PM
|
||||
|
||||
 Music: Divine Integration Trying to balance my forms out so that they all get levels equally. Still don't have a real strat for how to build Jimmy, so I figure a generalist build is a fine option that still leaves me open if I get a good suggestion or idea.  Oh, here's a side room with a puzzle.  Somehow I am unable to tell between these two entrances which one progresses the plot and which doesn't.  Quote:
 Quote:
 Anyway, side puzzle. The Temple of Sight has a bunch of terminals like these. The ones with red buttons can be interacted with, the others can't.  They sometimes display numbers, other times shapes.  In all cases, once you believe you've set the variable terminals to the right state, you can check the door lock. Green means go. As you can see, the shapes are a stand-in for the numbers, with the triangle being 3 and the pentagon being 5.  Quote:
 Back to it.  Oh, good, that means the last mural is close. I've been kind of hurting on MP for this area, so as long as we can tough it out for the last bit, we'll be done here and not need to return.  Something tells me it's north to the last mural, so let's not do that.  New puzzle element. Those red arrows on the floor indicate a sum: everything fed into the indicated terminal is added together.  So we've got to make the sum work out, then.  Easy.  We get a bigger reward chamber this time, so let's explore all the possible paths here and see what's up.  To the right, we find a new area with signs reading "Clarity". And the terminals can now reference letters.  The trick here is simple: the letters reference their place in the word. So C == 1, L == 2, A == 3, and so forth.  Nice, got some furniture AND sparkles to sustain us a little more.  Music: Interstellar Field Trip Quote:
 Music: Divine Integration The left branch is a giant mess. Not only do you need the "Clarity" clue, but you also get these blue arrows. As you can infer from the example here, it's a subtraction operation.  This side is simple enough.  Likewise, the central sum can't be anything but this.  For whatever reason, though, the bottom isn't quite right.  Like, the subtraction is sound, but it doesn't accept that specific configuration. |
|
#128
11-07-2019, 06:01 PM
|
||||
|
||||
 This is the only one that works.  There's the lightbulb, at least.  Really hope this last mural has some concrete answers.  Quote:
 Quote:
 Quote:
 Anyway, that's the Temple of Sight done.  Music: Air Spirals When we get back outside, Punch Tanaka is gone, and only a scroll is left where he was.  Quote:
 I'm sure he'll find his way.  Music: Let's Color Today As for us, we gotta get going! We've got a lot of stuff on the backburner to tackle now that we have four party members!  But we've gotta make our way through here first. Next Time: I'm not very good with people. I think it's because I don't see them that often. I'm just so busy, you see. They also tend to scream at the sight of me. |
|
#129
11-07-2019, 09:02 PM
|
|||
|
|||
|
Quote:
|

|
#130
11-08-2019, 05:12 PM
|
|||||||
|
|||||||
 Music: Parabolic Smile Aw yeah. Welcome to the Path of Enlightenment, featuring my Clubhouse song of choice. Parabolic Smile is amazing.  Throughout the rest of Secret Meridian, we'll be encountering Punch Tanaka's journal entries. They are always a treat.  Quote:
 But hey, he's got these haiku on lockdown.  Music: Interstellar Field Trip Quote:
 Music: Parabolic Smile But this also means the XP payouts are getting pretty chunky.  Music: Interstellar Field Trip Quote:
 Music: Parabolic Smile Quote:
 Continuing to mosey.  Four toyboxes here, not counting the one we just opened of course.  Not sure how we're supposed to reach that one yet.  Hi again, mystery fish! Someday you'll work up the courage to say hi. 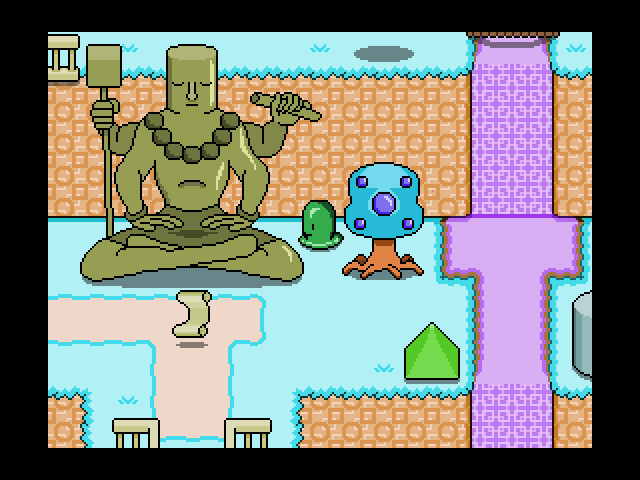 Check THIS statue out, eh?  Quote:
 His taste, at least, remains unsullied by his amnesia.  Music: Interstellar Field Trip Quote:
 Music: Parabolic Smile Anyway, it's technically optional to go this way, but I'm feeling SAUCY.  Hovering shaaaaapes.  Quote:
 We will be ignoring it, and it will quickly become apparent why.  Music: Simple Arithmetic It's time for another hidden side area. This one is usually called Symmetrical Cavern, and it's not hard to guess why.  Set all the terminals to match their opposite alongside the center line, and the door opens.  Everything about this cave is perfectly symmetrical. Even the enemies we encounter are all just shapes.  Music: Interstellar Field Trip One other thing about the Shape line of enemies: higher-level Shapes have increased stats, and lower chances to successfully steal Edges from them. Hexagons, in particular, are very dangerous enemies, with over twice the HP of a Pentagon and similarly spiked stats elsewhere.  Just to reeeeally drive home how much Thermal Bomb can carry you through encounters. And this is without Focus active, since you don't lose extra MP to the passive effect if you end the fight in one turn. |
|
#131
11-08-2019, 05:13 PM
|
|||
|
|||
 Music: Simple Arithmetic Aha, we've reached Andrew's memory cave.  Guessing Buck isn't exactly an academic.  Music: Interstellar Field Trip You have now seen every Shape in the game. WOOOOOOOOOOOO!  Music: Simple Arithmetic Oh nice, finally hit level 15 with a form! Hello, Early Riser!  For reference: a third grader like Jimmy would be studying up on all basic algebraic operands: addition, subtraction, multiplication, and division. Looks like Jimmy's pretty good at math for his age!  Next area's got a few more elements than just terminals.  We also have to get both those sconces lit and position these cubes just so.  Nailed it.  The cave branches out a bit more, but remembering the rule of symmetry, anything we find on one side ought to have a companion on the other side.  Let's head laterally as far as possible first.  Guess that leads to toyboxes.  You can never go wrong with one of these. You can use them for base, height, OR cube!  Doesn't take long to find the next few memories.  Hm. As good as Jimmy is with math, I guess he's had something else he's not as good at. You can probably guess what it is if you've been paying attention, but the game will spell it out eventually.  On the other end of things is an overheard conversation. Don't know what exactly is going down, but it looks like Andrew really put his foot in his mouth there.  The next room has some terminals that can't be modified, but it also provides us with a movable mirror.  Let's tug that sucker all the way over here...  Curious. Walls have appeared, but we can interact with the buttons now. So it's a bit of an extended memory test: can you keep the numbers in mind as you move around and through the mirror?  If it helps, you can remember that the terminals with even numbers never get buttons.  Don't forget to recenter the mirror when you're done!  Final chamber, earliest memories.  D'awww.  Quote:
 Music: Interstellar Field Trip Hahahaha balls I forgot to pack an Emergency Exit. LONG WAY BACK IT IS  Music: Parabolic Smile Back outside, a convenient fruit tree lets us recharge a bit. |
|
#132
11-08-2019, 05:15 PM
|
|||||||||||||||
|
|||||||||||||||
 Clearly we go left here.  Yusss  Quote:
 Nailed it. Anyway, the exit is down south, but there's one last thing we can do here.  Cross the bridge to reach a familiar sight.  This takes us to uhhhhh...  What... exactly am I looking at here?  Quote:
 In any case, he's not going to hurt Jimmy, so we'll tell him a story.  ...Great?  Quote:
 For now, at least, Pointman's aid is enough to reach the lightbulb on the Path of Enlightenment!  Pep Talk time!  Music: Let's Color Today We're making good time, but as fun as it would be to progress further, there's something very important to notice.  We can access the Clubhouse now. Which means we can warp back to the other islands. And now that we have a full party of four thanks to Andrew, this is a primo time to go back and knock out some pretty important stuff!  Music: Oh-So-Cool Castle We'll give Oh-So-Cool Castle one last run as we check out the first two pieces of the Funky Set: the Beanbag Chair (+1 DEF) Quote:
Quote:
 Quote:
 And the first two pieces of the Secret Meridian inspired Geometric Set: a Happiness Sphere (+3 LUK): Quote:
Quote:
 Music: Beep Beep Boop Village Quote:
 Anyway, I owe Lars a proper shaking of the King here, and I'm rewarded with a reminder of what I actually need to focus on.  Blah blah blah it's Arena time. SO! The Arena is basically a chain of customized encounters, with stats scaled up slightly and some kind of field modifier each fight, which you fight in sequence without breaks. There's multiple Cups, each of which has eight fights in total, although you can back out between fights if you don't like your odds. Winning successive fights gets you scaled up points, which can be used at the Arena shop to buy stuff.  You start with the Honeysuckle Cup available, obviously presided over by Princess Honeysuckle herself. By either clearing all eight fights in the Cup back-to-back, or spending Arena Points, you'll obtain the Honeysuckle Trophy, which unlocks the Exhibition match for the Cup. This is a boss fight that, upon completion, allows you to compete in the next Cup. All pretty straightforward stuff, although this spectator will give a tip as to which combatant you'll encounter in the Exhibition.  Unlike Chuff's stock, there's no party spoilers here, although there might be technique spoilers. I consider those less essential, so I'll go over the inventory here in full.
 Now, I'm going to tackle the Honeysuckle Cup immediately. It's a very safe bet to do right after picking up Andrew, and again, that Earth Badge can be very useful, especially for Helga right now. I can't guarantee I'll grab it immediately, but it's on the table for sure.  Music: Slaughter Promise Now, while the prizes aren't necessarily spoilers? The enemies in these fights absolutely are spoilers for later areas. I'm still going to include a full video of the fights whenever I do a Cup, not least because there's some creative team themes here and it's a good indicator of what random encounters through regular play look like if you're curious, but just be mindful that there are some enemies here that I will not explain right now, and which might give away some of the thematic discovery of later zones. Anyway, here you go.
Last edited by Kalir; 01-03-2020 at 06:40 PM. |
|
#133
11-08-2019, 05:16 PM
|
||||||||||
|
||||||||||
 Music Our full haul for clearing the Honeysuckle Cup, in addition to the usual XP/money rewards, is 36 Arena points and a Honeysuckle Trophy, granting us access to the Exhibition.  Music: Beep Beep Boop Village Which we are, of course, flying right facefirst into.  Music: Slaughter Promise Time for that rematch, Coltrane!  Let's see what a real Legato Knight can do!  BRING IT ONNNNNNNN Music: Righteous Scrabble (8-Bit) Yeah when Mulgren said we wouldn't stand a chance against Coltrane one-on-one? He meant it! Coltrane is every bit as much of a powerhouse as his rep indicates. To refresh your memory, his actor's moveset was either a normal attack, tensing his muscles for one turn to power slash the next, or tensing two turns in a row to slash with extreme prejudice. The actual Coltrane can do this, but he can also do area attacks after tensing his muscles with similar, slightly lower grades of strength to the single-target moves, as well as an untelegraphed Counter Stance whenever he wants. To make things more fun, at half health he'll activate his Mind's Eye, granting him a permanent and drastic boost to ATK, MAT, and AGI for the rest of the fight. That said, now that we have a full party, Coltrane is a little more manageable as a fight. Relying solely on physical attacks makes Lars a really powerful contributor in the fight, and Andrew doesn't care about his ability to Counter at all. In general, try to rely on magic attacks when possible to avoid the Counter damage, since Coltrane will easily do enough damage to put someone down if they mess up on that even once. Also pay close attention to his tensing: one turn of tensing is usually manageable, but if he goes for two? STARTLE THAT. When he becomes a tornado of flashing blades, at the level you're expected to fight him, that will flat out wipe your party, ESPECIALLY with that Mind's Eye buff. The good news is that his Counter stance is the full extent of his defensive capabilities, so pile on the hurt faster than he does!  Music But once that's done?  Hell yeah brother!  And we get another piece of the Pixel Set!  Music: Beep Beep Boop Village This immediately opens up the Raspberry Cup and the related Arena stock. Let's go in for a closer look!
 Quote:
 That's it for the Arena, but here's a sneak preview of who we might face in the Raspberry Cup.  Music: Parabolic Smile Quote:
 Music: Quest for the Journey Right, time to finish this stupid temple off. To spell it out: the statues dotted across the land that match up with this stupid thing have either dots or tildes on them. These dots and tildes are also found at the entrance to each temple. The order the temples were built in correlates to the markings at the entrance, which means you can work out a numerical system here. A dot is a 1, a tilde is a 4. Use that with the statues here, and you can work out an order you activate them in. I'm not putting it down here because I honestly don't know it off the top of my head, I just remember it well enough to brute force the rest.  This gets us the most treasure out of all the temples.  Furniture, lightbulb, and...  Quote:
 Music: Parabolic Smile Quote:
 Music: March of the Corgis Back in Legato, something isn't quite right in the air here. This Tootsoldier isn't the only citizen feeling off-kilter, everyone's got something going slightly off with their day: nightmares, strange impulses, sleepwalking...  Now that we have Andrew, we can access a few new nightmare zones, and all of this in Legato is hinting at one of them. Also: most of these nightmare zones will kick our asses if we tackle them now. I'm keeping a sharp eye on the stats of the available bosses we can encounter on the wiki, and this one is definitely out of our league.  Only the Legato Knights, save for the missing LeGrange, appear unbothered.  I'll let these guys handle things here for now.  Music: Carton of Smokes, Half-Smoked Back in Mute Notes, we'll have Inspector Ludwig turn up some clues about Castle Dragon.  Every subsequent lightbulb you have him track down increases the cost of further clues. I'll do this a few times anyway, even though I could look them up, because flavor text is fun and also another reason.  Music: My Animal Friends Quote:
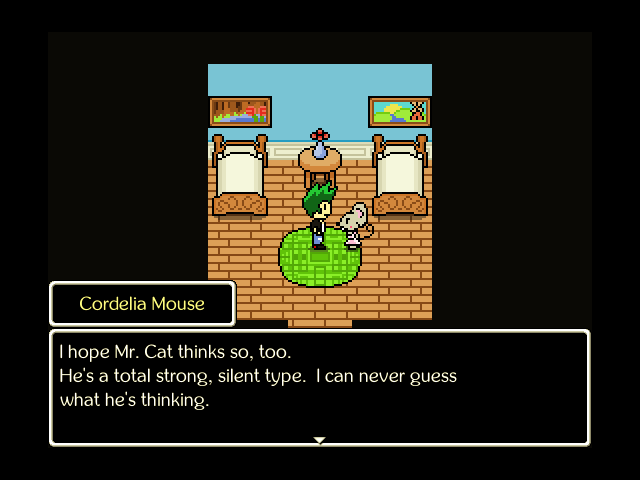
 I know Cordelia wanted out of Smile, but I doubt she'd just up and leave without sending letters or something. That's... not super encouraging to hear. Next Time: Dr. Carruthers isn't nearly as cute as you. |
|
#134
11-08-2019, 06:52 PM
|
|||
|
|||
|
Cordelia Mouse is M.I.A.? Let's look over what we know. Potentially spoilery theory stuff abound, just going off what we know in this LP
Last edited by MetManMas; 11-08-2019 at 07:13 PM. |


|
#135
11-08-2019, 08:49 PM
|
|||
|
|||
|
Quote:
Quote:
|
|
#137
11-09-2019, 02:25 PM
|
|||||
|
|||||
 Music: Fortress of Nitwits Let's keep the side content rolling! First up: Punch Tanaka's old tent atop the Wilted Lands. Now that he's doing some self-reflection, we'll reflect on his old self.  Music: Knuckle Sandwich and Ladyfingers Yeah this looks about right.  He just wants to be cool.  He was in the habit of writing things down even before the whole monk thing!  Kay that was fun. Now, onto the main event!  Music: Cloud Sundae There is an astonishing number of nightmare zones we can access right now, but most of them will kick our teeth in. This one, just off the beaten trail of Cloudy Hill, is barely within reach, which is exactly how I like my RPG encounters.  You can reach this area as early as recruiting Helga and Jonathon, for example. And if you do that, the encounters here will have their way with you, to say nothing of the boss.  Music: Let's Color Today That's right, it's finally time to climb this mountainous spire!  Music: Razorwire Tightrope Back when I first played, I went out of my way to dive right into all of the nightmare zones as soon as they became available. This skewed my playthrough somewhat, as I'd frequently get myself thrashed pretty hard for going in, but end up drastically overleveled for the main story.  Can you blame me, though? These areas are really neat and tell an entire story without using a single word!  For this place, we'll be doing a LOT of climbing.  Quote:
Quote:
 The bridges creak ominously as we cross over them.  Sometimes we have to head into tha caverns here to ascend.  Quote:
 Those are some long, long nooses.  As we cross this bridge, it snaps out from under us!  It's fortunately a short way back to where we came from.  Once snapped, we can just hop over it. Or float, if you're of a spookier disposition.  Way up here now, but there's still higher to climb.  It'd be a nice view, except for all the horrific flying monsters.  Come on, I was hovering! That's just downright unreasonable.  You fall a long way on this one, too. All the way back to...  This early bridge. Fortunately, any broken bridges stay broken, so retreading your ground isn't a huge ordeal.  Quote:
|
|
#138
11-09-2019, 02:26 PM
|
||||||
|
||||||
 On our way back up, we grab High Five from the Low-Level Goon skillset. Finally, we're getting the good unlocks from it.  Once you reach this bend, you'll want to swap over to Happy Little Sunflower.  Music We're high up enough now that we're basically walking up a straight spire here.  When the wind starts picking up, burrow into the ground.  Those gusts are strong enough to carry you off the ground, and we don't need to redo any more of this.  Music: Razorwire Tightrope We're past the clouds, but that looks a lot more intimidating here than in Secret Meridian.  As we climb, a massive shadow blots out what little light remains here.  It looks like we've woken up the bird perched on top.  It takes us into the sky for an intense battle. Are you ready?  Music: A Cocoon Throbbing in a Dead Man's Mouth BECAUSE IM NOT AYYY LMAO Slightly miscalculated that one. Let's go take care of some less threatening bits before we fight this thing.  Music: Carton of Smokes, Half-Smoked Quote:
 Music: Parabolic Smile Quote:
 Music: Let's Color Today We'll swing by Calm Valley for a bit. Sacred Lantern isn't exactly a town, but this place is!  Music: Perspectives of the Maypole Welcome to Calm Valley. It puts forth a really strong atmosphere right out of the gate with that music, let me tell you.  Quote:
 This is a less subtle sprite detail of Helga just dragging him off at top speed before he even remembers to turn on his walk cycle.  Get some rest if you need to.  Lars trudges off, leaving Jimmy alone to explore Calm Valley by his lonesome.  Quote:
 SLEPPY DAOG  Quote:
 sheps  fluffy!!!!!!!!!!!!!!!!!!!  Quote:
 so many sheps |
|
#139
11-09-2019, 02:28 PM
|
||||||||||||
|
||||||||||||
 Quote:
 Quote:
 Quote:
 For example: he's already got enough money to open a bank in a new place, deem it too unprofitable, and shut it down. No regard for the people living there like Braque.  Remember back when he tried to keep something around to remind him of Smile? Yeah those days are long gone.  Quote:
 A place doesn't need to have things happening to be enjoyed.  Just to demonstrate how Lars handles being shaken. He's always up for roughhousing with his nephew, up to a point.  Quote:
 Quote:
 The haikus are getting gradually worse. There's still a few more as we approach The World's Library.  Ms. Robin sells the last two pieces of the Funky Set but nothing else new.  Quote:
 Helga and Andrew are on the terrace, and we have to check in on them to progress.  Quote:
 But hey, they're happy with each other. Let's leave them be for a bit.  Quote:
 Quote:
 First, let's get sassy.  That bit about taunting the ram wasn't just Punch being Punch. That was a clue for how to access this area.  Use the Revolting Blob to taunt the ram into shattering the boulder.  And then a second time to get it to charge the gate open.  Nailed it. We're done here.  Music: Parabolic Smile Anyway, the Funky Set. Last two pieces are the Peace Sign (+1 MDF): Quote:
Quote:
 This is the power of the Funky Set. We're getting closer to completing some Monster and Rare sets, but those last few pieces will prove VERY elusive. |
|
#140
11-09-2019, 02:31 PM
|
|||
|
|||
 Music: Quest for the Journey Next up: we're gonna give Dark Dungeon a crack!  Music: Eye of Newt As soon as we enter, we're randomly locked into our Red-Billed Squawker form.  I was not kidding when I said it's basically Mario Party Pit of 100 Trials. Every floor is a small game board like this, which we normally traverse by rolling a die. Of the spots we can see: the stars award us some Dungeon Points, the skulls are encounters, the horned skulls are powered-up encounters, and the trapdoor immediately forces you to the next area.  Music: The Toys Move on Their Own The music is randomly decided from the standard battle tracks we have available at this stage (so we could get this, Motion Sickness, War of Hearts, Toaster with Teeth, Battle in the Fire Tornado, or Interstellar Field Trip). The encounters for every five floors scale up to match certain areas: floors 1-5 sport enemies from the later areas of King's March, while floors 6-10 will have encounters from the Temple of Sight. My gameplan is to clear ten floors and then immediately head out, but we'll see if the RNG decides to play nice.  Music: Eye of Newt As per usual Mario Party rules, you'll often get choices as to which path you take. You only have to make that choice once you arrive there, thankfully. Note the healing fountain spot in the center path: those are pretty rare, so be on the lookout for those if you're planning on an extended Dark Dungeon run!  There's also spaces where you can get a dungeon item, a Rubik space where he'll offer you a deal (from a choice of two roughly-equal options as he usually does), conveyor spaces that force you to keep moving, and lock spaces. Without a key, those paths are unavailable to you.  It's common, but not a guarantee, that you'll need a key to access toybox spaces. These are often host to rare items, with every five floors having one unique item you can obtain solely in this way. You can also get a Dungeon Point jackpot, and have a chance of encountering a Mimic here as well. Your runs through Dark Dungeon should be planned with the intent of getting rare items from toyboxes as a top priority.  By landing on item spaces, you can find yourself in possession of dungeon items, which let you tip the odds in your favor. Five of the six item types can be acquired in this way, with keys only being available from key spaces. The rest are listed below. All dungeon items are cleared from inventory when you exit Dark Dungeon, and you have a cap of 9 of each item type (except for the Ladder).
 Music: The Toys Move on Their Own Important note: all furniture is just as griftable from these areas, or the Arena, as they are in their normal encounter regions. So that's nice.  Music: Eye of Newt Good, this run will end exactly when I want it to, right on the start of floor 11 (unless it has a toybox I can easily get).  Come on, Double Dice!  Well, I didn't get the treasure, but I also avoided getting stabbed for half my party's health... more than once.  I don't even want to put this in a video, to be honest. It'd be even less entertaining than an Arena cup. That said, this is a very good way to get XP under your belt, especially if you've laserfocused yourself on one form too much and need to be forced to branch out.  I am likely to snag at least a bit of furniture though, especially if I can luck into a key space.  If you happen to land on one of these spots...  Music: War of Hearts I don't know exactly what this status does, but it's a significant boost to all enemy stats, so uh... don't hit those spaces if you can avoid it!  Music: Eye of Newt So uh... screw this layout in particular, huh? If you can dice your way past the trapdoor spaces (or just Trap Detector them) it's a good payoff, but I find it costs way too much for my tastes.  Good timing.  The next floor has a very reasonable treasure to get. That lower part is on a circuit, so even if we don't have Loaded Dice we can just keep looping around and trying our luck on the door, and once it's unlocked we're all clear.  If you would.  Nice!  OKAY BYE  Music: Quest for the Journey I immediately purchase both the track for Dark Dungeon (it's dirt cheap, may as well) and the VIP Pass from Chuff: Quote:
 Music: Parabolic Smile Quote:
 Music: Terminal Broadcast Oh, and if you go all the way behind where you fought Jonathon Bear? |
|
#141
11-09-2019, 02:32 PM
|
||||
|
||||
 Woo, bonus furniture!  Music: Parabolic Smile Quote:
 Music: Razorwire Tightrope Okay, round two. Music: A Cocoon Throbbing in a Dead Man's Mouth Grimclaw alternates between two phases. The first is where it's snatched you up, and you're clinging to its back as it goes for a death spiral. You have a mere three turns to take down the Nerve Worms infesting it and pull it out of the death spiral, or Grimclaw will crash, game over, no saving throw. Grimclaw itself doesn't attack in this phase, but the three Nerve Worms do: their bite can inflict Withering, Sick, Immunodeficiency, or just extra damage. At the end of the turn, each Nerve Worm will leech a bit of health from Grimclaw, and each one that died that turn will double the strength of all remaining Nerve Worms. The strategy for this phase is pretty obvious: area attacks, lots of them, big ones. Lars can also use Counter Stance, since the damage there is good and the Nerve Worms don't have moves that aren't physical attacks. Once the Nerve Worms are down, Grimclaw will take to the skies for a while, Flying far out of reach of your physical attacks. While up there, it can screech to damage and Startle the whole party, slam into the party for decent damage, breathe fire on one party member, or barrel towards you, twisting in agony. That last one is the telegraph move, and the payoff is a wave of darkness that deals heavy magical damage to the party. Let me be blunt: at level par for encountering Grimclaw, this will wipe your party. It's possible that Jimmy can cheese it with Barrier or Elaborate Dance, but far better is to simply Startle Grimclaw out of the move. Eventually, Grimclaw will grab you and take you into the first phase again. In the Flying phase, you need magical offense, which prompted me to, in addition to getting levels by Dark Dungeon, go grab some Roman Candles from Ashby's and a Kiondo for Helga so she can contribute magical damage with Black Spiral. Andrew and Jimmy can put out major pain, of course, but having a third attacker helps out a lot. Lars' MAT is simply too low for him to do much, but he can take a lot of punishment if played right, so you should be okay having Helga go offense every so often.  The second round is much smoother.  Music: The Noble Sea We find ourselves safely perched in Grimclaw's old nest after the fight. This area, like Slither's cave, is very upfront about the fear represented: heights. Flying enemies everywhere, constant risk of falling, and the signature move of the boss is a divebomb with you on its back.  Quote:
 Quote:
 And more furniture.  Anyway, that went all right. I have a good idea of where I want to go for next update too, contingent on how much of a pain in the ass backtracking would be. We'll see, I suppose!  Music: Parabolic Smile Quote:
Next Time: I tried to look up and see what the giant's crotch looked like, but it's so tall I can't. |
|
#142
11-10-2019, 02:38 PM
|
|||||
|
|||||
 Music: Parabolic Smile Quote:
 Music: Let's Color Today So, today's play session was one where I DRASTICALLY underestimated both the threat of some bonus areas and how much time the game would take, so I'm probably going to excise out a lot of what I was actually doing for readability's sake.  Music For the moment, we'll focus on tackling the Legs of the Ancient Giant.  Jimmy is eight.  Quote:
 Honestly, the Legs of the Ancient Giant are not a hard area to get through at all.  Ten?! Okay, there has to be a nightmare zone here somewhere.  And there is, right back here. Tell the truth: this is one of the things I tried to tackle. But unfortunately, I couldn't even get past the encounters without burning too much MP to make the boss at the end livable. I spent a lot of time on trying it, though.  Fortunately, you don't have to see any of that. In we go.  Music: The Growing Ladder To progress up the Legs, we need to find a way to open that door. There's no lock, just a square-shaped indentation.  Hello mystery square.  With a chime, the square warps to the indentation, unsealing the door.  This brings us to an elevator! Waow.  I guess the monk statues tell what floor we're on.  Even if they didn't, the bridges between the legs give us a good indicator anyway.  The door to the elevator for each floor has more and more advanced seals.  The shapes necessary aren't usually far off, and always on the same floor.  Music: Interstellar Field Trip Quote:
Quote:
 Music: The Growing Ladder Quote:
 Anyway yeah. Navigating this area isn't hard at all, and it gets even easier if you need to redo it as may sometimes be the case.  PARDON ME.  Next floor.  Wonder how high up we are now.  Can't even see the ocean anymore. But I do see a crumbly bit...  I FOUGHT GRIMCLAW, THIS AIN'T NOTHIN' |
|
#143
11-10-2019, 02:39 PM
|
|||
|
|||
 Nailed it.  This takes us to the lightbulb for the area.  We can backtrack up here in short order.  Circle.  More seals, not big surprise.  Triangle down here.  Quote:
 No problem!  Why don't these elevators just go all the way down? Would make things easier.  It's not very hard to navigate this area at all, though. There's at most four cardinal exits from each elevator point, one of which is devoted to a bridge to the other leg.  And going into the nightmare zone early got me a bit of extra XP, so I don't even need to fight encounters here.  So this area just ends up kind of inconsequential to me, I guess.  Bit of a shame, since it's a cool concept and setpiece. It's just a little bland is all.  Like... this circle is in eyeshot of the door.  We really aren't doing much more than padding for time here.  This one is green!!!!!!!!!!!  Right let's move on.  Music If we enter the leg on the right, it serves as a one-way elevator to the bottom, which is nice because of some of the stuff we have to do in The World's Library. But, again, the Legs of the Ancient Giant aren't hard to navigate at all.  Music: Let's Color Today If we go south, we can see that we've reached our destination.  It's time to learn.  Music In we go, then.  Uh-huh. That's your opener for this area, is it?  For one thing, there's only seven bookshelves. I know there's more than seven bookshelves worth of books in the world.  For another thing...  Quote:
|
|
#144
11-10-2019, 02:40 PM
|
|||||||||
|
|||||||||
 Quote:
 Hopefully he's close to a breakthrough.  Quote:
 Quote:
 Interesting viewpoint.  Sure, why not?  That's the selection we have to work with, huh?  I guess Advanced Chemistry will be educational.  The other books, of course, increase ATK and LUK by one, respectively.  That's fair. Still no sign of the Secret Knowledge, though...  Why build a normal library all the way up here, though?  One click and a "whoops" from Lars later...  Hey, he did it!  Probably an entire dang dungeon!  Music: Dragon Slayer I don't want that kind of pressure in my life right now, so we're going back to Castle Dragon for a bit.  Now that we're in the past, the contents of the castle have changed a bit.  Rather than princesses, the (unlocked) cells now contain toyboxes, for one thing.  Quote:
 Quote:
 Never mind, that's a pretty handy bit of knowledge!  Quote:
 Quote:
 One last difference to this version of Castle Dragon: it's the night just after this place became infamous.  Music Quote:
 Music: Parabolic Smile Quote:
|
|
#145
11-10-2019, 02:42 PM
|
||||||||||
|
||||||||||
 Music: Infinity Mirror Anyway, The World's Library! This area's got a lot of secrets to it.  Many of these secrets involve doing things for these glowing tomes. In this case, we have to return the book found in Castle Dragon.  This opens up a secret passage!  That was convenient.  Music: Interstellar Field Trip Quote:
 Music: Infinity Mirror The section you're in will be clearly indicated somewhere in the room.  Music: Interstellar Field Trip Quote:
Quote:
Quote:
 Music: Infinity Mirror In the classics section, she'll either sip tea, or read, telegraphing a tea-soaked rampage that hits twice and gains a damage boost depending on how many times she's drunk tea. Most of these moves are informed by the unique monster of the area, so consider that a spoiler if you want.  Quote:
 This place is a little twisty, but it's not too hard to track your location by section.  Just east is the self-help section. Bookworms here can either attack or read to telegraph a party-wide slam move, but their attack power gets multiplied by the turn count.  Music: Interstellar Field Trip Quote:
 This wouldn't be a problem, except that the tome in the area requests you to last at least eight rounds in a fight with Wubbly to unseal its passage. As you can see, that gets really deadly after a while!  Music: Infinity Mirror Thanks.  Quote:
 Opposite the Self-Help section is the Pop Fiction section. Bookworms here can either Leech your blood, or read to telegraph materializing around your party and Leeching all of them.  Music: Interstellar Field Trip Quote:
 Music: Infinity Mirror Lots of upper level stuff here.  Next up is the biography section. Here, Bookworms will either attack, or read to telegraph fleeing from the fight.  As with the Self-Help section, the passage here is linked to the unique enemy for the section.  Music: Interstellar Field Trip Quote:
 Music: Infinity Mirror Might take a few tries, but you shouldn't have much trouble with that strategy.  Yay, a Pyramid!  From up here, we can finally go high enough to reach the second level.  Music: Interstellar Field Trip Quote:
|
|
#146
11-10-2019, 02:44 PM
|
|||
|
|||
 We get the track from this toybox in the Pop Fiction section.  When you hit Periodicals, you know the library's coming to its finale. Bookworms here can either attack, or read to telegraph slashing like a maniac to hit everyone.  Don't mind if I do.  Music: Interstellar Field Trip Quote:
 Music: Infinity Mirror Off this way, then.  Hey, Punch. You okay?  Well that's a boss fight telegraph if I ever did see one.  Had to check.  Well, let's get through the door and get this over with.  Music Or not. Music: Righteous Scrabble The Lingering Eyes attack as a duo, and like the Balanced Equation, they will attempt to balance each other out by healing each other every so often. They also alternate between open and closed states with each hit, which affects what they do at the end of the turn. If both are open, they just watch you. If one is closed, then they'll wink at someone, inflicting Mind Control. If both are closed, then they don't see you, so you don't exist, and one of your party members instantly goes down. Beyond that, the eyes share a pretty standard moveset: normal attack, a creepy glare that can Startle someone, an ice spell, and a twitch, which telegraphs one of three moves: a three-hit rampage, Combust to hit the party, or a scary look that has a chance to inflict Afraid. This fight is a pain, because to get through it without a load of headache, you need to ensure that if you're attacking, you need to hit whatever eyes you're hitting twice that turn. Area attacks are nice, but right now your only ways of doing that are Thermal Bomb and Jimmy's Fierce Growl or Combust. It's a lot of annoying bookkeeping to deal with midfight, and if it ever gets messed up (say, by Lars' Counter Stance or the Golden Cross, or just a plain ol' Startle) then all your planning goes out the window and you've lost the ability to use a party member. I'm also unsure of which Lingering Eye you have to Startle to break Mind Control, or if that's even an option at all, I think I tried it once to no avail. Chip damage from Toxicosis and Toxic Sludge don't change the state of the eyes, at least, but on the whole I don't have a clever way of cheesing this fight. Just don't wear the Golden Cross like I did and you'll probably have an easier time of it.  Music: Infinity Mirror Good riddance.  Music Guess it's a good thing that the Lingering Eyes were protecting something so critical. Let's give it a once-over, then!  Hmm... Hey Andrew, think you can help out?  BELAY THAT, BRACE FOR IMPACT  Music: Skin Thieves Aw hell, the Pulsating Mass found us again.  Wait... Buck?  Maybe it's both. He's kinda splitting the difference between Giger and Liefeld here.  Don't suppose he'll react nicely to Helga?  NOPE.  Hey bro, let's talk this over.  Help HELP HELP  Quote:
 Music But then!  Music: Knuckle Sandwich and Ladyfingers Punch Tanaka is back!  Quote:
|
|
#147
11-10-2019, 02:45 PM
|
||||
|
||||
 Quote:
 Now with some new Monk Tanaka haikus!  Quote:
 Music Quote:
 ...Oh.  Music: The Thresher That's pretty consistent with a Punch Tanaka plan.  Oh. Yeah, that's kind of a problem. HEY PUNCH, AIM FOR LAND 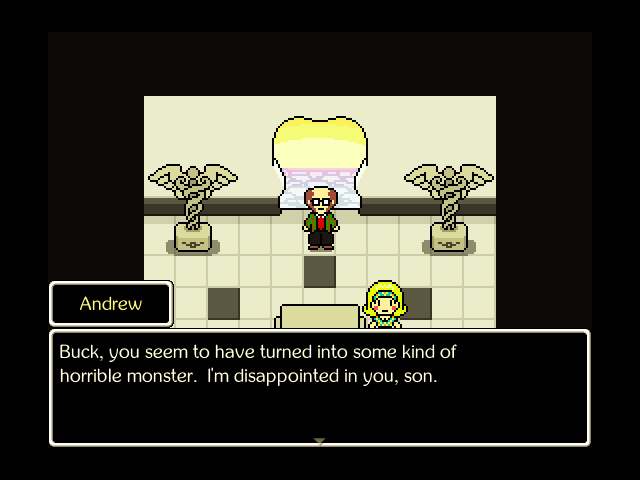 Thanks, Andrew. Really laid down the law there.  He heads down after Punch Tanaka, and Helga follows suit.  Music: Skin Thieves Guys? Jimmy's still here being pinned to the wall by an angry mutant Buck. Little help.  Buck lets Jimmy down for the moment, though.  Are you gonna jump out too? Is this just what we do at the end of every island?  Ah. Never mind, carry on.  Music Just Jimmy and Lars for now.  Quote:
 Lars jumps out, leaving just Jimmy.  Jimmy heads out himself, but he's having a hard time thinking of beaches for some reason. Next Time: That could have gone better. Last edited by Kalir; 01-09-2020 at 06:35 PM. |
|
#150
11-11-2019, 12:02 AM
|
|||
|
|||
|
Quote:
anyway i've caught up and then some, so i'm reading this again |