
-
Welcome to Talking Time's third iteration! If you would like to register for an account, or have already registered but have not yet been confirmed, please read the following:
- The CAPTCHA key's answer is "Percy"
- Once you've completed the registration process please email us from the email you used for registration at percyreghelper@gmail.com and include the username you used for registration
Once you have completed these steps, Moderation Staff will be able to get your account approved.
Fresh. Let's Play Jimmy and the Pulsating Mass!
Back to Let's Play
< 1 2 3 4 5 6 7 8 9 10 11 12 13 >
< 1 2 3 4 5 6 7 8 9 10 11 12 13 >
|
#331
 01-15-2020, 11:08 AM
|
|||
|
|||
 Music: Slurry of Malformed Words Quote:
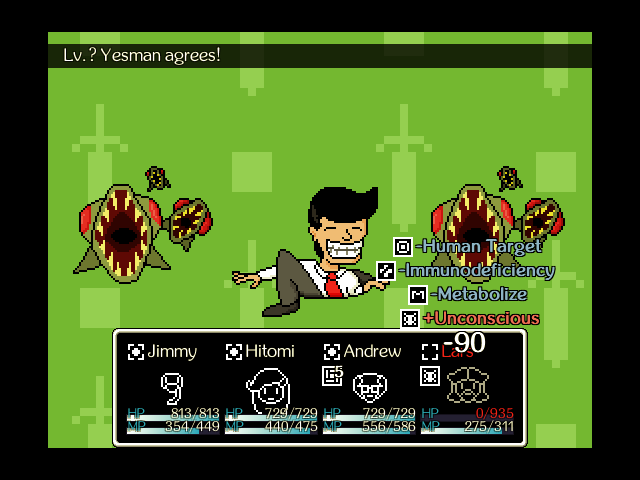
 Music: Dragon Slayer That's all I was really able to get out of this run. So it goes! At least we're up to floor 50 now, and I've gotten one of the bits of kit I really wanted.
 Music: Quest for the Journey I also snag the Love Circuit for her. Of the character-specific accessories Chuff sells, the Love Circuit is definitely the most useful for this team, since it lets Hitomi survive longer, and if she's going to be our support character, surviving longer is Good. The Magnifying Lens is a bit pointless for Buff Andrew since MP consumption really isn't an issue for him at all (remember, only two of his basic Science skills are worth using generally here, and of them, one is a buff that lasts five turns and the other is once per fight). Molecular Beam Andrew wouldn't want to leave home without it, though.  Music Thus armed, I take another crack at the King Cup.  No luck. Just need a few more levels under our collective belts, I think.  Music: A Closing Window Right, take five, Buck.  It's Helga time now.  You better believe I'm kitting her for using the Heavy-Handed Glove. Note that the Crush manual here is a mistake, since she can already do better than that with Super Slap. I think I end up switching her over to Kung Fu Punch despite my distaste for it, since the Eradicator Ray is our best physical weapon for her and the normal attack on it hits all enemies, so Roughhouse isn't really worth using either.  Music As mentioned, each door needs a different party member to open, so Helga's tagging in for the Optimistic wing of the Heart Prison.  Music: Two Rivers Back to Fermata Forest, although the gimmick this time is slightly different, as with the Brash wing and Central Stamen before it.  We get to see the location of the toybox early, but can't access it.  Music: War of Hearts As before, the enemy set here draws from a bunch of different areas. I'm willing to bet the Virus has a unique move if the Science Guardian calculates with it, probably an airborne Immunodeficiency virus that hits the party.  Music: Two Rivers This isn't a real branch here, the right path is a dead end.  Music: War of Hearts Grunk is also here.  Music: Two Rivers Can't get up here. We haven't seen any season drums yet.  But as we pass by these two statues, the season suddenly shifts to summer.  If we were to go back between the statues, it would flip back to spring. Thankfully, that's not needed here.  Since season shifts are only checked at specific spots, it's not nearly as winding and confusing an area as the actual Fermata Forest.  So we should have no trouble following the path here.  Past a row of these statues...  We're in autumn now.  I'm still getting inescapable encounters here, I'm just not getting anything with NEW foes.  If we go north here, we can face the boss. Fie on that, we need that toybox!  Sure enough, heading south here rotates us back to summer.  Music: War of Hearts There we go. |

|
#332
01-15-2020, 11:10 AM
|
||||
|
||||
 Music: Two Rivers This should take us right to the toybox.  Nice straight shot and everything.  And it rotates back to spring again as we get closer.  Quote:
 Anyway, back we go.  Up here!  Instantly winter.  Hehehehehehehe.  The winter segment is really brief, though.  Literally already done.  Music Why do I suddenly get the feeling that someone's getting a kick out of things at my expense?  Ah, back to this fight again, I see. Music: A Cocoon Throbbing in a Dead Man's Mouth As before, the Mad Queen's gimmick for the fight is rotating between four suits, which each modify her moveset. None of the movesets have any changed properties that I'm aware of, so you should expect the same fight as before, but with Helga as a fixed component. The only real wrinkle she could provide is from the wealth-based attack in the Diamond suit if you're still using the Coinpurse, but I was able to make that attack a threat by just not caring about using the bank anymore since no more toyboxes will give bonuses. (The cutoff to make that attack more deadly than a normal attack is $37,500 this time around, if you care.) Beyond that, the Mad Queen doesn't really do anything special that would make Helga as a fixed party member interesting. Helga's role is still the same (heal all your dudes), there's no abundance of status effects she'd have to Mental Clarity away regardless of Calming Bells, and the Heart suit will end up restoring your MP for you just as much as usual, so she can just keep going. There is, at least, the thematic link of Helga vs. the Mad Queen here, but ehhhh.  Music No probalo.  Music: The Noble Sea Again, the wrinkle here is more likely to come from the fact that the required party member will be somewhat underleveled for these areas, and even then that's not a huge deal and would easily be mitigated by me just having a slightly different playstyle. I just don't want to grind them up to match everyone else, that's all.  That's all for the Optimistic wing.  Music Next up is the Supportive wing. As you can probably intuit here, the wings will generally open up in order of party members joining.  Music: A Closing Window Which means Helga's done for our run of the game, and we'll be tagging in Jonathon Bear next.  Before we do that, though...  Music: Worm Party Quote:
Quote:
 Quote:
Next Time: If you lose, Jimmy, I just want you to know that it won't make you a loser. |
|
#333
01-16-2020, 02:07 PM
|
||||
|
||||
 Music THIS TIME WILL BE DIFFERENT
 Music Nailed it. That's 4500 more Arena points and the King Trophy.  Music: Beep Beep Boop Village I grab Hitomi a new prize and head right back on in there for the exhibition match.  Thanks!  Music: Knuckle Sandwich and Ladyfingers Something feels different this time.  Quote:
 Music Let's see what you've learned! Music: Beach Volleyball Massacre This is our final showdown with Johnny Katana, Big Norman, and DeeDee. Their techniques have been refined and improved to the point where they're almost, but not quite, unrecognizable. We'll start with Big Norman. He's gained the power of positive thinking, and can increase his attack power with it permanently during the match. He can also give a Motivational speech to his friends, do a normal attack, or attack the party with newfound energy. As before, he's the slowest, but hardiest, member of the team. I focused him down first when I played, but that's because with my team composition, I'd kind of need to do that to not die over time. Next up, Johnny Katana. While it is still possible to steal the Katana from him and render him as a helpless Johnny No-Katana, that one item is the single hardest thing to steal in the entire game. This means you have two ways to deal with him: spike the HELL out of your LUK and steal odds, or fight him head on. I chose the latter, and it's a dangerous path to take. Johnny Katana can do a normal attack (which can sometimes ignore Human Target???), a Counter Stance, or tense his muscles to telegraph one of three special attacks: slashing like a maniac to hit the party, slashing with expert precision for a quadruple attack, or going in for the kill to instantly drop someone. As always, he's got speed and power on his side, so don't expect him to be a walk in the park if you leave that Katana in his hands. Finally, DeeDee. Who... hang on, I cooked up an image for this.  Each of DeeDee's moves chains into another move, with her attack sequences coming in sets of three. So she'll start with either a physical palm strike, or targeting a pressure point for magic damage and Startling. Whichever of those moves she does will link to another move of the same stat later, and whichever of THOSE moves she does will link to yet another move. It's a scary moveset for sure, but the practical upshot is that every single turn, she will only ever choose between two specific moves, and if you've been watching her, you can figure out EXACTLY what two moves she has available to her. This makes the Love Circuit I gave to Hitomi very, VERY valuable, as you can see. Even outside of her repertoire of techniques, DeeDee is BLAZING fast, handily outspeeding almost anything else in the game. Every single one of these three is a major contender all on their own, and you need to be on top of your game to handle them. It doesn't matter what your overall strategy is here, provided you have one that can handle everything they'll throw at you. Identify which of the three is either the biggest threat or the one you can eliminate fastest, and flip the odds before they take you down. Other notes: under some conditions, Sacrifice is NOT once-per-battle, and Lunar Serene, despite using two stats, is flagged as a magical attack for the sake of Counter Stances and Barriers. Which annoys me, because I'd rather it just bypass both. It needs investment in both offense stats to work, LET LUNAR SERENE IGNORE BARRIERS  Music: Knuckle Sandwich and Ladyfingers Quote:
 Music But let's not forget...  That's the entire Kingland Arena cleared!  Quote:
 Music: Beep Beep Boop Village From now on, the three of them will chill out in the Arena bar.  I think you go back to your roots and become a beastmaster. Johnny Cats would be a fierce foe.  Anyway, good for them, but we've still got two places left to explore.  Music: A Closing Window And that means we need a Supportive bear.  I really WANTED to give Jonathon the Megaphone and Porcupine Suit together for silly counterspam, but I forgot that the Megaphone disables counterattacks by design. I ended up with this loadout, which wasn't especially smart of me, I should've stuck with the Megaphone as weapon and designed Jonathon as a tank, given this team composition and how I've specced out Jimmy. Still, it's servicable enough for most areas.  Music Let's go!  Music: Bucket of Stink Back to Blood Marsh this time.  Which means more tedious skull-dragging.  First one, at least, is a gimme.  Music: The Toys Move on Their Own New enemy sets, as before.  Music: Bucket of Stink The first skull was the only gimme. The others will be a lot meaner.  Our toybox for this area lies behind this rock here.  Music: The Toys Move on Their Own Spider! |
|
#334
01-16-2020, 02:08 PM
|
|||
|
|||
 Music: Bucket of Stink Let's climb atop this hill.  Music: The Toys Move on Their Own Jennifer Skunk is the only one of Jonathon's friends in the area.  Music: Bucket of Stink We can enter that cave down below to progress. That was quick.  DON'T NEED A REASON  Hooray, the ends justified the means!  Music: The Toys Move on Their Own And that's all the enemies here in the Supportive wing.  Music: Bucket of Stink All right, let's lug this stupid thing over.  Bah, still not enough pressure. And there's nowhere else to go but inside that cave.  Hey, we're really moving on up here! Elaborate Dance is a nice thing to have unlocked, but I'm not stopping my Bird Quest until I get Annoying Squawk, which should give a lot more utility to Buck's Accusing Finger.  Maybe there's more in here.  Oh, Grim Echoes. How I haven't missed you in the slightest.  There's big ol' hand branches no matter which way we go from here.  The left side has our skull, but now we have to drag this to a vent somewhere in here. 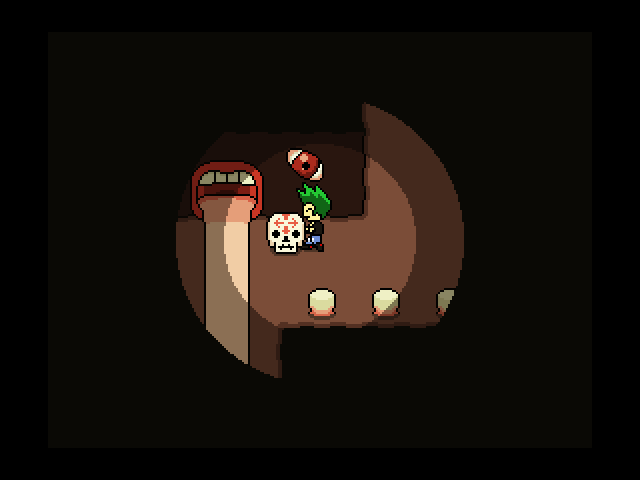 Right, come on, you.  What's down this way...  Oh, the area exit. Which means...  BAAAAAAH.  This skull-pushing is REALLY REALLY SLOW, I'd like to add.  MOVE IT  Quote:
 Away with ye!  Music Oh, there's another way the Polar Bear Claws are a jerk move.  Hi again, Grimclaw. Music: A Cocoon Throbbing in a Dead Man's Mouth As before, Grimclaw alternates between two phases: a time-limited fight with the Nerve Worms on its back, and a long-range engagement while it's Flying and thus immune to physical moves. The strategy remains the same as ever: big huge area attacks in the first phase, magical offense on the second, and here I am stuck with Buff Andrew. The Polar Bear Claws are a mean trap to give to Jonathon here though, since the MAT on those is hardly worth mention, and Jonathon should be prioritizing magical offense here. I do eventually remember that I've been sitting on capped consumables all game for the second phase, and Jonathon does at least have Sunshine to wield there. But really, I made this fight a lot harder on myself than I really had to. I should've geared up Jonathon the same way I geared up Hitomi, maybe with the Megaphone for tankiness reasons during the Nerve Worm phase. Oh well. Also I was being a coward about Grimclaw's telegraphed divebomb move, since Love Circuit boosted Protect and Lovely just turns that sucker right back on Grimclaw. This fight isn't that hard, I just made it a lot harder on myself than I needed to. If you DO plan on using physical fighters, try to extend the time you're fighting the Nerve Worms as long as possible, to give them ample chances to dunk on Grimclaw.  Music Ehhhhhh it's over.  Music: The Noble Sea That's the Supportive wing! Sorry that I didn't use Jonathon as effectively as I could have. Again, he's got a lot of potential, but that potential asks the player to wield it in really goofy ways. |
|
#335
01-16-2020, 02:09 PM
|
|||
|
|||
 Back downstairs.  Lazy wing is next, so that means Lars.  Music: A Closing Window Later, bear. Next Time: Hmm... yes. You want dice? *sniff* *sniff* Yes, yes! That will do. |
|
#336
01-17-2020, 02:12 PM
|
||||||||
|
||||||||
 Music: Quest for the Journey Right. At this point, the next piece of kit I REALLY want for this party is way, way down in here. We also need points, so we can get some extra dungeoneering supplies to start with. So let's go big and then eventually go home.  Music: Four Black Belts in a Pinto Nice, rolled up a Rubik space. What've you got for us?  Oh. So, this individual, who bears an unnerving resemblance to Rubik, tends to have much more... extreme offers. The prices are very high, but the rewards are equally high. In this case, we're literally two floors into our run. I'd be an imbecile to NOT do this.  FEEL THE POWER!  Music: Butterscotch Train I am not to be trusted with such horrible power, and promptly abuse it to access the most annoying goodies trove in the entire Dark Dungeon repertoire.  Quote:
 Music: Infinity Mirror This one was legit just rolling the double dice to skip past an annoying trap and getting lucky.  Music: Fun, Sunny Day Okay now this is ridiculous. Two of this guy in one run?! Hell yes take my blood I have Comforting Smile equipped.  Music: Simple Arithmetic I sorta wanted the Golden Gloves, but the RNG for that area didn't feel like providing a good toybox for it. Oh well, also want this!  Quote:
 Music: Oh-So-Cool Castle Not getting a lot else out of this run, so my big priority is to shoot for any good toyboxes that remain and see if Rubik can get us big point loadouts. Still, we made some serious bank!  Music: Wind-Up Sprocket Quote:
 Music: Rhythm Factory Right, I think I'm done here. I got drunk on power and used double dice to skip over a toybox I used a key to access which could only have held points anyway.  Music: Quest for the Journey Time is a circle. But hey, floor 70, not bad.
 I get out and count my winnings, and would you look at that, Chuff's stock still has a few things I haven't listed yet. Naturally, I buy the Pocket Ladder, thus removing the biggest issue I have with Dark Dungeon. Further points will be spent on the following:
 Music: A Closing Window Right, let's get to the main event for today, hilarious as that was.  Not exactly a subtle build for Lars here. The Porcupine Suit is mostly here for testing purposes, although I'm pretty sure if you have a passive Counter effect and a Counter Stance, only the biggest modifier takes effect. The Cartoon Hammer is perhaps the most outgoing bit of kit here, but only barely, since Lars doesn't care at all about AGI.  Music Whatcha got for us today?  Music: Dragon Slayer Back to Castle Dragon, huh?  Now, you'd think to get Lars' weapon, we'd have to revisit the three princesses somehow, and that could be fun, right?  Well, I'm sorry to disappoint, but the actual puzzle here is right here, at this branch. If you want to go to the boss, go left. If you want to go to the toybox, go right. This is not signposted in any way whatsoever.  Music: Battle in the Fire Tornado The encounters for this area are explicitly tuned to maximize the number of physical attacks aimed at you (i.e. Lars) in one turn. Which sounds great, but even for a properly-leveled Lars, you still have to spend one turn putting up Undulate to ensure those attacks hit, and if you don't, well, best hope the rest of your party isn't so squishy that they can't be chunked by RNG!  Music: Dragon Slayer Anyway, I didn't read Kasey's mind when he designed this map, so.  Music: Battle in the Fire Tornado Nice of all the potential enemies to be showcased in the first two turns. This configuration is actually the friendliest because everything here needs a telegraph turn before they can multi-hit. The far more common Yesman/Piranha Swarm configuration does not wait and simply kills the hell out of you. So in between the following screenshots of identical low-res hallways, imagine Lars getting eaten by a billion angry fish and sycophants.  Music: Dragon Slayer I changed out Roughhouse for Perfect Guard, which doesn't really solve the main problem. (I then equip the Burning Tuxedo instead of the Porcupine Suit to increase Lars' defense, making the main problem even worse. I have a degree.) |
|
#337
01-17-2020, 02:13 PM
|
|||
|
|||
 Staaaaiiiiirs  This looks like another fork. It isn't.  Both sides lead up here, which only has an exit to the left.  More stairs!  I really do not have a way to make Castle Dragon tilesets and Lars dying to infinite physical attacks interesting. I am sorry.  Anyway, we can go in here to get to the boss.  Quote:
 Music I use the Marvelous Teleporter to bounce back out and say hi (we're still a few coins short of the next thing) and then get in, but this time go right at the fork.  Music: Dragon Slayer That is legitimately, 100% all that it takes.  Different carpets? Different carpets.  Quote:
 Music: Battle in the Fire Tornado Backtrackiiiiiing  Music: Dragon Slayer Get me out of here. Who are we fighting?  Music Oh, it's zombicide again.  CUZ THIS IS THRILLER Music: A Cocoon Throbbing in a Dead Man's Mouth Y'all know the drill: same big bad enemy, new and improved stats. This goes both for the Totem itself and for the Information Guys. Having Lars as a fixed party member doesn't really mean a whole lot since he's locked into the party by the time you can face it, his job is still to absorb all of the hits from the Information Guys and maybe pull a sick dunk with Karma Release. So what does my party of Hitomi/Buff Andrew do that sets them apart from vanilla Helga/Andrew? Uh... not a whole lot, really. Sure, there's less sustain for Lars, but he's perfectly capable of handling himself, and let's be real, I tried using Helga for damage anyway that time. If anything, I needed even less sustain here since the Information Guys didn't have enough of a stat boost to handle getting vaporized by area attacks almost instantly. That took the fight from the intended version to the Totem just kind of no-selling everything Lars did while everyone else just finesses on the Totem.  Music Squawking Imminent  Music: The Noble Sea Right, cool, let's wrap this wing up.  Sorry Lars, you didn't even get a chance to see your potential cool toys.  Music: A Closing Window Oh well! Next Time: If shaking me will bring you serenity, then shake away, young man. |
|
#338
01-17-2020, 08:29 PM
|
|||
|
|||
|
Quote:
|

|
#339
01-19-2020, 01:53 PM
|
|||||
|
|||||
 Music: Quest for the Journey Quote:
 Music: Toy Soldier Parade You might notice that we're on floor 4, rather than higher up. Simple reason for that: now that we have the Pocket Ladder and some better starting items, we can actually get this early toybox!  Music: Rhythm Factory Quote:
 Music: Eye of Newt Quote:
 Music: Quest for the Journey I tried to get more out of my run here, but it was not meant to be.
 Music Ah well, didn't feel like any more diving.  Music: Divine Integration For the Erudite branch of the Heart Prison, we're revisiting the Temple of Sight, which means actual puzzles!  Literally right in this door at the start.  Nine is here for a reason, and that reason is obviously linked to these circuits of sum terminals all linked to each other.  No really fancy tricks here. Just get each loop to total up at 9.  And y'know what? That's fine, cuz that's okay.  Quote:
 Thanks! Bye!  And now, hallways.  Music: Interstellar Field Trip New area, new mess of enemies. No theme is really jumping out at me looking at these guys, though.  Music: Divine Integration I'm giving you landscape shots of the Temple of Sight Mk II in the meantime.  I wonder what this water tastes like.  Music: Interstellar Field Trip Two more new enemies. Okay.  Music: Divine Integration Since the puzzle was right at the start, the entire remainder of the Erudite wing is a completely straight shot.  There's some neat scenery here or there, but not much.  Pyramid of rectangular prisms!  I got bored.  Very good.  Once you reach the depictions of the Day of Annihilation, you're near the end, but also HEY WE HAVE ANNOYING SQUAWK NOW. Putting that right on a universal slot for Jimmy so we can abuse the Accusing Finger properly.  Yes yes doomsday proclamations all over the place. |
|
#340
01-19-2020, 01:54 PM
|
|||
|
|||
 Let's fight a boss.  Music Well, we already showed how Molecular Beam Andrew handles this, maybe Encyclopedia Set Andrew works differently.  And as it happens...  Music: A Cocoon Throbbing in a Dead Man's Mouth Being slightly underleveled and using a weird build for Andrew makes this much harder than usual!  Music Can you guess where I last saved?  Music: Serotonin Flowers START OF THE UPDATE, HEYYO  Music: Quest for the Journey Ahahahaha let me just repeat all of that.  Music: Worm Party Quote:
Quote:
 Music: Interstellar Field Trip Backtracking through the Erudite wing, we find the last enemy here. I guess that makes two foes who can steal MP? That counts as a theme, maybe?  Music: Divine Integration For my third and successful attempt at this fight, we're taking things in an even dumber direction than usual. Music: A Cocoon Throbbing in a Dead Man's Mouth We've already seen the Black Prophet fight, particularly in a scenario where Andrew is front and center. However, despite the novelty, the Encyclopedia Set build is just not as good as the Molecular Beam build for raw damage output, and as mentioned, this is a fight where you can't afford to hold back on damage. But since we're on the underleveled side and Andrew's damage output is fairly inconsistent with this build, I have elected to take this fight in a much, MUCH dumber direction. By stacking the abuse of Annoying Squawk, Accusing Finger Insult, and Psyche, I'm able to stunlock the Doomsday Clock for frankly unreasonable amounts of time. It's also a great field test for the Alert-clearing effect of Insult, which retains the ability to Startle even if Alert is up. This stretches the normally-twelve-or-so turns we WOULD have access to up to an incredibly stupid amount of turns for Andrew to do what damage needs to be done. And, of course, Jimmy's able to now Startle the Black Prophet regardless of his form, although being in a faster form or having access to Hyperactivity helps. I also start leveraging consumable items much more aggressively from this point on. Jimmy, in particular, gets better damage from items thanks to the Coat of Pockets, so the last push strat of Mana Burn boosted Cherry Bombs is pretty effective in and of itself, to say nothing of letting Andrew rely on Super Balls when Kung Fu Punch is on cooldown.  Music Gotta love the dumb strategies suddenly working far better than they ever should.  Music: The Noble Sea Anyway, that was tough, but fun!  Erudite wing's done.  Music Next up is Punch Tanaka, which means I want to go get a particular something from Dark Dungeon. I believe people wanted to see big huge damage, yes?  Music: Osaka Konnichiwa We'll get to that in due time, don't worry. Next Time: You can punch a turtle in this! |
|
#341
01-19-2020, 02:37 PM
|
|||
|
|||
|
No offense intended, but after how awesomely thematic the various optional dungeons available throughout Jimmy and the Pulsating Mass were, the postgame for the most part really just feels like padding to increase play time.
The Heart Prison has been all "Here's old things to fight with new stats" so far, and aside from maybe the sick bee who dies even though you gave him all the medicine there's been nothing quite as interesting story-wise as exploring a forgotten toy's Spencer Mansion, or diving into a sleepy reaper's Yume Nikki-ish realm, or Mr. Beaver's tower of rules. The Doomsday Cult was a lot more interesting when they had their own place instead of being tacked onto a redux of other Number Land stuff. That said, it was neat to have one last fight with Punch Tanaka's gang in the arena. |
|
#342
01-20-2020, 02:52 PM
|
|||||
|
|||||
 Music: Wind-up Sprocket Quote:
 Music: Simple Arithmetic Quote:
 Mostly just showing this for the last of this guy's faces. The runs kind of blend together once you know how it all works out.  Music: Parabolic Smile Quote:
 Music: Quest for the Journey That's all for Dark Dungeon for today!
 Music: A Closing Window Anyway, it's Punch Tanaka time.  While I could spec him for higher physical damage than this, I also want him to have good stealing odds, so this is the loadout we're going with for the Shifty wing.  Music What's next?  Music: Slurry of Malformed Words Back to the Subway. Makes sense.  Unlike the normal Subway, the Shifty wing is not lit at all. So our responsibility is to find our way through a dark maze. Hey, it's slightly more creative than the Lazy wing.  Music: Beat Squad Unsurprisingly, the enemy set here is designed to allow Punch lots of good steal opportunities.  Music: Slurry of Malformed Words For starters, I head right at the first fork.  Seems to have worked out okay for me.  Music: Beat Squad Of course there's a Vendomax. Why would there not be.  That about covers it for enemy set.  Steadily building these up.  Music: Slurry of Malformed Words Further right is just a dead end. Phooey.  North, though...  Quote:
 This ladder leads up and out of the Shifty wing. It's not nearly as bad as some of the other wings despite the darkness, it's pretty short and you can get a good idea of where things are based on how well you remember the original Subway. Ladder up to exit, ladder down to Butterfly Knife. Only issue is with no other platforms to visit, there's no map to get your bearings with.  Easy. Who's the boss this time?  Music Really? Huh, okay. Not what I expected.  But also not a problem in the slightest. Music: A Cocoon Throbbing in a Dead Man's Mouth Well, that's not technically right. This time around, the Golden King has a complete immunity to damage until all four Treasures are stolen from it, AND the steal odds for those treasures has gotten much trickier this time around. Which is why I specced Punch to have good steal odds as well as for the Violent Video Game: to make sure we could get to the phase that actually mattered as quickly as possible. The actual fight itself is tricky, but not super hard, because of the Miasma constantly draining health. Jimmy has to spend a LOT of time keeping the party alive, because while Hitomi's Rejuvenate is good at the job, it can't heal through Miasma, Withering, AND Acid all at once. Additionally, Startling the Golden King is incredibly valuable, both from the threat of the telegraphed moves and for its ability to both Grasp and Mind Control party members. Without Accusing Finger Buck or the Psyche manual, you need to be extremely careful about when you Startle, because the alternative is leaving far more of your party incapacitated than you can really afford. Also you can't reflect the wave of darkness and I'm upset.  Music Still, easily within out capabilities. Plus, hey, Mana Burn for Jimmy!  Music: The Noble Sea The Golden King fight also gives a fixed payout of 25000 dollars, which is half of the max reward from the Halls of Greed, but still really nice (and I bet you can affect it with the Coinpurse or Business Savvy). |
|
#343
01-20-2020, 02:52 PM
|
|||
|
|||
 That one was pretty effortless!  Music Two more left. We've got the Fashionable wing up next, so we can go back to the fixed endgame party of Hitomi/Andrew/Buck from here on out.  Music: A Closing Window I know there's probably a bunch of cool synergies leaping out at you to try, but that will have to wait for your own playthroughs to pull off. Next Time: Hello. My name is Mr. OIEO. My password? Ha. You'll never guess it. |
|
#344
01-21-2020, 01:13 PM
|
||||||
|
||||||
 Music: Finer Circuitry Okay, stupid cleanup time for Dark Dungeon. I need to grab all the furniture I skipped over, and the least tedious way to do that is to jump to the nearest multiple of 10 and go for it, then ladder out and repeat.  Music: Cloud Sundae For you lot, this will happen in the blink of an eye. For me, each dive takes about 10 minutes or so of dice-rolling and trivial battles I can't just run from.  Music: Simple Arithmetic But I'm committed, dang it.  Music: Parabolic Smile We've now got the full Mystical Set, which includes Stonehenge (+3 LUK): Quote:
Quote:
Quote:
 It's no longer people. We're keeping this, Top Tables, and also a Box Fan for the rest of the game.  Music: Dragon Slayer Quote:
 Music Right, next wing!  Music: Night Stroll Back in Tetsuya Kawaii HQ, unsurprisingly for the Fashionable wing.  All of the men's restrooms are boarded up in here.  Music: Toaster with Teeth I guess they wanted all the battle themes evenly represented, but the Shifty wing already use Beat Squad?  Music: Night Stroll Taking the elevator up, we find a difference from the regular Tetsuya Kawaii: none of the usual characters appear in the picture. It's all Mr. Makura.  Music: Toaster with Teeth These guys are all over the place, huh.  Music: Night Stroll This area does have an actual puzzle to it, thankfully.  Music: Toaster with Teeth As with the Kingland Arena, we've got Multipliers loaded up with extra Integers, so they're not safe to handle with a one-and-done steal.  Music: Night Stroll I wonder if this elevator is important?  It leads over here, which...  Huh. Y'know, Mr. OIEO, you bear a striking physical resemblance to Mr. Makura.  Sure you are.  Anyway, just past Mr. OIEO's office would be the next boss. Not feeling it yet, though.  All of that was to the right from the first elevator. Suppose we head left instead.  Now we're getting somewhere.  We still have to figure out that password, though.  It took me several hours to brute force solutions until I found the correct answer. As near as I can tell, Mr. OIEO has a peerless command of infosec and has left absolutely no clues as to his password. Use this knowledge wisely.  Quote:
 Anyway, let's take on a boss. Black Fountain is a nice unlock under normal gameplay, but Jimmy already has Immolate and no real reason to hold back on MP. I'm really gunning for Dark Ritual here. |
|
#345
01-21-2020, 01:13 PM
|
|||
|
|||
 Music Oh, no. Of all the bosses to come back to, we're doing this again?  Yes, hello, you've reached the Jimmy Whoop-Ass Cannery. Please do not remain seated. Music: A Cocoon Throbbing in a Dead Man's Mouth Mr. Cat does enjoy one very different change compared to his usual version: he is fast. Crazy fast. Super fast. He is literally as fast as a Super Rad Ghost. So while the first phase of the original fight could be easily cleaned out with proper Startle spam, we are unfortunately required to use Hyperactivity and Annoying Squawk together to have a chance of landing a Startle on him. So, the fight ends up being a lot more straightforward after the first part, with the same strats as before (especially finding ways to mitigate Sleep) prevailing. We had Hitomi before when we did this fight, but now that she has the Love Circuit, we have a good answer to the dark magic move. Sure, that requires a bit of gutsiness in hoping he does that instead of another move, but hey, why not be bold here? Beyond that, it's hard to really say what Hitomi's expected role for the fight ought to be, by her design.  Music AND STAY DEAD  Music: The Noble Sea With that, we've cleared almost every branch of the Heart Prison!  Only one remains...  Music And this one is the Empathetic branch. Which means that we can take any party we want in there (we are, naturally, keeping the Hitomi/Andrew/Buck team). Strange as it sounds, we're nearing the end of the postgame! Next Time: I heard a rumor that the heroes didn't actually kill Dark Demon. Instead, they sealed him at the bottom of Dark Dungeon. |
|
#346
01-21-2020, 02:14 PM
|
|||
|
|||
|
I know this dungeon has pretty much just tacked on boss fights from previous parts of the game onto unrelated areas, but Mr. Cat, of all enemies, (presumably) being the penultimate boss of the big postgame dungeon...Damn, man. Would've been nice to never see him again after that episode.
Like, why not Ebeezil instead? That guy didn't horribly murder any cute mouse girls. Or how about Mr. Grouse? Be good to kick some 1% ass again. But nope, it's the shadowy predator that gets a rematch. Mr. Cat is the worst. |
|
#347
01-22-2020, 11:20 AM
|
||||||
|
||||||
 Music: Quest for the Journey Today, we're polishing off Dark Dungeon.  Music: Butterscotch Train Oh also doing this I guess.  Music: Fun, Sunny Day Quote:
 Quote:
 Ordinarily I'd just bounce from Dark Dungeon and re-enter at 90 with supplies like these... but nah. Let's get that last prize.  Music: Machines en Vogue I've been skipping over the many, many, many encounters we've had to get into in Dark Dungeon, and in the later depths, those encounters draw from the same redux tables as the Heart Prison. The last handful of floors use the Empathetic branch, so despite them being "new", I'm skipping over them for now.  Music: Fortress of Nitwits Annoyingly, we get all the way to floor 99 without the last toybox appearing. And floor 100 is a bit special.  Music: Eye of Newt After all, this is where Dark Demon was sealed away. But that can wait, we've got some last loot to grab.  Music: Quest for the Journey Oh yeah and by this point we have too the hell many points. Not spending them yet. Don't really feel like it. I guess Buck COULD have a Chainsaw, but eh.  Music: Two Rivers Quote:
 Music: Quest for the Journey Broke: give Buck a chainsaw. Woke: give him a Moon Rock. Chainsaws don't make you go faster, y'know.  Music: Parabolic Smile Oh, right, the very last hidden set. Waterlogged asks you to get all the watery stuff: a Lilypad, the Holy Grail, a Fish Tank, a Hot Tub, and a Fountain. It is entirely useless to me with a completed Mystical Set.  Music: Quest for the Journey Quote:
 Which is why we went down to 100 before laddering out: to make challenges on Dark Demon easier.  Music: Eye of Newt So, the trick with the final floor is that you need three keys to open up Dark Demon's lair. With your starting gear acquired from Chuff, you can get by with only a single key. Each of the three locks has a track full of spaces around it, including a single key. The first track is usually the easiest to work with given the conveyor spaces, so if possible, save your resources for the other two.  I met them halfway. The inner ring is a little harder, usually full of monster spaces.  But eventually we get it.  Music Hey, Dark Demon. Jimmy is here.  Gotta say, this was not the design I was expecting, but I'm here for it. Music: A Cocoon Throbbing in a Dead Man's Mouth (8-bit) So, first note. As with Dark Dungeon itself, Jimmy is randomly locked into forms during the fight, on the same cooldown as his normal transformations. This means you can't just use a ridiculous Jimmy build with three passives to no-sell whatever Dark Demon is doing. Furthermore, Dark Demon's moveset is incredibly expansive, and includes a selection of moves that change depending on your form. In all forms, Dark Demon can scratch the party with cursed, Withering claws, cast Ice 2 to damage the party, cast Fireburst for a three-hit magic attack, slam into someone for heavy damage, and grab someone in their mouth, which works much like Jonathon Bear's version, right up to eventually biting down and killing whoever is grabbed. Dark Demon can also do a two-hit rampage, which then chains into a four-hit rampage, which further chains into a tremor attack that hits the party. At 50% health or lower, Dark Demon can also absorb darkness, which both self-heals slightly and chains into an unavoidable wave of negative energy that inflicts Unguarded, Unmotivated, and occasionally Afraid. The moves Dark Demon can perform dependent on form are as follows:
None of this is anything really new within the game system, honestly. And with our everyman Jimmy, we're well-equipped to handle any form Dark Demon shoves us into. The real catch is from Dark Demon's HP totals, which is to say: they're big. Dark Demon has 150k HP, so no matter how you approach this fight, you're in for the long haul. Survivability is just as good here as firepower. Thankfully, despite how it looks, this team's actually pretty hardy now, especially Jimmy and Buck. It'll take a while to persevere here, but you eventually will. Still mad that Love Circuit doesn't counter the negative energy wave though. IT SHOULD.  Music LIGHT THIS PLACE UP  Music: The Noble Sea Honestly? Not too bad. The forced form-shifting is a pretty neat trick to throw, though.  Oh, and we got the best furniture in the game.  Music: Parabolic Smile Quote:
Next Time: Are you sure? I don't know any "Timmy." |
|
#348
01-23-2020, 04:03 PM
|
||||||||||||||||||||
|
||||||||||||||||||||
 Music: Beat Squad And now for the part where I grind Marvelous Coins. Thankfully, armed with Intimidating Stare, it's not too bad. Lucky Nekos are weaksauce at this point in the game, and Andrew can even oneshot Super Rad Ghosts with Pulverizing Light, so we get some good XP out of it, too.  Music: Samurai Children As before, the secret land of fish is the ideal place to do this. I'm also getting those 50's Style Vampire levels for Dark Ritual, not that I really need it.  Music: Worm Party Quote:
Quote:
 Quote:
 Quote:
 Anyway, there goes Mr. Marvelous.  Ehhh probably.  Music: Carton of Smokes, Half-Smoked But yeah. The club in Shinryu is where we can use the pass.  The Room of Happiness, huh? Sounds like fun.  All that's in there is a screen and a dingy chair, though.  Jimmy takes a seat, but all that happens is...  Mt. Fuji doing a little jig. Which... good for him, I guess, but kind of underwhelming.  Music: My Animal Friends This is where one of the biggest secrets of Jimmy and the Pulsating Mass hides, believe it or not. To unlock the true potential of the Room of Happiness, we have to travel all around the world. We'll start right here in Smile, where Ms. Robin's stock has expanded to include everyone's penultimate weapons. There's one other item in here, but don't buy it if you can afford not to.
 The actual way to obtain that item is from Timothy Mouse. If you go through your adventure together without shaking him too much (he doesn't like being shaken!) then he'll do this for you. If you do, he'll call you a jerk, and you'll have to get this item the hard way, by paying Ms. Robin.  Quote:
 Music: Alien Signal For the next stone, we return to the cemetery full of Information Guy zombies. And, well... Only stands to reason that the Happy Little Sunflower's burrowing ability can check out graves. By scouting all of them out... Quote:
 Right, let's bounce. Maybe see what Mr. Marvelous is up to.  Music What.  Quote:
 Quote:
 Look out for yourself. We're heading out the invisible door just behind us.  Music: Let's Color Today This is, unfortunately, the next stop in our whirlwind tour.  Music: The Pulsating Mass Do you remember that code from the robot on the Sandswept Isle next to Central Hub? I do. I wrote it down.  Enter the code in here by speaking to the mouths in order, and you'll get...  Quote:
|
|
#349
01-23-2020, 04:04 PM
|
|||
|
|||
 Music: Osaka Konnichiwa For the next one, we've got to unseat the Game Master, which means getting all of the high scores. Which, unfortunately, means actually doing well at the Rock Paper Scissors game.  This happens on my second game. I would not believe it if you told me, either.  I will immediately waste this on Mecha Super Balls and you can't stop me.  Our reward for being Game Master...  Quote:
 Music: Slaughter Promise We've already seen the location and description of the Low-Res Stone, but just to refresh: it's a pretty expensive prize from the Kingland Arena. Takes two full runs through the King Cup to scrounge up the points needed. I end up snagging Dark Ritual in the process.  Music: Beep Beep Boop Village But here we are again, just to refresh your memory.  Music For the next one... we've got to finish the Heart Prison.  Music: The Pulsating Mass Here's the Empathetic wing.  This one is extremely straightforward, as much so as the Lazy wing is.  For the toybox, go left at this fork. For the boss, go right.  As always, the Heart Prison has six enemies available from all the different areas mixed in.  But the scenery is... same as it ever was at the Pulsating Mass. Is it cool if we skip most of it? I'm gonna skip most of it.  If there is a theme to the enemies, I'd call it "darkness". Cackle is the most colorful enemy here.  Anyway, it's not super far through here either way. Probably shorter than the Lazy wing overall.  The Living Shadow is annoyingly common for how fast and Startle-happy it is.  Quote:
 Right, now let's go the other way.  Cool, that's Calming Breeze unlocked, and not a moment too soon.  For the sake of being thorough, I stop right outside the boss hall to bait more Empathetic wing encounters. Haven't seen that last one, y'know.  Yep, Molly Raccoon. Cool, let's go.  Music Huh. Not exactly what I expected to see down here. Well, let's go check out Jimmy's room upstairs.  This isn't the upstairs of Jimmy's house.  But Jimmy's family is here?  Music: Skin Thieves Quote:
|
|
#350
01-23-2020, 04:05 PM
|
|||
|
|||
 The final battle is here. And I've gotta warn you: this one runs for 54 minutes and change. So if you don't care about the gameplay here, you're not missing anything you haven't already seen. Just warning you before you decide to hop in. I'm mostly including the video for completion's sake and don't actually expect people to watch it. But here we go: Music: A Cocoon Throbbing in a Dead Man's Mouth Jimmy's family handles as a team in much the same way as they did in your party. Andrew's the magical attacker, Buck the physical, Helga does healing, and Lars is the tank. Each of them also breaks out a special move at 50% health, too. Their health totals are also really high, with each of them having nearly or more than twice the health of Buck in the Pulsating Mass. In order:
The nice thing about this fight is that you already know basically all of that. Obviously, you're going to have to focus down Helga first with as much spike damage as you can muster, and then decide whether Buck or Andrew is the bigger threat. I bungled the spike damage on Helga like a damn fool though (remember, Analysis doesn't work with the Mecha Super Ball!) which in turn led to this fight taking far longer than it should have. My overall strategy was still sound, and was a spin on the strat I used when I first did this fight on my own file (Jonathon with the Doughnut Bracelet), but it just wasn't as effective in execution. Unfortunately, this team composition has a hard time with spike damage, despite the surprising survivability of Jimmy and his healing ability. Rather than messing with the Mecha Super Ball strat, I should've had Jimmy abuse his many methods of stacking damage buffs (Called Shot, Mana Burn, and Analysis) and swung with Immolate instead, or had Buck and Andrew work together with Reckless Charge and Analysis while the other two ran support. Yeah, Lars can potentially shutter that, but it'd be more effective than what I actually did. And that's without getting into area attacks, which you should be using once Helga is down despite Lars' existence, OR rearranging my furniture to include the Modern and Geometric Sets. Still, this team is almost impossible to kill, so it worked in the end.  Music: Skin Thieves Quote:
 Music Quote:
 And... well, we've gone over this before, in a ton of instances in this game. As legitimate and terrifying as this is, we have little basis to expect that Jimmy's family would react this way. The Pulsating Mass has done more damage to these five people than can be imagined, but do not even think for one second that they would rather they didn't have Jimmy in their lives. They wouldn't hurt as much as they currently do if that wasn't the case.  Music: Eye of Newt Odd as it sounds, that ISN'T the final stone in the game.  Music: A Cocoon Throbbing in a Dead Man's Mouth (8-bit) If you go back into Dark Dungeon and face Dark Demon a second time, they gain the Power Up! buff and a massive increase to max HP.  Music: The Noble Sea Quote:
 Music: Carton of Smokes, Half-Smoked Each of these stones, as mentioned, adds a little more to the Room of Happiness. Here's a showcase with all of the stones, and proooobably all of the skits? And with that... we've found almost everything there is to find in Jimmy and the Pulsating Mass. Only one thing remains that we have to do. Next Time: You're a growing boy. You have to make your own decisions. |
|
#351
01-23-2020, 05:36 PM
|
|||
|
|||
|
That fight with a family that wants to forget Jimmy as his biggest fear is a great thematic way to cap off the game in general. It's just a shame that it's buried under a pile of remixed content that might turn off people from ever getting to it.
I get that there's already a ton of content in this game, but it really deserves its own unique dungeon like so many others got. Quote:
|
|
#354
01-24-2020, 03:48 PM
|
|||
|
|||
|
Quote:
We knew this world was a dream and that Jimmy would leave it one way or another. And we know that cancer is a cruel disease that doesn't care who it takes. But after spending so much time in the world inside of Jimmy's head just to have everything taken away...Goddamn, man. I guess the most we can hope for is that Jimmy reached some level of peace with himself before his passing. Jimmy did his best. |

|
#357
01-25-2020, 01:29 AM
|
|||
|
|||
|
Much like Undertale, going back to the game after seeing the ending felt like a betrayal of what it was trying to say, and I couldn't bring myself to do it. It felt truly wrong. The reason I didn't want to comment on much in this thread was that I knew exactly what was coming thanks to Kalir getting me to play the game and I didn't trust myself to talk around and not spoil what was going to happen around the serious stuff the game tackles.
Absolutely fucking top tier LP Kalir, I really really enjoyed getting a second look at the game and getting to read into the hidden layer that the game has from the very start without having to go through the roller coaster again, as well as getting to experience the content I couldn't. |
|
#358
01-27-2020, 12:48 PM
|
|||
|
|||
|
EPILOGUE BONUS POST
JIMMY DID HIS BEST. Yes, that is the ending. After everything that went down... well, like everyone said. It's extremely tragic, but also the only realistic conclusion to Jimmy's story. Nothing in Jimmy's power could stop the Pulsating Mass. Even if you get all your forms to level 50+, equip Flames of Rebirth, beat all the bosses, get all the secret stones... none of that changes the outcome of walking through that door and waking up from the dream. I don't personally have a lot I can add to that with an epilogue post... so I'll start in some other directions. MAKING RPG BATTLES FUN Bit of a tonal shift, but important nonetheless. With a lot of JRPGs these days, one of the most common complaints is that, despite how riveting the story is and how much you might be involved with the characters and all the cool customization you can do with your skills and gear, by far the biggest chore is the combat. At the end of the day, there's only so many ways you can spice up selecting different animations from a menu until the numbers go down. And once you reach the point where that gets "solved", every single battle from then on out is either a tedious but insignificant roadblock, or a hard wall until you go accrue more numbers. Jimmy and the Pulsating Mass has this same problem to a degree, but there's a lot of novel ideas to combat the issue of combat being "solved". Among these ways is the same trick that a lot of Boundlikes tend to do: limiting your character choices based on the point in the story, and heavily differentiating what those characters can do. The early game party of Buck, Helga, and Jonathon handles completely differently from the later party of Helga, Lars, and Andrew, and both of those are different from my voted party of Hitomi, Andrew, and Buck. Further, all of the weird optional gear everyone gets really changes the calculus of encounters. There's also the issue of customization. The mental exhaustion from trying to super-customize EVERYONE on your team, as happens with a job system, often ends with lots of time invested in trying to balance out a team by trying a new role, only to get frustrated because the cool toys take too long to pick up, and you have to keep shooting your efficacy in the foot every so often. The imagination system is a cool way to handle that, by linking that system solely to the "main" party member, as well as giving you the entire repertoire of each new form as long as you're there AND letting you change it freely. There's a lot of creative stuff that the game already does with it, and which the player has room to do. And while the gameplay doesn't hold up well enough for the postgame to a lot of people, it still does the job VERY well for what story Jimmy and the Pulsating Mass is trying to tell... mostly. The bonus nightmare zones having no signposting except for the encounters there kicking your ass is cool and flavorful, but on the off chance you survive an excursion into one of them and come out stronger, that just ends up overleveling you for the main story, which leads a lot of players to feel like they're "missing out" on some stuff. And with the system presented as-is, I don't know if there's a good solution that doesn't involve level-scaling encounters, which just makes gaining levels at all a pointless system. IT'S ALL FUN AND GAMES UNTIL THE BEEHIVE ROTS ALIVE In any event, the gameplay is mostly a vehicle for the story, and I was absolutely not kidding with those content warnings throughout. That colorful appearance that the game greets you with lasts for just long enough to bait the player into expecting an overly silly romp in a dream world full of Low-Level Goons and mouse friends. And then the Buddy Bees get destroyed by the Pulsating Mass, long before its name is even uttered for the first time in Legato. That kind of sudden tonal shift is VERY hard to make slide, and you see a lot of fledgling creators fumble that ball very often. It happens even more with amateur or fan works, where someone gets the idea that the thing that, say, Sonic or Pokémon or Minecraft was missing was murder and hard drugs. The way that Jimmy and the Pulsating Mass makes it work is by couching all of this horrible stuff in the dream of eight-year-old Jimmy, and NEVER dipping outside of that framework. Not to undermine how scary the nightmares of a kid can be, far from it. But the game starts out as whimsical and colorful, and even in the gruesome and horrifying parts, it STAYS whimsical and colorful, and eventually goes back to that full time, only to dive right back in to the horror later. That oscillation maintains the tone needed to make this work. After the Beehive, you go visit the Iron Flamingo with your spaceship AI grandma, and then go to Legato, home of the talking feudal musical instruments. And all throughout that, or even in between, you're both metaphorically and literally looking for those hidden corners of Jimmy's mind where the terror and darkness lurks. THIS IS A GAME ABOUT FAMILY. In most boundlikes, your plucky kiddo with world-saving powers usually builds their team from their closest friends, occasionally adding in an oddball like their dog or some scoundrel with a heart of gold. Jimmy, though, is shy and not exactly in the kind of condition to go over to friends' places, or even to make friends. So his party consists of either family members, or imaginary friends. And while the imaginary friends have their own stories for sure (possibly barring Hitomi), it's the family that really matters at the core of this experience. A lot of people place a lot of importance on filial piety, even beyond the point where it's a good or even safe idea to do. Jimmy doesn't really get a choice, he's stuck with the family he has. And, well, we've seen that while they're all ultimately trying to be good people, there are some seriously crippling problems they are all facing, and when your energy is being sapped trying to help a terminally ill kid live their best life, those problems simply don't get the attention they similarly need. For the most part, from Jimmy's perspective, his family is as helpful and loving as they could ever be. But when the cracks start to show, sometimes more quickly for some party members than others, you can see that this entire Pulsating Mass thing is doing almost as much damage to Jimmy's family as to himself. Which leads into the epilogue. Jimmy's last two words to his family, or even to the world, are "I'm sorry". Because despite everything, he still can understand exactly how all of his family members feel. He can understand Buck's rage at his family and situation, and how he can't just solve this problem by "getting stronger," even though it's been what's likely saved his life in the past. He can understand Helga's desperation to keep her family together and happy, despite everything coming completely unglued, and burning herself down to nothing in the process. He can understand Andrew's frustration, at how this should just be another puzzle to be solved, and how he blames himself because the solution fails to appear no matter how hard he studies the problem. And finally, he can understand Lars just wanting someone, anyone to love him and accept him into their family, while simultaneously viewing himself as completely unworthy of that love. And because Jimmy understands all of these things, he thinks the proper thing to do is apologize. It's his fault they're all suffering like this, right? Now that he's gone, they can move on and eventually find peace with themselves, right? Fuck no, Jimmy. Every single member of Jimmy's family would not be who they are without him around, and I mean that in the best way. The frustration with the Pulsating Mass is the real thing tearing everyone up, not Jimmy. Every single member of Jimmy's family would love nothing more than to just spend a little more time with him, in their own ways. It is perfectly understandable, and absolutely tragic, that Jimmy considers the fault to lie with himself. But as we've already seen: a few of Jimmy's fears are unfounded. It will never stop hurting to think of Jimmy after he's gone. But that pain is evidence that, if Jimmy somehow came back, they would happily welcome him back without a second thought. NOW FOR THE HARD PART. Jimmy and the Pulsating Mass is a very good game, although you have to be ready for it. I first heard of it, and followed an LP of it over on SA, earlier last year, during... let's say early summer? I was gifted my own copy in August, and began playing it throughout the rest of the year. In January of that same year, my mom suffered a debilitating stroke. And I mean debilitating. Her left side shut down almost completely, and she's still having trouble recovering strength and range of motion for it. Her executive function, already hampered by her ADD, has been almost completely shot, and she needs virtually constant supervision to stay on track and not hurt herself, even today. And that's without getting into the fact that they very nearly missed an issue that would have been lethal to her, and required open heart surgery in March to fix. It is a fountain of miracles that she is even alive today. It has been hard for me. Still is. I haven't got the income to cover all of this, so the financial burden of caring for her is largely on my brother. We've had a ton of support from our friends and family (probably some of you reading this LP have already helped out!), and some days I still feel like as poor a caretaker as Buck. Pointing out things she needs to do to recover or stay safe are met with such resistance that even minor quibbles quickly become heated arguments that she acknowledges no part of, because from her perspective, we're being overbearing and harsh. Getting to stay at my girlfriend's place is now a rarity rather than a half-the-week thing. I was the one who found her first, and not a day goes by where I don't wonder what would've happened if I'd found her faster, even though my being there at all is the reason she's still alive. Which should give a good idea of the lens I've been playing this game, and LPing it, through. Every time I try to get Mom to do something independently, I'm wondering if I'm not just Buck looming over Jimmy with the weight bar. When I can't help out with money around the house, I find myself feeling like Lars, more hindrance than anything and only really able to provide weak moral support. The optimism I tried to carry about all of this early on has more or less vanished, leaving me feeling like a floored Helga. The credits gradually lapsing into decoherence probably hit me hardest of all. But, despite it all... She's still here. And she's still a very important figure in my life. And I'm glad for that. Flaws and all, she helped raise me and tried to steer me on a good path in life, and I would not be even half as good a person without her. And I'm glad I played this game, flaws and all. Nothing helps with handling fears like confronting them head-on, seeing what they can actually do, learning about them, and ultimately proving that you have a mastery over them. At least, it helps me. And hey, Jimmy's dream wasn't all bad. You had the Petty Thugs, you had Punch Tanaka, the Mouse family, the Legato Knights, the family in Calm Valley, Captain Fish's crew, all of them... they grew, and learned, and supported Jimmy, and by extension, the player, throughout this tale. If it wasn't for Jimmy, we wouldn't have met any of them. Hell, we wouldn't have met Jimmy or his family either. Jimmy did his best. And I'm going to try to do my best. I hope you do too. CREDITS: DESIGNER: Kasey Ozymy: That's a cool game you put together there, thanks for making it! INSPIRATION: GrandmaParty: Ran the original LP I followed on Something Awful, and even had me on for an episode! I would not have gotten into this game, and LP'd it, without them. POSTERS: MetManMas: The Mouse family did their best. R^2: Knowing where the story ends isn't the same as experiencing the path to that ending. Torzelbaum: Quick, name the food best suited to dreamworld tales. LancerECNM: I'm glad you posted as much as you did. aturtledoesbite: You cannot crush mathematical problems to death, but I appreciate the gumption. Mightyblue: Jimmy's family is doing their best. Mogri: Thanks for following the rules and being polite. Lucas: We can only hope that Lars eventually makes a better life for himself. Awkward Grant: Elsim. Serephine: I absolutely get that. This is a hard game to avoid spoiling! BEAT: JESUS FUCK indeed. Gerad: Don't worry, Jonathon Bear loves you! Westerhof: Interesting theory about Andrew's line. We don't know exactly how old Jimmy was when he heard it, after all. Adam:  Lokii: Thanks for following! Destil: We've finished bounding for now. ME: Me: Part of the reason I even started a Patreon was to help the family out in these tough times. Chip in if you can, but I will do my best to keep making LPs regardless. YOU: YOU: But it just wouldn't be the same without people experiencing the stories I have to share here. Thank you all very much for reading! |
|
#359
01-27-2020, 01:04 PM
|
|||
|
|||
|
Quote:
Quote:
Well... damn. |
|
#360
01-27-2020, 01:08 PM
|
|||
|
|||
|
I don't think the game ever really addresses it, so there's no telling what the intent here is, but I always got the feeling that Punch Tanaka had a "waking world" basis in the janitor at Jimmy's hospital. The only thing that comes close to suggesting this is the Shinryu High segment, but even so, I like the idea. If we assume Hitomi is based on the anime/games that Lars watched/played with him, that would leave Punch as the only character without a waking analogue otherwise.
|