
-
Welcome to Talking Time's third iteration! If you would like to register for an account, or have already registered but have not yet been confirmed, please read the following:
- The CAPTCHA key's answer is "Percy"
- Once you've completed the registration process please email us from the email you used for registration at percyreghelper@gmail.com and include the username you used for registration
Once you have completed these steps, Moderation Staff will be able to get your account approved.
Fresh. Let's Play Jimmy and the Pulsating Mass!
Back to Let's Play
< 1 2 3 4 5 6 7 8 9 10 11 12 13 >
< 1 2 3 4 5 6 7 8 9 10 11 12 13 >
|
#301
 12-19-2019, 01:00 PM
|
||||||||
|
||||||||
 Music No more hiding. We confront the Pulsating Mass now.  Music: The Pulsating Mass Central Hub has the same layout as before, but looks completely different. 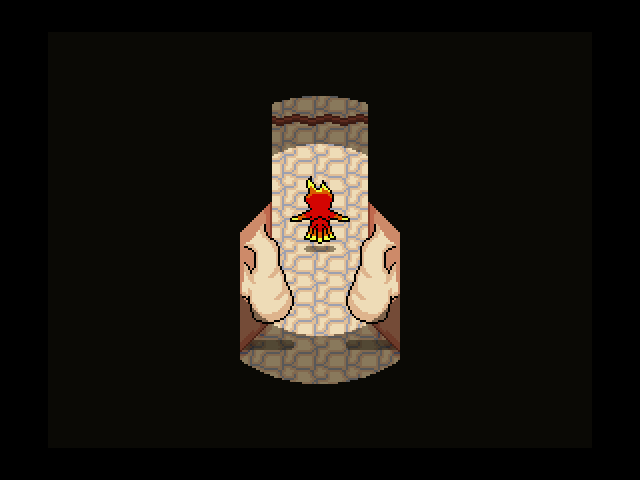 The faces that adorned the walls are gone now, degraded into mere fleshy growths.  These used to be those crystal-looking spires.  And the conduits of energy throughout the area are just veins now.  As we enter the main area, the exit seals up behind us. We can still get out with an Emergency Exit or VIP Pass, but you are expected to commit to this area once you're in, of course.  Quote:
 Ah, that's why Cubbins ran in. 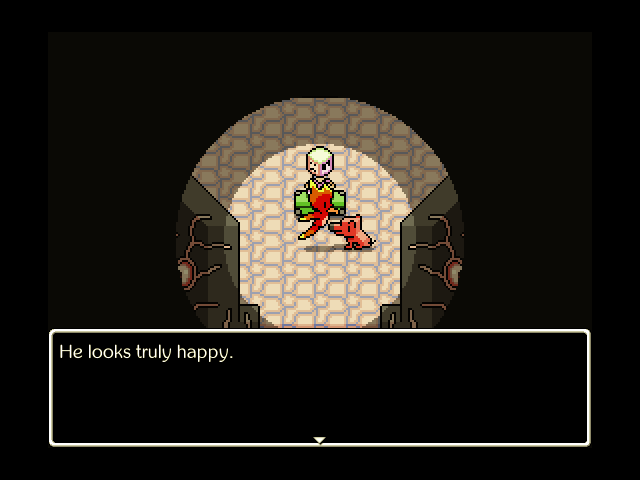 DAOGS........... SO GOOD  Rubik's stock here is the same as ever (save for the Bike Chain -> First Edition swap), which is another reason why the choice from before is what I went with. Yeah, healing fountains are good, but we have enough money and can earn enough from the fights that we can pop a bunch of restores before buying up to capacity here again whenever we want to heal up.  Quote:
Quote:
 The lockdown in the front is still active, so we've got to go down each of the six side paths again.  Quote:
 The water here has gone foul.  Quote:
 No sign of the robot down here. And even if there was, I doubt it would just tell us "EVERYTHING IS REGULAR" now.  The pumps are still here and functional, but barely. They're stuttering a lot and meeting lots of resistance.  I don't like letting the Pulsating Mass know that we're here... but at this stage, we don't really have a choice, do we?  One down, five to go.  Quote:
 The XP in here is pretty good for just speed-leveling forms if you want to.  But let's just focus on getting what we need to accomplish here done.  The mouths here have no energy left to speak with.  Legbot just flat isn't here anymore.  That's one more machine done, though. |

|
#302
12-19-2019, 01:01 PM
|
|||
|
|||
 Here's the... door, I guess, that we have to open up.  One step at a time.  The eyes in this area are open, but bloodshot. I guess things aren't very restful for Jimmy right now.  Already to level 15 in Phoenix.  Just gotta keep moving.  This is what the elevators have become, I guess.  Does this still work?  Not well enough.  Halfway there.  Taking this in the same order as the last time we visited.  The clocks are still here, although they're just as covered with fleshy growths as everything else.  I guess whether they work or not is a moot point.  No sign of all the reminders, either. Guess that's not important to Jimmy right now.  Making progress.  Branch number five.  The pods here don't work anymore, either.  Neither do the security robot assembly bays.  And the Steel Pelican and Silver Goose are just as devolved as everything else in here.  Nearly done.  One last branch.  Everything here is gone, too.  The screens depicting Jimmy's memories are all static.  We can enter the core again.  No way anywhere but forward.  Somehow, it's even darker in here. |
|
#303
12-19-2019, 01:03 PM
|
|||||||
|
|||||||
 Music: Skin Thieves When we arrive, the core energy nexus is gone. All that remains is... what used to be Buck.  Quote:
 It still radiates more than enough power to scatter the family back.  Quote:
 Music Bring it.  We don't care how much power you have, because we're still going to fight the Pulsating Mass with everything we've got! Music: Gut Punch Pulsating Mass Buck is back, and he's picked up some new tricks. For starters: the Brain Bats from the Principal Pulsating Mass fight make a return, but a different one from before: the only one that actually applies its effect to Buck is the Alertness one. The ones that apply Impenetrable and Barrier give it to the last Brain Bat, which seeks out Weakpoints. Ultimately, this means that the Brain Bats' role in the fight is just to amplify Buck's damage and punish wide-scale moves. I decided to chip them down with focused attacks, but no rule saying you have to do that for this fight. Buck himself also has lots of new moves. He'll spread miasma that drains HP constantly, first at 3/4 of his max health, then again intensified at 1/4 of his max health. Buck's more able to switch between flying and grounded during this fight, and each form has some new moves, too. While grounded, he can do a high-speed, Startling charge attack, or grab someone for three turns, dealing heavy damage while they're Grasped. If he's flying, he can twist shadows around someone's ankles to deal magic damage and Startle them. Finally, regardless of form, Buck can watch Jimmy to think about his next move. Early on, this adds a move to his next turn, but as he gets lower in health, he just immediately goes for the follow-up after watching you, which changes depending on Jimmy's form.
I really wanted Buck to showcase his ability to absorb energy, both because he didn't do it last time and because it would be HILARIOUS to then immediately dunk on him with Analysis/Karma Release. Sadly, it was not meant to be, he just kept flying around too much. In any case, this fight shouldn't pull any tricks you haven't already seen in your adventure. Just do your best, watch out for the meanest things Buck can pull, and you'll manage. Not to undersell this fight, he absolutely swings for the fences, but by now, you can take him. Oh, and we also get the Gut Punch track from the fight!  Music Got him!  Man are you crazy? Buck is swole as HELL.  Music: Skin Thieves Uh-oh. That's no empty threat.  Music But then!  Music: Morning Lullaby Quote:
Quote:
 Music Here goes. Hit the deck!  One last wave of malevolence blasts through the area, and darkness falls.  Music: The Pulsating Mass Quote:
 But he does.  Quote:
 We're still right outside the core.  Buck remains there, defeated.  But by the time Jimmy gets to him, he's all alone.  At least Buck's got his own body back.  And just to prove it, he pries the weird parasite off of his back...  And effortlessly crushes it with one hand.  There's a lot you can read about all of this, and Buck's general arc in the story of the game. Probably the most interesting interpretation of all of this: it all raises the possibility that Buck might have had to deal with cancer on his own, and has survived it and gone into remission. That reframes a TON of the story as a concept, and I'll leave it to all of you to work out the details on that one.  Quote:
 ...You mean down the giant chasm, into the core itself, don't you. |
|
#304
12-19-2019, 01:04 PM
|
||||
|
||||
 We've got your back, Buck.  We have to keep going until we are free.  This is the final encounter.  Buck's rejoined the party proper, and although I've kitted him out as I feel befits what I'm aiming for here, he does bring some creepy new gear for where he's at in this part of the game. His default weapon is Bone Spikes (+60 ATK): Quote:
Quote:
 Nearly done here.  Gotta find our family, the Secret Knowledge possibly, and confront the Pulsating Mass at its core.  Just down here.  Music As we approach, we can hear a sound like a heartbeat. Might even be a heartbeat.  Blood, or something like it, is pumping into... whatever this is.  This must be the Pulsating Mass. It's core, or true form, or whatever you want to call it.  Quote:
 Andrew's visage melts back into the Pulsating Mass as it does what the name implies.  Quote:
 Give Jimmy back his family.  That's not how the song goes.  Final foe. Music: Organic Nightmare The Pulsating Mass, true to form for a game heavily inspired by Earthbound, doesn't have a traditionally challenging final boss so much as it has an emotionally challenging one. Jimmy will always start the fight off with two turns of Afraid, and for good reason. The Pulsating Mass cycles between different forms as the fight goes on, whenever it drops low on health, fully healing itself in the process. You must defeat each form before the fight ends.
If strategy is on your mind for this fight, you're in the wrong mental space for it.  Music Defeating the Pulsating Mass opens up a door underneath it.  Our victories have stopped feeling like victories.  But we have to save Jimmy and his family.  Into the dark.  Heartbeat All that remains in here is Jimmy.  Everything else is black.  Is there even anywhere left to go?  Even Jimmy's family is fading away.  We eventually find Lars in the darkness. |
|
#305
12-19-2019, 01:05 PM
|
||||
|
||||
 If we don't find something to work with, it doesn't matter how many times we've won.  Come on, something, anything...  Not like we have anything else to use.  At least all of our family is still here, barely, for now.  Run? Where?  Oh. Away from that, for starters.  Jimmy runs through the darkness, hounded by... whatever those are.  But they outnumber him and there's nowhere to go.  There's the Secret Knowledge, though. This is Jimmy's last chance.  All he has to do... is read.  And quickly.  The world is asking the impossible of him.  And he still feels like it's his fault.  Do your best, Jimmy.  Music Quote:
 The Secret Knowledge emits a piercing light!  It blazes right through the Pulsating Mass and out above Central Hub!  Music Did... we do it?  Music: An Open Window Back to Central Hub, back to normal, it seems.  Quote:
 Quote:
 The family files out of Central Hub.  Sure, no prob-- wait a damn second.  Music You having a giggle there?  Music: Serotonin Flowers Quote:
|
|
#306
12-19-2019, 01:06 PM
|
|||
|
|||
 Anyway, NOW we can leave for that picnic.  Let's roll some credits. I could talk more about the game with a big-ass epilogue post as I tend to do these days, but... nah. That can wait until after postgame's done.  Let's just enjoy the picnic for now. Next Time: Moon Baby giggles. Too bad this is her only power. |
|
#308
12-19-2019, 01:44 PM
|
|||
|
|||
|
I so want to believe that everything will be fine and good for Jimmy. I want to believe that he beat cancer. But...
Quote:
At the very least I'm glad that Rubik and Cubbins were reunited. Also what the heck is going on in front of the Mouse family graves? I thought it was the cultists at first but the sprites don't match up. |


|
#309
12-19-2019, 02:30 PM
|
|||
|
|||
|
Elsim.
|
|
#310
12-19-2019, 03:15 PM
|
|||
|
|||
|
Graves: It's the cultists. You can spy them sneaking around on the beach (wooden balcony at the top of the screen) and in Legato (exits to the left). I think they're looking at the Mouse family graves, so all we see is their cowled backs, looking like a black lump.
Their presence and the credits slowly losing all cohesion combine to make it pretty clear that there's growing pressure on some important bits of Jimmy's brain. Edit: Okay, so the sprite is different, so it might not be an apocalypse cultist specifically. But black-robed figures sneaking around is pretty obviously bad, and that we maybe haven't seen them before might make it worse. (There's one at the Buddy Bee hive, too. Don't know how I missed that one.) Last edited by R^2; 12-19-2019 at 11:19 PM. |
|
#311
12-20-2019, 11:44 PM
|
|||||||||
|
|||||||||
 Music: A Closing Window When we get back from the picnic, we're home again.  We can walk around the house more or less freely, but if we leave through the front, the epilogue will play, and we're not ready for that yet.  Everyone in Jimmy's family is here, including Hitomi and Moon Baby. We'll talk to them in a bit.  Jimmy's room has the closet closed, but as before, someone or something is knocking on the inside. Ugh, fine, let's get this over with.  Music No way.  Music: Knuckle Sandwich and Ladyfingers Punch Tanaka? He lived?!  IN YOUR FACE, PULSATING MASS  Quote:
 Music Wait, what.  Quote:
 Music: A Closing Window Oh really now?  Music: Let's Color Today Let's have a looksee for ourselves.  Wow, you're not kidding, huh. This is where real postgame starts. I'll begin, of course, by showing that last bit of furniture we've obtained, but the actual gameplay itself will be absent for this update, and I'll cover why in a bit.  Music: Parabolic Smile Quote:
 Miss me with that chance-based nonsense, even if it is a pretty good chance.  Oh, and I forgot last time, but if you load your house to the brim with chairs (Beanbag Chair, Great White Chair, Love Seat, Toilet, Bat Chair, Uncomfortable Couch, Paw Chair, Throne) then you get Ample Seating. It's a good bonus, for sure, but do you really want to commit a full eight slots to it? Just give me It's People instead.  Music: A Closing Window Right, let's get to the real fun part of postgame.  From here on out, we can freely customize Jimmy's party! Jimmy himself, of course, is a permanent fixture, but everyone else can be added or removed as we see fit. Moon Baby can help facilitate things by keeping the equipment tracking to a minimum.  Weird power but okay. ANYWAY! This is where my backlog for now comes to an end, and for good reason. My plan for postgame is to stick to a solid core of three party members for as much of it as I can. The three I opt to take, though, are up to YOU, the viewer! Here, let's break down the stats and capabilities of each and every one of our candidates. For each stat, I'll give it a rating of either Stellar (better than anyone else), Solid (above average), So-So (functional at best), or Shoddy (absolutely garbage) since it seems pretty much every stat tends to have one of those four ranges for each character. Stats that are normally considered So-So can be overcome with the proper equipment (like Andrew's ATK with the Encyclopedia Set).  Buck Bullying older brother, obsessed with sick gains, used to be a mutant terror.
Buck's primary role, in any party composition, is to beat the hell out of his opponent as hard as he can. He's the best raw physical attacker in the game, and has pretty good survivability. With Insult, he can pull Startle duty, but he really needs some extra gear to make that worthwhile. He's at his most fun when you spec him for raw balls-to-the-wall Bloody Knuckles offense, rolling at low HP so his punches get even bigger.  Helga Mom as hell, has the 80's anime lady laugh, mood swings to high and low.
Helga's moveset and immunities, naturally, lend her to raw support, more than anyone else in the game. This is especially true if you give her the Doctor's Bag to amplify the strength of her healing skills, letting her keep pace with Phoenix Jimmy. Don't overlook the possibility for other roles, though: she's quick on her feet and doesn't do too badly as a physical fighter if built for it.  Jonathon Bear Cuddly stuffed bear, wants to be Jimmy's friend, did some very bad things.
Jonathon Bear's incredibly powerful personality and stats are hindered by his extremely weak moveset for his role. Fortunately, his role is very much up to you. You can make him a full-time itembot, which has some potential for both offense or support, although he has some of the weirder options, equipment-wise, for really broadening his role. He is, fittingly, an extremely Johnny character, and not for everyone.  Lars Depressed layabout uncle, has questionable tastes, will give it all up to help out.
Lars is perhaps the least flexible of all of your party. If you pick him, you're getting a tank whether you like it or not. That said, you can still get a bit of leeway on that front. It's possible to build him as a bulky physical attacker, leveraging Counter Stance and Karma Release for heavy damage, or you can have him take over a support role, using his excellent self-sustain moves to keep him in the fight and keep the heat off of your team.  Andrew Walking lexicon dad, emotional cold fish, values knowledge above all.
Andrew is your other primary choice for dedicated offense, and the best one for magical damage. He can also facilitate some of the best spike-damage moves in the game with his Analysis move. Really, no matter how you build Andrew, expect big huge damage, and enough MP regen to sustain an offensive throughout even the longest boss battles. If you really want to get goofy, you can even spec him for physical offense with the Encyclopedia Set!  Punch Tanaka Leader of The Petty Thugs, all-around cool cat, inexplicable affinity for janitors.
Punch Tanaka is a good choice for fast physical offense, and he's also the only non-Jimmy party member capable of stealing without spending a manual slot on Master Criminal. He's got some pretty nice utility options too, although most of the best ones require a bit of esoteric equipment support. That high LUK also bears mention, especially if you're interested in pursuing Mecha Super Balls as a boss-killing tool. |
|
#312
12-20-2019, 11:45 PM
|
||||||||||||||||
|
||||||||||||||||
 Pretty Soldier Hitomi Secret Moon Warrior, literal dream girl, aunt with a space yacht.
Hitomi is perhaps the most customizable character in our roster. With good stats for attacking across the board, her versatile personality, lots of MP, plus the power to reset her cooldowns, the sky's the limit for what we can set her to do. However, she's one of the less sturdy characters on our team, with no defensive stat one would call "good" and only Protect and Lovely as a defensive technique. She's super good, but you need to be ready to watch out for her survivability.  Music: Quest for the Journey Oh! And let's give Chuff's inventory a proper breakdown now, since the reason it was spoilers all along was that it has unique gear for every party member! WAAAOW!
 Music: Parabolic Smile Oh, and here's a secret set I've been hiding from all of you until now.  Y'know... if you really wanted to spec Jonathon for physical attack. Get all the animals together under your roof (Stuffed Hippo, Stuffed Skitter, Maneki-Neko, Fish Tank, Elegant Ice Swan, Pet Turtle) and you can do that!  Music: Beep Beep Boop Village Quote:
PARTY MEMBER VOTING RULES: There are no rules. Vote for someone infinity times. Vote for someone negative infinity times. Bellow a string of nonsense words and wait for me to assemble a themed team based on what I can glean from it. The only bad play is saying nothing. Whichever three you guys goad me into using will be our stalwart companions for (most of) the postgame. Next Time: One of these will definitely make me better. Thank you so much! Last edited by Kalir; 01-12-2020 at 10:36 PM. |
|
#313
12-20-2019, 11:55 PM
|
|||
|
|||
|
BUFF ANDREW
THE SECRET KNOWLEDGE IS A WEAPON, AND THE BEST WAY TO USE WEAPONS IS TO SMASH THEM ON THE ENEMY |
|
#314
12-20-2019, 11:59 PM
|
|||
|
|||
|
Helga and Buck, and maybe Andrew for the final slot, but I'm not married to the idea.
|
|
#315
12-21-2019, 12:05 AM
|
|||
|
|||
|
oh also
BUCK GO FAST FAST ENOUGH TO DEAL DAMAGE WITH SPEED VROOM |
|
#316
12-21-2019, 12:32 AM
|
|||
|
|||
|
Jonathon is a very bad bear who did some very bad things, but Jimmy doing a very bad thing himself in the real world (i.e. STEALING HIM) is the only reason he ever imagined him that way in the first place. I'd forgive him; Jimmy might not be able to imagine up a proper apology for the bear, but Helga did go to the trouble of salvaging and sewing up Jonathon's remains even though she knew he was stolen goods.
Anyway, we've spent most of the game with the family, but not as much with the B squad. My vote's for Punch/Jonathon/Hitomi. |
|
#318
12-21-2019, 01:34 AM
|
|||
|
|||
|
Buck, Punch & Hitomi
Quote:
|
|
#319
12-21-2019, 07:08 AM
|
|||
|
|||
|
Quote:
Buck/Jonathon/Hitomi is acceptable since Buck's been gone most game anyway. Last edited by R^2; 12-21-2019 at 07:41 AM. |

|
#322
12-21-2019, 08:45 AM
|
|||
|
|||
|
Family is for losers! Friend characters only! Punch, Hitomi, and Jonathan!
|
|
#323
12-21-2019, 10:58 AM
|
|||
|
|||
|
Quote:
|
|
#324
12-23-2019, 12:14 PM
|
|||
|
|||
|
Okay, looks like voting's cooled down for now.
So I'll call it and say that the postgame party for this run will primarily be Hitomi, Andrew (buff edition), and Buck (vroom edition). If that doesn't seem to line up with the votes in this thread, remember that there are no rules, and more importantly: you'll get to see everyone in the postgame, if perhaps only for a little bit of time for some of them. |
|
#326
12-23-2019, 06:34 PM
|
|||
|
|||
|
That's cosmic inflation for you.
|
|
#327
01-14-2020, 02:57 PM
|
|||
|
|||
 Music: A Closing Window Right! As mentioned, we'll have a team of Hitomi, Andrew, and Buck.  Let's cover what role each of them will have in our party, since different compositions might want to use different characters in different ways.  Hitomi is going to be built for two things: magical offense, and support. Unfortunately, we don't yet have the gear to make that really worth going for, and most of the remaining kit we want is sequestered in Dark Dungeon. We'll get there, though.  Andrew and Hitomi both got the most general votes, and ordinarily with that team I'd have Hitomi stick to physical offense.  In our case, though, people explicitly wanted Encyclopedia Set Andrew, which means that he's going to handle the physical offense for the team. The manual selection here is EXTREMELY limited: Crush is acceptable for the low cooldown but on the weak side, and Kung Fu Punch has too MUCH of a cooldown to be worthwhile. So Pulverizing Light and Roughhouse it is.  The last party member we have is Buck. This slot was a lot more contested, with both Punch and Jonathon getting close to claiming it, but as the thread correctly guessed, Buck and Punch both serve similar roles in combat. Jonathon, in this team, would likely take the support role over for Hitomi, letting her do fulltime magic damage.  Buck and Punch both serve similar roles, but this becomes more of the case if we wanted to spec Buck for speedy damage. Unfortunately, the crown jewel here, the Perpetual Motion Device... doesn't actually work with Inner Rage, because Angry just amplifies the ATK stat, which Buck's normal attacks wouldn't use here. Buck can still be an okay user of the Perpetual Motion Engine with the Accusing Finger and Buck's Mix Tape, but it feels like a lot of work for a setup that doesn't actually pay off very much (especially compared to Jimmy). In short: this particular loadout isn't going to stick around, but I'm still going to make sure Buck gets to go fast with the Accusing Finger.  Again, don't be discouraged if your favorite didn't make it in. They'll get a chance to shine.  Just to keep things thorough: here's Jimmy's loadout. The Luxurious Perfume is kind of a "whatever" move to see what fits in, to be honest.  Music: Quest for the Journey Now, in the interest of full information here: you do get a full list of the unique items to be found in Dark Dungeon. And I'm going to provide that list here! If you've been paying attention, you might even be able to guess who gets what! As with Chuff's inventory, the trinkets tend to modify an existing move of the wielder. The weapons tend to have pretty good stats, but in an unconventional manner that might make for harder builds to use. I'll post and update this list with stuff we find after every run.
 Music: Balancing the Great Rings That said, for this run, I'm not in it for the material goods. I'm here for points: both to get Buck's Accusing Finger, and to get further dungeon items. I didn't list it in the last post, but Chuff also stocks a second helping of each Dungeon Item starter pack, as well as a starting Ladder. Those will make Dark Dungeon runs a lot more tolerable.  Music: Glass Cathedral As is, we're either stuck with Rubik's offers, or lucking into a ladder draw on item spots. And that's every. Single. Time.  Music: Bucket of Stink Luck has EVERYTHING to do with it. Once we get the starter item full set, Dark Dungeon becomes a much more interesting affair, where you have to budget your resources and press your luck for the rare stuff. Before then, you're literally 100% at the mercy of the RNG.  Music: Glass Cathedral AAARGH why can't you give me this one when I have more than a single die! A full loadout of Loaded Dice is a blank check to smash and grab this place!  Music: Eye of Newt All these dice don't matter if I don't have the keys necessary to get to the good stuff, though. There are a rare few layouts with toyboxes that don't require keys, but they're usually insufferably painful in other ways (that frequently require Too Many Trap Detectors and Also Loaded Dice). This is why getting the Safety Tips instead of the Skeleton Key Ring was a misplay way back when.  Music: Quest for the Journey Let's fix that first.  Music: Slurry of Malformed Words This here would be one of the ones you want Trap Detectors for. Double Dice also help out a lot. And you still need a Loaded Dice at the end to have a real chance of hitting the toybox.  Music: Glass Cathedral Here we go, now we're talking. Get us the good stuff!  Quote:
 Music: The Growing Ladder Here's another "decent" layout for getting toyboxes without keys. Since there's more branching paths, you're less at the whim of the RNG for whether you get one of these spaces.  The catch: these guys seem to have a much higher chance of being Mimics. I'm guessing the further down the road the toybox is, the lower the odds, but I still hate it.  Music: Four Black Belts in a Pinto Wehhh I already used my one key. Now this just gets to TAUNT me.  Consolation prize!  Oooh, now THIS we can work with.  Music: Circle of Snakes One key and a few floors later... |
|
#328
01-14-2020, 02:59 PM
|
||||||
|
||||||
 Music: A Cocoon Throbbing in a Dead Man's Mouth I'm going to eat all dice.  Music: Eye of Newt And now I don't get to leave and the game gets to taunt me for however many floors it damn well pleases.  Music: City of Phosphorescent Moss This isn't even for treasure. This is just to skip this level that sucks.  Music: Machines en Vogue Ugh, FINALLY. Now to rack up low-effort point payouts and then ditch this place.  Music: Toy Soldier Parade How dare you.  Music: Oh-So-Cool Castle I will not have you impugn my honor like this.  Music: Dragon Slayer At least we got a ton of points.
 Music: Quest for the Journey This is as fast as we can make Buck go. And don't get me wrong, 450 AGI is a lot. Hell, 400 is a lot if we wanted to swap the Hyperdrive Unit for Buck's Mix Tape.  Unfortunately, all that AGI is a bit of a double-edged sword. With the Accusing Finger, Buck doesn't have the easy Startle on demand. Breaking Alert status is good, but mostly only if Jimmy's already keeping up on Startle duty, and he's usually doing healing instead. Still, people wanted to see a fast Buck, and I intend to stick to that. Maybe if I get a bunch more Red-Billed Squawker levels and get Annoying Squawk unlocked for other forms' use, I might be able to get more out of this. Worth consideration, at least.  Having given up on the Perpetual Motion Engine with the realization that Inner Rage doesn't buff it, I shift tactics for the moment and go for this build. It's also not a great idea, though, since that requires someone to keep Buck alive but at low health, which basically requires someone that isn't him to tank, and while Jimmy CAN do that, again, it's not what I usually have him do. I guess I'm just not used to having postgame Buck around.  Music: Beep Beep Boop Village Anyway, Dark Dungeon is boring for now. There's other postgame to cover yet, including the new King Cup. Here, I'll cover some of the new additions to the arena shop!
 Music: Slaughter Promise Now, I really WISH I could handle the King Cup right out of the gate, and I'm able to get through one or two battles on my own, no problem.  Music: Battle in the Fire Tornado But, well, this party just has the same problem as the Raspberry Cup team of Lars/Punch/Andrew did. There just isn't enough durability and sustain to keep up with repeated fights here. Jimmy would have to run both as tank and healer to keep things going here, Hitomi's support abilities just aren't good enough even with her Moon Badge and manuals.  Music We'll get there eventually, though.  Music: Let's Color Today Time for our final destination today, and the core of the Jimmy and the Pulsating Mass postgame. We've been able to access this island ever since we got Hitomi's spaceship, but only now in postgame does it have anything for us.  Welcome to the final island.  Music The main room has the same design as Central Hub, but the only things to see are this healing fountain...  And these doors. There's eight of them in here, each with a display next to it, but only this door to the far left has anything on it. By now, you know that that symbol represents Buck and his Brash personality, right?  Here's the trick. Without Buck in your party, this door will not open. The first time you're able to have Buck in your party and enter this door is after defeating him in the Pulsating Mass, and even then you're down to a party of two until you finish there and move to postgame proper.  Music: City of Phosphorescent Moss That's how the Heart Prison works. Behind each door is a revamp of an existing area we've gone through, in a smaller segment. Each door requires a specific party member to access. What this means for my team composition is this: Jimmy, Hitomi, and Andrew will be used in each of these areas. If a party member not in the current party is required, they'll tag in to Buck's slot. Otherwise, Buck stays with us. So in short: you'll get to see every party member for at least one part of the Heart Prison.  Anyway, to help this Buddy Bee, we need to track down and shake all three of the plants' pollen onto Jimmy.  Every room of the Heart Prison has exactly one toybox accessible in a similar manner.  Music: Motion Sickness The enemy sets for these areas are a little different as well. The stats are scaled up appropriately, though.  I guess the theme for this area is Enemies Explode?  Music: City of Phosphorescent Moss Anyway, first one is over here, just head up and left. |
|
#329
01-14-2020, 03:00 PM
|
|||
|
|||
 Right, we're probably going to actually see what this one does this time.  Next, we'll head to the right.  Music: Motion Sickness Wow, that's a hell of a statdown.  Music: City of Phosphorescent Moss As before, we finish the area by entering the tower.  Just past it is the purple pollen.  And down and to the right, there's the blue.  Happy to help!  Jimmy can understand how this guy feels.  It's not how we want it to happen, but the Buddy Bee is out of our way now.  Quote:
 Music: Motion Sickness And that's the last enemy type in this neck of the Heart Prison. Let's move on.  Music: City of Phosphorescent Moss Each branch of the Heart Prison has something waiting at the end.  Music And that something is a boss rematch.  Whisper Weaver, round two. Music: A Cocoon Throbbing in a Dead Man's Mouth The boss stats for each branch of the Heart Prison are also scaled up accordingly, which means the Whisper Weaver is faster than anyone in our party, including Buck or Jimmy. The Whisper Weaver also immediately goes for the Terminal injection one turn after Grasping a target, so you have less wiggle room there, too. Nothing really out of the ordinary, save that we can approach this fight with any team composition we want, provided it includes Buck. So what does Buck bring to the table in this fight that makes him worth building around? First: if we CAN get him faster than the Whisper Weaver, that would be really good, because then the vast array of the Whisper Weaver's moves can be Insulted away. It possesses very few direct, untelegraphed attacks that are worth worrying about. The Accusing Finger makes this a little tricky, since it gives Insult such a huge cooldown, but really, that would be fine on its own since we could get Jimmy to Hyperactivity Annoying Squawk whatever the Whisper Weaver tries to do for at least the first three attempts, while Hitomi and Andrew just swing for the fences. Done this way, we don't even care about Buck being faster. If we had a party that could support Bloody Knuckles, that would also be good fun, since the Whisper Weaver does a lot of damage over time but not many direct attacks (and the only area attacks it has are telegraphed, so tanking is absolutely viable). Let Buck get Sick, that's fine. It just makes him hit HARDER.  None of the boss refights is that far beyond what they used to do, really. It's more a test of how well you can fold a given required party member into the strategies involved, and most fights tend to be pretty decent for the party member in question.  Music: The Noble Sea The only thing we get for beating a boss in the Heart Prison is access to the next area.  Fair enough.  Music The warp spots just take us to the entrance.  Clearing up the Brash branch has opened up the Optimistic one, which means Buck's gonna take a brief hiatus while Helga tags in. Buuut that can wait for a bit. Expect these updates to be shorter: my playtime will be around the same time (since I also plan to do runs of Dark Dungeon and Kingland Arena until I succeed) but the actual content I can give you is lesser. Next Time: Do you know what you need? A fancy new suit. |
|
#330
01-14-2020, 03:19 PM
|
|||
|
|||
|
Equipment, mechanics, mechanics, equipment, "Christ Jimmy chemotherapy is awful how do you even" ah there's the gut punch
I think I know who the last fight of King's Cup is gonna be and if I'm right then HYPE for it |