
-
Welcome to Talking Time's third iteration! If you would like to register for an account, or have already registered but have not yet been confirmed, please read the following:
- The CAPTCHA key's answer is "Percy"
- Once you've completed the registration process please email us from the email you used for registration at percyreghelper@gmail.com and include the username you used for registration
Once you have completed these steps, Moderation Staff will be able to get your account approved.
Make sure you don't hurt nobody. Let's Play Barkley: Shut Up and Jam: Gaiden!
Back to Let's Play
< 1 2 3 4 5 6 7 8 9 10 >
< 1 2 3 4 5 6 7 8 9 10 >

|
#152
 09-17-2010, 03:31 PM
|
|||||
|
|||||
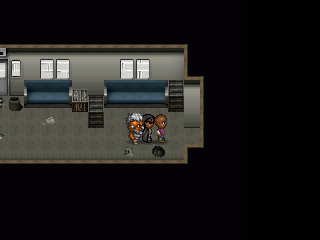
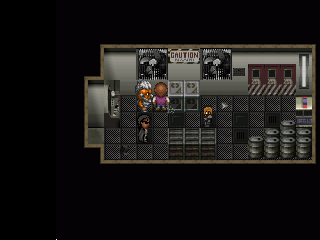
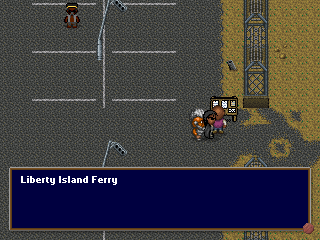
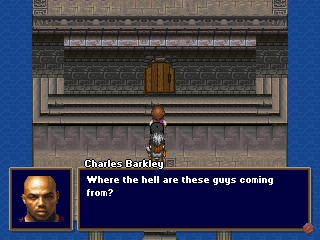
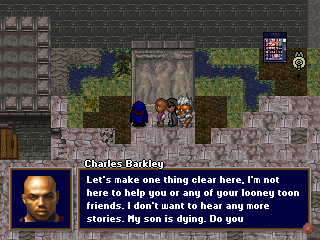
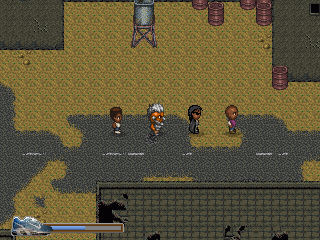
 We exit Proto Neo New York in the southward direction to find the recluse in question. Can we save Hoopz from diabetes? (You can spell it diabeetus if you want.) 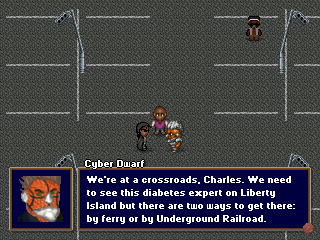 We turn east and arrive in a big parking lot, where the group has to decide which method of travel they will take. Quote:
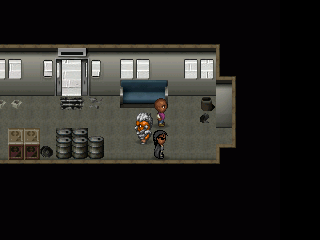
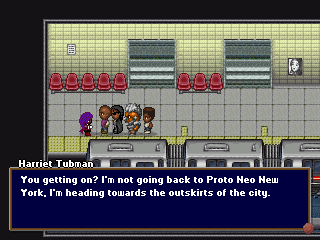
 Before we do either one, we buy some new stuff from the vendor up near the railroad entrance. I pick up some new equipment for Cyberdwarf, a few accessories, and the Mystic B-Ball. 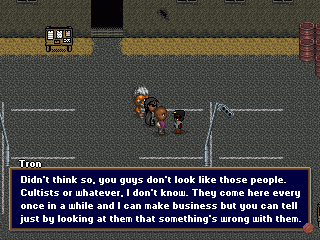 Barkley makes some meaningless small talk with the vendor, who says that most people going this way seem like cultists or something. He makes a remark about how they seem to be short on insulin. That's probably a bad sign... 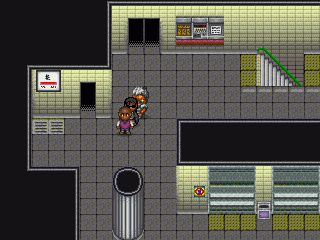 Barkley first checks the Underground Railroad to see if it's an effective route.  NOT THE GIFT SHOP! 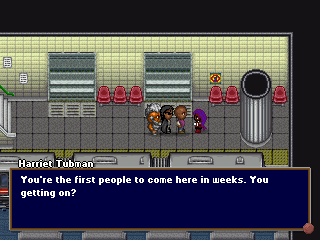 The group finds the Underground Railroad, run by a woman who calls herself Harriet Tubman (but who looks like a Tifa recolor). Quote:
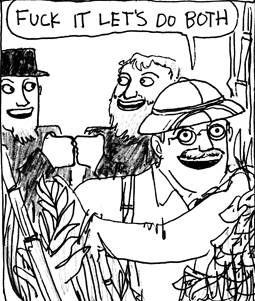 Paralyzed with indecision and desperate to save Hoopz, Barkley attempts the legendary and dangerous Beaton-Roosevelt Temporal Fission Maneuver so that he and his companions may take both paths at once, rejoining when they reach their destination, and thus having the advantage of whichever one is faster. 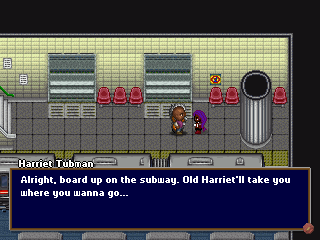 (so yeah I'll do both because that was in popular demand, but I'll do the train one first!) 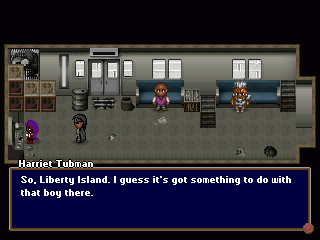 On the train, Harriet Tubman tries to make small talk with Charles Barkley. ...This game is weird. Quote:
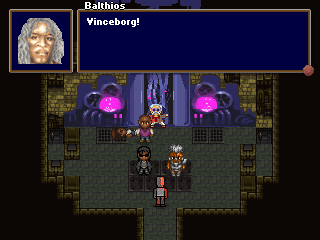
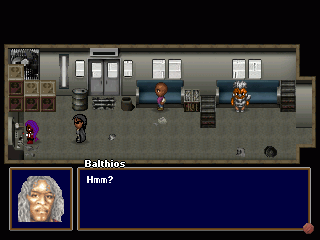 A dull clanging sound catches the attention of Balthios. Quote:
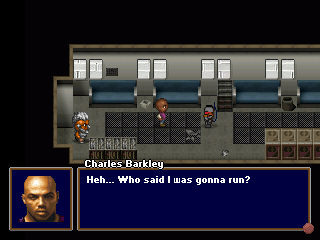
 Can't be that tough. Let's get to work. 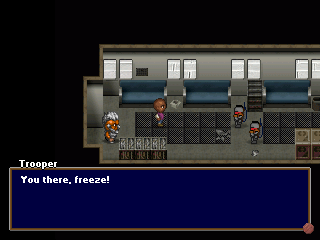 It's the po-po! Book it! Quote:
 DERP I messed up the first QTE, but fortunately you have quite a bit of time in between these and they're all pretty obviously told. 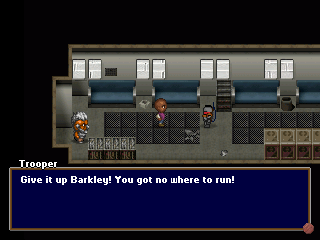 Barkley takes a laser to the face, but counters with his b-ball and takes down his aggressor. Last edited by Kalir; 07-11-2017 at 10:51 AM. |
|
#153
09-17-2010, 03:32 PM
|
|||
|
|||
 That was your one free hit, sonny. Now you're all dead. Barkley dodges this guy's laser and retaliates easily.  PURGE THEIR WEAKNESS FROM OUR MIDST 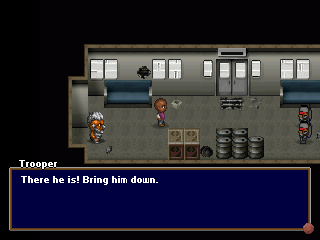 Dodge, dodge, dodge and counter, Mac baby! 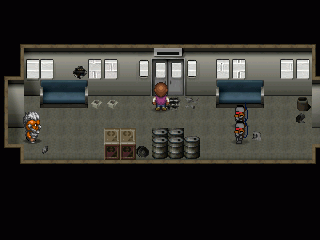 You got it! This calls for a chocolate bar! Ha ha ha! 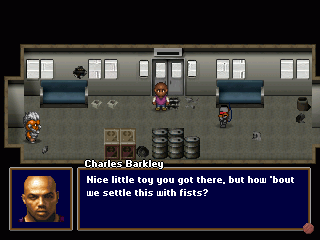 Barkley challenges the remaining trooper to fisticuffs. 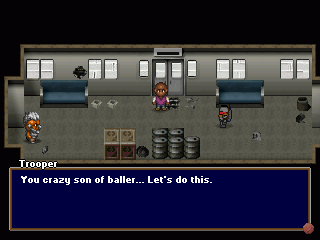 Well, I would say to just ignore him and use your gun, but we've been dodging that so far, so... 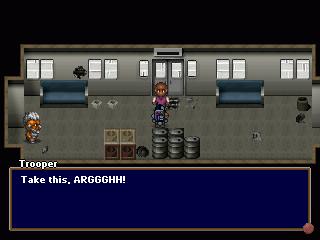 Hah, sucker. Taste asphalt!  Oooh, he's gonna feel that in the morning. 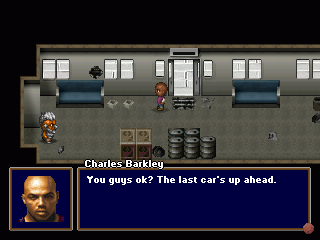 Bravely venture forth into unknown lands! 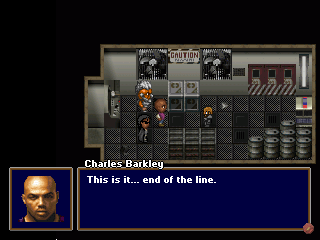 Here's the leader of the BRD troopers attacking the train. Quote:
 It's just a hop to the left. 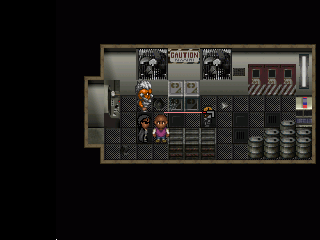 And a step to the riiiiiiiight~ 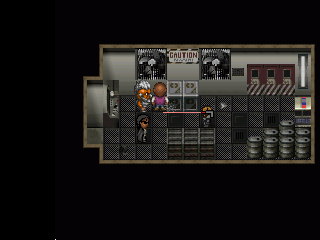 LET'S DO THE TIME WARP AGAIN! 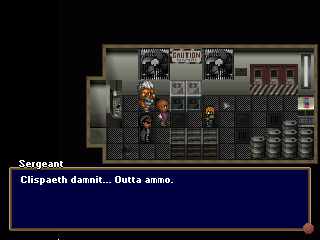 Seriously? Your deadly criminal apprehension laser cannon only has three shots? 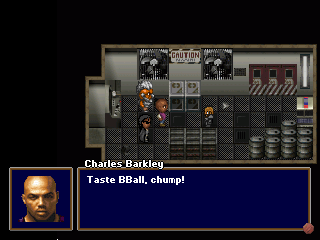 What the big guy said! Last edited by Kalir; 07-11-2017 at 10:51 AM. |
|
#154
09-17-2010, 03:34 PM
|
|||||
|
|||||
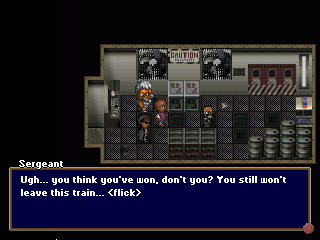 The sergeant gets the last laugh, though, as he was carrying a switch for... 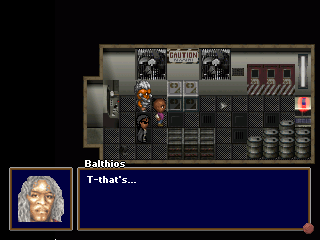 Yeah, see that red light back there? It's emitting an alarm for a reason. Quote:
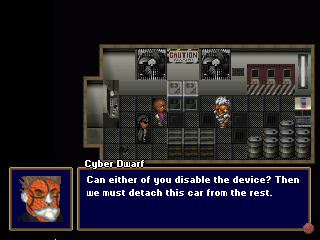 Since nobody here took points in the Demolitions skill, we have to make do with Cyberdwarf's Disable Device skill. Quote:
 Okay, so which one do we pull? Quote:
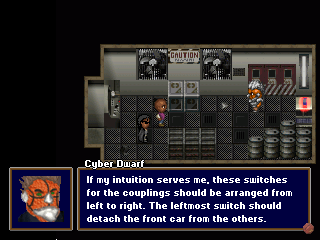
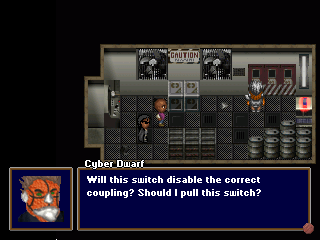 Um... no? 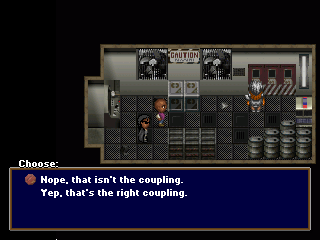 GUYS THIS IS HARD GUYS 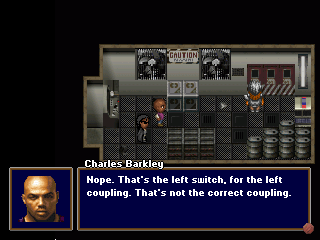 I seriously don't even know what to say to this. I guess it's meant to poke fun at puzzles in RPGs that are just stupidly easy and the game acts like they're OMG SO HARD GUYS. In retrospect, I should've told Cyberdwarf to disable the leftmost one just to see what happens. Oh well. 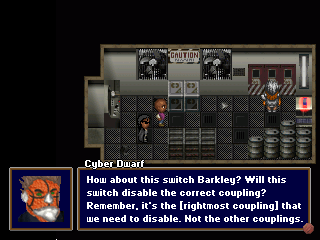 Yes, he asks for each switch. 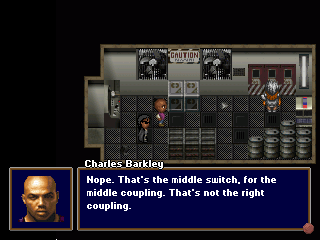 i r smrt 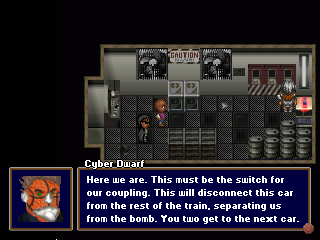 Okay, now that we know right from left, Cyberdwarf plans to flip the switch while we get to safety. Quote:
 And it works! Barkley and Balthios leave, and Cyberdwarf leaps into the car mere seconds before the bomb explodes, just out of range of the other cars. 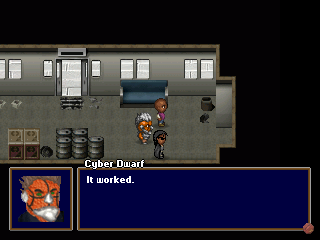 Pro bomb diffusal strategery, right here. 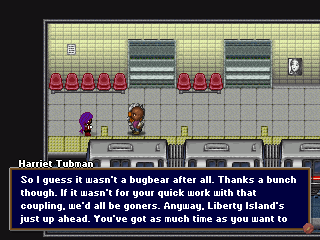 The train was damaged slightly in the confusion, but once it gets fixed up we should have a way back home. 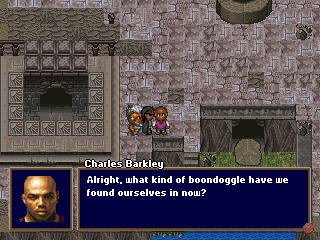 Here we are, on Liberty Island. Quote:
 Yeah, we could do that... or we could see what happens on the other end of things! Last edited by Kalir; 07-11-2017 at 10:52 AM. |
|
#155
09-17-2010, 03:35 PM
|
||||||
|
||||||
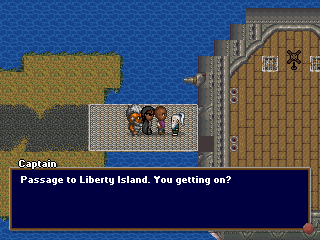 Unlike Harriet Tubman, the captain doesn't even have a name. Quote:
 And we're off! 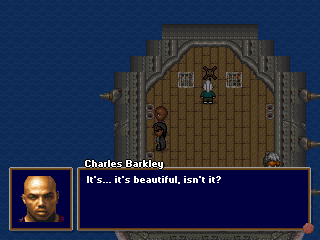 No transition here, it apparently becomes nightfall as soon as they set off. Quote:
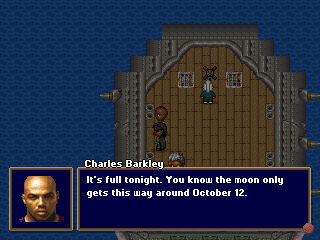 Barkley takes a break from his psychological goldmine to muse on the date. This freaks Balthios right the hell out. Quote:
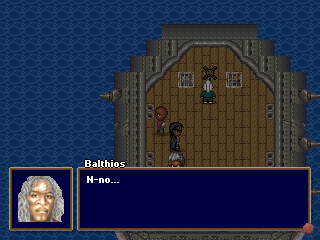 He starts backing away from the group. 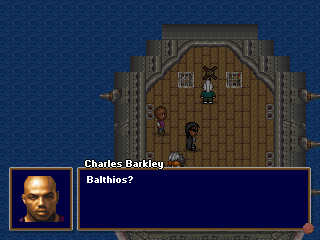 Hey, calm down, man. Columbus Day isn't that bad. Quote:
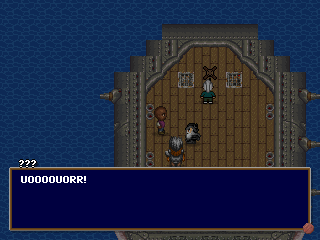 WHAT Quote:
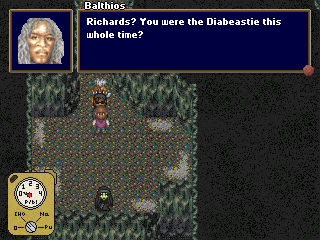
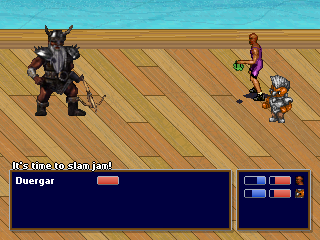 It is the Duergar! The only really tricky thing about this fight is that you're down two party members. Without Hoopz, you can't do as much damage, and without Balthios, you can't debuff the everloving crap out of the Duergar. Aside from that, it's not too bad. 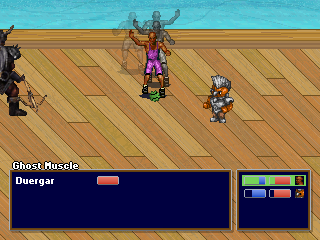 Barkley puts his Ghost Muscle skill to immediate use, buffing his Power and... something else? I forget. 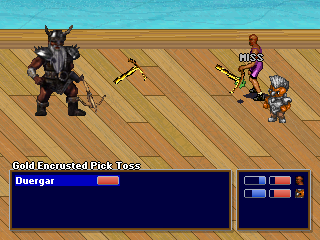 The Duergar has a number of strong attacks, but this Gold Encrusted Pick Toss is about the least accurate thing ever. It doesn't hit us once. 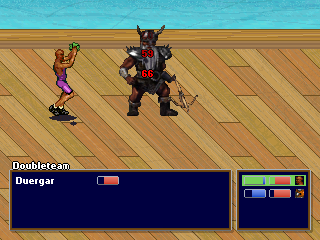 Supoosedly, the Duergar also knows high level magic like Level 3 Melf's Acid Arrow, which does high damage and inflicts diabetes to one enemy, but he never gets a chance to show it off.  Most of the Duergar's turns are spent using Gemstorm, which does about a fifth of both fighter's VP. 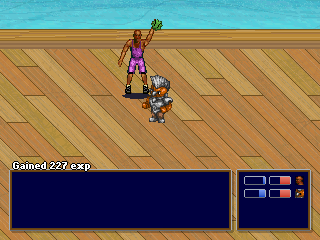 Challenge: negligible. 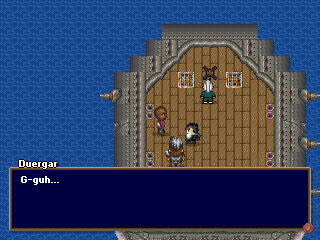 The defeated duergar stumbles around, growling and roaring in fury, before... 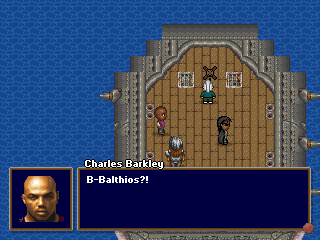 It turns into Balthios. Quote:
Last edited by Kalir; 07-11-2017 at 10:52 AM. |
|
#156
09-17-2010, 03:36 PM
|
|||
|
|||
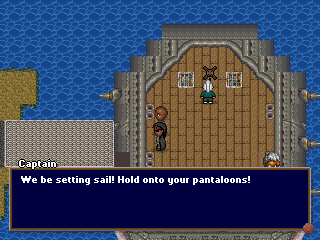
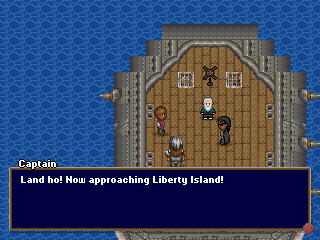 The captain has been paying zero attention to us for the whole voyage, and calls out our arrival to the island. 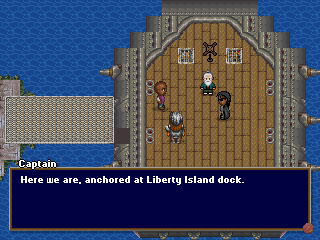 And the Beaton-Roosevelt Temporal Fission Maneuver pays off! 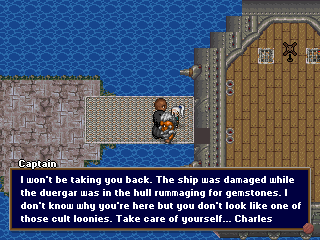 No matter which path you take, you're stuck using the train to return. We bid the "old man of the sea" farewell and go find the truck pump to save. 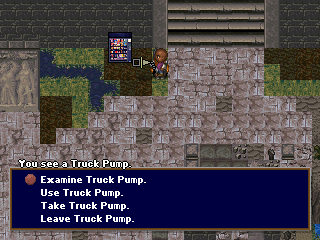 Um. This is new. Uh... I guess I'll examine it? 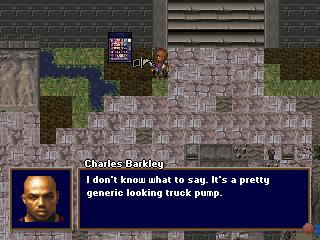 All right. Hey, can we take it? Saving anywhere is pretty neat, guys!  Dang. Oh well, let's just use it. Quote:
Last edited by Kalir; 07-11-2017 at 10:52 AM. |

|
#160
09-17-2010, 04:02 PM
|
|||
|
|||
|
Quote:
This game, man. This game. |

|
#163
09-20-2010, 05:48 PM
|
|||
|
|||
|
So, uh... Yeah. This update, right here? This is gonna be big.
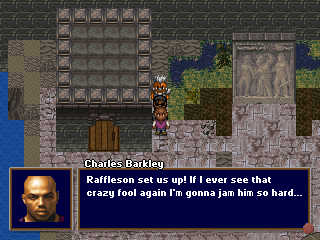
No seriously, you may want to go get a sandwich or something. I'll wait. ..Okay, you set? Here we go.  Today starts off on Liberty Island, where Barkley and his allies have traveled in the hopes of curing Hoopz of his type 2 diabetes. 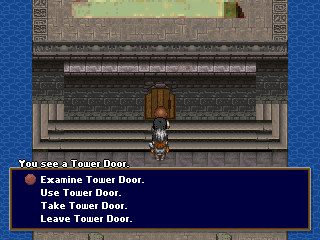 As the previous update sort of spoiled, the gimmick for this area is that each relevant item has three operations to it: Examine, Use, and Take. I'm sure you've all played at least one RPG with a similarly clunky interface, and in this area, usually only one of the commands is really useful or needed, although the others occasionally have funny messages. 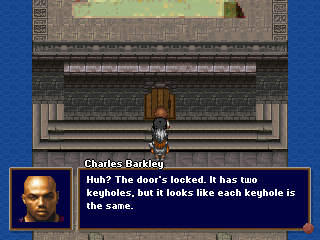 For example, if we try to examine or use the door, we quickly find it locked. 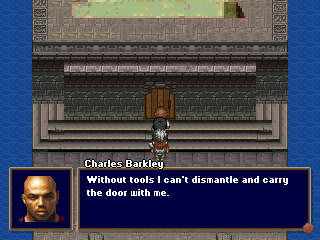 Attempting to take the door leads to an unexpected response. 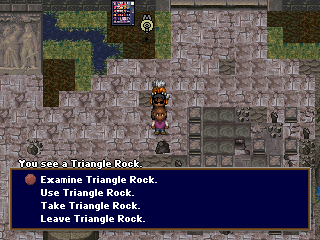 Heading back to the main area, we find a shining triangular rock. 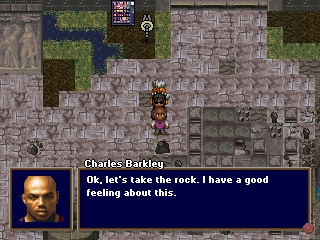 Rock get! 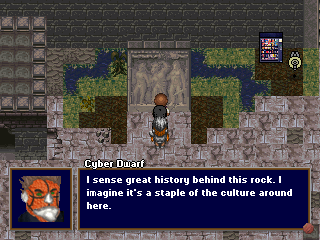 Examining the picture slate leads to Cyberdwarf commenting on it, but it doesn't tell us anything new. The image is all but indecipherable anyway. 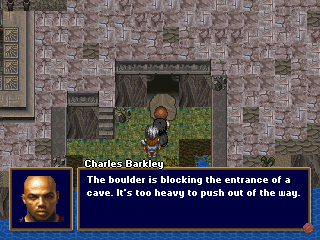 Damn boulders, think they're so great. 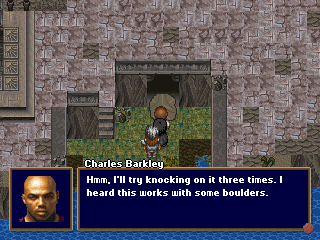 Um... okay? It didn't work, but good effort, I guess. 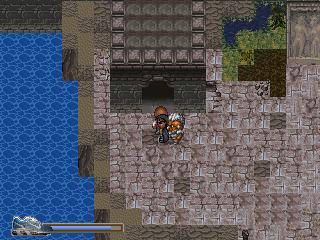 Well, whatever. Let's check out this house. 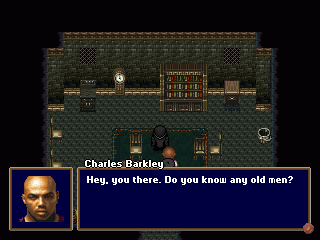 Excuse me sir, do you know a Mr. Threepwood? 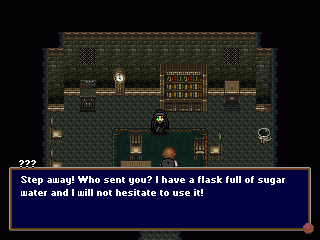 Oh, right. Damn diabetic cultists. Quote:
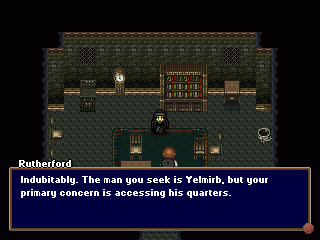 Rutherford helps to lay down the framework of our situation, starting with Yelmirb, the man who can heal diabetes. Quote:
 Oh right, people kind of frown on kleptomania nowadays. 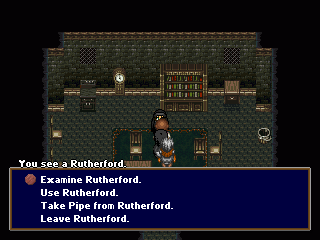 Fortunately, once you have access to the tools you need, the prompts change accordingly. Last edited by Kalir; 07-11-2017 at 10:53 AM. |
|
#164
09-20-2010, 05:50 PM
|
|||||
|
|||||
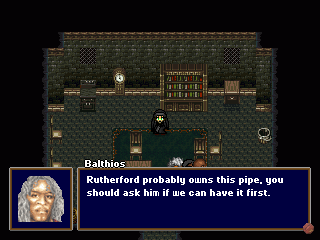
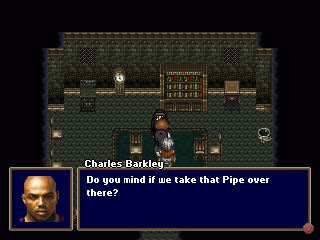 Hey man, nice pipe. Quote:
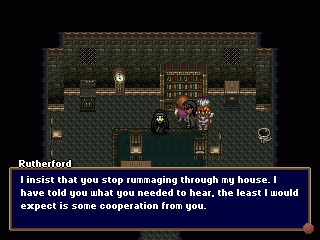 The prompt doesn't even come up for the rest of this stuff, since Rutherford tells us to piss off and leave it be. 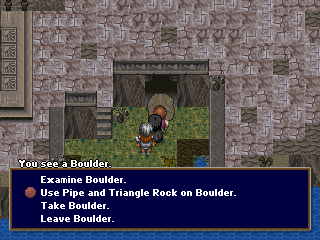 Meanwhile, back at Bowldertown USA... 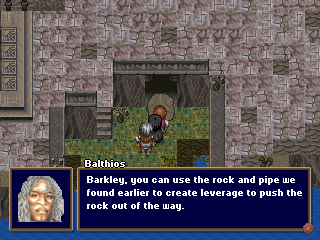 You don't say? Physics, you sly devil, you! Quote:
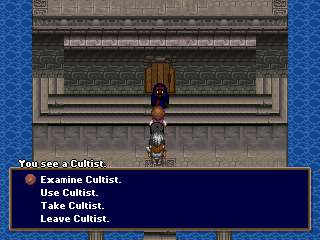
 Using our makeshift fulcrum, we easily dislodge the boulder and can enter the cave.  Most times when you try to take the cultists here, Barkley remarks that he doesn't want a loony following him around, so we'll just talk to him (by using him, of course).  Quote:
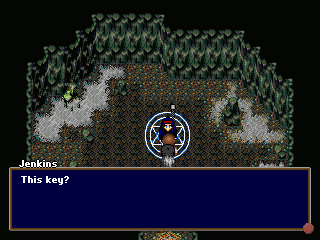 Weird lookin' key, but hey. Quote:
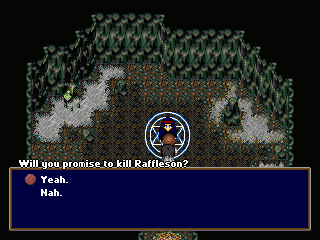 I dunno if the plot changes at all depending on if you agree to do so or not, but I doubt it, so sure, why the hell not. 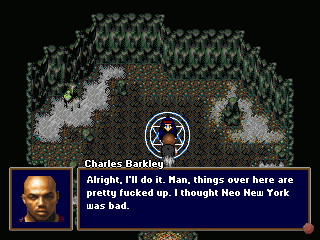 You have no idea, Barkley. 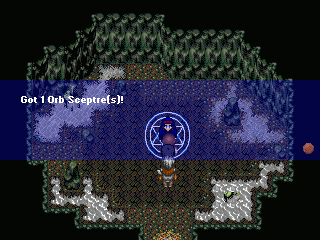 Okay, now we can go into the tower! 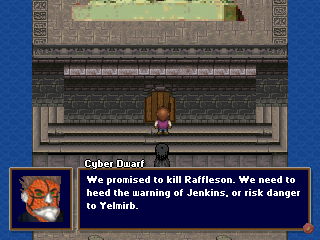 Of course, it won't let us if we go up there. I guess that's a "but thou must" all over again. 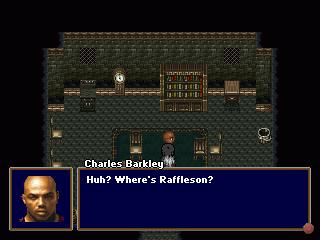 Rutherford/Raffleson is nowhere to be found, however. Quote:
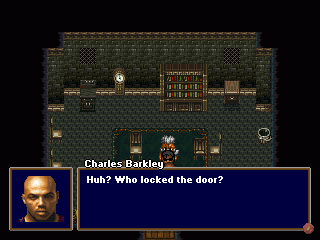 Well, that's less than good. 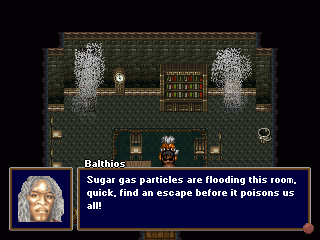 Uh-oh! Quick guys, find an exit! Last edited by Kalir; 07-11-2017 at 10:54 AM. |
|
#165
09-20-2010, 05:51 PM
|
|||
|
|||
 The group only freaks out for a little bit before the death trap breaks, though. Sucker. Quote:
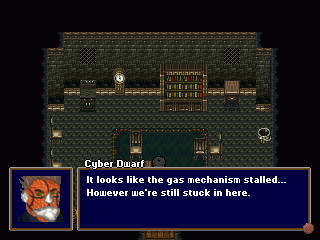
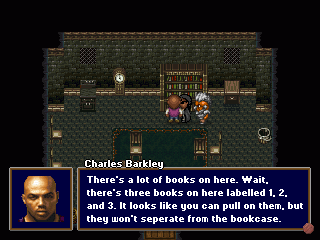 Anyway, in order to get out, you have to fiddle with all the stuff here. I forgot to check it, but there's a Zaubermancer Robe that Balthios can use in the dresser. Barkley checks these books and finds that they can be pulled out partially, and then wonders if the room has any number sequences in it. 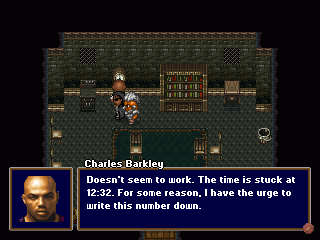 How mysterious! And somewhat familiar! 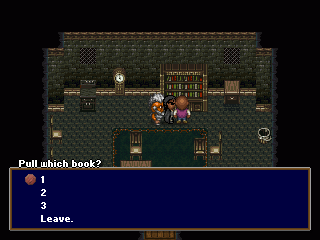 Yeah the solution here is simple enough. Pull the books as they match the clock numbers and...  Huzzah! Onward to Yelmirb! 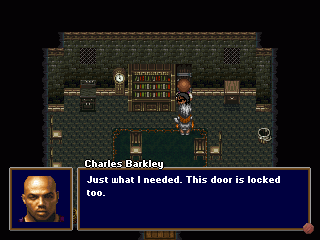 Whoops. Guess we need to find a key. 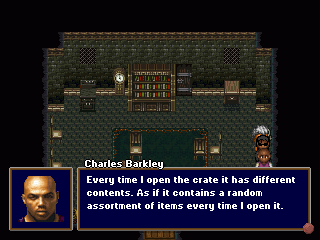 It's not in the crate, although there is other assorted neat stuff inside. Quote:
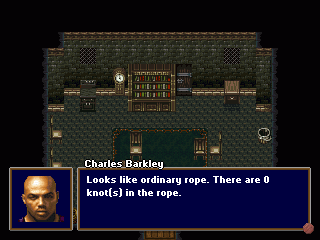 This rope doesn't have anything to do with anything, although Barkley comments on the lack of knots and potential for more knots. 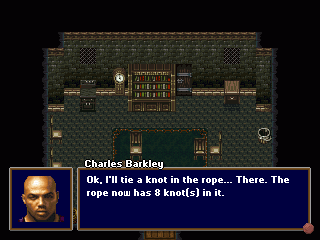 I play with the rope for a bit, then get bored and go find something else to do. I don't think the rope does anything.  This drawer is probably where the key is, but it's also locked, and Rutherford probably took the key with him. 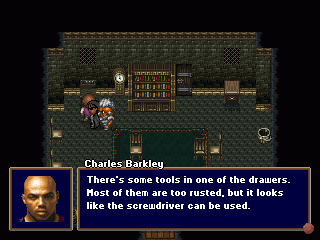 Fortunately, I've played Crimson Room, so I know just what to do here. 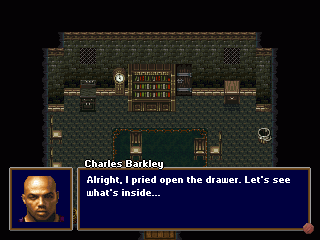 At least I didn't have to use a projector to find a hidden switch on a wall. 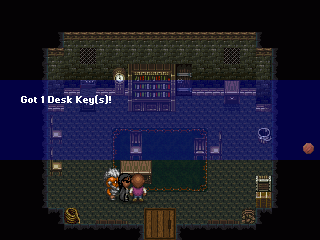 Hooray! Let's go try it on the door!  Wrong door, smart guy. 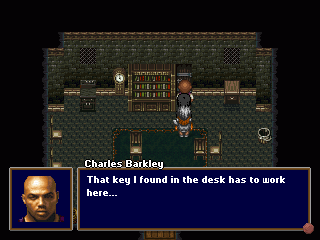 There we go. We unlock the hidden back door and escape. Last edited by Kalir; 07-11-2017 at 10:54 AM. |
|
#166
09-20-2010, 05:53 PM
|
|||||||
|
|||||||
 Tell Sanchito that if he knows what is good for him he best go run and hide... Quote:
 Our progress to the tower is blocked off by another cultist. Barkley doesn't like the cut of his jib. 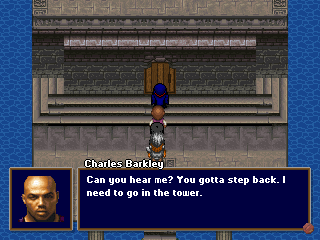 We try to talk some sense into the man with the poorly cut jib... 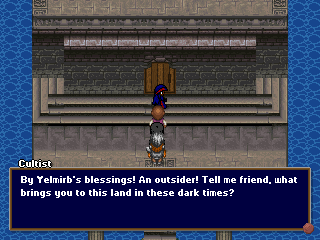 Uh... little farther to the right, bro. Quote:
 Maybe they can burrow through rock? Anyway, we go to meet Mack by the tablet.  Mack launches right into his explanation, which goes on for a while. Quote:
 Seriously, man. This isn't Metal Gear Solid over here, we are on a strict schedule and Barkley does not care for your meanderings. Quote:
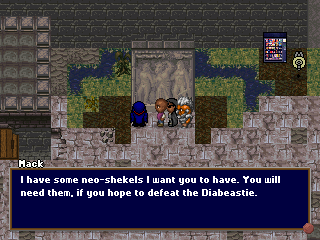 Um... okay? Neo-shekels aren't a very powerful weapon, but whatever, 750 more for us. 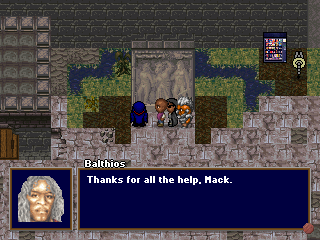 Yeah, whatever, let's get going. 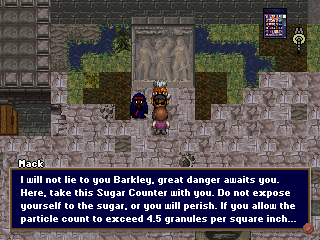 Mack stops us one last time for a dire warning. Quote:
 Namely, CORPSE LOOTING!  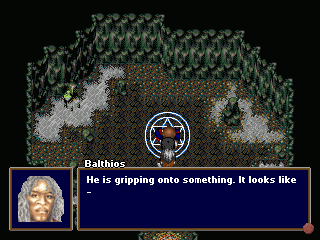 Quote:
 Hooray! This is the last skill in the game, and Cyberdwarf's sole offensive skill. It hits all enemies and lowers a random stat for them, giving Cyberdwarf the means to put his BP to use for things other than healing, which our consumable items pretty much handle already. 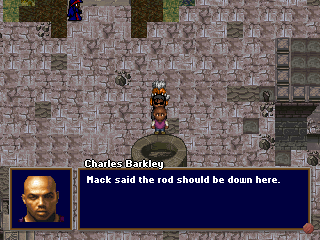 Properly armed, we descend into the sugary depths of the well. Quote:
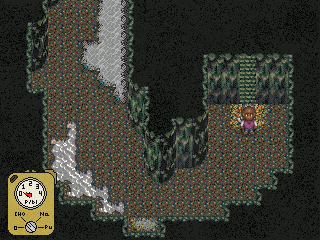 Right, see that thing in the corner? This area has no music, just the Geiger-esque clicks of that Sugar Counter, which will warn us if we get too close to dangerous sugar deposits. Last edited by Kalir; 07-11-2017 at 10:54 AM. |
|
#167
09-20-2010, 05:54 PM
|
|||
|
|||
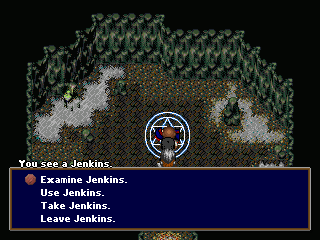
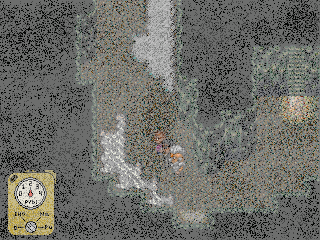 As an added indicator, the screen will frost over with sugar crystals if you get dangerously close. I dare not dwell on the fate of those who get too close. 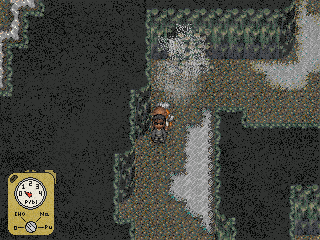 To make matters worse, the high sugar levels play tricks on your eyes, and phantom images dance at the edges of your vision, striking terror into your heart. 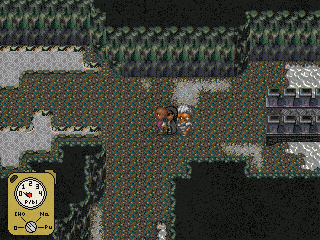 It's a shame I can't ever screenshot the damn things flitting about. I swear to Clispaeth there was a bag of sugar running around here...  Whoa. Okay, we definitely can't go that way. How about south? 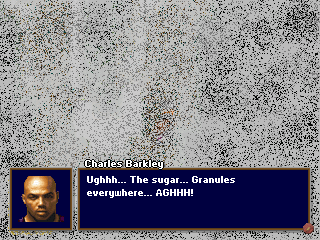 No- NOOOOOOO! 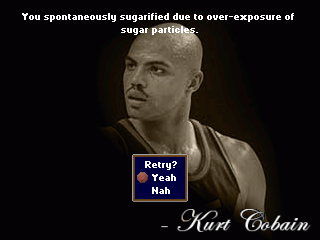 Balls. Like a quicktime event, screwing up and getting too close to a sugar deposit is an instant game over, but you are free to restart from the beginning of the area. 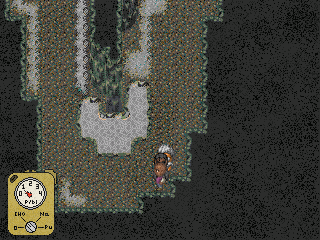 Here's where I died. You have to be careful and stay as far away from that concentrated pool as you can. 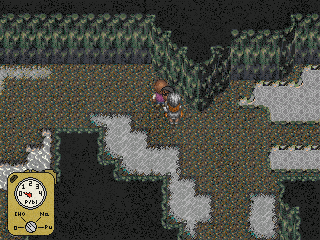 As you can see, different types of sugar pose a different sort of threat. That bridge over to the right is a deathtrap, whereas the stuff in the upper left only has trace amounts. 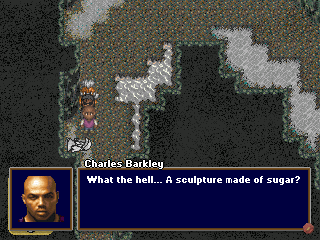 Another corpse? Potentially a lootable one? 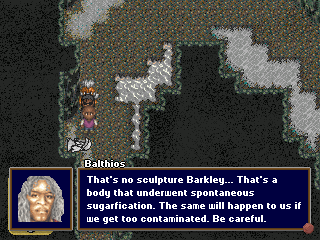 Oh. Well, you don't need to tell me twice. 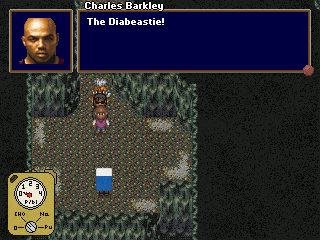 There it is! I told you I'm not crazy! Quote:
 Oh, it's just this jerk. Quote:
 Nope. Can we have the rod now? Quote:
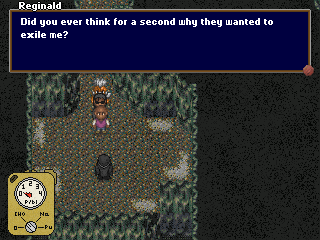
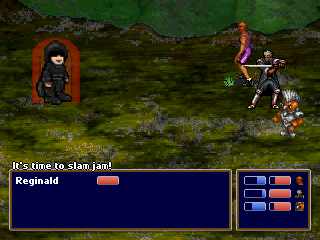 Here's Reginald, the first of the-- 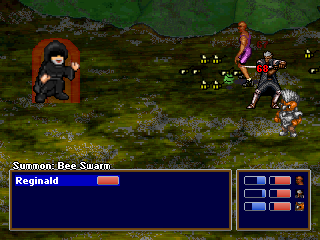 JEGUS FUCK wait for me to finish before you attack, man! Anyway. Reginald is the first boss in the Liberty Island area, and as you can see, he has both speed and power on his side with his Bee Swarm spell. Last edited by Kalir; 07-11-2017 at 10:55 AM. |
|
#168
09-20-2010, 05:55 PM
|
|||
|
|||
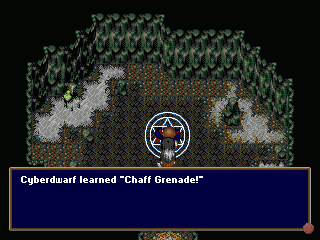
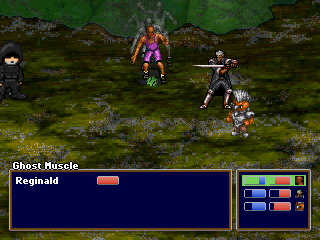 We get right into the thick of things. 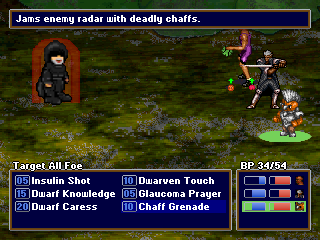 Cyberdwarf decides to put his racial aptitudes for thrown weapons to use with the Chaff Grenade. 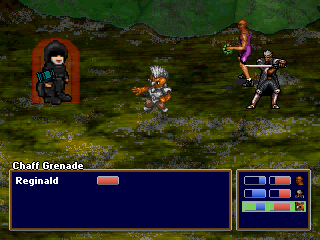 THEY'RE GONNA BURY WHAT'S LEFT OF YOU IN A SOUP CAN ...Actually, if you don't care about debuffing them, Cyberdwarf's normal attack is better for single foes. 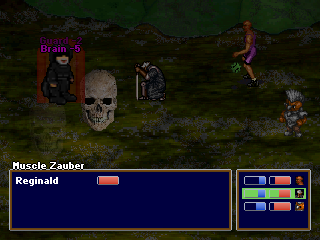 The rest of the group does what they usually do. Notice that Reginald hasn't attacked us yet? Even though he's fast, casting spells wears him out, so he has to take a turn to rest after doing so. 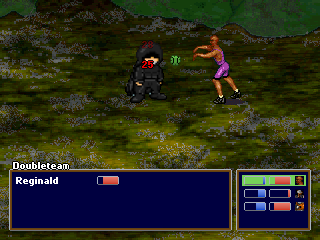 This is one battle where you can play defensively and still do well, since he attacks so infrequently. 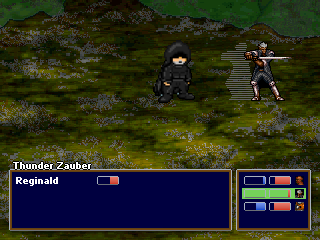 wheeeeeeeeeeeee 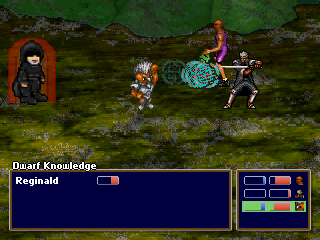 Since Balthios is more wounded than usual, I have Cyberdwarf use Dwarf Knowledge to heal him this time. It comes at a cost of a stat boost, but Reginald's on the ropes anyway.  Since he was low on BP, he has to Eat Sandwich to get some more back. Too little too late, pal. 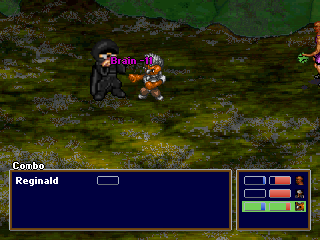 WHO'S THE TOUGH GUY NOW? HUH, TOUGH GUY? 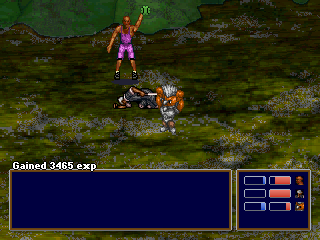 ALL IN A DAY'S WORK 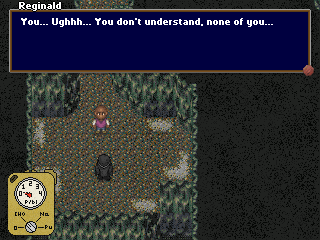 Don't care, more like. 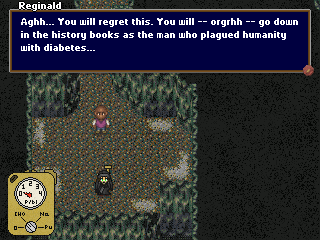 Hey, he dropped the rod! Awesome. 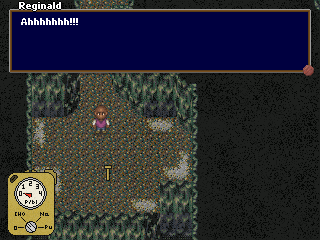 You will be missed! Okay, not really. 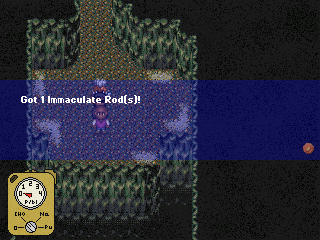 SHING! 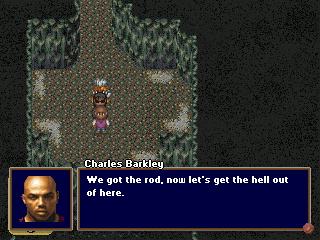 Fortunately, you don't have to backtrack through the sugary depths. The game automagically sends you to the surface. Last edited by Kalir; 07-11-2017 at 10:55 AM. |
|
#169
09-20-2010, 05:57 PM
|
|||
|
|||
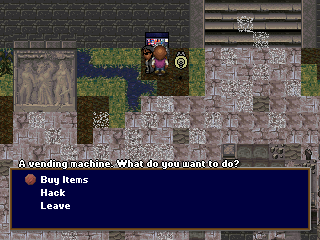 We find ourselves facing a grim and sugary sight. I stock up at the vending machine in preparation for what comes next... 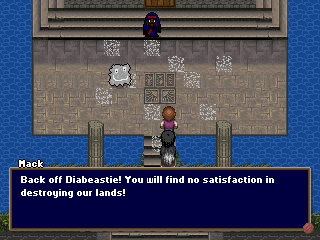 There it is! Quote:
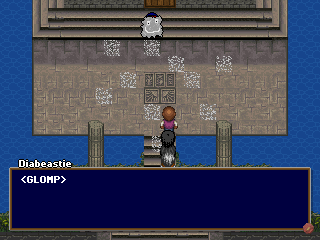 Quote:
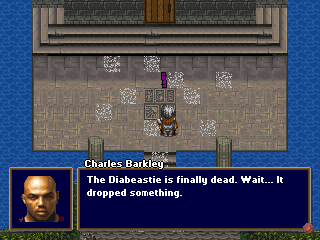
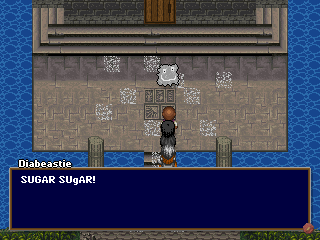 Gotta slam 'em all! 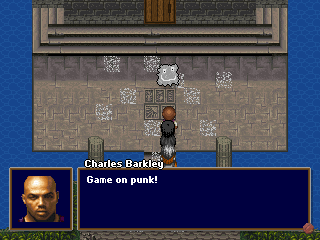 THERE IS NO SUCH THING AS TOO MANY PRE-BATTLE TAUNTS 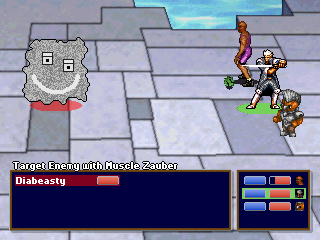 Okay, here's the second boss. The Diabeastie is actually fairly difficult, due to the 100% chance of getting the diabetes status and his instant-kill move, Spontaneous Sugarification. 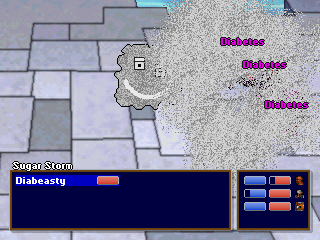 See? First thing he does is inflict diabetes on everyone.  I should just omit this picture from now on, because seriously. Ghost Muscle boosts Power and one other random stat with each use, so you can use it until Barkley is fully pumped and then go to town. Or, y'know, you can ignore it and beat the hell out of people normally. 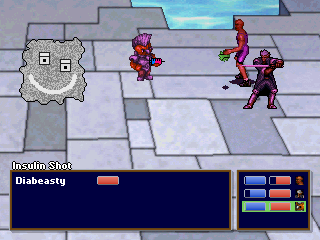 Cyberdwarf opens up with Insulin Shot, which not only cure diabetes, but renders the target immune to further diabetes attempts. It's very useful in this fight.  Partway through the relentless smackdown, I notice that the Diabeastie has a Deadly Smile. I didn't pay it much mind initially, what with the Thunder Zauber and all... 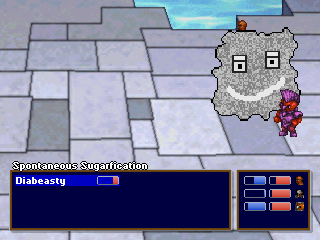 That's his giveaway that he's going to launch into Spontaneous Sugarification, however. 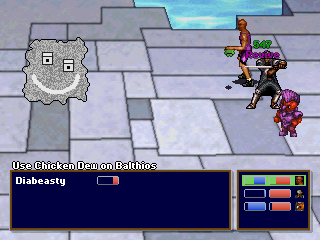 No big deal for us, though. 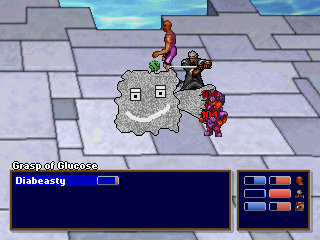 Grasp of Glucose is a basic three-hit attack, which does a bit of damage, but not enough to be really scary. 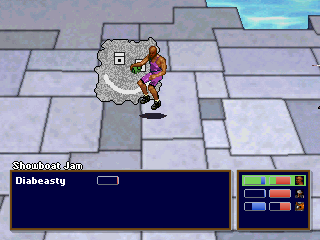 Hey kids! Guess what screenshot comes next and win a prize! 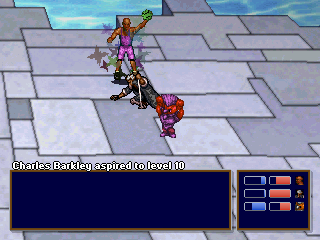 Haha, didn't expect that I'd level up from the fight, did you? Suckers. Last edited by Kalir; 07-11-2017 at 10:56 AM. |
|
#170
09-20-2010, 05:58 PM
|
|||||
|
|||||
 Did it now?  Huh. I... don't know what to do with this. 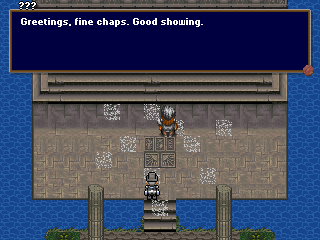 A slow clap from offscreen heralds the approach of...  Took the words right out of my mouth. Quote:
 Ehhhh... no.  Another choice for the evil reward. The Poleshaft has no mechanical use for the party.  Whatever, man. 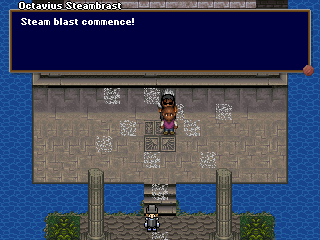 what 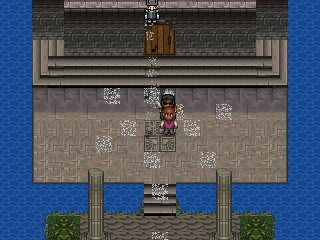 And off he goes. Maybe he will be back someday. 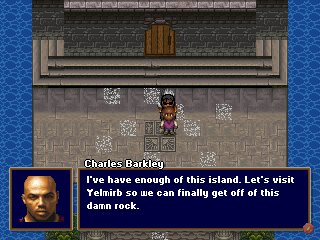 Yes please 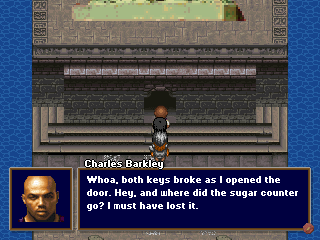 Well, that was well-timed. Quote:
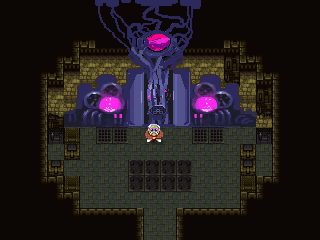
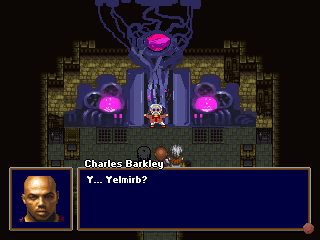 Not far into the tower, we find this strange machine, and a mustachioed fellow attached to it. Quote:
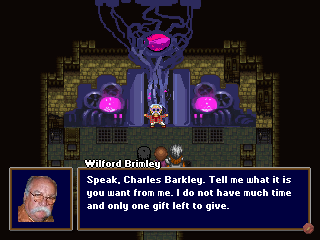 Yelmirb's true identity is, naturally, Wilford Brimley. Quote:
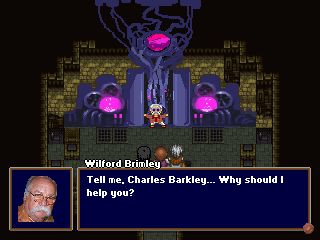 Every time Brimley talks there's this long pause before, to indicate how close he is to death. Quote:
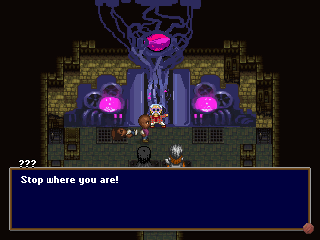 Before we can begin, we have one more interruption to handle... Last edited by Kalir; 07-11-2017 at 10:56 AM. |
|
#171
09-20-2010, 05:59 PM
|
||||
|
||||
 In the flesh/circuitry. Quote:
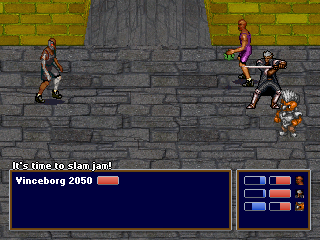 How about one more boss fight? Vinceborg's gotten a bit of an upgrade since our last fight. He now uses Recharge with a lot more frequency, and he has two new attacks. 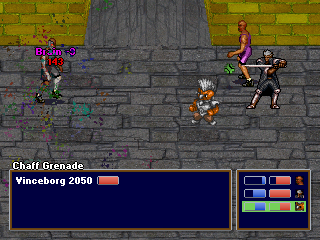 Chaff Grenade is as good a start for the fight as any... 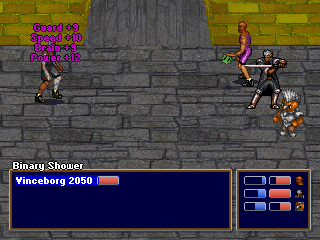 And this is why. Binary Shower boosts all of Vinceborg's stats, and between this and his Recharge, I couldn't even scratch him at first. 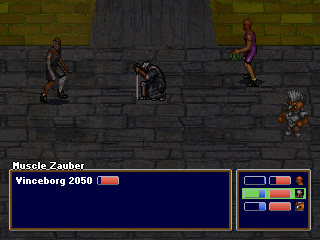 Balthios ran out of BP trying to counter the buffs with Muscle Zauber, but the game seemed hellbent on only lowering Vinceborg's Brain with my debuffs. 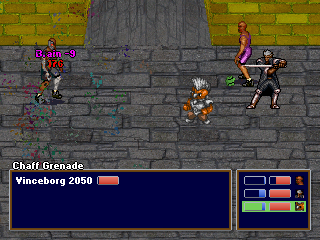 See? This makes the fight a fairly uphill one. 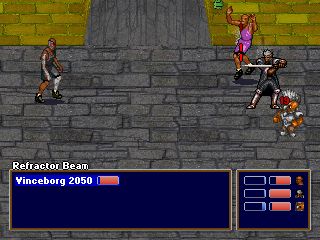 All the brain debuffs had an upside, though. Refractor Beam practically does nothing at all. 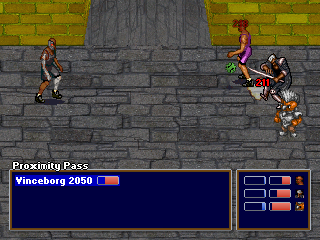 Proximity Pass, on the other hand, packs a wallop. 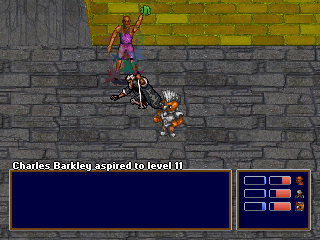 Eventually, though, we wear down Vinceborg and gain another level for our difficulty. 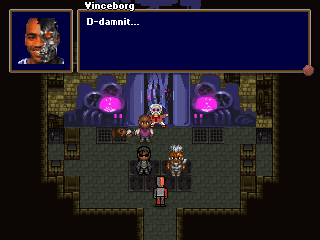 And he runs off, tail between his legs. 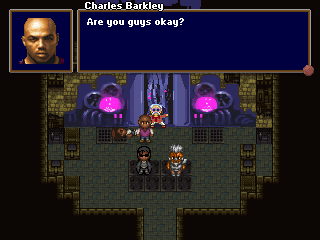 Barkley checks on the others after the fight. Quote:
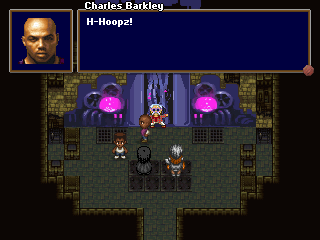 Hoopz is miraculously cured! Hooray! Quote:
 The group leaves, and Wilford Brimley falls from his machine, dying alone in the Statue of Liberty.  Back in the train station on Liberty Island, Barkley prepares to have a good long talk with Hoopz. Quote:
 Barkley's team is pretty much stuck, from what I can tell. Last edited by Kalir; 07-11-2017 at 10:56 AM. |
|
#172
09-20-2010, 06:00 PM
|
||||||||
|
||||||||
 Not that that stops him from talking trash. Quote:
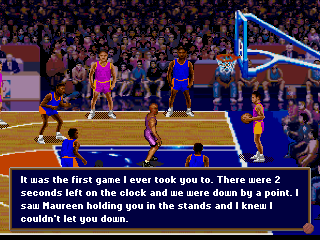
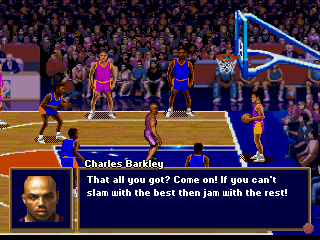
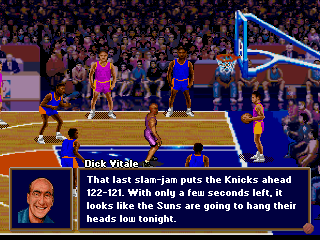 Announcer Dick Vitale sums up the situation: the game's all but over here, close though it was. Quote:
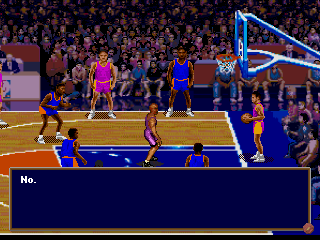 Barkley refuses to give in, though. 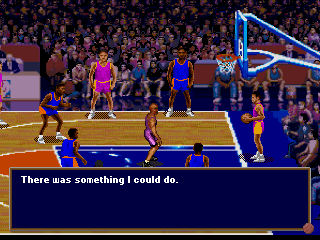 He's got one option left, something he'd never dreamed he'd ever have to do. Quote:
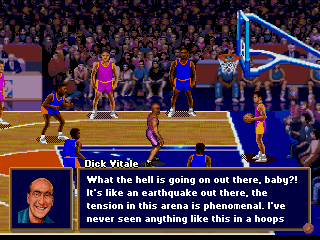 The gathering energy is palpable to all the spectators. Quote:
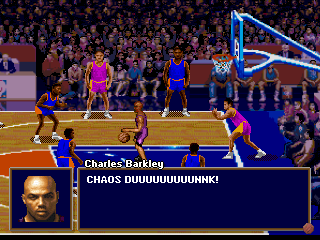 The ball is passed to Barkley, and he does the Verboten Jam whispered in b-ball legend... 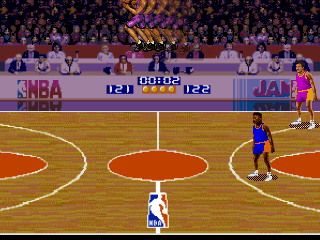 The Chaos Dunk. 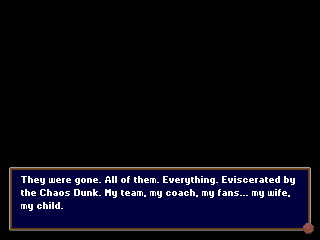 No one was prepared for the terrible might of a true Chaos Dunk. Nobody could have survived, save for Barkley... 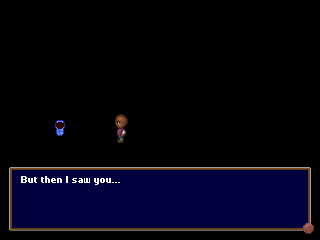 And his son, born of a b-ball egg... 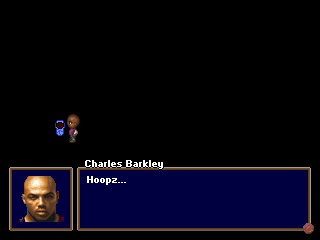 The One, Hoopz Barkley.  Quote:
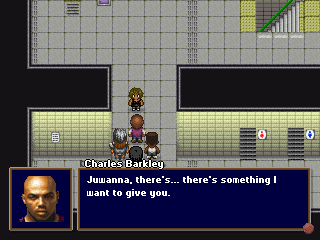
 Seriously? More dialogue? 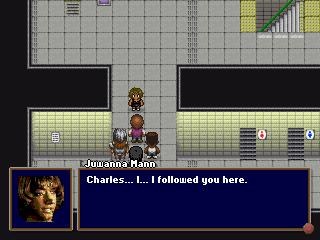 No! Go the hell away! Quote:
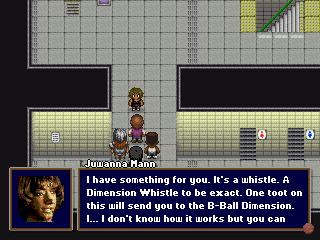 Oh. That might actually be pretty useful, even if I plan to put it off for endgame. Quote:
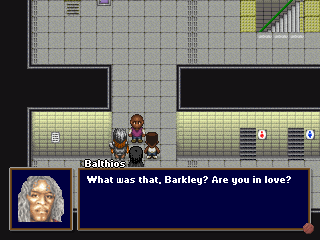
 What, seriously? Quote:
Last edited by Kalir; 07-11-2017 at 10:57 AM. |
|
#173
09-20-2010, 06:01 PM
|
||||||
|
||||||
 This even comes with a "sad" sound effect to it. But hey, not like we needed it anyway. Quote:
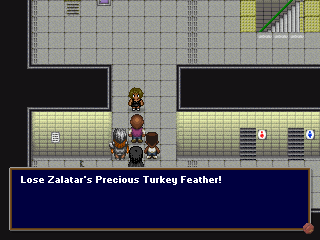
 Well, we did just hand off the useless turkey feather to her and claim it was from Maureen, so... no. Quote:
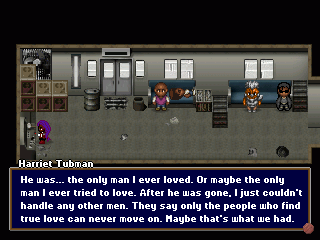
 YES GET ME OUT OF HERE BEFORE DREBIN OR SOMEONE SHOWS UP 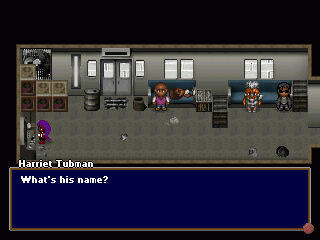 Argh! Damn you, Harriet Tubman! You and your nefarious plot to trap me in one final dialogue cutscene! Quote:
 Quote:
 Seriously, thank you for getting me out of there. Quote:
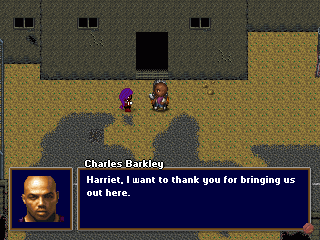
 To get to the truck pump from here, you head north until you find a campfire. 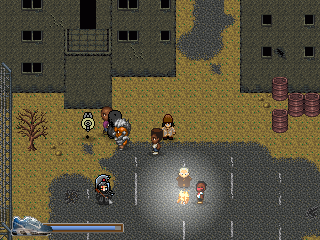 There you are. Tell us the stuff! Quote:
Last edited by Kalir; 07-11-2017 at 10:57 AM. |
|
#176
09-20-2010, 10:20 PM
|
|||
|
|||
|
This game is gatdam bonkers.
|
|
#177
09-21-2010, 12:20 AM
|
|||
|
|||
|
Quote:
This game, man. This game. |
|
#179
09-21-2010, 01:16 AM
|
|||
|
|||
|
There was a warning.
They warned you. |
|
#180
09-21-2010, 02:04 AM
|
|||
|
|||
|
Hey, wait. I missed the Truck Pump this time. I was so ... by everything else, I missed one of the best parts.
*reads* Quote:
|