
-
Welcome to Talking Time's third iteration! If you would like to register for an account, or have already registered but have not yet been confirmed, please read the following:
- The CAPTCHA key's answer is "Percy"
- Once you've completed the registration process please email us from the email you used for registration at percyreghelper@gmail.com and include the username you used for registration
Once you have completed these steps, Moderation Staff will be able to get your account approved.
Through the looking glass? Let's Play The Legend of Zelda: A Link to the Past!
Back to Let's Play
< 1 2 3 4 5 6 7 8 9 10 11 12 13 14 15 16 >
< 1 2 3 4 5 6 7 8 9 10 11 12 13 14 15 16 >
|
#211
 05-10-2008, 07:09 PM
|
|||
|
|||
|
Quote:
|


|
#212
05-10-2008, 08:44 PM
|
|||
|
|||
|
Quote:
|
|
#214
05-11-2008, 12:06 AM
|
|||
|
|||
|
Quote:
|
|
#215
05-11-2008, 12:21 AM
|
|||
|
|||
|
what is TP?
|
|
#216
05-11-2008, 12:25 AM
|
|||
|
|||
|
Quote:
And reading about the Yeti's House makes me want to play it again. Holy cow I didn't even know I liked it this much til I thought of it today. |
|
#218
05-11-2008, 12:36 AM
|
|||
|
|||
|
Quote:
|
|
#219
05-11-2008, 01:09 AM
|
|||
|
|||
|
Quote:
|
|
#220
05-11-2008, 04:50 AM
|
|||
|
|||
|
Quote:
|
|
#221
05-11-2008, 07:52 AM
|
|||
|
|||
|
Quote:
|
|
#222
05-11-2008, 01:22 PM
|
|||
|
|||
|
Quote:
Really makes you appreciate TP's "intelligent" rupee chests. |
|
#224
05-11-2008, 06:50 PM
|
|||
|
|||
|
Sorry about the lack of updates this weekend, guys. I should have Misery Mire up sometime later tonight, and maybe Turtle Rock as well if things go smoothly.
Quote:
|
|
#227
05-11-2008, 07:57 PM
|
|||
|
|||
|
Quote:
Also, my bizarre insistance that dashing into him is the proper way to hit him. |
|
#228
05-11-2008, 11:09 PM
|
|||
|
|||
|
I somehow ended up reading Nintendo Power's semi-awful Link to the Past comic before facing off against Trinexx, and I was kind of disappointed that he wasn't actually a super-awesome three headed dragon.
I mean, he sort of was, but...wasn't. |
|
#229
05-11-2008, 11:55 PM
|
|||
|
|||
|
Whew. Sorry this took so long - I had to help out with some lawn-maintenance work this weekend and I couldn't get out of it without looking like a douchebag.
 All right, now that we've gotten the Ice Palace over with, it's time to head over southwest where the desert used to be, in the swamp known as Misery Mire.  Oh, but if it were only that easy. First we have to find a way around this wall of rock surrounding the place...  ...and unlike the Ice Palace, we're not getting in the back door that easily. Which means we need to grab an item to get up here, and grab it we shall. 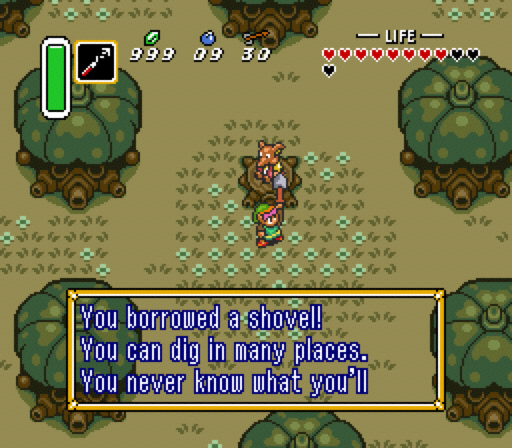 Our first stop is to drop by the forest flutist in the dark world. After hearing out his story (which, for an SNES game, is surprisingly dark), he hands us the shovel and asks us to find his flute for him.  Unlike in Link's Awakening or either Oracle game, the shovel doesn't do squat so don't bother digging around with it.  Let's grab that flute of his. Or in this case his ocarina (which I guess technically is a type of flute, but not the one people tend to immediately picture). After heading back to the dark world to play him a song before he petrifies, it's time to head off to Kakariko Village to unlock its full potential.  That's right, it's time to free the flying rooster! ...Er, duck. Whatever.  The point is that he's the one who's going to fly us up onto that ledge and help us get into Misery Mire from this side. And that's not all he can do - he can also fly you back to your house, Lake Hylia, Kakariko Village... |
|
#230
05-11-2008, 11:56 PM
|
|||
|
|||
 ...And even Death Mountain. Which we'll be dropping by next, by the way, as before we can even attempt to break into the dungeon we'll be needing a bit of extra firepower...  Remember this place? If you don't, it's just by the Tower of Hera off to the left side. It's not a hard place to find, but it's camouflaged just enough to appear innocuous at first glance so don't worry if you didn't notice it the first time around.  And here we are: the first of the three great medallions, Ether! With this in hand, we can not only freeze everything on screen, but unlock the entrance to the sixth dungeon as well. Now that we have everything we need, it's time to head off.  Yech, is this ever a dreary place. Wet, filled with monsters... no wonder they called it Misery Mire.  However, after firing up a blast of Ether...  The storm clears up and the swamp becomes a slightly better place. Time to head inside. |
|
#231
05-11-2008, 11:58 PM
|
|||
|
|||
 Oh fucking fuck, these guys are back, and this time they've brought Wizzrobes with them.  After clearing out that room of horror, we find ourselves in the main chamber. Unlike the last palace which revolved around one long, endless path, Misery Mire focuses more on this room as a central point with several paths branching off of it.  Our first direction is to head through this doorway in the northeast part of the room - the others are either blocked off at this point or lead to dead-ends.  There are two keys in this room - the first one is in the corner, hidden under a skull pot as per usual. The other, however, is hidden in that panel of spikes in the corner in a chest that only appears by hitting the switch under the skull pot nearby. As the spikes take off one heart per step, this leads to game over #1.  Once you do get the key, be sure to head north through here - ignore the stairs for now.  Just dash through this part - there aren't any enemies to get in your way.  Once you head into this room, slash this colour switch and head out through the south door - after grabbing the key, of course.  Watch out for the traps, since hearts are scarce in this dungeon.  See that skull pot over there, surrounded by the colour walls? Lift it up and hit the button underneath it.  There are a lot of keys this time around, huh? Sorta reminds you of Key Cavern in Link's Awakening... |
|
#232
05-12-2008, 12:00 AM
|
|||
|
|||
 In any case, head through this door using one of the keys we just grabbed.  Grab the key in this room and head further west, ignoring the floating skulls and the anti-faerie in the room.  A torch puzzle AND damage tiles? Ouch. Fortunately, we don't technically need to solve this puzzle to push on, so just head south instead.  Head up the stairs, ignoring the slugs farting bombs all the while.  Light the torches once you've moved all of the blocks out of the way. But be careful of the Wizzrobes that occasionally appear, since health is a commodity we can't afford to lose.  Now drop down into this newly-made hole to find the Big Key.  Now that we've got this baby in hand, we can finally explore the eastern route via the main room and grab the treasure. But first, head to the left and step on that warp tile to get warped back onto the western path.  Make a note of this room - it'll save us a lot of time.  And what a worthless treasure it is! Though we need it for a specific puzzle so we'll be taking this with us. Now head back to that door locked by the Big Key to take a shortcut to this room:  That saved us some time. Now head north through the door. |
|
#233
05-12-2008, 12:01 AM
|
|||
|
|||
 How that other bridge is standing up, I'll never know. Head downstairs next.  But watch out for the horde of firespewers first. Yeesh.  This is it. The Cane of Somaria's big power is to... create blocks. You know, this probably would've come in handy back in the Ice Palace...  The Cane's other power lies in blowing up said blocks, but that's situational at best, so.  Anyway, moving on you'll need to blow up this wall to get at the colour switch inside. Once you've hit it, move onto the next room.  If you're low on hearts, magic, bombs, arrows or even rupees, this place is ideal to farm and fill out your inventory before the boss. Since the slimes drop indefinitely, you can hide yourself in the corner here and grab everything you need without worrying about dying. Handy!  But enough of that. We've dilly-dallied enough as it is - it's time to take on the boss of the place. |
|
#234
05-12-2008, 12:02 AM
|
|||
|
|||
 Introducing Vitreous, yet another eyeball-themed boss to face off against (after Kholdstare and maybe Arrghus).  We've got to get rid of those eyeballs of his, as we can't attack him directly until we take his brethren out of the picture first.  If you want to take the easy way out, simply hide yourself in this corner here, face up and slash away - the eyeballs with run right towards you and you'll be able to hack them to pieces without fear of death. Provided you can slash them fast enough, that is.  However, if you'd rather take the hard way out, wait for the eyeballs to come near you and dodge to the side before slashing them, so that they can float past without hitting you.  Watch out for that eyeblast of his if you're using this method, as between it and the slime you don't have much room to dodge. However, if you have to choose between being hit by this or by the eyeballs, opt for the lighting - it only takes off two hearts as opposed to four from the mini-eyes.  Once you kill off the last eye, Vitreous will pop out from the slime and jump at you itself. Simply position yourself to the side and hit at him when he comes near to knock him back.  In total, I died around eight times in this dungeon, with an even split between the boss and the traps. As far as dungeons go, Misery Mire isn't half-bad - it's challenging enough that you can't expect to breeze through it, but it's spread out enough that you won't just get stuck at one point, unlike, say, Skull Woods for example.  Sadly, we have to bid it farewell now that we have the crystal. But don't worry, the party's just about to get even crazier... Next time: Turtle Rock and the Final Maiden! |
|
#235
05-12-2008, 12:06 AM
|
|||
|
|||
|
Quote:
|
|
#236
05-12-2008, 12:15 AM
|
|||
|
|||
|
Quote:
|
|
#239
05-12-2008, 01:11 AM
|
|||
|
|||
|
Quote:
|
|
#240
05-12-2008, 02:36 AM
|
|||
|
|||
|
|