
-
Welcome to Talking Time's third iteration! If you would like to register for an account, or have already registered but have not yet been confirmed, please read the following:
- The CAPTCHA key's answer is "Percy"
- Once you've completed the registration process please email us from the email you used for registration at percyreghelper@gmail.com and include the username you used for registration
Once you have completed these steps, Moderation Staff will be able to get your account approved.
4x4 = -wait, what's the title? Let's Play Ganbare Goemon 3!
Back to Let's Play
< 1 2 3 4 5 >
< 1 2 3 4 5 >
|
#1
 03-25-2012, 11:37 AM
|
|||
|
|||
|
I'm a bit late, but it's still technically March! I have a difficult time splitting my attention between two projects, and Super Talking Time Bros 2 is still in production. However it's close to completion, and I feel lame enough for putting this off as much as I have, so rather extend the start of this until April, I'm getting going now.
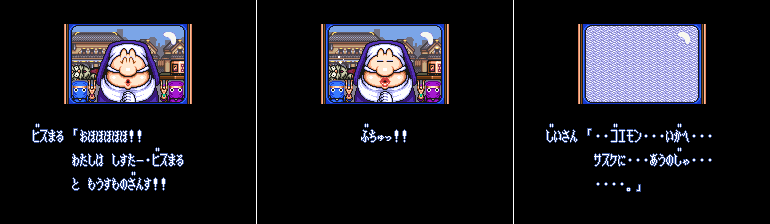
Though until STTB2 wraps up fully updates to this LP will definitely be slower than my Ganbare Goemon 2 LP, but hopefully after that I'll be able to keep up a decent pace. Anyway! 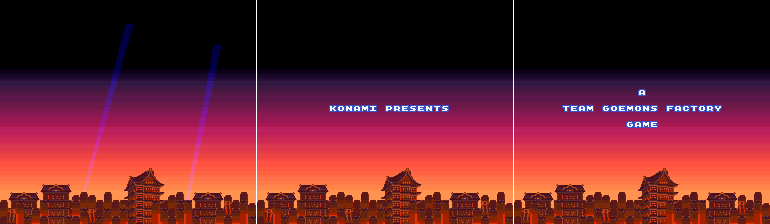 Music: Title Screen Wow, that music is downright ominous! It's a far cry different than the rambunctious tones of Ganbare Goemon 2. Also, 'Team Goemons Factory', is that possessive and they just forgot an apostrophe? Or was this game made by a factory that produces Team Goemons? The questions! 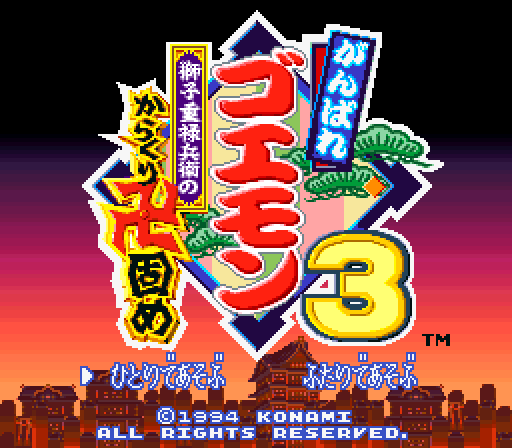 Ganbare Goemon 3: Shishi Juurokubei no Karakuri Manji Gatame. Or is it Katame? I've seen conflicting titles, and several distinct translations of it as well across the interwebs. Including "The Mechanic Octopus Hold of the Lion Elite Guard" "Shishi Juurokubei's Stolen Robotic Manji" "4x4=16 Hyoe's Tricky Trap" "Holy Crap a Nazi Symbol Hitler Must Be In This Game" None of these are correct, though some are closer than others (sadly not the Hitler one, you damn fool). Unlike Ganbare Goemon 2 I've never seen an English title for this game settled on, but basically there's this guy named Juurokubei, his title is 'ShiShi' (which I'm quite sure for the purposes of this game translates to 'The Lion'), and there's something about a robotic Manji (or maybe a tricky trap?). There's also a pun at play here regarding that character's name and title, as 'Shi Shi Juuroku' can literally mean '4 4 16' which I assume is where that third one came from. If you put a gun to my head and made me choose, I'd call this game Ganbare Goemon 3: The Robotic Manji of The Lion, Juurokubei! FUTURE EDIT: A more accurate title is actually the The Mechanical Manji Hold of The Lion, Juurokubei. In this case 'Hold' refers to a Wrestling move. I think. It's still not super clear but it makes the most sense in context. But that might also be incorrect, so let's just call it Ganbare Goemon 3 for short. I'll be offering a rough translation of important story events, adapted from an ancient translation of select story scenes I found ages ago, rather than posting huge blocks of images with nothing but moonspeak like my last LP this time around, though it's possible some of my translations might be a bit off. I'll do my best though, this is the most text-heavy of all the SNES Goemon games. Let's Press the Start Button on this thang. It's funny to note that despite the ominous music and dark red visuals and the sound of crows in the background, choosing to start or continue a game is accompanied by a silly clown horn, as you can hear in the teaser video I posted at the end of my Ganbare Goemon 2 LP. 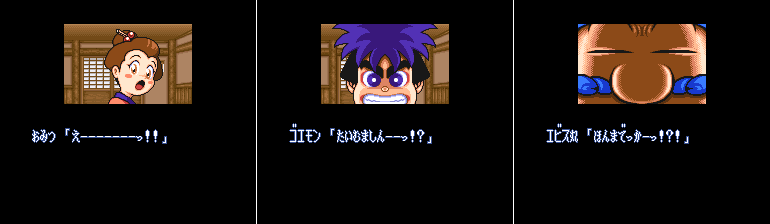 Omitsu: Eh---! Goemon: A Time Machine?! Ebisumaru: Seriously?! 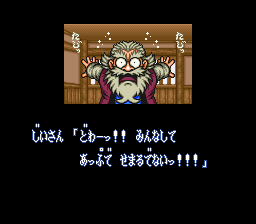 Wise Ol' Man: Whoa, don't crowd me, everyone! And so we already have the set-up for this game. TIME TRAVEL. Didn't take long for this franchise to give that a shot, huh? Alright, let's fire up the Fluxicapacitor and check out some future times! 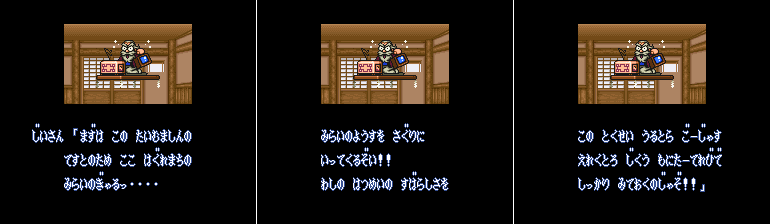 Wise Ol' Man: I'm going to go to Hagure Town in the future to look at the girls--- I mean, do important things! Anyway, with my latest wonderful invention, the Time Machine, I'll get to see the future! Unfortunately, it only seats one, so you'll have to watch me closely through this TV. Aw. Wise Man has dibs.  Wise Ol' Man: Well, I'm off! And his wavy sprite fades out with a wacky sound effect. Time Travel isn't nearly as flashy as I thought it would be. Oh well! Goemon's turn on the time machine will have to wait until his important business is.... 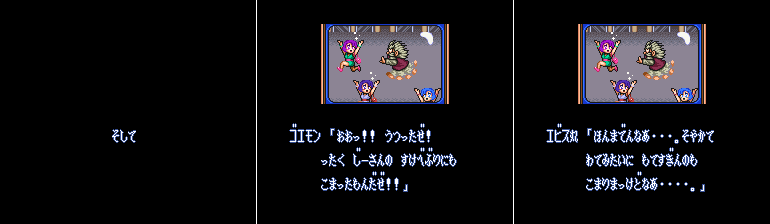 And so... Goemon: Oh, looks like his women obsession is causing trouble as usual. Ebisumaru: Yeah, unfortunately my trouble is that women aren't obsessed with me. Oh that wacky old pervert! He's about to be introduced to the future concept of the 'Restraining Order', ho ho ho! WHEN SUDDENLY 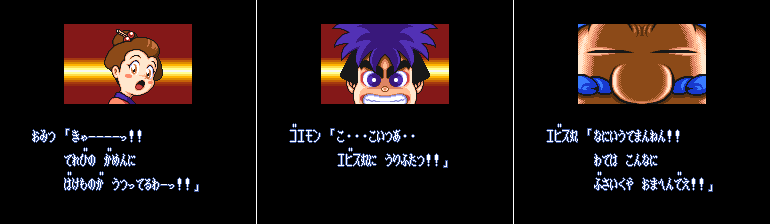 Omitsu: EEK! There's a Monster on TV! Goemon: It... it looks just like Ebisumaru! Ebisumaru: Impossible! I'm not anywhere near that ugly! Zoinks! Some kind of monstrous Ebisumaru from the future? Who on Earth could this possibly be?!  Bismaru: Ohohohohohoho! My name is Sister Bismaru. This Time Machine is wonderful. Thank you, I'll gladly accept it! The old man will be working for us now. We never expected such gifts, Lord Juurokubei will be most pleased! Goodbye~ *smooch* Wise Ol' Man: Goemon... go to Iga... find Sasuke... Oh GOD, it's her! With the same theme music and everything! Yes, if you were ever wondering just who the heck Sister Bismaru was when she came out of nowhere in the intro to Goemon's Great Adventure, well she made her debut here. She's also most likely the only real recurring villain in the series. Well, besides Kabuki, but he's more of a recurring boss monster, not a villain. 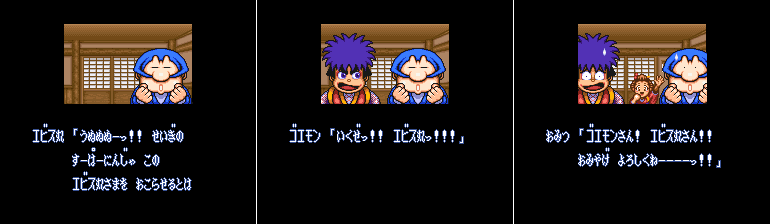 Ebisumaru: Oooooh, this Sister Bismaru has angered me, the Super Ninja of Justice! Goemon: Damn it! Looks like we're going to the Wise Man's home in Iga. Let's go! Ebisumaru! Omitsu: Mr. Goemon! Mr. Ebisumaru! Bring me back a souvenir! *laugh track* I didn't make that last part up, there's a laugh track in this game. It's nowhere near as robust as the one on the Nintendo 64 entries as it only has one recorded laughing clip, but it's still the first instance of it. 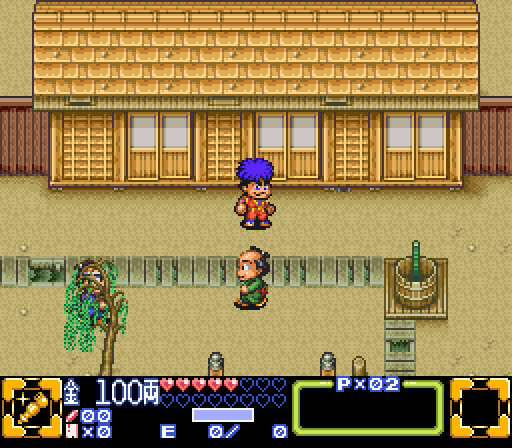 And so our game begins, we're once again in Hagure Town, and from here we'll be heading to the Wise Man's home in Iga. However we'll also be stopping here for now. I'll be going over the gameplay and everything next time, I just wanted to get the first post finished. It'll probably be a week or more before I'm finished with the next entry but, like I said, after STTB2 is finally wrapped up I should be able to increase the pace here. In the meantime, here's the Ganbare Goemon 3 Intro video, worth watching for nothing else than the music at the very start, which I found impossible to put into words. NEXT TIME: Gameplay and characters and fetch quests! Plus, an old ally returns! Last edited by SpoonyBardOL; 12-03-2017 at 07:27 AM. |

|
#2
03-25-2012, 08:33 PM
|
|||
|
|||
|
Looking forward to this!
|

|
#3
03-27-2012, 02:11 PM
|
|||
|
|||
|
Quote:
Quote:
|

|
#4
03-28-2012, 08:26 AM
|
|||
|
|||
|
(first post...)
Ah the Goemon games on the SNES were always a fun bunch to me, though it makes me sad Konami never gave the rest of them a chance overseas. Oh well, at least we got two awesome N64 games. 
|
|
#5
04-11-2012, 11:25 AM
|
|||
|
|||
|
Just letting you all know, this is still a thing and the first post will be coming at some point. It's just that IRL decided to throw me a few suckerpunches in a row. Hopefully something in another week or two.
|
|
#6
07-11-2012, 05:51 PM
|
|||
|
|||
|
Quote:
|
|
#7
11-06-2012, 06:50 PM
|
|||
|
|||
|
Here's hoping you find the time for this some day. Best of luck to you.
|
|
#8
04-04-2015, 11:51 AM
|
|||
|
|||
|
Oh, oh wow. This was a thing I was doing.
It's been, what, three years? That's a hell of a hiatus! But recent talk in the death of Konami thread about the Goemon games rekindled my interest. I did a quick playthrough of the game to refamiliarize myself with it, and I feel like I'm ready to actually LP it now. For realsies! I won't recap all the stuff I covered three years ago, them posts is still right up there. Wise Man invented a time machine, went into the future to harrass women, got kidnapped by Ebisumaru's evil french nun descendant, some guy named Juurokubei was name-dropped, Goemon and the others have to go to the Wise Man's home in Iga and find Sasuke. Got it? Got it. Village So, this is where we left off! We're just outside Goemon's home in Hagure town, which as you might remember if you read the Ganbare Goemon 2 LP was one of the towns in that game, as well as the starting town in Ganbare Goemon/Legend of the Mystical Ninja. It's a nice bit of continuity. There's a few things to look at around town, but as we cannot understand what the town's NPCs are saying, and the translation I'm going by only covered the necessary story scenes, I'm not going to waste time screen-shotting nearly every frame of moonspeak like I did with Goemon 2. Suffice to say, there's lots of villagers here and they say a lot of things in Japan-words. 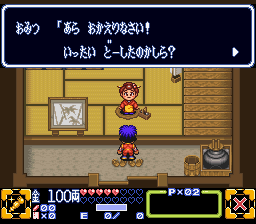 Though if we go back inside the house we start at Omitsu is still inside. I believe if you talk to her she gives you a general idea as to what you have to do: You basically have to find Impact's head, inside of its mouth is a warp straight to Iga. Why his head? Why would there be a warp inside his mouth? Uh.... r-reasons? 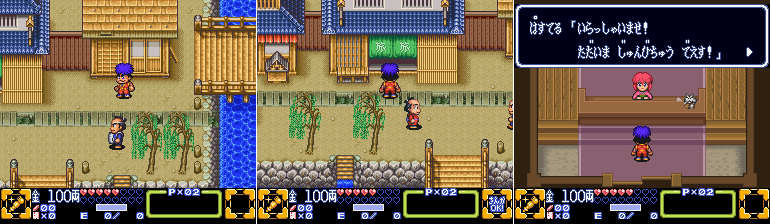 Travel Center If we go down and just a bit left from Goemon's home we encounter this building with a green curtain. It's a travel center. Much like the ones in Goemon 2 they'll warp us to any previously-visited town. Unlike the ones in Goemon 2, they're actually useful since there's no connected overworld to quickly zip around on. In this game you either manually walk to each location, or take the travel center. But Hagure is the only town we've been to thus far, so this building is useless to us right now. 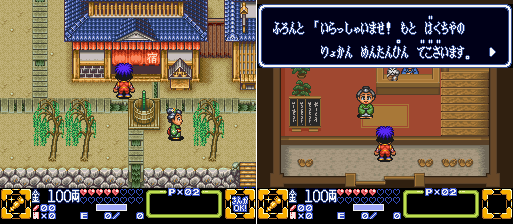 Shop Just to the left of the travel center is the Inn, which functions in much the same way they did in Goemon 2. You can sleep there and recover your hearts, as well as save your progress. You can select more expensive rooms to refill more of your life, or be a cheapskate with the crappy rooms and only restore a little bit. Since our five hearts are still unscathed I won't be wasting the money here. While Goemon 2 also had restaurants and bath houses to restore life, Goemon 3 streamlines things and only has Inns. It's more straightforward, though I do miss the variety.  Fortune Teller And just to the left of the Inn is the Fortune Teller. However the Fortune Teller is pretty much useless to us since A) She's speaking in words we can't understand anyway. B) I know what I need to do in the game, and even if I didn't there's a thing called GameFAQs. And... C) This fortune teller is not the Plasma Man from the N64 games so why would I ever waste my time here? You're terrible, SNES Fortune Teller! 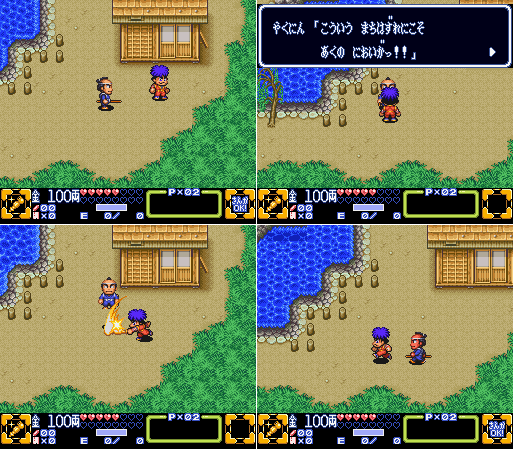 Village Oh, you can also speak to the guards walking around town, as well as any NPC. The townsfolk-as-enemies thing that Goemon 2 had was mostly a holdover from the first SNES Goemon game, which itself kept that as a holdover from the NES games. It just doesn't make much sense anymore to be able to attack townsfolk willy-nilly, so you're no longer able to damage them. Well, you can still damage the town guards. They still flip out and fight back too, though they no longer summon an unending legion of them to assault you to a wacky chase BGM. Bummer. 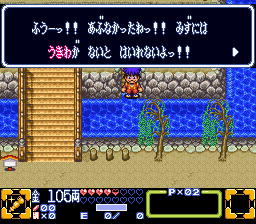 Also, while there are little stairways down into the water around town, we can't actually go for a swim. No damage or anything, just a text box telling us 'Nope'. 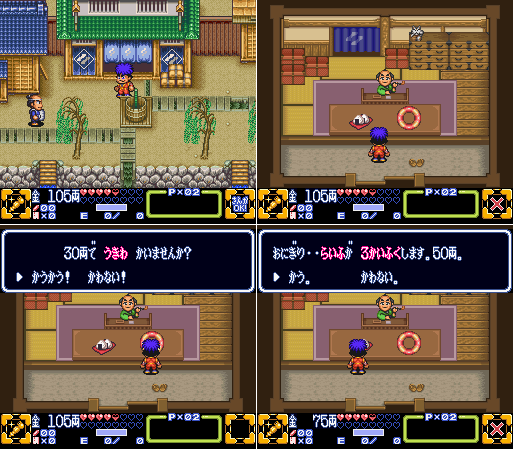 Shop But we can fix that easily enough. Backtracking to Goemon's house at the start and going slightly left instead of down we come across the Hagure town shop. It only sells two items, a Rice Ball for 50 Ryo (which works like it did in the last game, automatically refills 3 hearts when you lose all of them), and what is basically a floatation device for 30 Ryo. 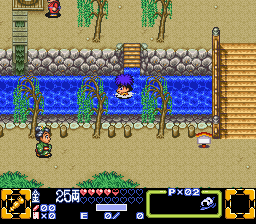 Village NOW we can swim! It's mandatory to eventually progress, too, you can't get too far without it. I wonder how many North American players tried this rom on a whim and just couldn't get anywhere since they didn't notice the inner tube for sale at the shop... 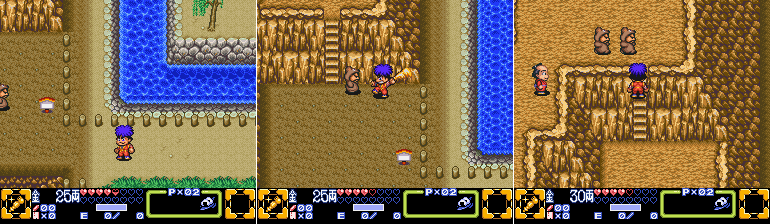 Before we get started going where we have to go, I head to the southwest exit of town for a little detour. This leads to a rough hilly area with a lot of bandits dressed in bear skins, along with a few friendly NPCs. 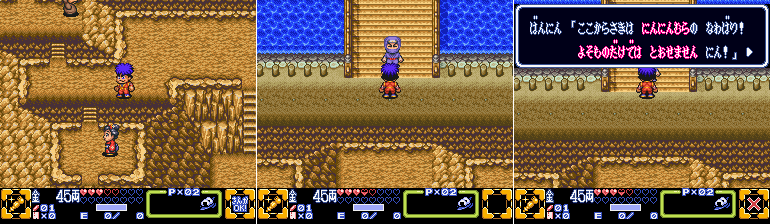 At the very end of this area is a bridge leading north, but Dr. McNinja here won't let us by since we don't have a SECRET NINJA VILLAGE PASS. Maybe we'll be back this way later? Also, while I can't read what he's saying f'real, I DO love he fact that he ends his sentence with 'Nin!'. Reminds me of Dororo from Keroro Gunsou, I guess it's a trope in Japan? (Alternate line: It's Flonne in disguise!) 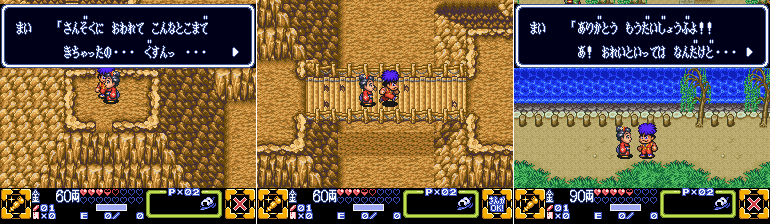 Ok what I REALLY came all the way up here for was to find this young woman and lead her back to Hagure town. She mentions that a bandit chased her up there and needs to be escorted back to town. As an escort sub-quest it's painless since she can't be attacked and follows you faithfully, even as you jump down off cliffs. Once back in town she thanks Goemon and offers a Crimson Sandal Strap as a reward. Which isn't all that helpful without a sandal, as Goemon observes, but oh well! It goes right in our inventory. Speaking of which! Last edited by SpoonyBardOL; 12-03-2017 at 07:30 AM. |
|
#9
04-04-2015, 12:01 PM
|
|||
|
|||
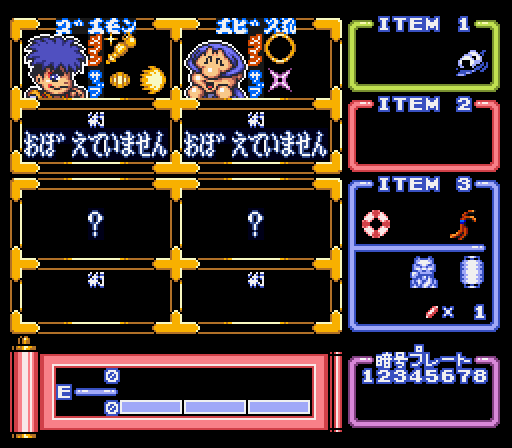 Pressing start brings this screen up. We have portraits for Goemon and Ebisumaru, as well as room for two other party members! Goemon is equipped with his usual pipe and Ryo weapon, while Ebisumaru is equipped with a hula hoop this time around, and his traditional shuriken. I mentioned in the Goemon 2 LP that Ebisumaru's weapons pretty much change from game to game, he'll have something completely different in Goemon 4, too! There's some text under their portraits which will eventually tell us what special skill they learn, but for now is saying they have nada. Below the characters is a red scroll with an E symbol, this will be relevant awhile later in the game. On the right side of the screen are various Item fields. Item 1 contains our bought items like the rice ball and, later, various armors. Item 2 contains plot-relevant items which will come into play later. Item 3 contains pretty much anything else, such as our floatation device and the Crimson Sandal Strap Without A Sandal, as well as an icon for a Fortune Cat and some sort of Energy Canister which I'll touch on later, and a scroll counter. Finally, in the bottom right is a field for some manner of Plate, but I'll touch on that again when we get to them later in the game. 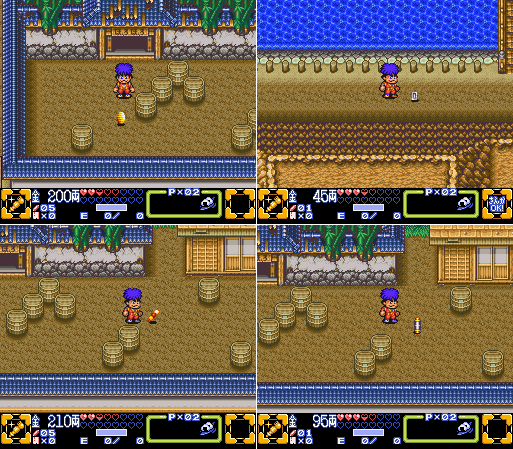 Now's also a good a time as any to briefly mention item drops. When you beat a baddie there's a chance they might drop one of six items. The golden ryo, which awards 10 Ryo, the little silver ryo, which awards 5, some manner of Japanese food (takoyaki? dango) which restores one heart, and a scroll, which are spent to use special abilities we'll acquire later on. Certain special enemies can drop a bigger golden Ryo, which awards 50 Ryo, these drops are limited to the larger, tougher foes you encounter. And, like I just said, there's a sixth one but it doesn't come into play until much later on. 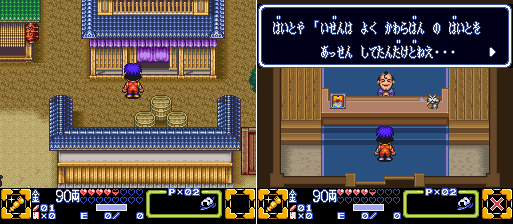 Anyway, let's get going where we're supposed to get going. Heading north through Hagure town we come to a back-street type area which might look a bit familiar to anyone who played Ganbare Goemon/Legend of the Mystical Ninja, it's the same area of town at the beginning where the ghosts appeared, right before the first stage properly began. There's also a house with this guy in it, I'm not sure what he's saying but I think he was the guy you talked to in that game to get going to the next zone, so it's neat he's still hanging around I guess. 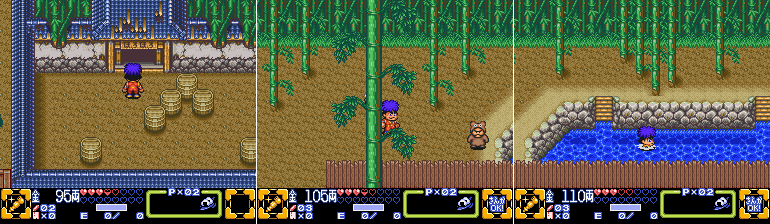 Further calling back to Legend of the Mystical Ninja, we come across the entrance to the Horohoro temple, which was the entrance to the first real stage of that game. It even brings us to a bamboo forest-type area once we step inside. Continuity! There's where we need the floatation device, by the way. We need to go through here to continue, and Goemon and Ebisumaru can't be bothered to squeeze through that bamboo next to the water. 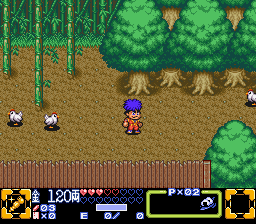 Also, if the game wasn't giving off subtle Zelda vibes enough as it was, there are chickens here. But you'll be disappointed to learn that attacking them over and over does not send a flock of them after you. 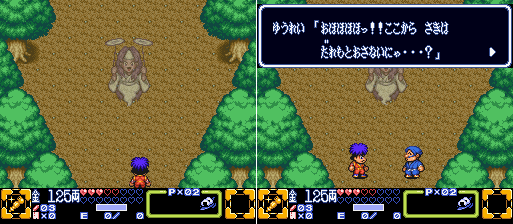 When we move onward we encounter that plate-tossing ghost from Legend of the Mystical Ninja! It's boss time already, let's go! 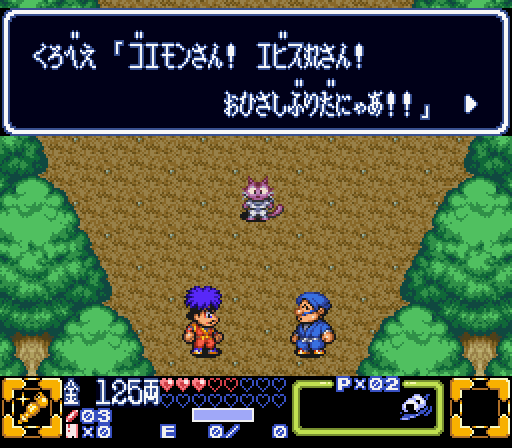 Nah just kidding. Much like that game where the ghost turned into Kurobei the Ninja Cat, it's just Kurobei in disguise here too. He has IMPORTANT NEWS for us. Kurobei: Goemon, Ebisumaru, long time no see! Goemon: Oh, it's Kurobei the Ninja Cat! What are you doing here? Ebisumaru: Did something bad happen to Princess Yuki again? Kurobei: No, I'm keeping anyone from going down this road (meow)! Goemon: Did I ask you to do that? Ha ha ha! (laugh track) Ebisumaru: Ha ha ha, that's funny Goemon. Well let's go, it's almost lunch time. Kurobei: Hey wait (meow)! I need to give you something good (meow)! Ebisumaru: Food!!!!!!! (laugh track) Kurobei: Wrong! I want to give you an amazing transformation ninjitsu! Goemon: Oh, great! Ebisumaru: (Ninjitsu, so does that mean Yae will have to join us? Ho ho ho ho) Kurobei: Special Arts, Mimicry Transformation Ninjitsu! Narrator: You learned Mimicry Transformation Ninjitsu, now if two people play together they can be the same character! Goemon: Kurobei, you're amazing! Ebisumaru: Wow, you've filled me with hope! (laugh track) Kurobei: And I'll leave you some money, farewell for now! Ok so what basically happened there is that Kurobei gave you (ie, the players) the ability to be two of the same character when playing in 2-player mode. Up to now if two people were playing they could not be the same character, one could be Goemon and the other Ebisumaru. Now there could be two Goemons (Goemen?) or Ebisumarus (...Ebisumarii?). It's kind of a weird convoluted story explanation for a basic gameplay caveat, and it's not even something I'll be exploring in this LP due to how difficult it is to control two-players alone. Though once I have the full party I might show off their alternate colors. Also, yes, there are laugh tracks at the places I mention in the transcript there, though there's nothing particularly funny being said. The loose script I'm going by is fairly rudimentary, so I guess it's something that's simply lost in translation? I imagine a real localization would have put some real jokes in there. 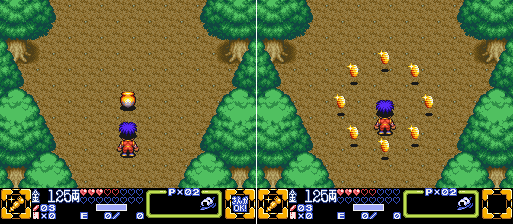 And as Kurobei said he left us a pot of money, which spills out 8 Ryo coins when broken, though I miss one when I get a-grabbin'. 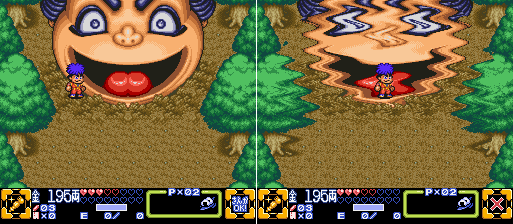 And just north of where Kurobei was is Impact's giant head. Huh, I guess THAT'S what Omitsu was talking about? But why would Impact's head just be sitting out here like that? The game either doesn't tell us, or it's mentioned by one of the NPCs that never got picked up by the main story translation I'm going by. Some speculate that Impact was straight-up buried for one reason or another, but I like to think his head has just been sitting there since the ending of Goemon 2. Anyway, entering Impact's mouth as Omitsu suggests causes the screen to get all wavey...  And we're warped somewhere entirely new, stepping out of a giant Tanuki Statue. We also have a side-scroller orientation now too. It's time to head into the first real stage of the game! ....next time. For now, here's some miscellaneous info: We start the game with Goemon and Ebisumaru, and for now they play fairly similarly. I've used Goemon's pipe for this first update, and that's his weapon for most of the game. Goemon 2 had weapon upgrades, but they were temporary power-ups you could obtain periodically throughout the levels, and you lost them upon taking damage. Goemon 3 has upgrades as well, but they're permanent ones that you obtain over the course of the game, some can drastically change a weapon and others simply add a special effect. 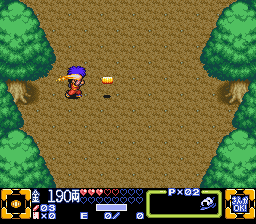 On top of his pipe, Goemon also has his trademark Ryo toss. You can switch between a character's primary and secondary weapons with L or R. The Ryo toss, like all secondary weapons, costs Ryo (the currency) to use. Goemon can also charge his Ryo attack to have it do more damage and pass through some barriers. 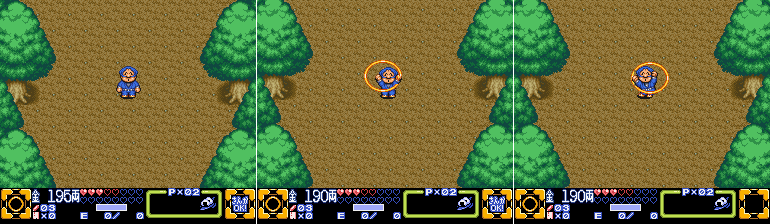 I haven't really used him yet, but as I mentioned earlier Ebisumaru's weapon this time around is a hula hoop. It has a shorter range than Goemon's pipe, but it is able to strike all enemies surrounding him in overhead sections, and on both sides of him on side-scrolling sections. Sometimes the reduced range is worth dealing with just so you don't have to worry about aiming, y'know? 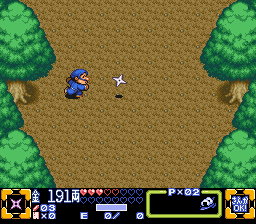 Ebisumaru's secondary weapon his his trademark shuriken. For now it's pretty much identical to the Ryo, except it doesn't have a charge-up function. One other thing I'd like to briefly touch on are the character sprites:   One of the things I like about this game are the more compact sprites. Goemon 2 was a nice-looking game, but all the sprites were a tad large and it could make things feel cramped. The sprites in Goemon 3 are a nice improvement there. They're also slightly better animated overall.  Seriously, look at him prance! He doesn't even care! Anyway, that's all for our first update, see you in the next part where I tackle the first real stage! I promise not to take three years this time! Last edited by SpoonyBardOL; 12-03-2017 at 07:35 AM. |
|
#10
04-04-2015, 01:01 PM
|
|||
|
|||
|
Hooray, this thread is back! Looking forward to more!
Quote:
|

|
#11
04-04-2015, 02:53 PM
|
|||
|
|||
|
Quote:
Also I guess I just narrowly avoided having this LP branded abandoned? Hooray for timing! |
|
#12
04-10-2015, 08:05 PM
|
|||
|
|||
|
And hey, we're back. See? Totally didn't take years.
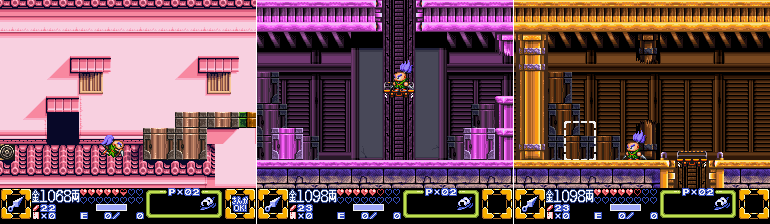
Though it did take a bit longer than I thought. I planned for this update to only take a few days, but it was a bit longer than I anticipated. Anyway, where we last left off we got teleported away from the Horohoro forest in Hagure Town, whereupon we exited from a giant tanuki statue's crotch. Whereabouts are we exactly? 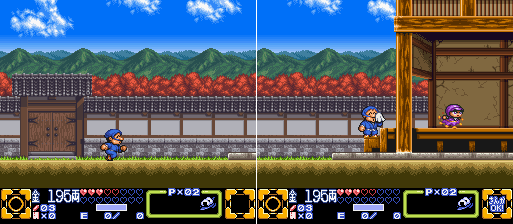 Stage 1 - Wise Ol' Man's Home Well as Omitsu suggested, the warp in Impact's mouth took us to the Wise Ol' Man's home in Iga. Again, I don't know if this is particularly explained, but Iga is where we needed to go so warp-via-giant-robot-mouth makes as much sense as anything right? This isn't even the first time we've been here in the series. Anyone who played far enough in Goemon 1/Legend of the Mystical Ninja might remember that one of the mid-late stages took place at the Wise Ol' Man's home, this is the same location. But enough talk about location. One thing I did in my Goemon 2 LP was give wacky and totally not canon names to the various enemies, so I might as well keep that up!  Name: Scurryin' Jimmi Scurryin' Jimmi is a mechanical doll with just one purpose in life, to scurry around. When he's not scurryin' around he's falling softly to a platform whereupon he starts to scurry around. Ahh, I missed writing that nonsense. Now then, moving forward! 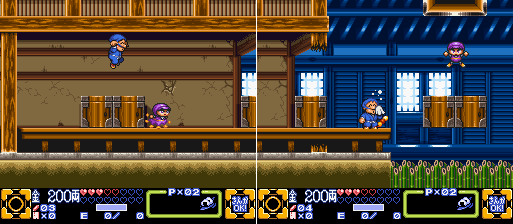 I'll be using Ebisumaru for most of this first stage, just because I can. Shortly into the entrance to the Wise Ol' Man's home we come across a few obstacles, and the first instance of a Scurryin' Jimmi floating softly down from the top of the screen onto a platform suspended over sharpened bamboo spikes. The spikes hurt, but don't instakill, this isn't Mega Man. The Wise Ol' Man's home is our first actual stage in the game, and really highlights the difference in structure between Goemon 2 and 3. Goemon 2 drew some slight influences from Super Mario World, at least in terms of its world map and occasional secret exits and the like. Goemon 3, on the other hand, really wants to be Zelda. Like, really really. This especially stands out a bit later on, and for now it only seems to be kiiiiiinda Zelda-y. But don't worry, you'll see the Zelda DNA in this game in due time. Those trappings didn't just come out of nowhere in the first N64 game. For now it's just important to note that there's not nearly as many stages in Goemon 3 than Goemon 2 had, but they're all quite a bit longer than any Goemon 2 stage (with a few exceptions we won't see till much later), and there's a lot of legwork to do on the overworld to fill up time between the 'dungeons'.  There is one thing I really like about this whole stage, and that's how it serves as a pretty good example of teach-by-showing game design. Here we encounter pushable blocks for the first time, and they're in a position where we cannot avoid them. This block has to be pushed, and it has to be pushed far enough that it falls into the bamboo pit for us to even proceed. So on top of teaching us about block pushing, it also kinda shows us the limits of our jump ability by showing us a pit we couldn't possibly clear with a jump, but not letting us tackle it without making it safe to do so. Also: I'm not sure if any of the town NPCs ever tell you this, but you can get a bit more oomph out of your jump distance by holding down the attack button before you get a running start. It's a little awkward since this still causes your character to swing their weapon first before they start moving, but the gain in horizontal distance is noticeable and downright necessary in a few spots. 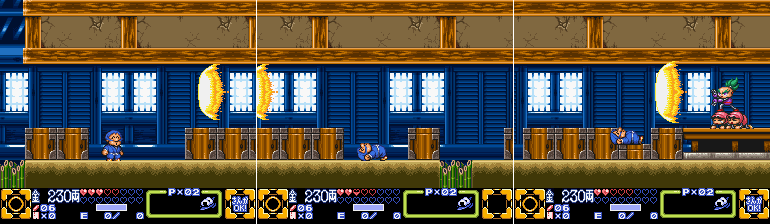 A bit further ahead we encounter an area reminiscent of the end of some of the castles of Super Mario Bros, a long hallway with various spots to hide in while damaging projectiles occasionally fly in from the right. Though these energy blasts are quite a bit taller than any of Bowser's fireballs and require ducking into the little cavities to avoid. Of course, you have much more leeway regarding damage here and can just tank the hit if you so choose. Also just showing off Ebisumaru's crawling animation. He lies on his back and scoots forward. It's so impratical, but goddamn if it isn't endearing. At the end of the projectile hallway we come across a new enemy! It's.... Sasuke?!  Name: Sass You, Kay? No it's not Sasuke, it's just a robot that looks just like him standing on top of two other robots who do not seem to be enjoying their job one bit. I guess the Wise Ol' Man only has so many humanoid robot designs. But Sass You, Kay? doesn't move and simply charges energy projectiles to fire. He takes several hits to go down and is the game's first 'large' enemy type that awards a giant Ryo upon beating. 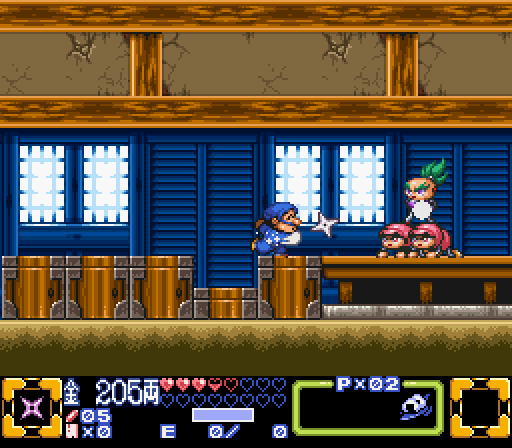 Ebisumaru has a shorter range on his default weapon than Goemon does, and while I could switch characters and melee him down and duck back into the cavity fairly easily, I just swap to Ebisumaru's shuriken and attack that way. I can't just stand in front of him and wail on him, I won't destroy him quickly enough before he gets another shot off. 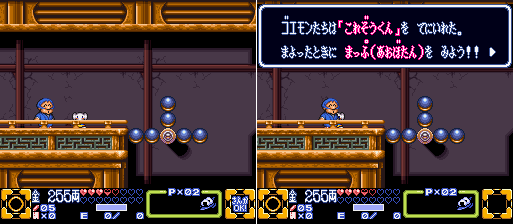 Moving on we encounter a new room, and an elephant statue. You might remember these from Goemon 2 as being the midpoints for each stage. Well not here.  Name: Elephant Map Elephant Map is a map for each stage, but an elephant. Don't ask why an elephant would also be a map, he just is. Maybe Elephant Map got some bad career advice in high school and now he's stuck with this out-of-place job, maybe Elephant Map just really REALLY likes maps and has always aspired to be one. Either way, you have to live with it. My map is an elephant, your argument is invalid. Anyway I don't get a shot of the map screen yet because I forgot to I want to save it for a bit later. Moving on! 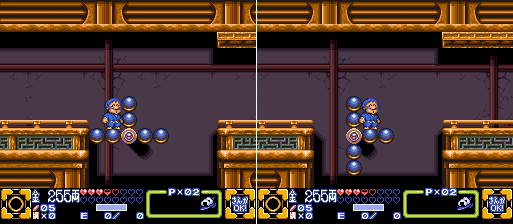 We're introduced to a new type of platform here. These things will rotate around when you strike them with your weapons, in a clockwise or counterclockwise rotation depending on which way you strike them. Ebisumaru standing where he is in the first shot and hitting the platform with his hula hoop causing it to rotate to the position in the second shot. I could have just jumped over the hurdle in the center and continued that way, but the platform just looks so enticing and punchable, doesn't it? Fortunately it's designed to not drop you into a pit regardless of which side you strike the center bit from, and it's not possible to attack downward so you can't get this first one in a position where hitting it will dunk you into the void. 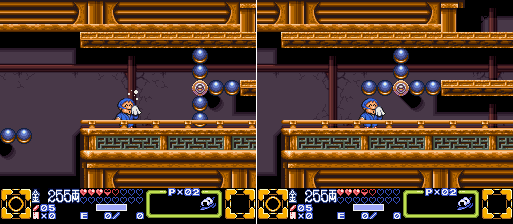 Just further ahead is another one of these platforms. Striking it on the bottom causes it to move like that. 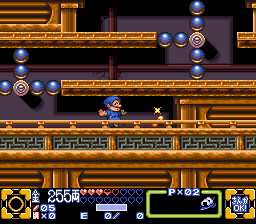 Though that fences us in to a dead end. There's a sparkling Takoyaki Dango, though. This either refills all of our health, or refills a lot of it. I've never been so low upon getting one that it never filled up all my hearts so I can't say for sure if it's a full refill or just a lot. Either way it's a welcome sight whenever it shows up. 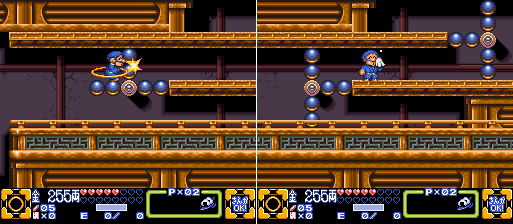 And as it turns out all you need to do in order to advance is jump up to the top and strike the platform from there. 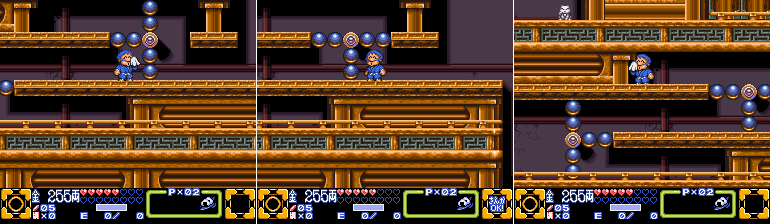 The next set of these platforms actually leads nowhere. Well, nowhere besides a fleeting glimpse at a Fortune Cat doll if you stand in the upper left there. We'll get to that later. (you can actually walk through the platform on the right side, that's not a barrier but a piece of foreground, but there's no benefit to doing so whatsoever) 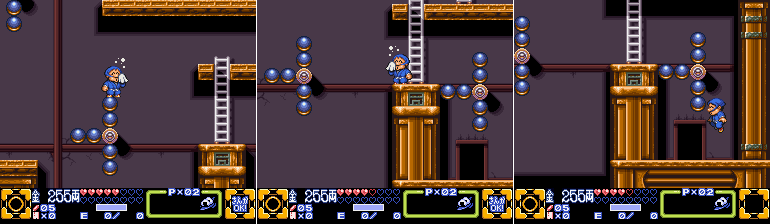 Here we have a branching path. We could go up top, but we'd miss out on stuff if we did so I hop down and head into the door. 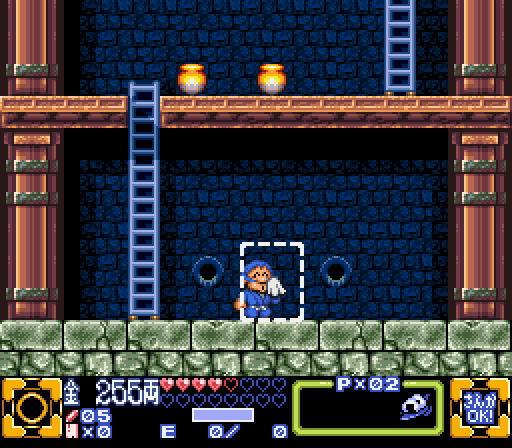 Doing so leads to this room, and this seems like a good a time as any to show off the map! 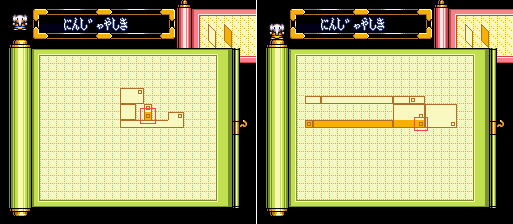 Nearly all of the game's main stages have two 'layers', a front and a back. The map on the left shows the backside, which I just entered, while the one on the right shows the front which I was playing on up until now. The squares indicate a door between the two sections. Looking at the map it's probably not too hard to figure out the route through the stage. We climb up the backside here, progress some more through the big room we were in, enter another big room to our right, enter the backside again and move around to the upper layer, where we then continue along the top to the left. 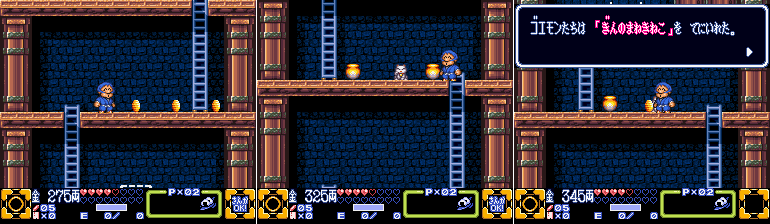 Anyway, this little area contains some Ryo and the first Fortune Cat we can actually grab! Last edited by SpoonyBardOL; 12-03-2017 at 07:41 AM. |
|
#13
04-10-2015, 08:09 PM
|
|||
|
|||
 In Goemon 2 these items upgraded your weapon. In this game they're basically Pieces of Heart, collect four to get another heart added to your life bar. It should be familiar to anyone who played the N64 games. Every one of the game's main stages has one heart's worth of Fortune Cats to find. Why yes I did phrase that last sentence in an obtuse way. Weird huh? 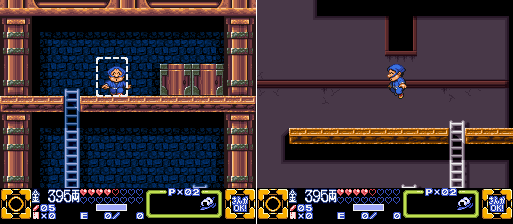 Anyway, exiting the backside causes us to be dropped out of a door we can't re-enter. Had we taken the top route earlier we just would have ended up here, but we would have missed out on the Fortune Cat. 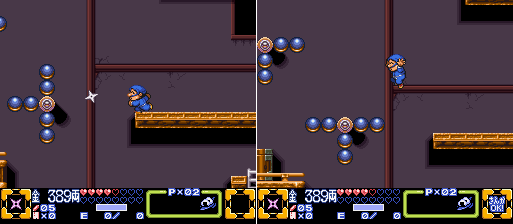 We need to use some projectiles on these platforms. 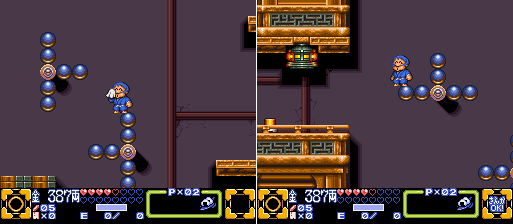 Across the gap we have a TOTALLY REAL BARRIER with a switch on the other side. ....yeeeaaaah, this was one of those cases of sprite flicker dodging my screenshot attempts. I tried to take a picture here about a dozen times, I swear, damn thing just did NOT want to be captured. But I promise you there's a barrier right in front of that button. 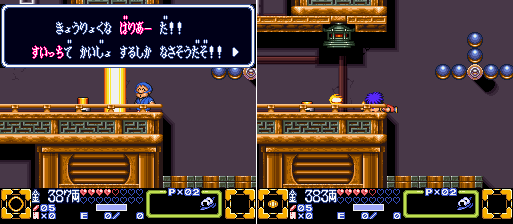 There! I got it there! Partially obscured by a text box, but see it does exist! Anyway, we need to swap to Goemon here since only his fully charged Ryo can bypass the barrier and push the button, which is what the text box is informing us of I'm sure. 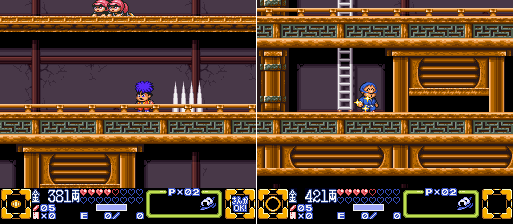 We pass through a short hallway with spikes that rise up and down through the floor, and a ladder at the end which goes upward and downward. Of course if you remember a few screenshots ago we saw a Fortune Cat in this particular area... 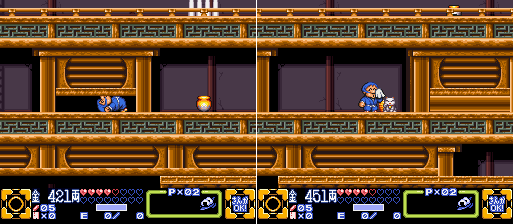 Bingo bango. Also by this point you might be wondering why so many of the images have Ebisumaru wiping his face like that. It's just his idle animation. It happens to kick in every time you initially stop moving, which just so happens to coincide with when I take most of my screenshots, so expect to see that frame a lot going forward. 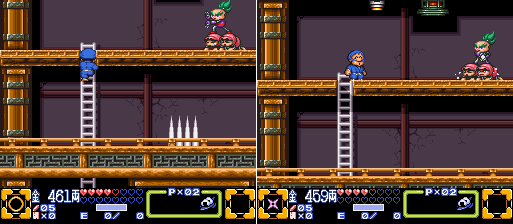 Anyway heading up we encounter another Sass You, Kay?, we could take care of it either by hitting the button to disable the flickering barrier that's totally there or just switch to Goemon and throw charged Ryo at it... and then hit the switch anyway because we need to in order to progress. I did one of these things, but I guess it wasn't that exciting since I didn't capture it. Moving on! 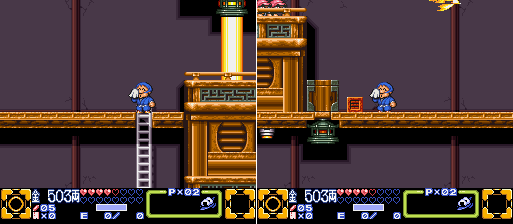 Climbing up another ladder we see another barrier (For real!) to our right and a Sass You, Kay? to our left. There's also a tiny box on the ground. It resembles the box we pushed earlier on so that should give the players some hint we can do something with it. 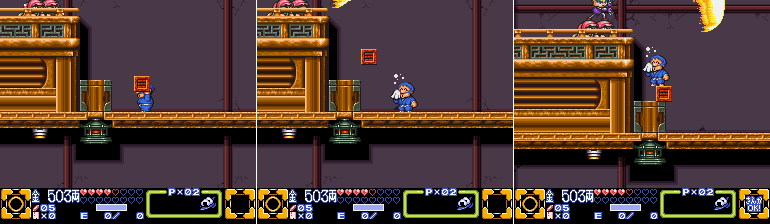 And that something is 'pick it up and toss it to use as a stepping stone'. 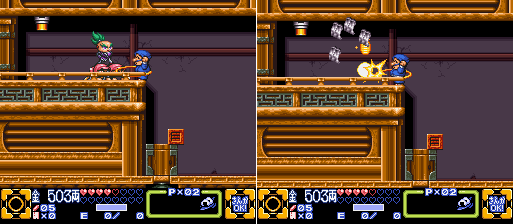 Turns out the ledge the Sass You, Kay? is perched on is just a hair too high to reach without block assistance. Ebisumaru hula-hoops it to death all the same. I guess having the high ground isn't an instawin. 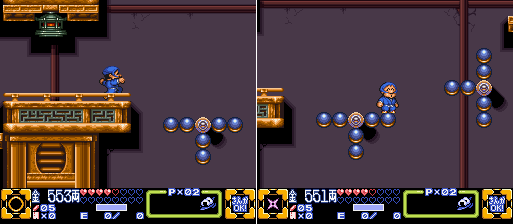 Just ahead to the right are more of these rotating platforms. 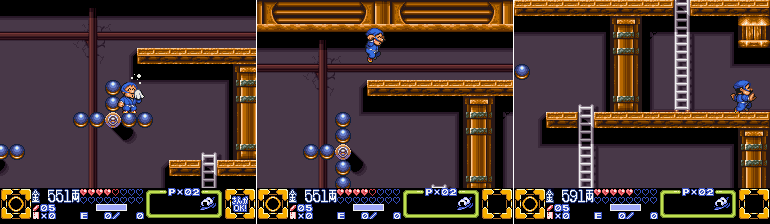 We could head down here but you'll find nothing but either some Ryo or some food, the upper path continues onward. 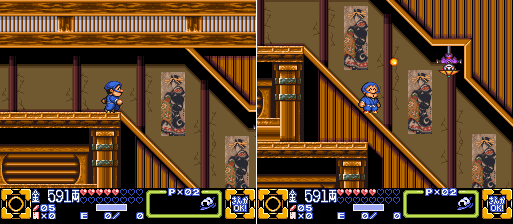 We enter a large room with a hallway sloping downwards, and a new foe!  Name: Strawhatted Shooter This foe is entirely stationary, and shoots vanilla-grade 'yellow ball' type projectiles, the most common of all enemy projectiles. Attached to the ceiling or attached to the floor, the Strawhatted Shooter will never fail in its duty to stay in one shot and shoot a perfectly steady stream of projectiles in a slow predictable pattern.  In another bit of good first level design, this is your first encounter with this foe and this entire hallway is set up in such a way that you are never in any danger from them if you're just naturally moving forward, though you get plenty of time to observe their movements. We move through some damaged walls and enter another door.  The door spits us out the other side with no floor to stand on and we plummet to the water below. This is kind of a point of no return since there's no backtracking to the earlier part of the level at this point. If you missed the two Fortune Cats along the way then too bad! No really, too bad! This is as good a time as any to mention that you cannot re-enter this stage after you beat it, so if you enter that previous door and did not get one of the two fortune cats? Welp! Cross a 100% run off your list! But hey, at least it's not like there's a hidden bonus for collecting all of them or something! ......oh wait. Yes. There is. Whoops! Yeah, kind of a dick move there, you can lock yourself out of a secret bonus if you're not careful. But don't worry, we'll be getting all them cats in this run, never fear! Anyway as soon as we land something comes up behind us, jumping forward from behind the wall.... oh crap. FROG! 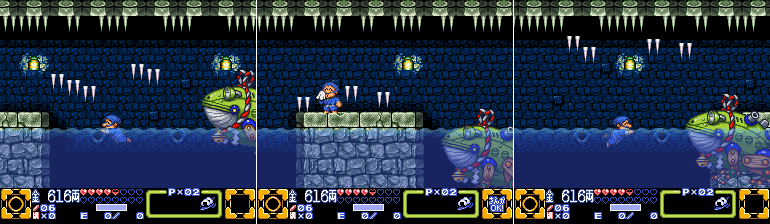 The giant frog chases us through this section, hopping along behind us. Every time it lands the screen shakes and some spikes fall. The spikes themselves also shake before falling, so it's easy to see where you need to be, or NOT be as it so happens. Last edited by SpoonyBardOL; 12-03-2017 at 07:44 AM. |
|
#14
04-10-2015, 08:13 PM
|
|||
|
|||
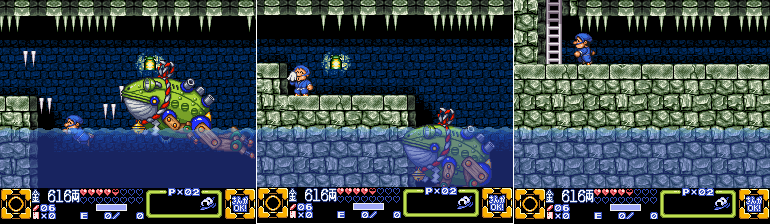 The whole section is autoscrolling, and it alternates between dodging spikes in water and dodging them on a platform. Eventually it ends with a ladder heading up. The frog simply stops chasing us once we hit the last platform. 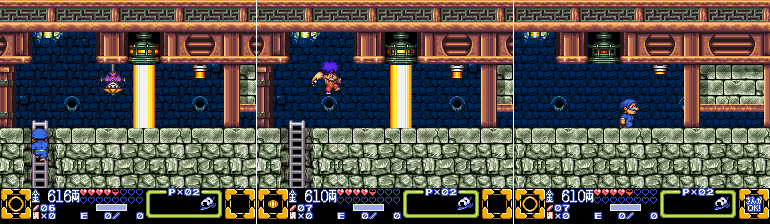 We enter a new room with a Strawhatted Shooter greeting us. Now here's another interesting bit of game design, the Strawhatted Shooters we saw earlier were positioned in such a way as to not hit us if we were just moving straight forward, but they were also placed just out of our normal weapon's reach, outside of making a jump up to specifically hit them. But here we see one again, and this time it has to be destroyed, since we need a charged Ryo shot to hit that switch and drop the barrier and the Strawhatted Shooter has to die first. 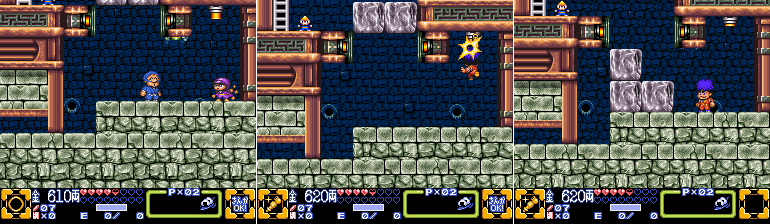 Just through the crawlspace is another button-barrier combo, this time a barrier is holding up three stone blocks. A Scurryin' Jimmi is quickly dispatched, and I swap to Goemon to thwack the switch since, again, Ebisumaru can't attack directly upward with his Hula Hoop. I suppose I COULD have just switched to his shuriken, but eh. Pressing 'R', pressing 'Select', either way I need to press a button to swap to something and swinging Goemon's pipe doesn't cost any currency. 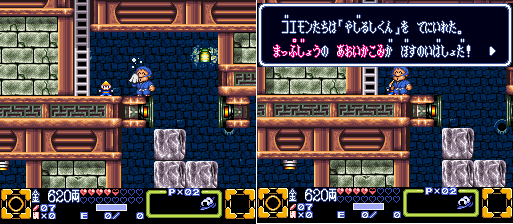 Just up the newly formed staircase we find a pointy-hatted fellow.  Name: Mr. Compass Mr. Compass, as he is eventually known in the N64 games functions as a Compass does in A Link to the Past, he points out where on the map the boss is. 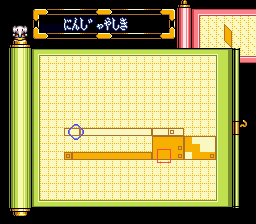 And here's Mr. Compass in action, there's now a blue circle at the end of that long hallway on the top floor. That red square shows our current position, however we're currently on the backside of the level and the boss is on the frontside, so we still have some climbing to do to reach that door on the upper right. 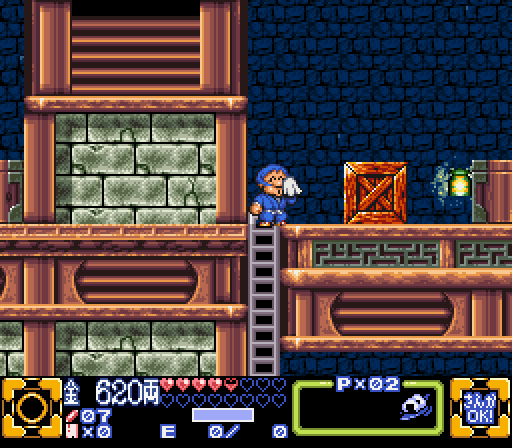 Climbing up a bit more we see.... hmmmmm! A pushable block that we know is pushable is in a room where it appears useless at first glance, but on the left side of the screen there seems to be a room with no way to enter! How on earth could those two things be related I wonder......... 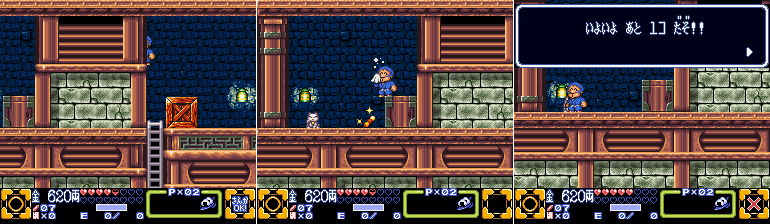 A durrrrrrrrrrr. Yeah it's a simple solution, but hey, we're still in the first stage. 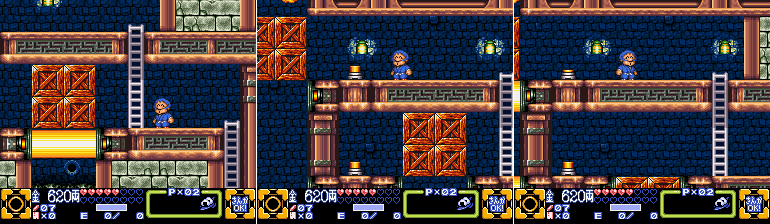 Next room! More boxes, more barriers, more switches. We've already seen the barriers hold up blocks in the previous room so there's only one way to go here. Shut them things off! 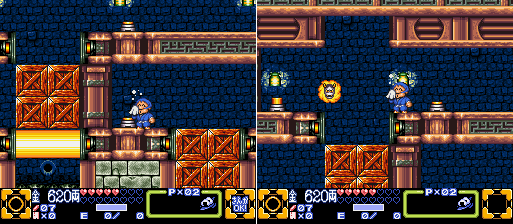 Oh crap new enemy!  Name: Mr. Onizooma Mr. Onizooma basically acts like a Bubble from Zelda 2, he ricochets all along the room and takes a few hits to destroy (mercifully, far fewer than his Zelda 2 counterpart). 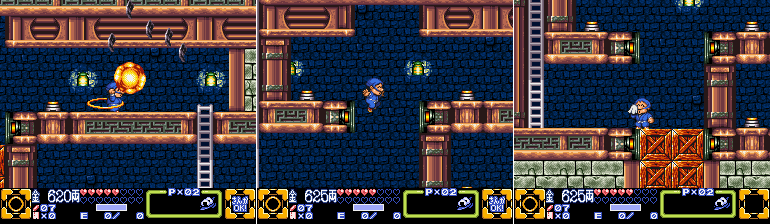 A few more switch-hits later and we've opened the way. Onward and upward! 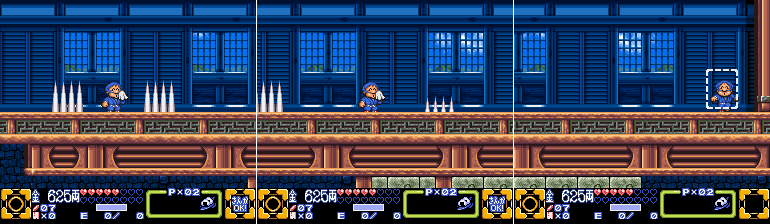 We get a view of the outside again from this spike-trapped hallway so we must be close to the top! 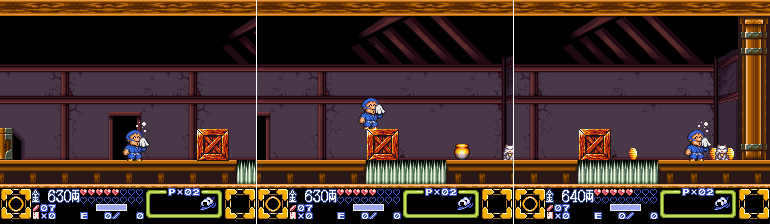 We've basically reached the attic. Before we head over towards the left, though, a quick look to the right is a pushable block, a spikey pit, and the final fortune cat for the stage! Extra heart get! 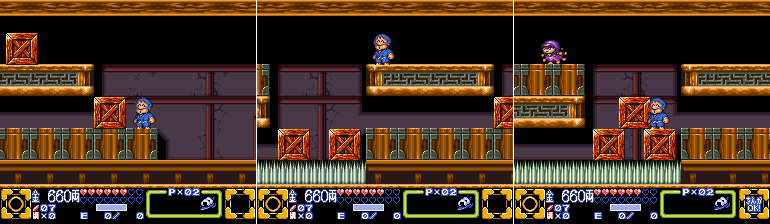 More block pushing! We have to push the top block down first, so the middle block has something to move on top of. If we pushed the middle block into the pit first we'd have no way to reach the top block and we'd have to exit and re-enter the room. 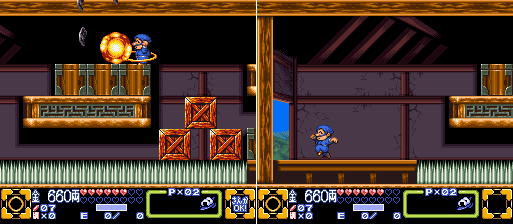 A lone Scurryin' Jimmi guards the exit to the attic. You did your job to the best of your ability, lone Jimmi, shame you weren't that good at it. 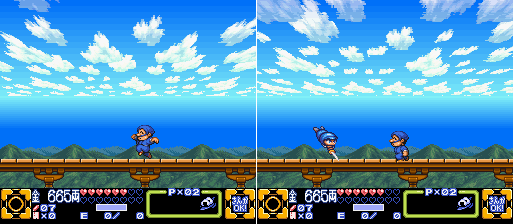 We're finally back outside, in an area with a really neat mode-7 sky. Oh hey, new enemy!  Name: Dive-Bombin' Jimmi The Dive-Bombin' Jimmi attacks much more aggressively than his Scurryin' brother. He rushes towards the player before leaping with his sword out. He has pretty good timing for a first-stage enemy, too, and the player often needs to back up a bit once Dive-Bombin' Jimmi leaps or else you'll take a hit. Though he gets comically stuck in the ground either way. Last edited by SpoonyBardOL; 12-03-2017 at 07:46 AM. |
|
#15
04-10-2015, 08:19 PM
|
|||
|
|||
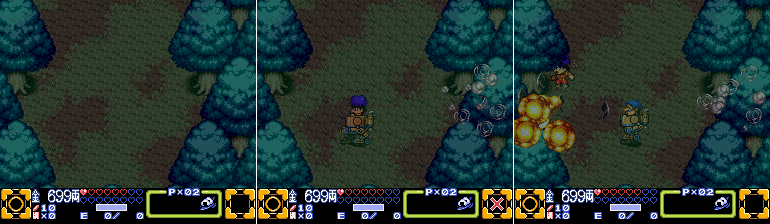
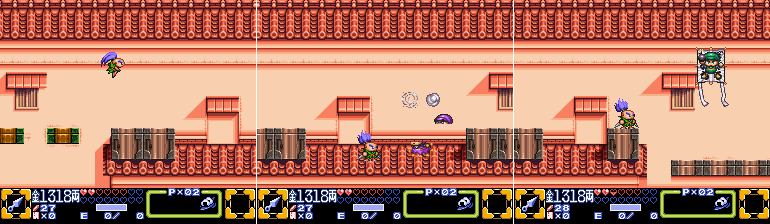
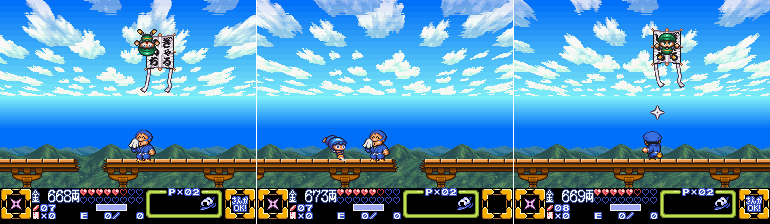 We proceed across the bridge, and on top of the Dive-Bombin' Jimmis we encounter ANOTHER new foe!  Name:Kite-Ridin' Jimmi The Kite-Ridin' Jimmi is the envy of all his brothers. On top of getting a totally sweet mode of transportation, he also gets to toss bombs down at any intruders safely from his lofty position in the sky. His bombs can even destroy bits of the bridge and make the stage more difficult! Really, he's just the best Jimmi, he knows it, his brothers know it, even Ebisumaru knows it, which is why this Jimmi is the priority to take down first. 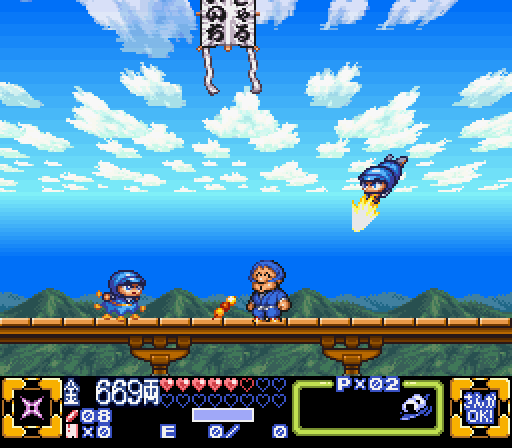 Not to be outdone by their cooler brother, though, Ebisumaru gets double-teamed by two Dive-Bombin' Jimmis. The Jimmis here can spawn from all sides, though you'll usually only encounter them ahead of you if you keep moving forward. Stall for a bit or move backward and suddenly you got them coming from behind too. 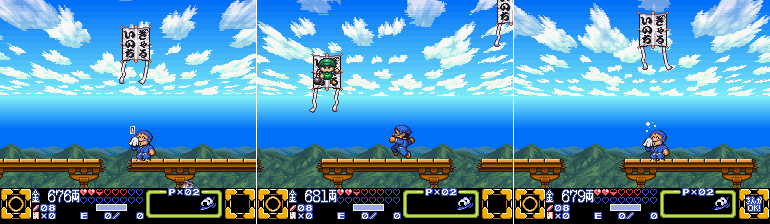 Towards the end of this section one of the Kite-Ridin' Jimmis succeeds in bombing away an extra large bit of the bridge. Incidentally, it looks like the kites the Kite-Ridin' Jimmis use say 'I-No-Chi Gya-Ru'. Life Girl? I guess? Probably some kind of reference here that's lost on me. 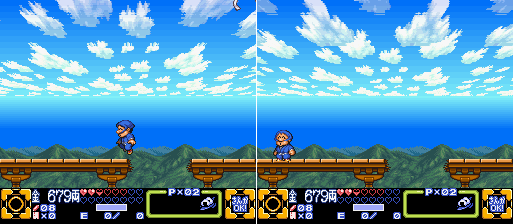 This jump is probably the most difficult in the stage since it more or less requires holding the attack button to get some extra distance. You CAN make it without doing that, but there's basically no margin for error. While this game does have a lives system, falling down pits doesn't make you lose one. There's not a whole lot of pits that don't just lead to more level in the game, anyway, and if you happen to fall down one that doesn't go anywhere you just respawn on the side of the pit you were originally on, minus half a heart. It IS a bit too easy to fall into the pit a second time if you're still holding forward, though, so you need to be careful of that. You respawn RIGHT at the edge. 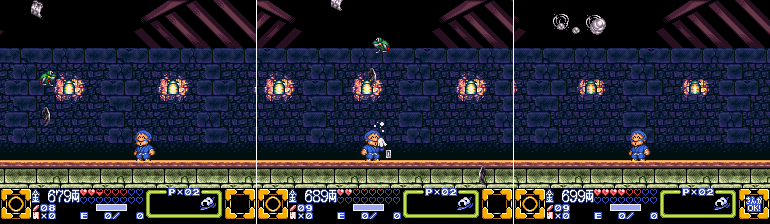 What Cute Frogs! And we finally enter the boss room and the music changes to this... cute little fanfare. Tiny robot frogs rain from the ceiling among random debris.  Name: Mini-Croaker The Mini-Croaker is the spawn of the giant frog we saw earier. It hops around rather harmlessly and is destroyed very easily. Their presence here probably isn't ominous at all. 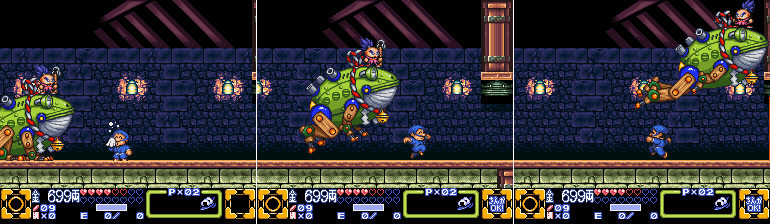 Boss Battle Oh crap... FROG!  Name: Giant Guardian Frog (Also Sasuke) The Giant Guardian Frog (Also Sasuke) is the guardian of the Wise Ol' Man's home, and also the first stage boss. It first appears to chase you through the water way half-way through, but then reappears later, crashing through the ceiling to finish the job. But Sasuke is our pal, so why is it directing the Giant Guardian Frog to attack us?  The Giant Guardian Frog (Also Sasuke) leaps around the boss arena rather slowly, giving ample time to run under it, and has two main methods of attack. If the player is in front of it when it stops to attack it will open its mouth and barf out some flame breath. 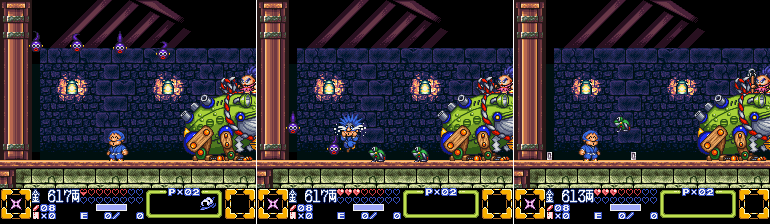 If the player is behind it when it stops to attack it will fire some tadpole eggs into the air, which hatch into tadpoles to divebomb the player. Any not destroyed upon hitting the ground turn into Mini-Croakers. (As for why the screenshots don't match up with this one regarding my hearts and rice ball situation, I used some save states to replay the fight and get screenshots of this attack. First pass through I actually forgot the boss did this) 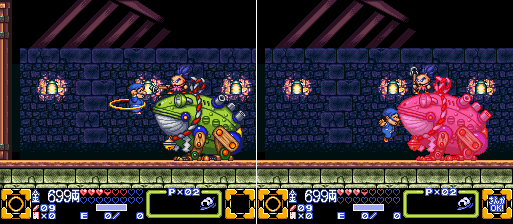 The frog itself is vulnerable on its nose. You'll know you scored a direct hit when it flashes hot pink.  You can also toss a Ryo or Shuriken into its mouth when it opens it to score a hit that way. It can be tough to avoid taking a hit yourself this way, though. 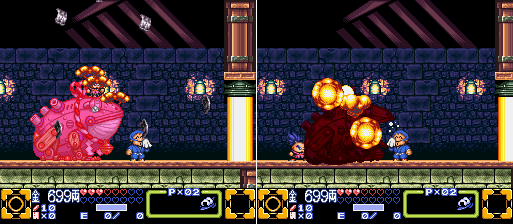 That's all there is to the fight, really, the boss doesn't wear out its welcome. After taking the last hit the Giant Guardan Frog explodes and Sasuke jumps off. 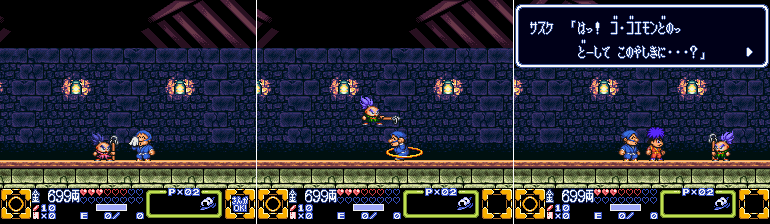 Sasuke angrily shakes his stick at us until we just straight-up smack him, at which point he turns from pink to his familiar green and snaps out of whatever it was he was in. 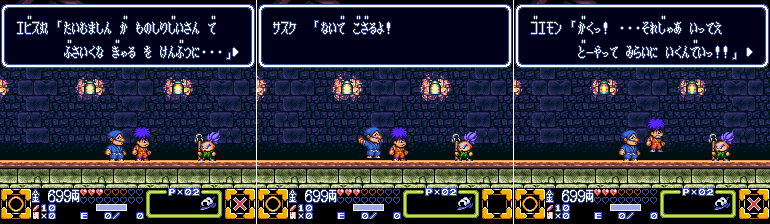 Afterwards... There's some dialogue where Ebisumaru and Goemon each take turns flipping out. Sasuke: Huh? Goemon? What are you doing here in the mansion? Ebisumaru: The Wise Ol' Man messed up using his time machine to look at girls... Goemon: Shhh! Ebisumaru, quiet about that! (laugh track) Actually, the Wise Man... Sasuke: What?! Is this true?! In that case we have no choice but to go after him to the future! Ebisumaru: Do you have another time machine? Is it somewhere in the mansion? Sasuke: Nope, it's not here! (laugh track) Goemon: Arrrgh! Then how are we supposed to get to the future? Sasuke: I think the Wise Ol' Man wrote it down on a note and hid it somewhere... if we use the Conch Triton Shell to summon... Ebisumaru: I can use the T-triton Shell??? Goemon: Ebisumaru, be a nice guy and wait before using the old guy's great... (laugh track) Sasuke: Uh-oh, looks like someone set off my self-destruct switch a little while ago! (Boom!) Goemon/Ebisumaru: Sasuke!!! 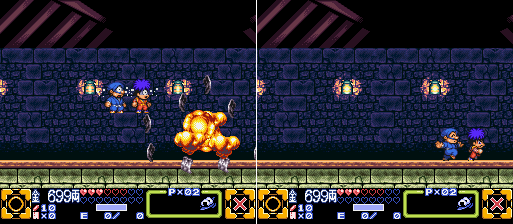 Soooooo, uh, that happened! After another conversation where it seems we have some lost in translation humor, Sasuke straight up explodes! Goemon and Ebisumaru quickly run outside, perhaps to find the one responsible. 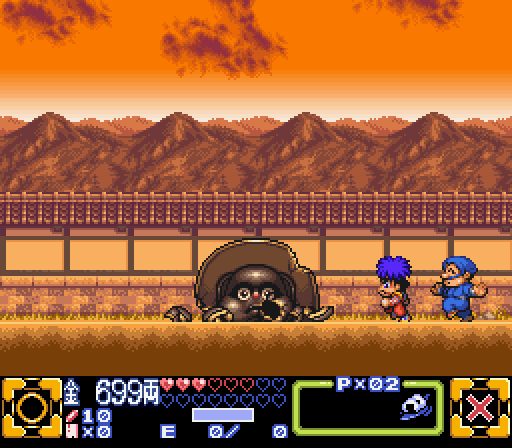 But upon reaching the entrance they find the Tanuki Statue in pieces! Well this is no good at all, that was their shortcut back to Hagure town. And now with Sasuke exploded they've hit a dead end! How will they ever get Back to the Future and rescue the Wise Ol' Man now? Find out next time! It should be a shorter update so hopefully I'll have it done in less than week. Hopefully! Last edited by SpoonyBardOL; 12-03-2017 at 07:48 AM. |
|
#16
04-10-2015, 10:42 PM
|
|||
|
|||
|
I'm glad to see you've picked this up again!
Quote:
|

|
#17
04-10-2015, 11:19 PM
|
||||
|
||||
|
Quote:
Quote:
Quote:
Quote:
Last edited by Torzelbaum; 04-10-2015 at 11:51 PM. |
|
#18
04-13-2015, 06:18 PM
|
|||
|
|||
|
Quote:
Anyway, here's a micro-update, more a bit of Ganbare Goemon trivia. Let's talk about the Wise Ol' Man's house which is one of those locations that pops up a lot throughout the series. We visited it in Legend of the Mystical Ninja, where we first fought Sasuke riding his GIRLS 4 LIFE kite and met the Wise Ol' Man for the first time. It didn't show up in Goemon 2, I guess it just wasn't on McGuiness's radar. However here in Goemon 3 we return and two of the most distinguishing features of the Wise Ol' Man's home are fleshed out. One, the long walkway between the two main structures which we see in the LP right before the boss, and the giant guardian frog robot which remains perched on the Wise Ol' Man's home from here on out. Here it is from the opening of Goemon 4:  (those aren't rabbit ears, it's the rope that's tied around its neck) You can also see the giant guardian frog during this scene in Mystical Ninja Starring Goemon, though there is no walkway from this angle. Finally, you can also see the giant guardian frog in the opening of Goemon's Great Adventure when Bismaru steals the Ghost Return Machine (earlier in the intro you can see the walkway as well). The overall design of the Wise Ol' Man's home persists throughout the games and I just think it's kinda neat is all. There aren't a whole lot of recognizable areas that are revisited in the series so the continuity is appreciated. Learning that the frog boss I was fighting in Goemon 3 was the same weird green thing on the Wise Ol' Man's home in Mystical Ninja Starring Goemon was kind of mind-blowing, I didn't connect the dots until I saw it more clearly in the intro to Goemon 4. I mean, let's face it, it kind of looks like it could be ANYTHING in the first N64 game, and since we didn't get the other SNES titles we had no way of knowing. Wise Ol' Man's house just had this green thing on the top of it, that's all! We didn't know any better! But now we do. I've given you the knowledge. And that's all for this little tidbit of trivia. Next update should be later in the week. |
|
#20
04-16-2015, 07:09 PM
|
|||
|
|||
|
Hey hey! Welcome back! When we last left our heroes they had just defeated a giant guardian frog and smacked some sense back into Sasuke, just to watch him explode before their eyes. Goemon and Ebisumaru run outside and also find their way back to Hagure Town a pile of rubble.
Afterwards... Goemon: Damn, we have a problem! Ebisumaru: It looks like the Tanuki blew up too... Suffice to say, it doesn't look good. What now? 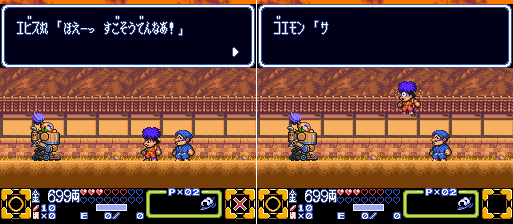 Before they can spend any time to think things over, Sasuke suddenly runs in from behind them riding some sort of mecha, that doesn't look AT ALL like a Magitek Armor from Final Fantasy 6, running over the remains of the Tanuki Statue on his way. Sasuke: We'll travel using this walker. The Wise Ol' Man invented it! Ebisumaru: Huh? What a surprise! Goemon: S-Sasuke?! Didn't you just explode? Sasuke: That was only a joke. Anyway, let's hurry to Festival Town. Ebisumaru: Why do we have to go to there? Sasuke: The Time Machine was purchased there, so we should be able to learn more about it. 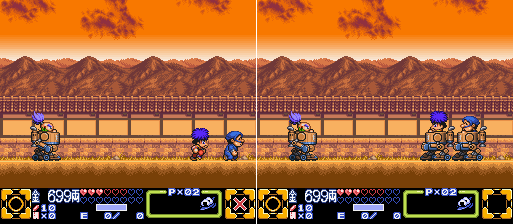 Well that settles it. Goemon and Ebisumaru run back to the left and grab mecha walkers of their own.  Goemon: I can't believe Sasuke made a joke... And Goemon pauses to reflect. On Sasuke making a joke, that is, not on something like a Time Machine being for sale at a mundane place like Festival Town. That's just perfectly normal. Then the game asks us if we want to save. Ominous! I do so and move on! 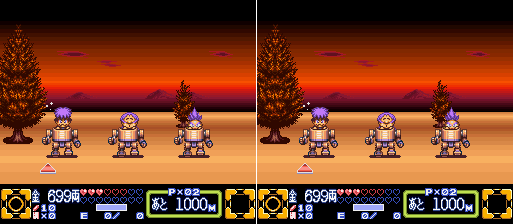 Making Our Escape... Suddenly we find ourselves in a completely different perspective, with Goemon and friends in their walkers moving towards the screen. 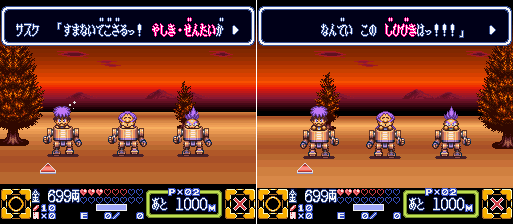 Goemon: Sasuke, it surprised me when you attacked us back there! Sasuke: I'm sorry! There was a strange disturbance and everyone in the mansion suddenly went crazy... Ebisumaru: Well that's no good, I am certainly-- (rumble) Goemon: Huh?! What's with this tremor??? The answer to Goemon's rather pertinent questions as to why Sasuke would attack them get interrupted by a loud rumbling in the distance. What is... 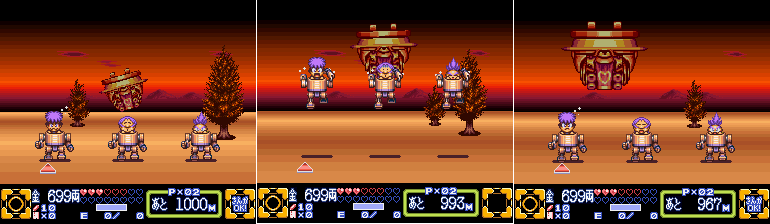 Run Faster! Oooooohhhhhhhhhhhhhhh balls. Goemon and the others pick up speed as the music shifts into something a bit more awesome. Everyone, say hello to the Bismaru Elegant. And it would very much like to wreck our faces. This is basically a mini-game of sorts. Goemon and friends have to make it to Festival Town without letting the Bismaru Elegant destroy them. You can see the distance to our goal in the bottom right corner, which counts down automatically as they keep running. All while the Bismaru Elegant peppers us with attacks that we have to dodge, or else we get damaged, and we are still hurting from the boss fight we were just in. No wonder it asked us to save. 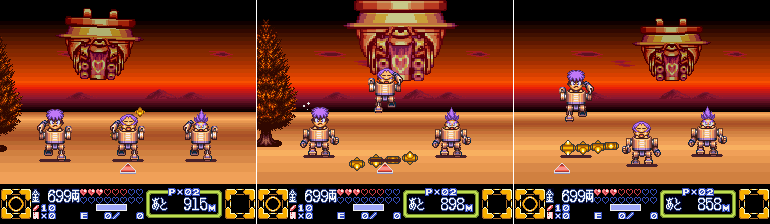 The first, and most common, attack of the Bismaru Elegant is to send these rolling spiked logs at a character. We have to select the targeted character and press B to make them jump over it at the right time. The trick to this is that you can let the spiked logs get a lot closer to you than you might think. It's very easy to jump the gun and leap a bit too early, only to land on top of it as it passes under you and take the hit anyway. 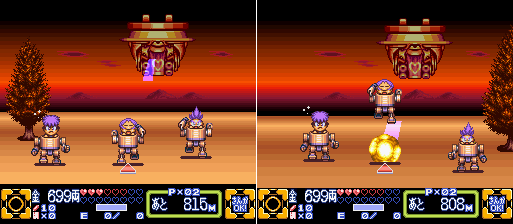 The second attack in the Bismaru Elegant's repertoire is a laser, which also targets a single member. This is the opposite of the spiked log, in that you have to be ready to jump a lot sooner or else you'll take a hit. 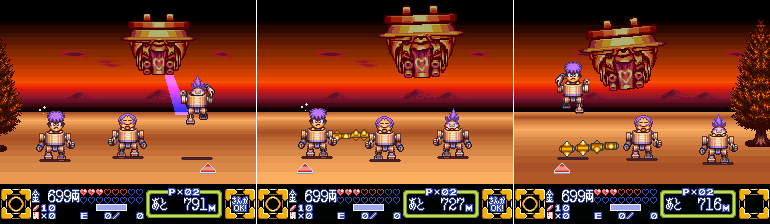 As the chase progresses the Bismaru Elegant starts attacking much more rapidly. Eventually lasers and logs get sent out nearly at the same time and you have to make a quick judgement call on which character has to jump and when to avoid the damage. 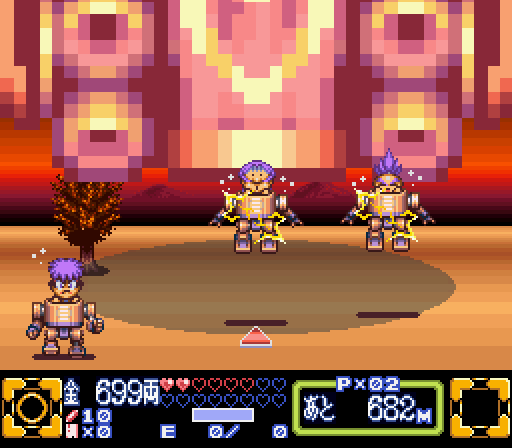 The third and final attack the Bismaru Elegant can throw at you is to fly forward and attempt to outright crush the party. You have to make them run forward a bit faster for a few moments by pressing A. I mess up the timing here, Goemon gets ahead of it, but both Ebisumaru and Sasuke take a hit. Each hit knocks off half a heart, so they both cost me a full heart here. 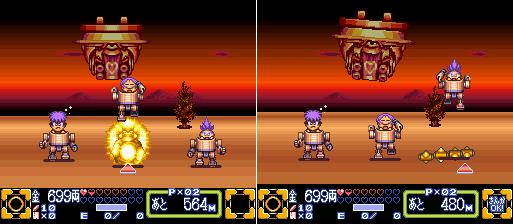 From there the assault continues as the Bismaru Elegant starts attacking quicker and quicker. Ebisumaru takes another careless hit.  Another crushing attack, this time I get everyone out of the way in time... 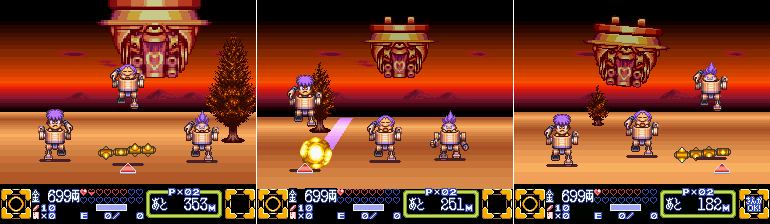 In the first screen here I actually had Ebisumaru jump a tad too early. He went on to land right on that spiked log. 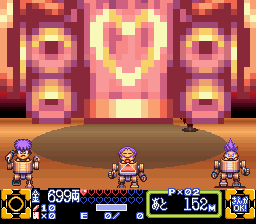 The third crushing attack is another swing and a miss for the Bismaru Elegant. You have a few moments to see it fly up to you so it shouldn't be too tough to avoid. Honestly that first one was just a fluke of bad timing. 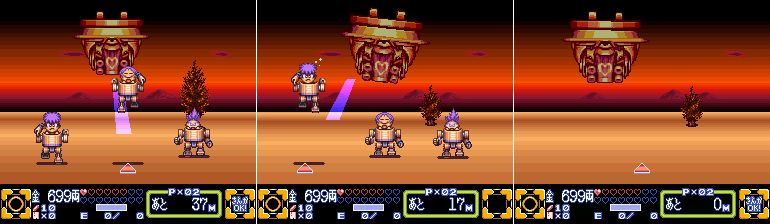 The flying mech takes a few more potshots at me as the distance counts down, but eventually I leave it in my dust. Well that was intense! But I'm sure we'll never see THAT thing again! Last edited by SpoonyBardOL; 12-03-2017 at 10:37 AM. |
|
#21
04-16-2015, 07:15 PM
|
|||
|
|||
 It's nighttime now in the forests outside of Festival Town. Goemon and Ebisumaru frantically run in from the right and smash their mecha walkers into the trees, ruining them. 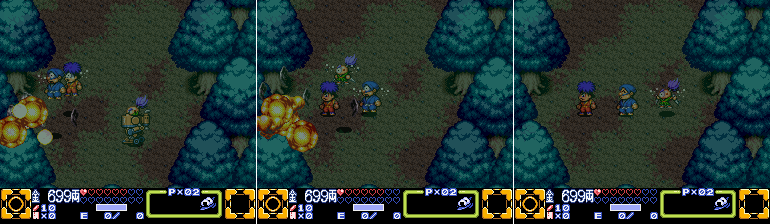 Sasuke closely follows behind them, ruining his as well. Oh well! They were fun while they lasted. 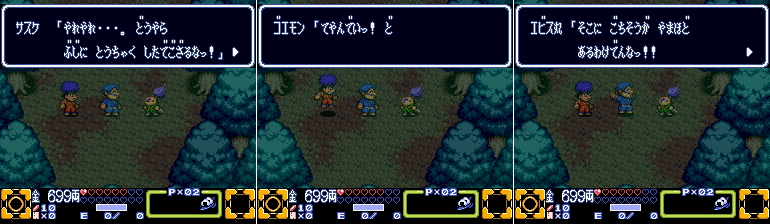 Sasuke: Well well, at least we were able to reach safety... Goemon: What the heck?! Exactly where is safe with that giant machine after us?! Ebisumaru: Yeah! And also I'm really hungry! I'm going to starve! Sasuke: It doesn't matter! Festival Town is right around the corner and the Wise Ol' Man's vacation home is right beyond it! ...Actually that place... Ebisumaru: ...must have a ton of food in it! I wonder if there's even enough for me to eat? Mumble mumble... Sasuke: Uhhh, we have to go there because the Triton Shell should be hidden somewhere there for safe keeping. It would be useful to get. Goemon: Alright, enough chatter! Let's go! Ebisumaru! Sasuke! Ebisumaru: Alright Goemon! I can't wait for the feast! Sasuke: (They're certainly enthusiastic about visiting the Wise Ol' Man's vacation house. They must not realize how difficult it will be inside, the Wise Ol' Man is very tricky after all...) Well I'm sure everything will be fine. 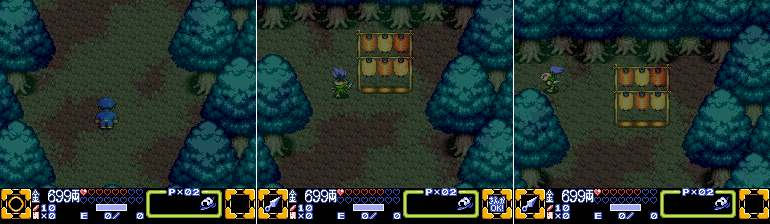 And now I have Sasuke in the party! Just a bit north are some festival lanterns, and Festival Town is just to the left.  Festival Town And here we are! Y'know, I just got through writing that post about the Wise Ol' Man's house and how there aren't a lot of revisited locations and continuity and all that jazz, and yet Festival Town is another location that pops up a number of times throughout the series. It never looks quite the same each time, of course, in fact the Festival Town here differs quite a bit from the one in Goemon 2, and from the one in Mystical Ninja Starring Goemon. Though it is usually forested, and it is usually always night here, so it has that going for it. (Hagure Town would be another commonly revisited location, but I feel towns aren't quite on the same level as landmarks for this sort of thing, but ANYWAY) 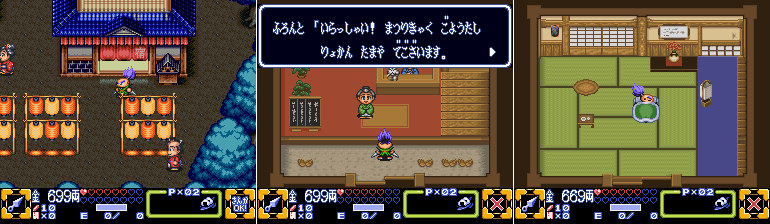 I'm pretty banged up from the boss fight and the frantic chase across the countryside so the first thing I do is hit up the Inn and recover them hearts. I mentioned a few updates ago that Inns have multiple tiers of rooms for different costs that restore different levels of hearts... well, not yet they don't. For now this is the only room the Inn has for us. But hey, it does the trick. 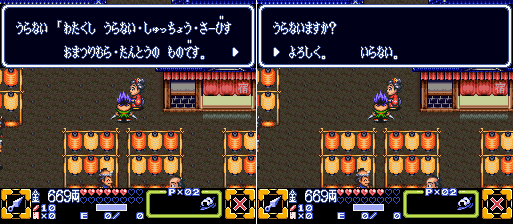 Just outside of the Inn is a lady that functions identically to a Fortune Teller, except she doesn't look like one and is out walking around town like a normal NPC rather than in a Fortune Telling Hut. Again, I have no need of her services. 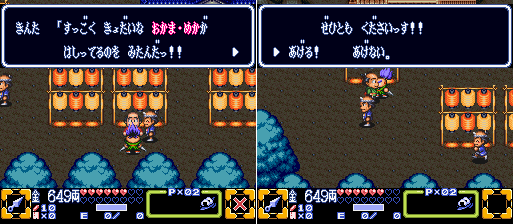 More townsfolk have things to say that I can't interpret, but one of them we speak to takes a sudden interest in our Crimson Sandal Strap. Man: I got too excited during the Dancing Festival and broke the strap on my sandal, dammit! (sob) ...Oh! That thing you have! Is that the Legendary Crimson Sandal Strap? Please give it to me! >Yes Man: Thank you! You're a life saver! I can dance my cares away again! To express my gratitude I'd like to give you this Enigmatic Bean! Narrator: Goemon and his allies receive an Enigmatic Bean! ...what on Earth does he mean by 'enigmatic' anyway? Huh! Looks like we might have an item trading chain? We handed off the Sandal Strap that was given to us by the young girl we rescued back in Hagure Town, and now we have a bean for our troubles. An Enigmatic one! 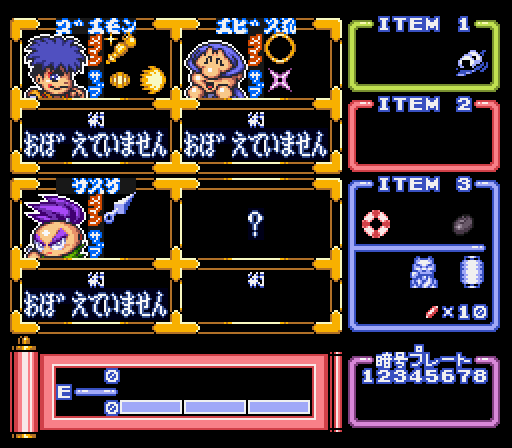 And there it is on our subscreen, sitting where the strap used to be. Also, Sasuke's portrait! Like Ebisumaru and Goemon he still does not have a special ability. He's even lacking a sub-weapon, for now anyway....  Also in Festival Town is a Travel Center! This will let me return to Hagure Town if I so desired. (I also forgot to mention this when I covered it a few updates ago, but the receptionist at each Travel Center greets you with a 'Irasshaimase!' voice clip to welcome you in, though neither the Stores nor Inns do this)  Village Anyway, just to test it out, here we are back in Hagure Town. 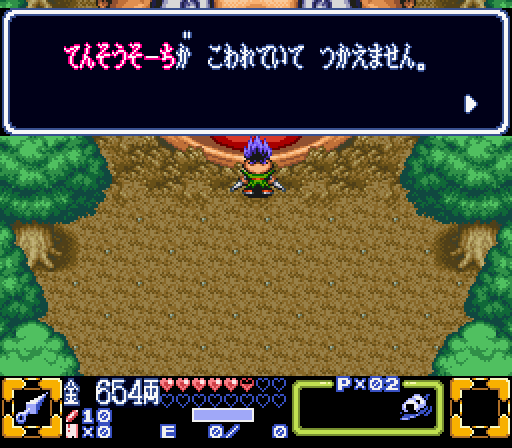 I even return back to Impact's head to point out that, no, you cannot return to the Wise Ol' Man's house once you clear it. I even replayed the stage and passed on the Fortune Cat statues just to see if the game would be kind to the player and let them return if something was missed in the stage, like Zelda II does with its dungeons, but nope! There's no going back to get them. Definitely a mark on the game's record what with it having a 100% complete reward. 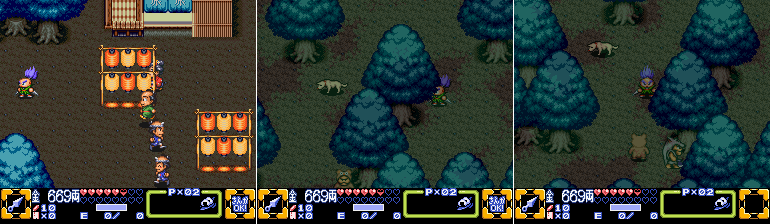 Festival Town Returning to Festival Town, I head out through the other exit into a forest. A forest full.. of bandits! Y'know I neglected to give ol' Bearskin an enemy profile when I ran into him earlier. Let's fix that shall we? Last edited by SpoonyBardOL; 12-03-2017 at 10:38 AM. |
|
#22
04-16-2015, 07:19 PM
|
|||
|
|||
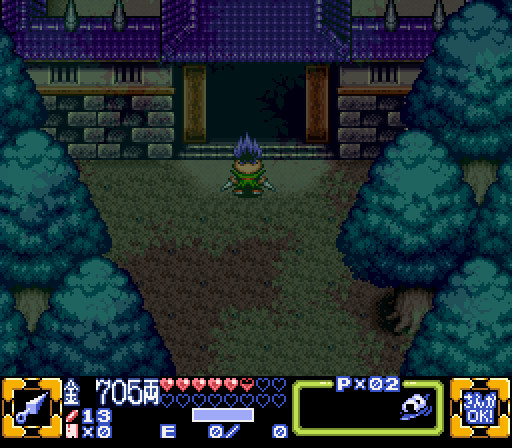
 Name: Ol' Bearskin Ol' Bearskin hangs out in the forests and mountains outside of towns with his many, many identical brothers to rob people. They're not very good at it, why do you think they're all stuck wearing hides? Sure, they can kill and skin bears like a pro, but can't hold into money to save their lives. Tend to charge blindly at any non-bandit they see, oblivious to the fact that they can be struck down in one hit. Also there's a second enemy hanging around the forest here!  Name: Wolfy Bigaxe Unlike Ol' Bearskin, Wolfy has no trouble robbing random villagers and liberating them of their monies. It's how he afforded his lovely giant axe! But he sticks around the forests wearing wolfskins anyway because he likes staying in touch with nature or some nonsense. Wolfy lumbers around and doesn't chase his prey, though he'll swing his axe if they get close. But he can survive TWO strikes, making him more durable than most foes, and after being hit once his calm demeanor changes and he beings charging right for whoever struck him. Yeah they're nighttime palettes. What? 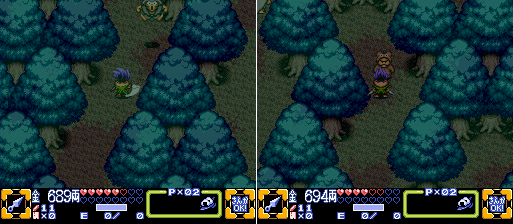 The hide-clad bandits torment me through the forest path. Though I DO love the expression on Wolfy's face when you first strike him. And when facing down, Ol' Bearskin's hood is totally adorable. 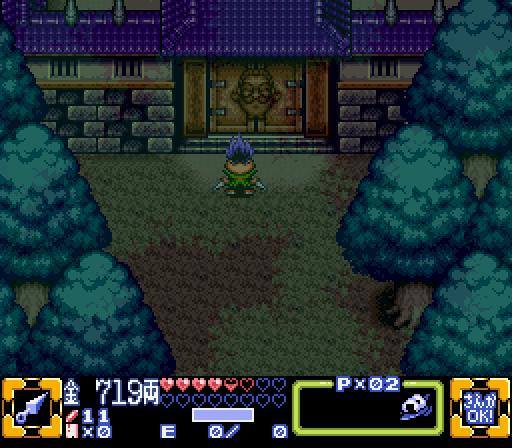 In the northwest part of the forest path we encounter a sealed gate with the Wise Ol' Man's face on it and GEE I WONDER WHERE HIS VACATION HOME CAN BE I HAVE NO IDEA GUYS MIGHT AS WELL GO HOME. There is, unfortunately, no way in as of yet. If only there were some way to blow the door up. If only one of our characters had some sort of secondary weapon that exploded. Oh well! 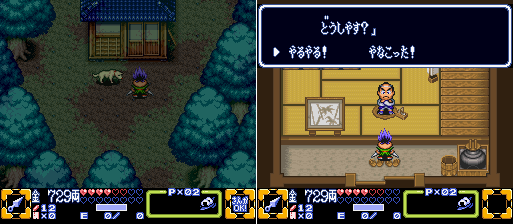 In the northeast part of the forest is this house that probably isn't important at all. Well actually it's super important. Inside is a gruff ol' Fireworks Maker, and it turns out he specifically needs the help of a little mechanical man wielding a kunai. Good thing Sasuke was in the lead of our party when we went inside, eh? 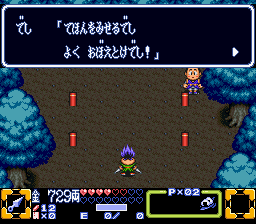 Mini-game time! This is basically Simon Says but with Fireworks. The assistant will run around to each firework launcher... 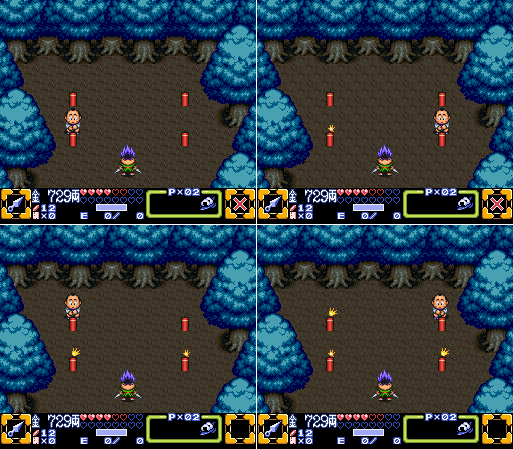 Like-a so. And then we need to hit the launchers with our Kunai in the exact same order to set off the fireworks somehow. I guess Sasuke's Kunai doubles as a flint? 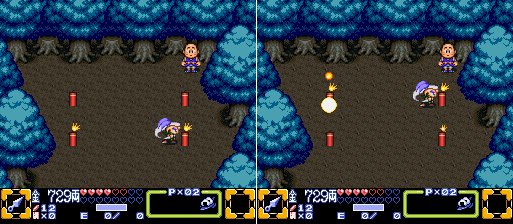 Anyway, remember order, strike fireworks, easy peasy. 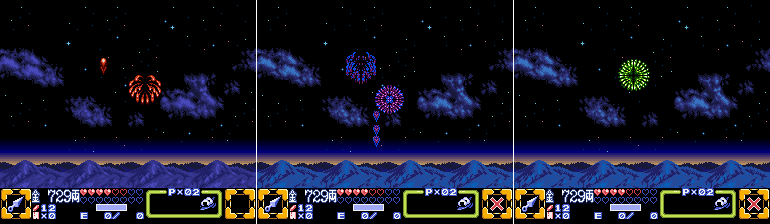 We get a nice fireworks show if we do it right! 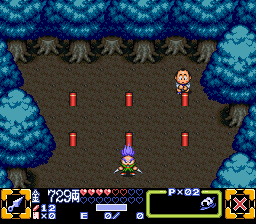 Buuuuut then we have to do the same thing again but with six... 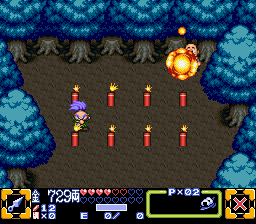 And then eight. Not super difficult, but a tad tedious. I think the game could have just dropped the 4 and 8 versions, and just gave us the one with 6 launchers and left it at that, oh well! 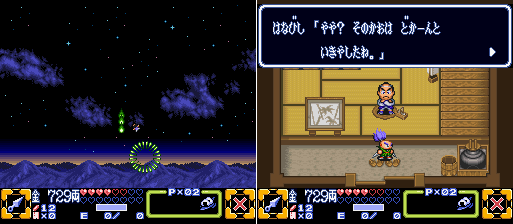 If you happen to screw up the fireworks fail to explode in a dazzling display of light and color that captures the hearts of children. You monster. Also Fireworks Dan here chews you out and you have to restart. Nuts to that. 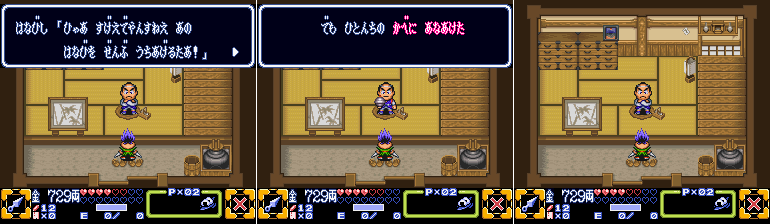 If you don't mess it up you're awarded with Sasuke's Firecracker Bomb! 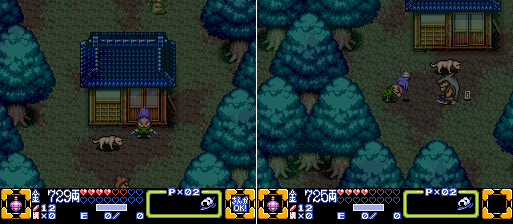 It's, uh, actually a bit ineffective on overworld segments due to how he throws it. It's way better on side-scrolling stages, but here it's super hard to aim right and usually tends to just drop at Sasuke's feet. 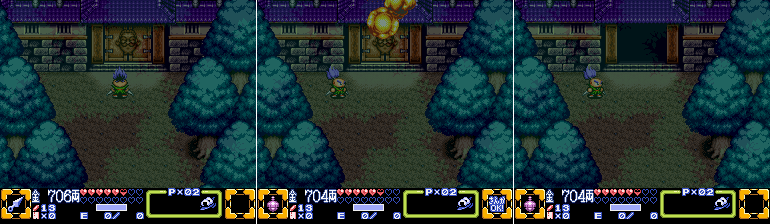 But hey, we don't really need to aim it to blow up the door! The vacation home is open! Time to see a house about a Triton Shell. Which we'll do next time! Laters! Last edited by SpoonyBardOL; 12-03-2017 at 10:40 AM. |
|
#23
04-25-2015, 09:13 AM
|
|||
|
|||
|
Oh man, who's ready for more Ganbare Goemon 3? I know I'm not!
 Ok I'll be honest, this coming section might be my least favorite part of the game. Not to start this update on the wrong foot just out the gate, but still, gotta lay it out there. I'll touch on my reasons why as I go, maybe you'll see where I'm coming from. Anyway, when we left off last time we were at the newly exploded door to the Wise Ol' Man's Vacation House, where we assume we'll find the Triton Shell which we're certainly going to be needing. I'll be using Sasuke for this area. 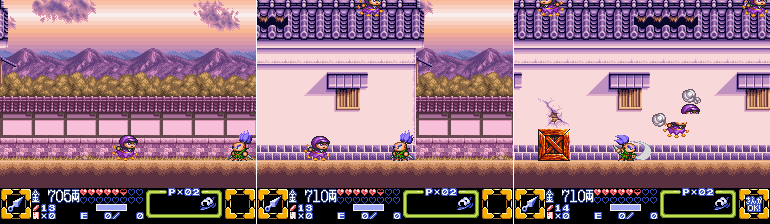 Stage 2: Wise Ol' Man's Villa Well, Villa, Vacation House, either works. Anyway, we start off just inside the gates and are immediately accosted by some Scurryin' Jimmies. Much like in Goemon 2 Sasuke's weapon neatly cuts most enemies in half, instead of simply making them explode like Goemon and Ebisumaru's weapons do. Even better, unlike Goemon 2 the bisected enemies still drop items so you don't have to worry about using Sasuke. Go ahead and slice em up to your heart's content. Anyway, along the way we pass by a suspicious hole in the outer roof that we cannot reach at all...  ... and a rather obvious crack in the wall with a pushable block under it. We find our way is blocked if we try to go any further, though since we JUST blew up a door to get inside using Sasuke's Firecracker Bomb it's pretty obvious what you need to do here. And the pushable block is a good hint that you need to have footing under holes in the walls like these in order to go in. I also like that the one block high platform keeps you from pushing the block up against the wall and getting it stuck. So, kudos for that much Stage 2. 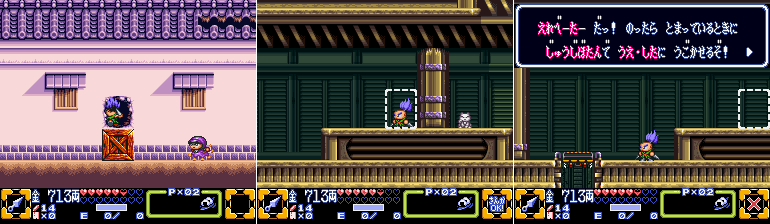 Immediately upon entering we see a Fortune Cat we cannot reach, and an elevator heading down. You'll also notice, if you didn't already from the outer area, that the tileset here is mostly the same one used in Stage 1, though with a different palette. Sure reused graphics aren't a big deal, but Stage 2 being so visually similar to Stage 1 might give someone the impression that the whole game is going to look kinda samey, and that really won't be the case. At the very least the tiles are used differently, and some tiles you only saw briefly in Stage 1 make more common appearances here, so at least the reused resources are smartly handled. 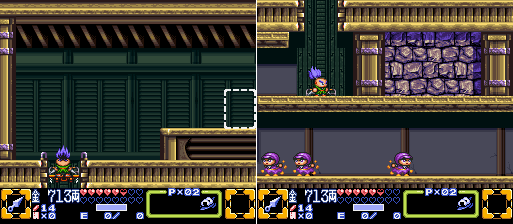 We head down and find ourselves in a basement, with an even lower area we can't access right now with a whole lot of Jimmies running around. 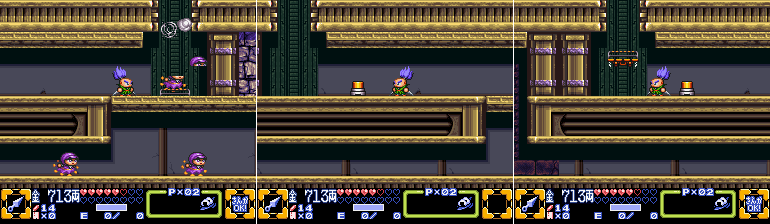 They're up here too, though easily dispatched. We also come across a button which calls an elevator down, which is another smart decision by the level. There will be a few places later on where an elevator is not in a position we can reach and we'll need to find a button to call it so it's good to establish that this is a thing that can happen up front. 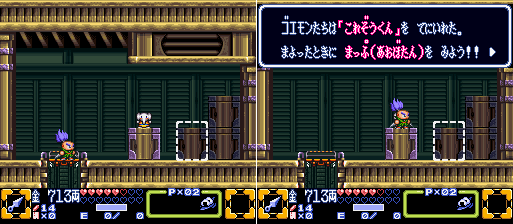 Back on the first floor we come across the Elephant Map right away. Let's get a look at Stage 2... 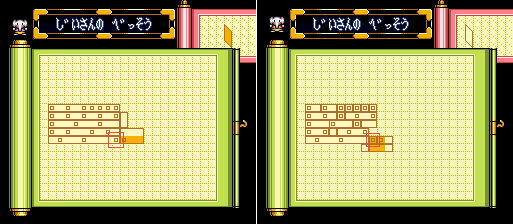 Wow. Well that's another thing differentiating Stage 2 from Stage 1. Where Stage 1 was mostly long hallways broken up by large rooms with a relatively straightforward path from start to finish, Stage 2 is smaller and compact with lots of going back and forth between the front layer and the back layer. The image on the left is the front layer, and the image on the right is the back layer which is where we are now. Just by looking at the image it's kind of hard to tell what the ultimate destination is, but one thing is for sure... There's going to be a LOT of doors. 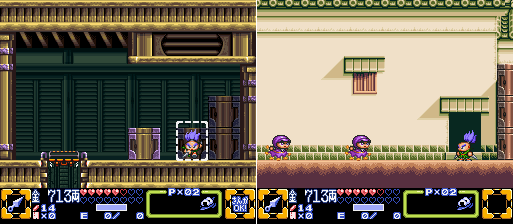 Like this one! It takes us back outside, just to the left of the pile of boxes that barred our way before. 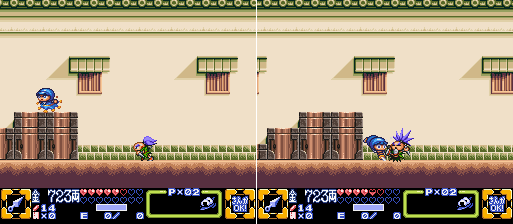 We also come across some Divebombin' Jimmies, who remind us that they're still just a little bit tricky to avoid. Remember, they'll pretty much always score a hit unless you back up as they jump. Though you can also hit them while they're in the air, the timing for this isn't too difficult either. 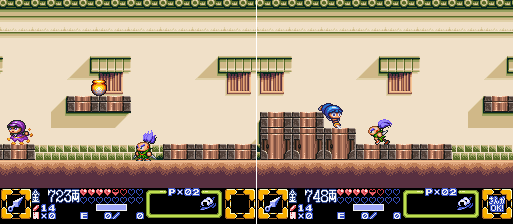 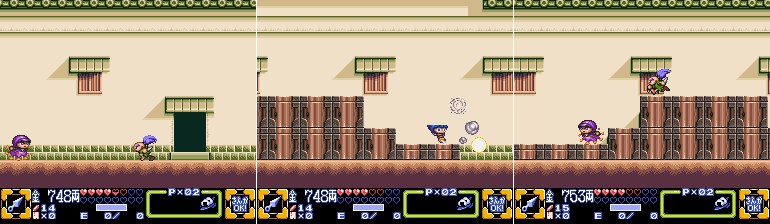 We pass by more Jimmies of varying stripes before we come across another door. I run by it, though, I like to see everything a room has to offer before I go entering doors. 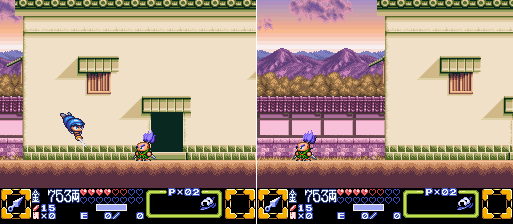 And... that's about all this room has to offer. Oh well! 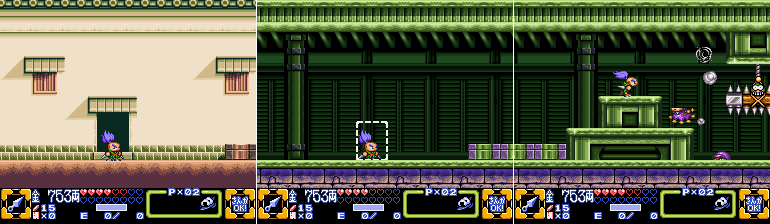 Entering the leftmost door another Scurryin' Jimmy tries and fails to get the better of Sasuke. Incidentally, I do like the dotted-line door which indicates when you have a door leading to the front layer from the back. You even enter it by pressing down, not up. 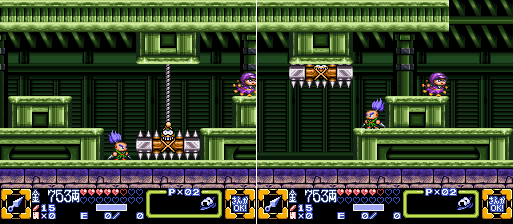 We pass by some spikey crushy stage hazards and.... hey wait, that thing has a face! Considering that Stage 2 would otherwise have no new enemies (spoilers) I'll go ahead and include this poor thing among the legit enemy roster. Congratulations Stompy!  Name: Stompy Why, Wise Ol' Man, why would you create something like this? Just look at that face, it clearly isn't enjoying itself! Its entire lot in life is to slam hard to the ground, and slowly climb the chain back up only to slam down again. It doesn't even get a breather to wait for an intruder to walk under it, it just keeps going up and down on a schedule. Such a pitiful existence. 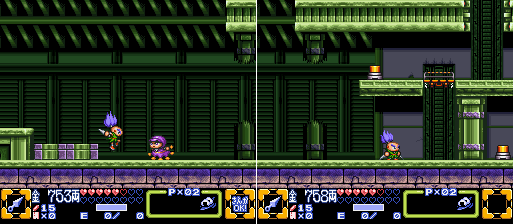 Anyway, further ahead we come across an elevator we can't reach, and a switch we can't hit. We were supposed to enter the first door we came across first, weren't we? Goddammit... 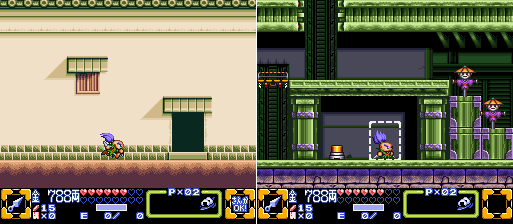 Backtracking to said door.. yup, there's a room with a switch and nuffin else. 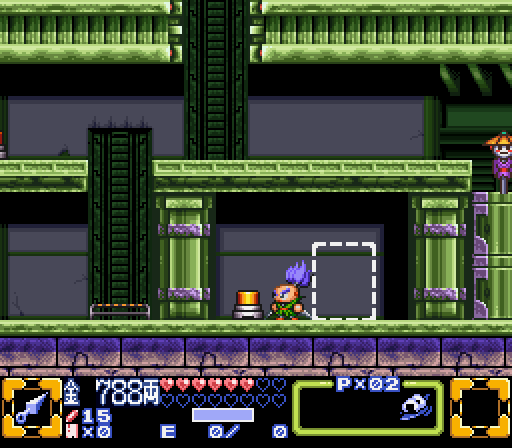 And wouldn't you know it, hitting it causes the elevator we just couldn't do anything with to lower. Here's another thing about Stage 2, a lot of the time it doesn't try to trick you and the correct path usually is the first one you come across... but this isn't ALWAYS the case and sometimes you do need to explore ahead of yourself to find the right way forward. Guess how often I make the wrong choice? 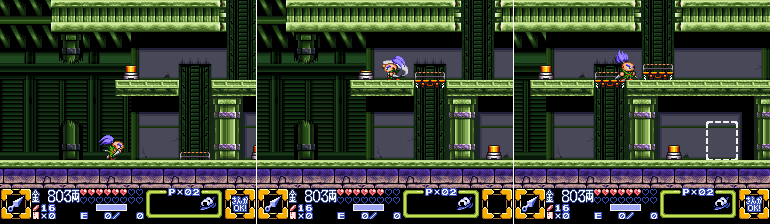 Anyway, I get back to the elevator and hit the other button, which calls ANOTHER elevator. It's some real Elevator Action. Last edited by SpoonyBardOL; 12-03-2017 at 10:48 AM. |
|
#24
04-25-2015, 09:17 AM
|
|||
|
|||
 Though before I go up to the next floor I head to the right and take down some more mooks. 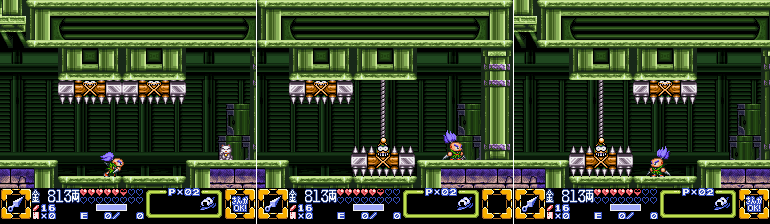 And am rewarded for exploring by this stage's first Fortune Cat Doll. 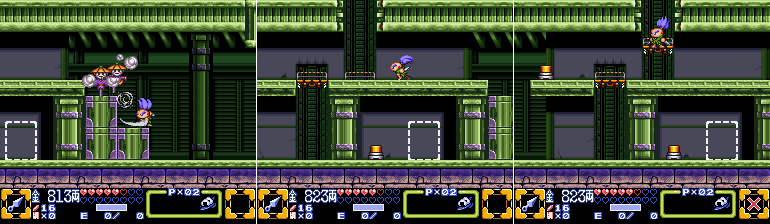 Enemies respawn when you scroll them a bit off screen, by the way. Not a huge deal since most foes go down in one hit, a lot of them are just cannon fodder. Like these Strawhatted Shooters, hell if anything they're easier to deal with while they have the high ground. 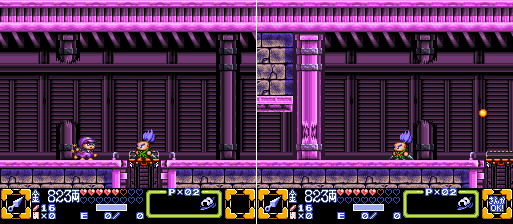 The next floor up is very pink. I suppose that since this entire stage is so compact with samey looking graphics they had to differentiate the floors somehow, so drastic color changes it is! 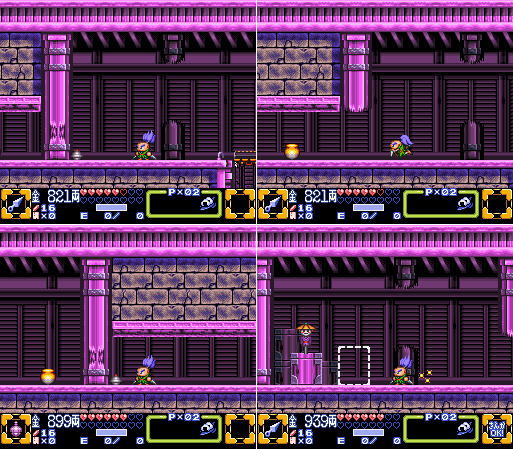 Also there was a cracked wall, and by now it should be obvious that one of the smaller themes to this stage is blowin' up walls with the Firecracker Bomb. 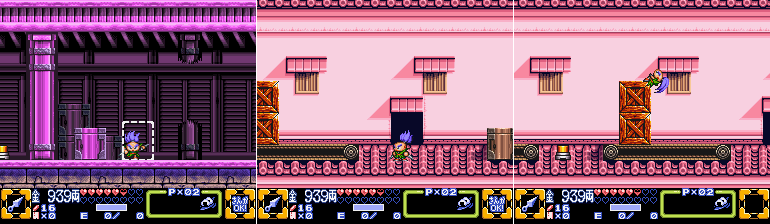 Heading outside we see what looks like a conveyer belt, though it isn't moving, and some boxes stacked on it. The boxes are too high to jump over, and with two stacked together they're too heavy to push. 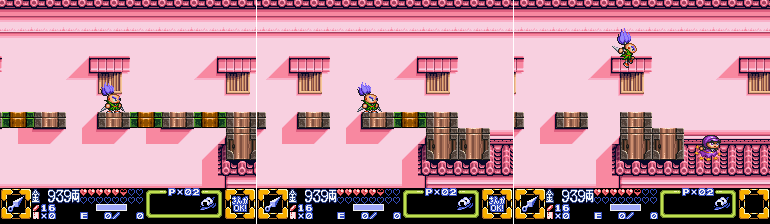 Heading to the left we come across some green platforms which drop as you step on them. The pit here is not fatal, fortunately, nor does it even do any damage like the drop from the walkway at the end of Stage 1. Unfortunately it will drop you down to the previous level, so you'll want to avoid it all the same. 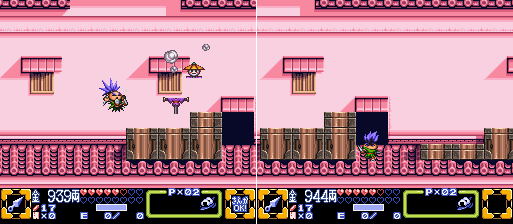 Hey a door! Let's go inside right away instead of going onward and ignoring it, surely it will be the right decision! 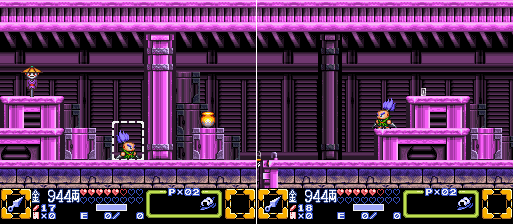 Except it's just the same room we arrived in, just further to the right. Probably... probably should have looked around a bit more first. Oh well! 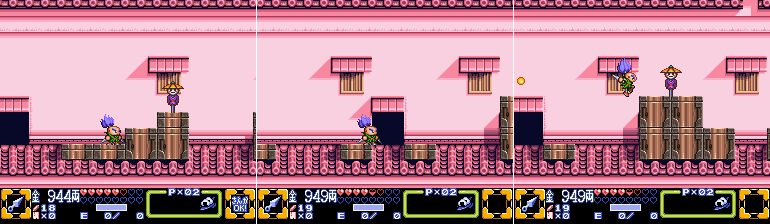 Back outside we come across another door, and wall we cannot jump over. The shape of the platform and the Strawhatted Shooter on top suggests there must be a way over there though. 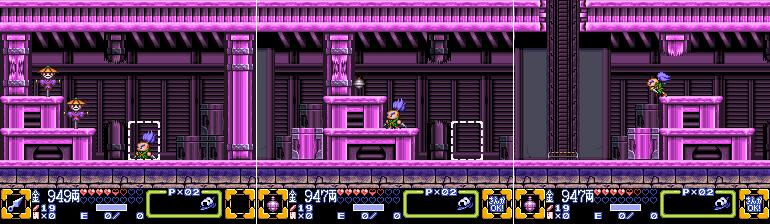 No time to worry about that now. Going in the door we come across a cracked wall and an elevator up. 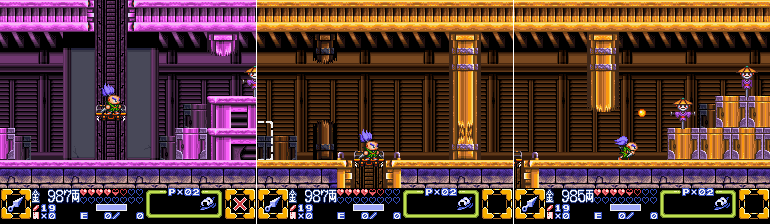 Now the palette is brown (orange? tan?). There's a door to our left, but let's see what the rest of the room has to offer beyond the exploded wall. 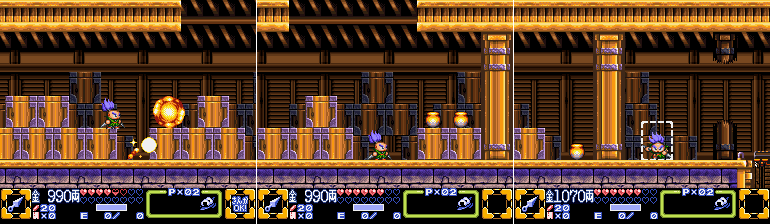 A sparkling Takoyaki Dango, some Ryo pots, and a dead end. Great. 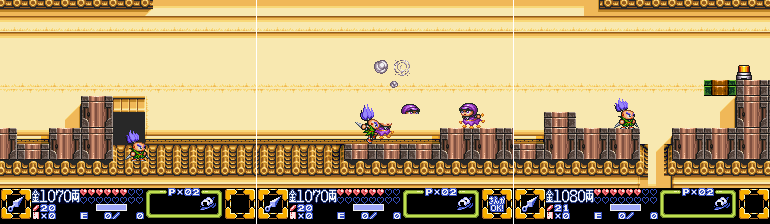 So going in the door there's a wall we cannot leap over to our left, and a suspicious platform next to a switch on the right. There's also a tiny suspicious pit, and you know what we do with tiny suspicious pits? "Avoid them?" Ha ha ha, I reeeeaaaally should have. 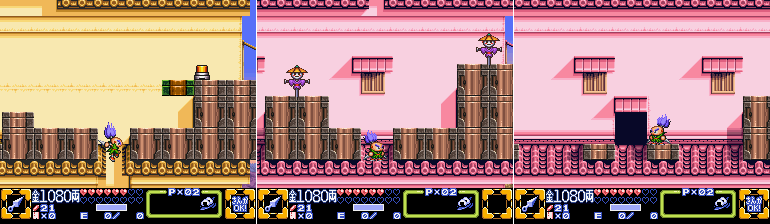 But nope! Banzai! It takes us back down to the floor below, on the other side of that one platform we couldn't scale, and there's nothing on the other side worth mentioning. Oh well, lesson learned! Let's just go back to the elevator and 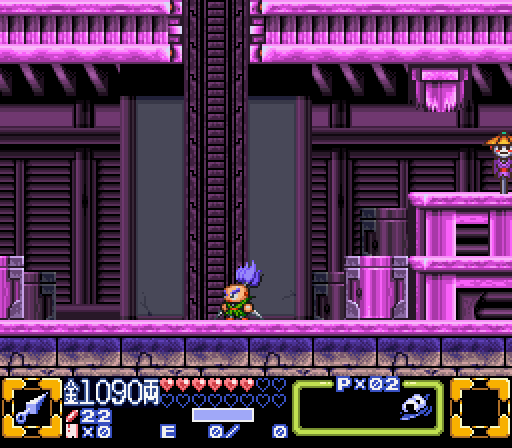 ....aaaaand it's not there. Of course it's not, we left it on the floor above! Fortunately, the game already gave you the information you need here. You already know, after all, that switches can move elevators, so this one SHOULD have a switch somewheres right? 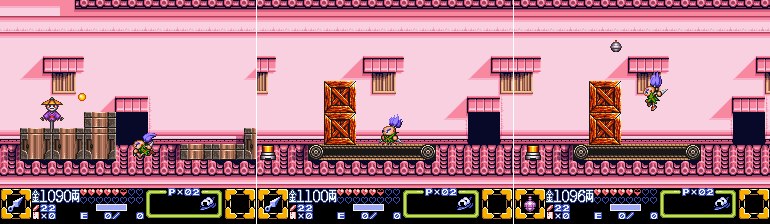 There is. First you head back to the two boxes stacked on the conveyer belt, and keep tossing Firecracker Bombs over them until you hit the switch. 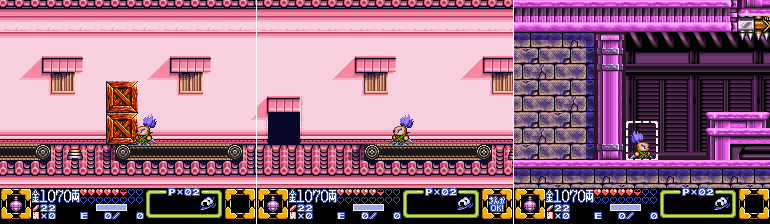 Doing so activates the conveyer belt, moving the boxes out of the way. From there you can continue onward to the other room on this floor. 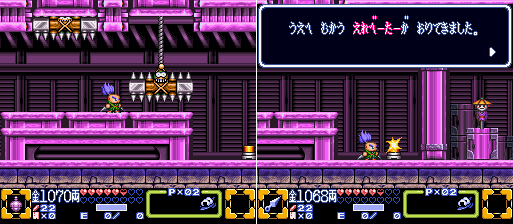 Whereupon you'll find a pair of Stompies, and the switch that calls the elevator. Note that the elevator was already in the bottom position when we came across it first, meaning you never need to hit this switch. The entire 'toss a Firecracker Bomb over the boxes' puzzle exists solely for the purpose of providing players who fall from the floor below a way back up. I'm still on the fence on whether this is dickish or clever... Last edited by SpoonyBardOL; 12-03-2017 at 10:49 AM. |
|
#25
04-25-2015, 09:24 AM
|
|||
|
|||
 Back up we go, and out the door again. 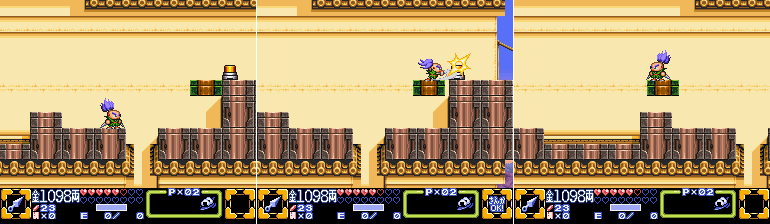 THIS time we hit the switch and ride the now-moving platform like we should have from the start.  It takes us over the wall we couldn't clear before, and over a pit that we also would not be able to clear. Of course if you fall here it's back down to the floor below and you'll have to go hit that switch again. Nuts to that. The game at least provides a visible track that the platform follows so you can easily see where it's going to stop. You don't have much time to leap off it once it does, so don't miss your chance or you're headed back down to the floor below anyway! 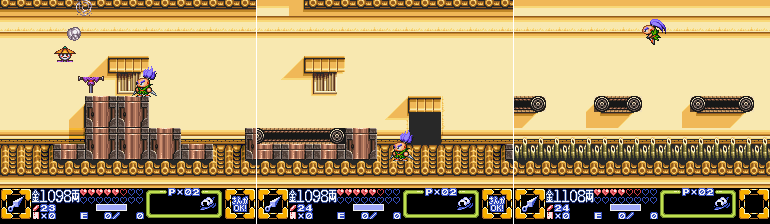 New door, I'ma pass on it again for now. Yes I know it may be the wrong decision, but I've already started second guessing the level and at this point I'm not even sure what it wants. 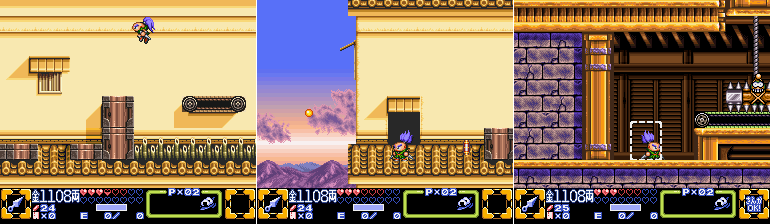 A second door to explore, and a decent view. Inside we find some more Stompies... 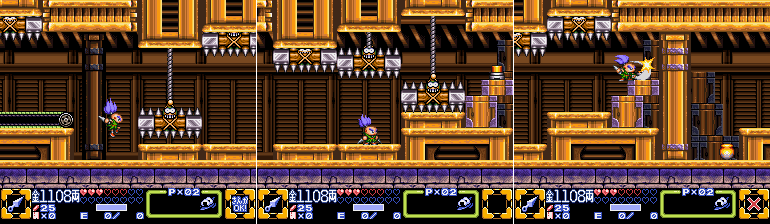 ...LOTS more Stompies, and a switch! Hah! I did the right thing this time! You were supposed to find this switch first! 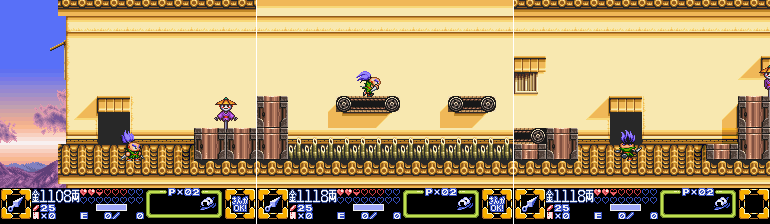 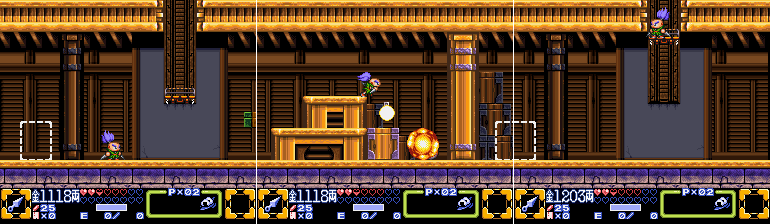 Because it calls THIS elevator, which wouldn't be there if you didn't hit it. I'm getting wise to your game, Stage 2. 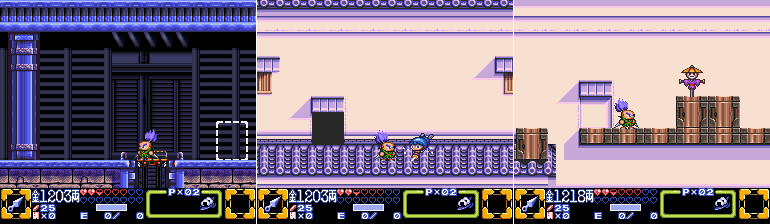 And now we're in purple town. Or is it dark blue? Whatever. Heading outside and to the right we come across what looks like a closed door. No getting in just yet. 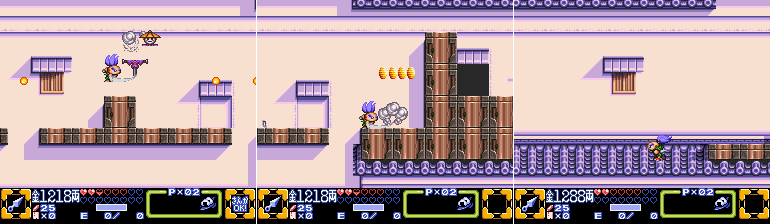 Another closed door, and another impassable wall, dammit. Though that other open door that we cannot get to just yet looks important. I forgot to open up the map and get another screenshot, but that door would be on the right-most edge of this screen. Where on earth could it even lead? No worrying about that for now, back to the left! 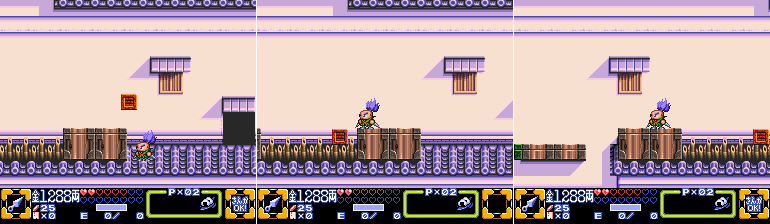 Just to the left of the door we exited earlier there's a throwable block right next to a bed of bamboo spikes. Fortunately we don't need to throw it far to clear them. They're not even instant death either, no matter how spike-like they look or how much Sasuke looks like a Little Metal Boy. 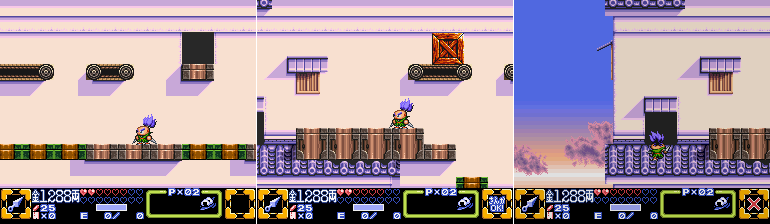 Another open door that can only be reached by those conveyer belts, but they're not moving right now and there's no way to reach them. 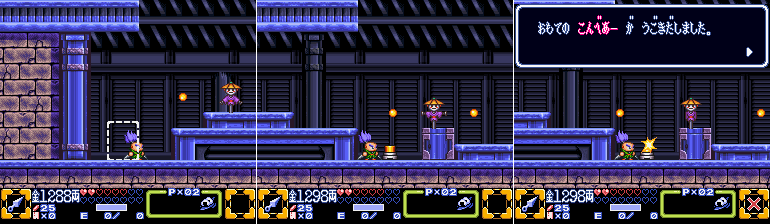 The switch to turn them on, though, is not far. 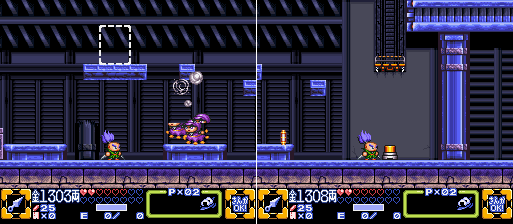 You can explore the rest of the room if you'd like, but it will just show you where you're soon going to go. Though there is a switch to call that elevator, if you fall back down after heading up and need to return. 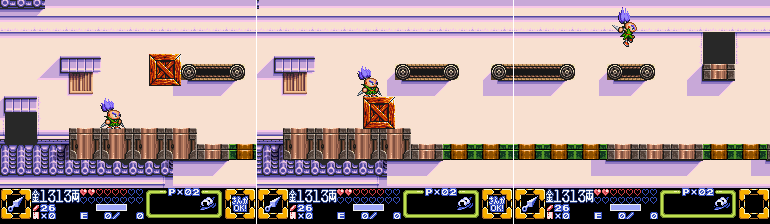 Back outside the conveyer belt moves, the block falls, and he door is now accessible. 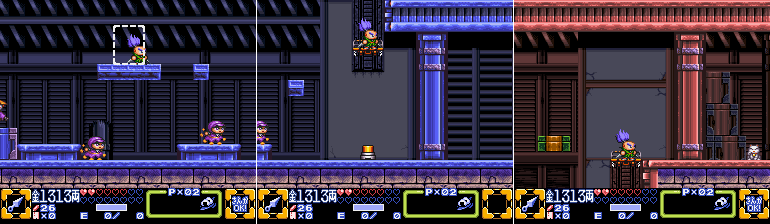 And the new floor is... magenta? Also, hi Fortune Cat! We'll get to you soon! 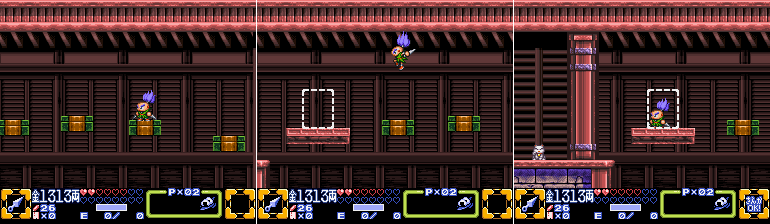 ...and your friend too. Wow, this Stage had one Fortune Cat near the start and nothing until now, when it throws two at us at once. 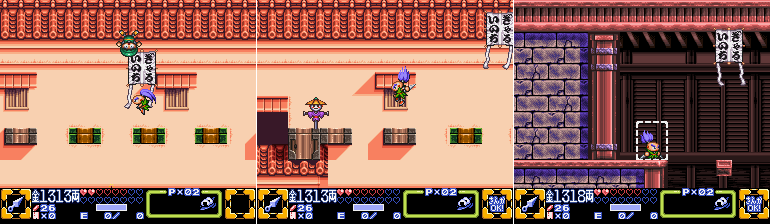 Back outside the Kite-Ridin' Jimmies make their return appearance. They're also the only other enemy to appear in this stage. As I said before, no new enemies at all, unless you count Stompy. 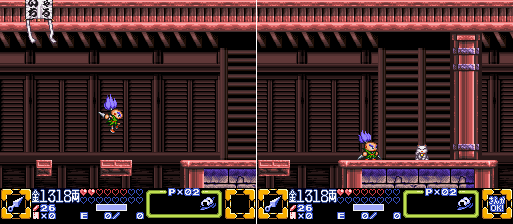 Anyway, the outer door to the left brings us to one of the Fortune Cats. 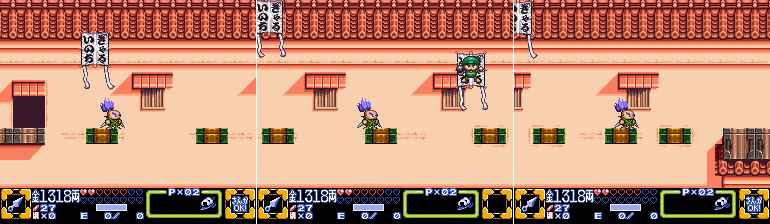 While heading to the right brings us to a treacherous area with falling platforms and Kite-Ridin' Jimmies. It's pretty easy to fall here and have to retrace your steps, so be careful. Last edited by SpoonyBardOL; 12-03-2017 at 10:50 AM. |
|
#26
04-25-2015, 09:28 AM
|
|||
|
|||
 Hey more closed doors. And another stretch with some Kite-Ridin' Jimmies, but at least these aren't falling platforms right? They CAN be exploded by their bombs, though, so there's a greater pressure to take them out first. 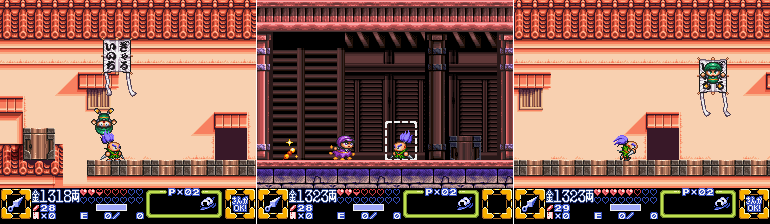 Anyway, one door leads us to some Sparking Takoyaki Dango, which was appreciated by this point. 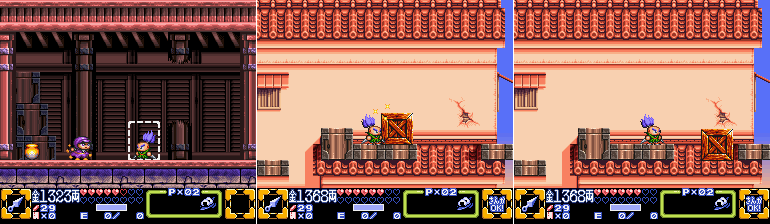 And the next just leads to some money. But just a bit further to the right is a wall with another crack in it and a pushable block. I don't really need to spell it out for you do I? 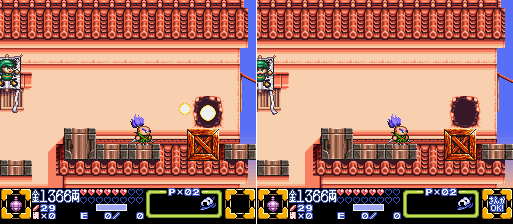 Boom. 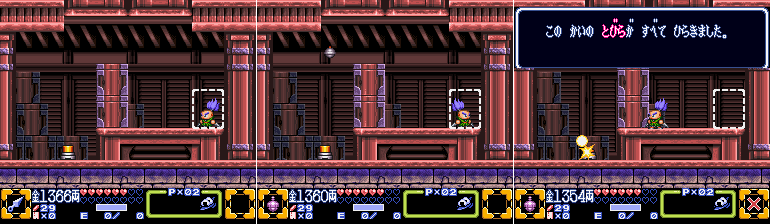 Here's another 'toss a Firecracker Bomb over a wall' puzzle, if you could call it that. Really the challenge here is less figuring out what to do and more actually executing it, since the arc of the bombs is kind of weird. You have to have a bit of forward momentum yourself to get the bomb to fly forward enough, but too much and you'll miss the switch entirely. It will most certainly take a few tries. 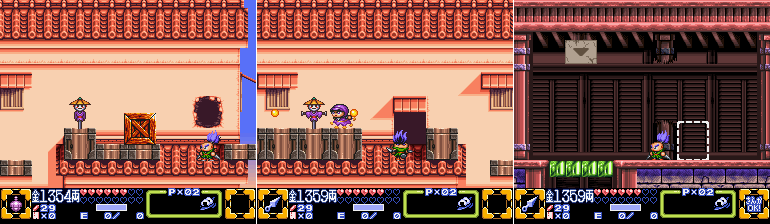 But hey, that opened up those closed doors on this floor. The first door we encounter to the left takes us to a room with suspicious green crystals and an arrow pointing down. How mysterious! 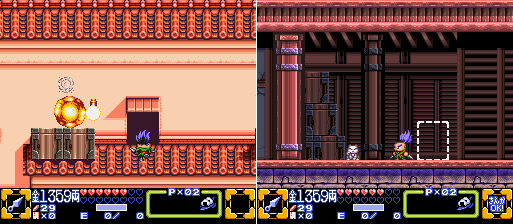 Before I do anything with them though I head back out and go back to the left to the other door that was closed and pick up that first Fortune Cat I saw when I arrived on this floor. One more to go for this stage, and we already saw it when we first went inside, so we're probably heading straight down at some point! 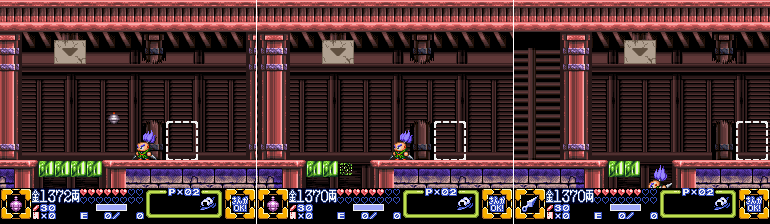 Anyway, these green crystals. Like most every other obstacle in this stage you get rid of it with Sasuke's Firecracker Bomb. It's not as plainly obvious, though, since the crystals aren't cracked in any way or otherwise hint that they're explosive. But the player only has so many options available to them at this point so they're bound to try a Firecracker Bomb sooner or later. At the very least these blocks explode on contact with a bomb, rather than having to wait for it to naturally explode on its own. 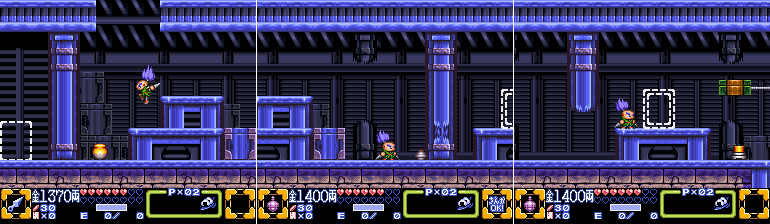 Down below there's another damaged wall, and a dotted door outline with a second pattern inside of it. This indicates a closed door from the other side, so you can't enter this yet. Since we're back on the purple floor then it's clear this is one of those two closed doors we saw much earlier. 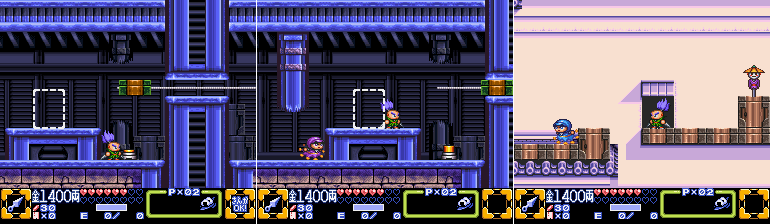 Hitting the switch causes the platform to move through a gap we can't fit through, but it also opens the door. If you'll recall the purple floor had two closed doors fairly close together, so what needs to be done here is pretty clear. 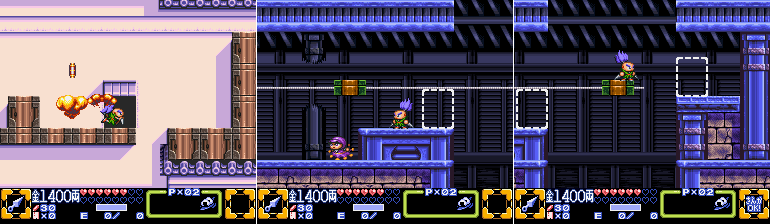 Head outside and run to the other door before the platform passes it by. 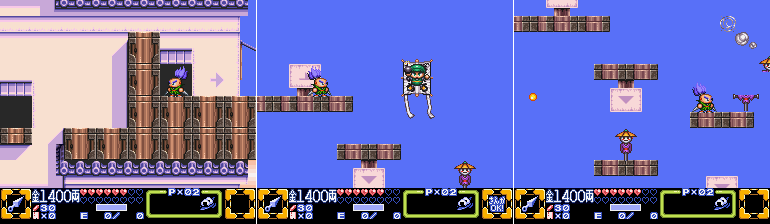 This grants you access to another door you saw earlier on but couldn't reach, with another arrow pointing out which way to go. It might seem obvious, but really, it's kind of necessary to point out since every other screen boundary in the outer areas wouldn't take you anywhere when you walked up to them. This area takes you straight down. You're pretty close to the entrance of the stage now, except coming at it from above. 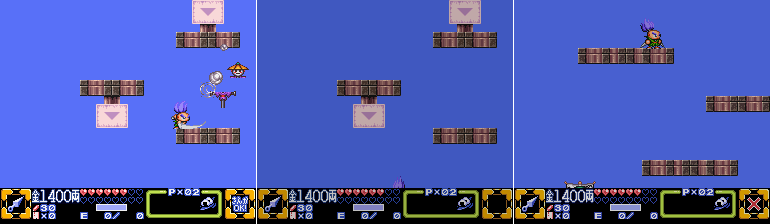 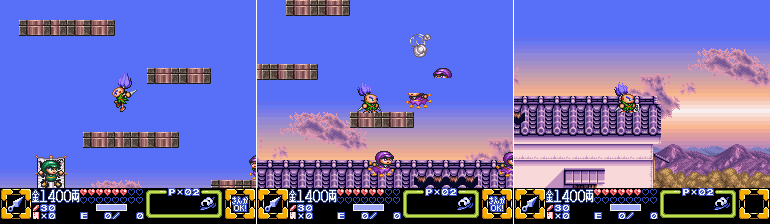 As we keep heading down we eventually reach the first area again. If we were so inclined to redo the entire stage we could jump off the right side here, but this is the LAST part of the game that needs to be re-tread. 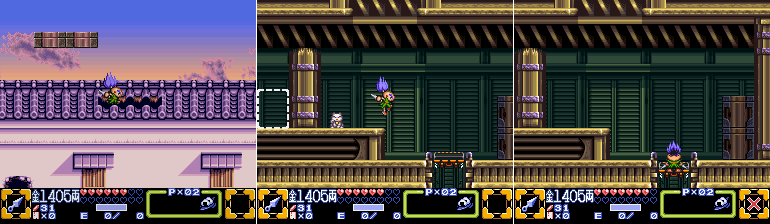 So instead we jump in that hole in the roof we saw way back at the start. It takes us to the first Fortune Cat we saw, which brings our total up to four again, and awards us another Heart! We take the elevator down, and... 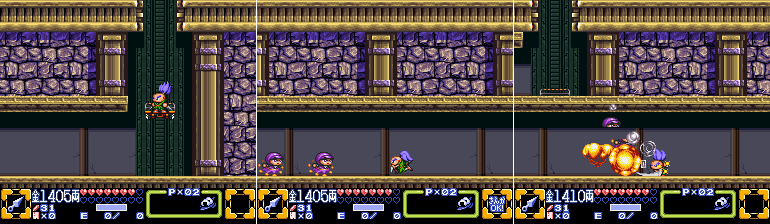 ...we come across that inaccessible hallway from the start. The Scurryin' Jimmies aren't any more threatening even if there's a bunch of em. 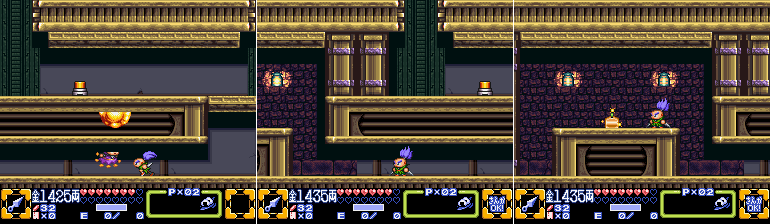 And finally, at the very end of the Wise Ol' Man's Villa, which was ironically right at the start, we find the Triton Shell! That is not at all shaped like a Shell. More like a card, really. Probably wouldn't make much noise if you blew into that. ... ...that's not the Triton Shell, is it? 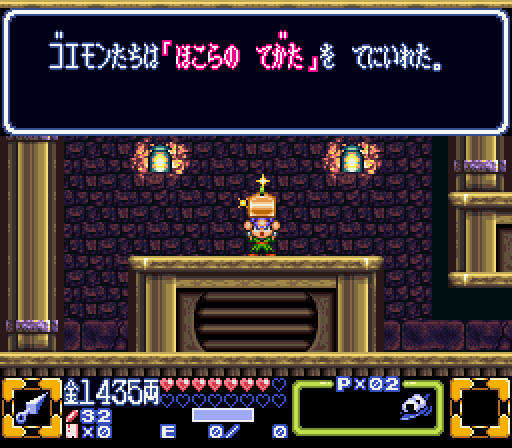 Fanfare Instead, it's some manner of Shrine IOU. Or rather, it's a note that what was supposed to be here has instead been moved to some kind of Shrine, I'm assuming. Actually as Syo! points out below, it's more of a Shrine Pass, but either way the result is the same. The Triton Shell is not here, and has probably been relocated to a shrine somewhere. Wise Ol' Man you jerk. (But hey that fanfare should be familiar to anyone who played Mystical Ninja Starring Goemon) 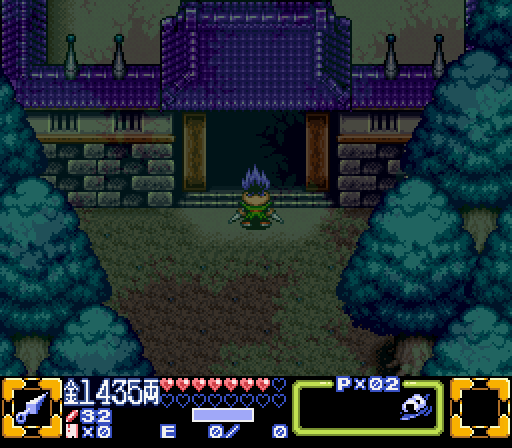 Welp, we're exactly back where we started at the beginning of this update. Literally! We gained practically nothing from he Villa and now the party has no leads. What will they do now? Something will probably come up... Next Time! Sooooooo yeah, Stage 2. It's probably my least favorite part of the game. Reused tiles from Stage 1, samey looking areas that are largely differentiated by color rather than design, none of the fun set pieces that Stage 1 had (flippy platforms, a chase through a water way, the climb to the attic, the skyway at the end), no new enemies besides Stompy, not even a boss! It really feels like filler, and it's a shame it's so early in the game. Don't worry though, it's mostly up from here. You'll see! Also, quick question, how's the screenshot spam? I like to be thorough, but sometimes I wonder if I'm being a bit too meticulous. But it might just be how samey Stage 2 looks as well. What do you guys think? Last edited by SpoonyBardOL; 12-03-2017 at 10:51 AM. |
|
#27
04-27-2015, 06:49 AM
|
|||
|
|||
|
Also, not that I'm trying to bump it for attention, but I'd like to have the thread reach page two before the next update, it's getting kind of image-heavy here.
Maybe I should use fewer images per post instead of around twenty? |
|
#29
04-27-2015, 09:17 AM
|
|||
|
|||
|
Appreciate resuming an LP dormant for 3 years
 I'd like to point out; What you repeatedly refer to as "Takoyaki" is Dango, a Japanese dumpling/rice sweets. You can see more here: http://en.wikipedia.org/wiki/Dango Also, the screen Quote:
hokora = a variety of small Shinto shrine tegata = an old form of pass used centuries ago, usually a wood board So basically it means now you can enter a small shrine somewhere on map. |

|
#30
04-27-2015, 10:17 AM
|
|||
|
|||
|
Quote:
Quote:
|