
-
Welcome to Talking Time's third iteration! If you would like to register for an account, or have already registered but have not yet been confirmed, please read the following:
- The CAPTCHA key's answer is "Percy"
- Once you've completed the registration process please email us from the email you used for registration at percyreghelper@gmail.com and include the username you used for registration
Once you have completed these steps, Moderation Staff will be able to get your account approved.
4x4 = -wait, what's the title? Let's Play Ganbare Goemon 3!
Back to Let's Play
< 1 2 3 4 5 >
< 1 2 3 4 5 >
|
#61
 05-23-2015, 09:17 AM
|
|||
|
|||
|
Top o' the Saturday to ya, let's play some Ganbare Goemon 3!
Last time, we left off with Goemon and Pals about to storm a factory belonging to the notorious Band of Mechanical Thieves. 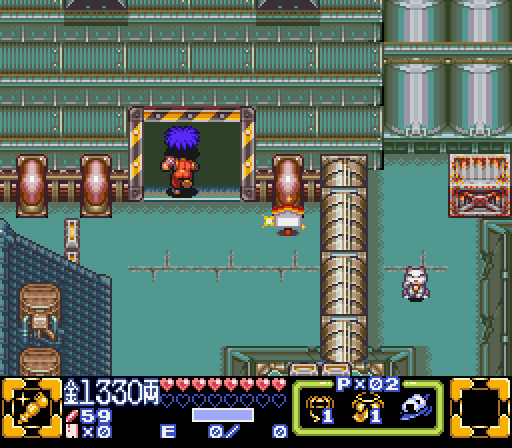 Future Overworld Sooooooooo let's get to stormin'! 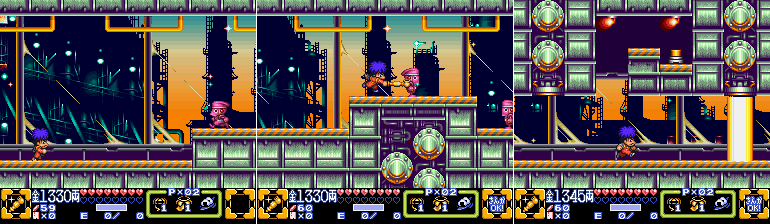 Stage 4 - Walker Factory Oh man, it's been a couple of updates since we've had an actual side scrolling stage. This one's a doozy too. Don't get me wrong, I appreciated Stage 3 for not being Stage 2 and all, but it was kinda blink and you miss it. Not the case here. Also that stage BGM is pretty dang catchy. Anyway, after a few varieties of Bimmies, we come across the first barrier in the dungeon. This one requires Ebisumaru's Super Shuriken, so thankfully we did all that malarkey with the Cat Burglar. If you didn't, well, you'd be turning your butt right around at this point. 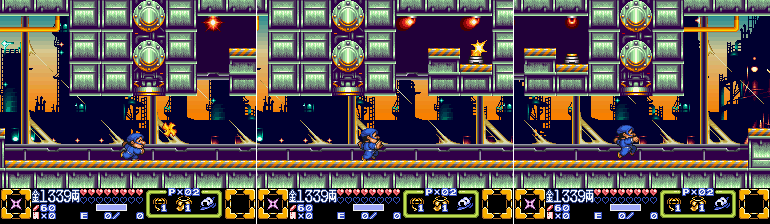 You have to stand back a bit to hit it just right, since Ebisumaru fires it at an angle upward from the start. 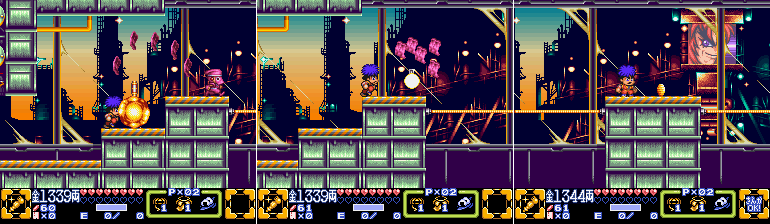 Just a bit further ahead, some open pits have rope suspended between them, which gives our jumps a bit of extra bounce. And in the background on a monitor there's some redhead with 80s glam rocker hair and a pair of fantastic eyebrows....  I'll be honest, I was thinking about doing this whole thing about being coy on his identity and making up random nonsense every time his likeness popped up, but no one has time for that. There's only one person that could possibly be anyway so it's not even really a spoiler, that's 'Lord Juurokubei' mocking us in the background. Just you wait, you'll get yours Juurokubei! You AND your eyebrows! 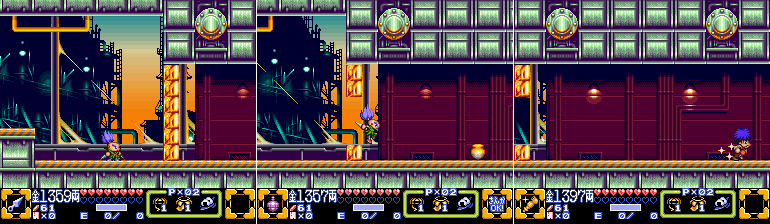 Just beyond there is a Firecracker Bomb wall that we need Sasuke to take care of. I'll be sticking with Goemon for most of this stage otherwise, though, just because. 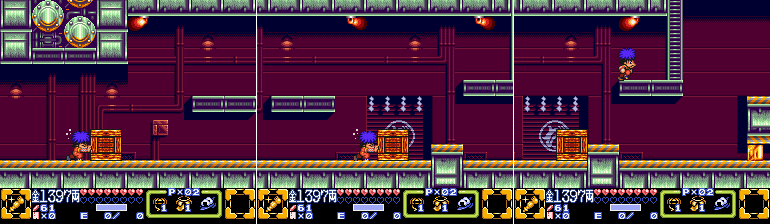 The next room has us pushing blocks around to reach a ladder. You might be tempted to climb up right away, but that would be a mistake. You want to crawl through that small opening blocked off by a Firecracker Block.  I said I'd stick with Goemon, but I just had to use that screenshot of Sasuke in mid-attack pose. Just looks kinda badass is all, especially with the bisected enemy being blown away. 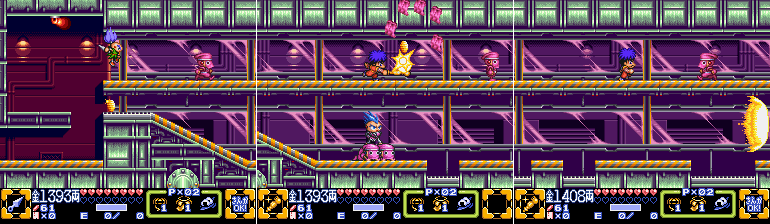 Oh hey, a new enemy! Oh... it's just a future version of a Sass You Kay. Ehhhh...  Future Version of a Sass You Kay: Does what it says on the tin. Last edited by SpoonyBardOL; 12-09-2017 at 06:28 AM. |

|
#62
05-23-2015, 09:20 AM
|
|||
|
|||
 At the end of this room is a new stage element we have to deal with now that we're in the Future: keycards. They basically function like your standard Legend of Zelda key, use em up to unlock basic doors. There's even a Gold Keycard later for golden doors. The game was flirting with it before, but it's here that its overall direction takes a hard left turn towards Zeldatown. The stages from here on out basically resemble side-scrolling Zelda dungeons... so kinda like if Zelda 2 got a bit of an upgrade I guess? And now that little card counter underneath the scroll counter has a use. 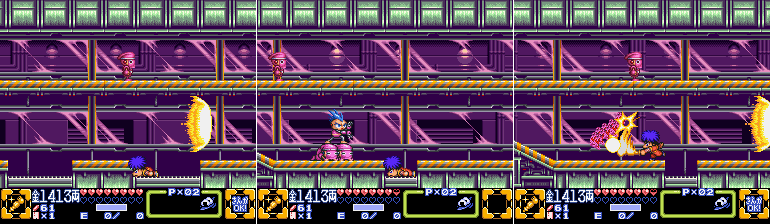 More duck 'n progress shenanigans, we saw this back in Stage 1, though the timing this time around is a bit less forgiving. 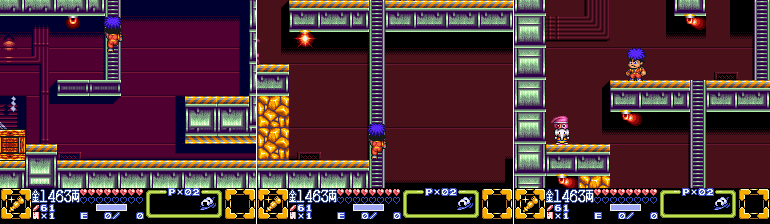 Stage 4, Part Two Ok, NOW we can return to the ladder and climb up. And once we do the stage BGM changes to something entirely different. Honestly I'm not a fan of the change here, but it is what it is. Even if you climb back down to the lower area the new BGM sticks, by the way. As we climb up the ladder here we see some conspicuous stone blocks to the left which appear to be obstructing a rather large door. 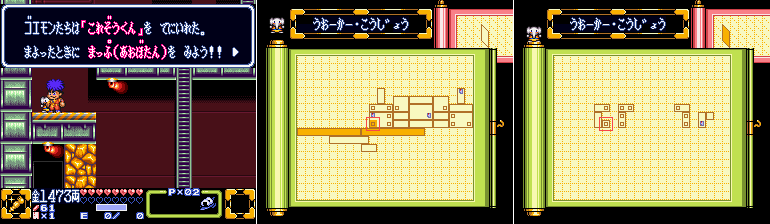 And just to the left from the top of the ladder is the Elephant Map! We're not missing anything in the first map image, that is the entire width of the dungeon on the Front Layer, lucky for us. It might not look too big at first glance, but there's a lot of ground to cover in this place. The dungeon map is courteous enough to come with a built-in keycard radar, so no need to find a second item for that function. 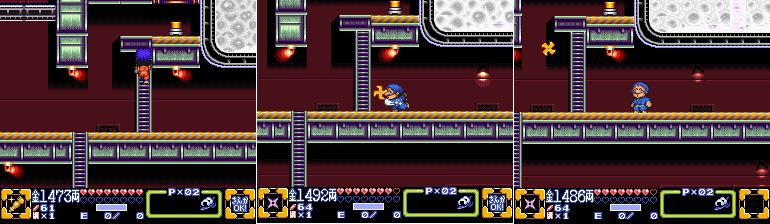 Just a bit further up is another switch we need Ebisumaru's Super Shuriken to reach. And, I'm gonna be honest with you guys, you're gonna see some inconsistencies with the screenshots going forward. See, despite doing a full playthrough of the game right before starting this LP I STILL got lost in a few places in this stage. Yes, that's right, this stage is far less linear than the three before it. It still essentially has a single correct path through the whole thing, but you have a lot more opportunities to go off the beaten path, though it doesn't amount to much. If I included all of my running around then this entire update would be about 1.5x longer than it currently is, so I cut out the aimless portions. Though this meant that I didn't have adequate screenshots for some areas since I was lax in re-taking shots when I revisited them, so I added in screenshots from earlier in my run. This means that now and then you'll see that my Ryo, Life, and Keycard quantities don't always add up. So rather than ignore it, let's point it out with a counter, shall we? Time Paradox Count: 1 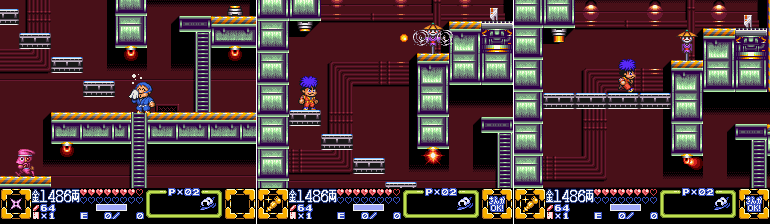 Moving right along, hitting that switch lowers the platforms to the left. It leads to another keycard, but we need to hit this other switch to cause the platforms to retract again so we can claim it. 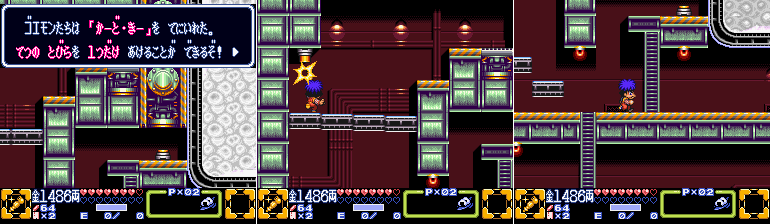 And second verse same as the first, hit switch, lower platforms, move on. 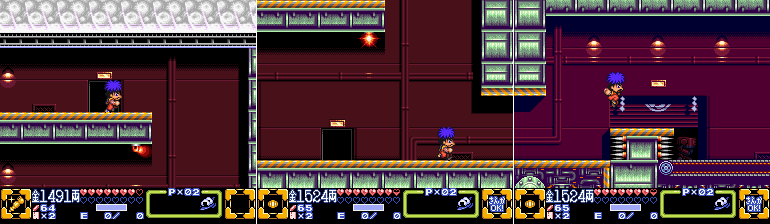 On the far right side of the upper platform is a door we'll be ignoring. It ultimately leads to a dead end. Jumping down to the lower level there's another door we'll ALSO be ignoring. Instead we move on into the next room on the right, which has a conveyer belt with some rather painful looking spikes on the end. Time Paradox Count: 2 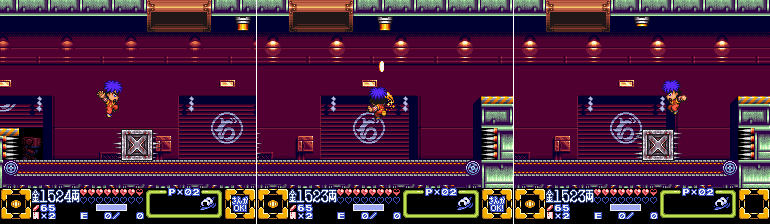 Spiked crates are regularly dispensed from the vent in the ceiling, and they move along to the left via conveyer belt. Though we really want them moving right instead so we can get the jump height needed to move on. Thankfully there's a switch on the ceiling that we can hit with a ranged weapon.  More of the same in the next room, though no switch we need to find, we just need to make sure we don't hit the sides of the boxes. Last edited by SpoonyBardOL; 12-09-2017 at 06:31 AM. |
|
#63
05-23-2015, 09:23 AM
|
|||
|
|||
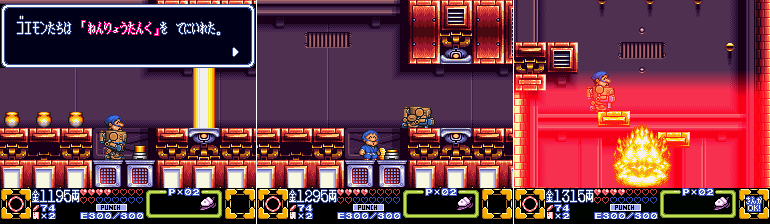
 There IS a switch in the next room, though, and actually hitting it is kinda tricky. We need Ebisumaru's Super Shuriken, clearly, but the correct position is a bit hard to discern. I even completely forgot to get a pic of it, but you basically need to stand under the switch facing to the left. There's probably other ways to hit it, but that's what worked for me. Time Paradox Count: 3  This causes the spiked crates to move to the left, which is what we WANT this time, oddly enough. Previously they were falling from the ceiling and immediately exploding upon landing since he conveyer belt took them straight into the wall, there was no chance to land on them and jump up. Now though? Easy peasy. 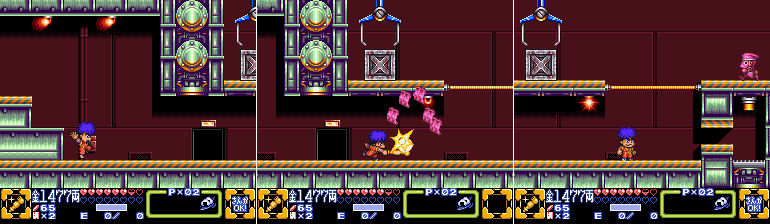 Next room! Another Bimmy we explode, and another door we ignore for now. 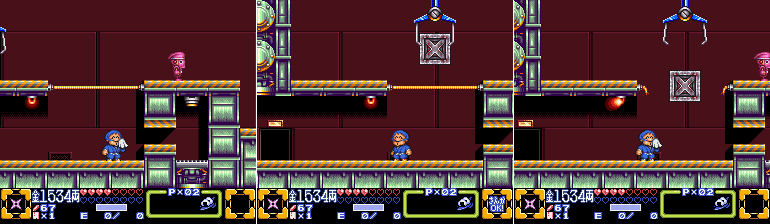 And another switch we need to hit with a Super Shuriken. The positioning here is a bit touchy, but not too hard. It activates a crane which carries a box over to the suspended rope. The box is dropped, and the rope is snapped. Guess the ropes can't handle much weight, eh? Time Paradox Count: 4 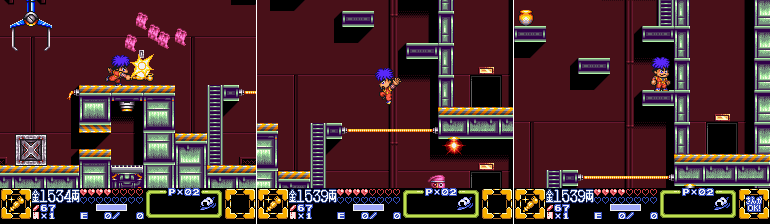 Two doors await us just beyond, let's climb up and hit the higher one first... 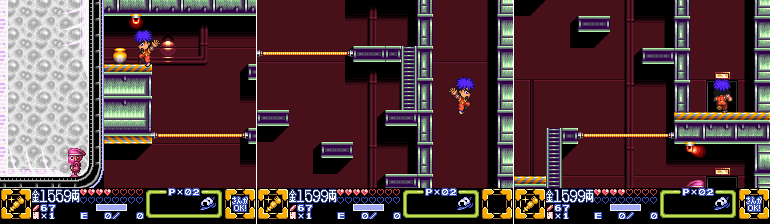 On the way up we see a smog-filled tunnel with a poor Bimmy running around in it. Good thing they're robots and don't need to worry about silly things like breathing. 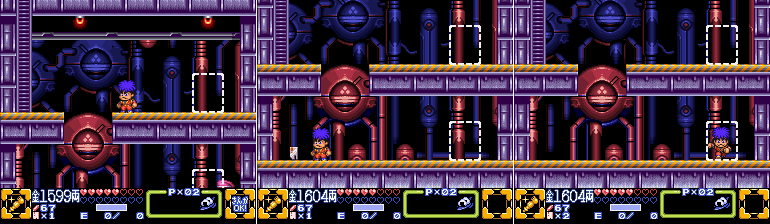 The upper door takes us to the same room the lower door would have, but it gives us access to a ladder. However I remembered something at this point and have to jump down since there is a keycard on the lower level! Derp! Time to make the climb up again. 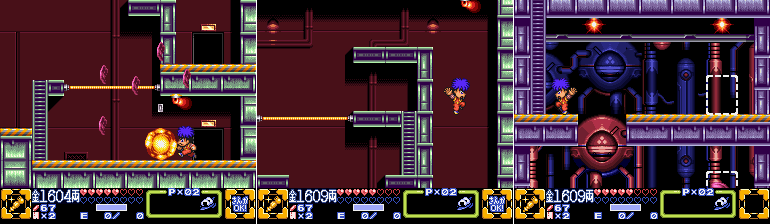 Ok, let's try that again. Ladder time! 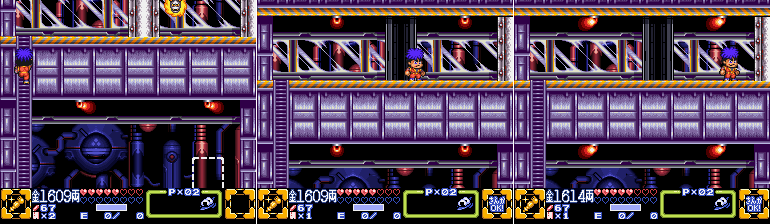 This leads to a hallway patrolled by a Mr. Onizooma, and two locked doors. Luckily we have two keycards. What's that? Shouldn't we have three? Never mind! Time Paradox!  Beyond the two locked doors is a furnace, which is producing all the smog we saw earlier. Since pollution is bad and since Goemon and pals are HEROES they get to wreckin'! The future people will surely thank us when we stop their precious industry to save the environment they no longer care about. (...seriously, the TREES have PIPES) Last edited by SpoonyBardOL; 12-09-2017 at 06:32 AM. |
|
#64
05-23-2015, 09:25 AM
|
|||
|
|||
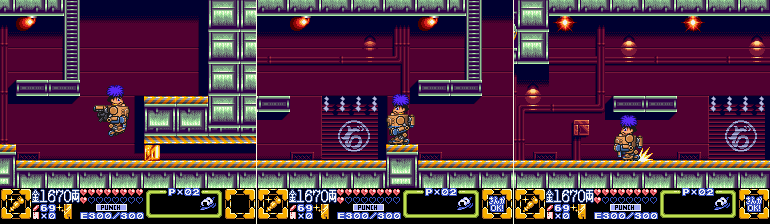
 With the furnace destroyed the smog is stopped, so it's time to backtrack! 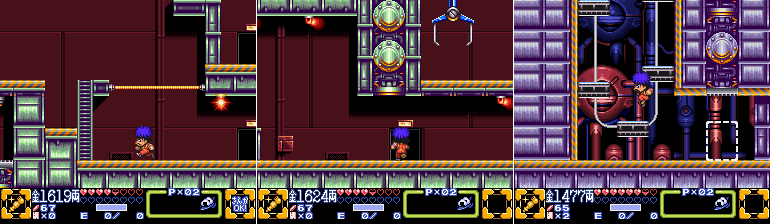 Back to the most recent door we ignored. Time Paradox Count: 5 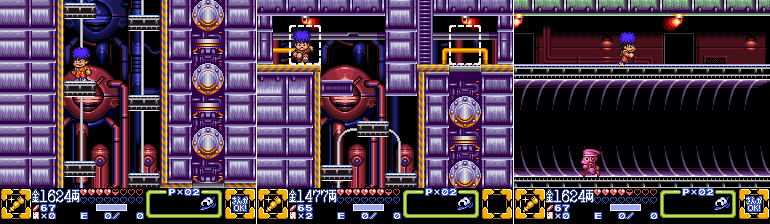 Riding the platforms up take us to a door to the back layer. Had we not destroyed the furnace then those pipes would have been totally smoggy. Time Paradox Count: 6  The brief trip to the back layer was just to bring us to the door just across from the one we just entered, and a ladder leading up. 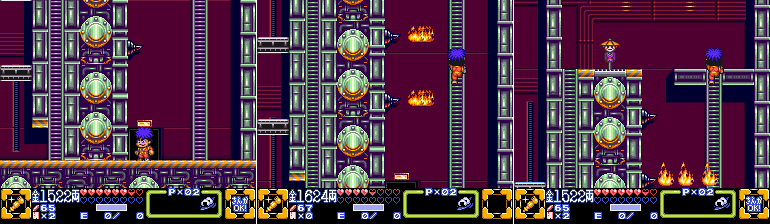 This new room has a common staple in side-scrolling platformers, some manner of retracting hazard obstructing a ladder. Here we have to wait for these flamethrowers to quit before we continue upward. It's not a super long wait, thankfully. Time Paradox Count: 7  Just up and down the pair of ladders is a room with a series of conveyer belts, and a new foe that bears a striking resemblance to the Tazmanian Devil. Time Paradox Count: 8  Taz the Manic Springmouse: The whirling foes are in fact robotic springmice, rather twitchy ones too. They'll flip out at the slightest provocation, and once they start spinning they won't stop unless something makes them, at which point they kind of explode. Can't be harmed directly with attacks, and best avoided.  Activating the switch at the bottom left part of the room gets the various platforms on either side of the conveyer belts moving, allowing us to ascend. Jumping over the Springmice while on the belts can be tricky since you don't have much headroom. Any character can do it, but Sasuke has the greatest advantage due to his innate speed and slightly greater height clearance in his leaps. 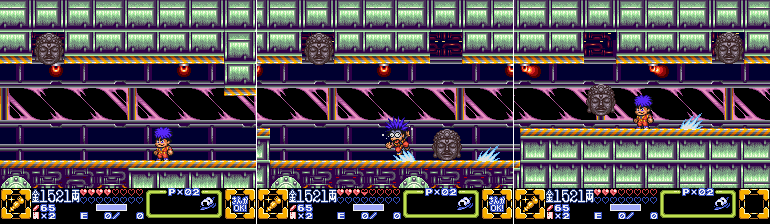 The next room has some enemies that behave about as much as you'd expect, if you've spent any time playing a Mario game. Giant stone faces hanging around the ceiling? Gee, I wonder how they behave... Time Paradox Count: 9  Thwemp: A distant relative to Thwomp and Thwimp, Thwemp is always trying to out-do its more popular cousins. On top of slamming down on any passing heroes at a speed that is usually to fast to avoid by casually running underneath, Thwemp also sends out a shockwave upon landing, making it all the harder to deal with. Last edited by SpoonyBardOL; 12-09-2017 at 06:33 AM. |
|
#65
05-23-2015, 09:28 AM
|
|||
|
|||
 There was a locked door between the previous room and this new one which I totally forgot to get a screenshot of my first time through, but that's where one of our keys disappeared to earlier. This room has some sloping platforms, and some Springmice falling in from the left. If we head straight down we see a door on the other side of a barrier, and another Firecracker block.  And just beyond it is another Fortune Cat! Nice! If we climb up a ways there's a little alcove we can fall into with a sparkling Dango, which was really nice at that point. Those Springmice are surprisingly hard to avoid!  At the upper left part of the room is the vent dispensing the Springmice, and more Firecracker blocks. Clearing them away leads us to the door we saw earlier, and a switch which raises the barrier in front of it, making the way through here a lot easier. 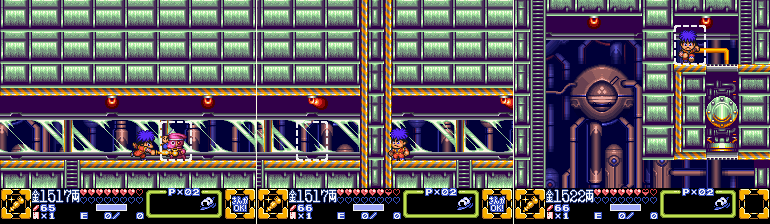 In the next room we're ambushed by a Puppetmaster Bimmy on our right. At the end of the hall is a ladder leading down to a door. Remember those two doors I ignored waaaaaaay back when? The rest of the room we see in the last image is where they lead, and it's ultimately a dead end from that side.  In the next room we have a switch which lowers some platforms and makes an entrance down into the previously smog-filled tunnels. If we had come all the way here without removing the smog, then the platforms would start to lower, but then reset. 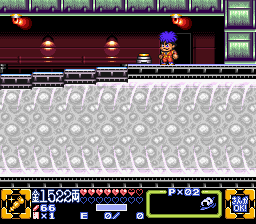 Like that. Too much, uh, smog pressure, I guess. Time Paradox Count: 10 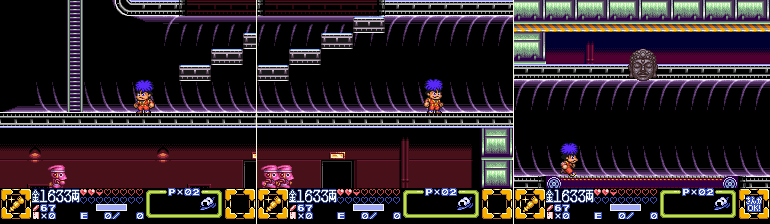 We could go up the ladder to the left, but we'll go right, first. In that direction is a room with a few Thwemps, and some conveyer belts to deal with too. Thwemps are tricky enough on stable footing, they're even worse when you got the floor moving you in the wrong direction. Though if the conveyer belt is moving you forward you can safely run under a Thwemp and outrun both it and its shockwave. It's the only time it's safe to do that. 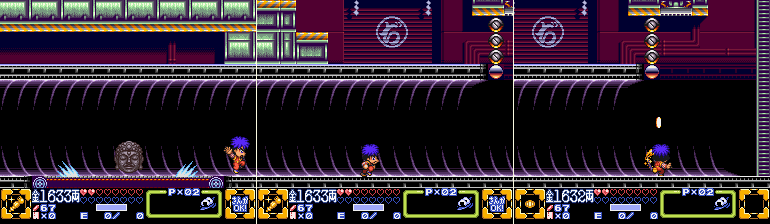 We enter a much larger room. Near the center are some platforms which look like they can rotate if struck with a weapon, and while they CAN they won't do bupkis if struck from this angle.  We move on through this room for now, we'll explore the upper area in a bit, though we do see a keycard just out of our reach. The next room is another Thwemp/conveyer belt setup. Been there done that. 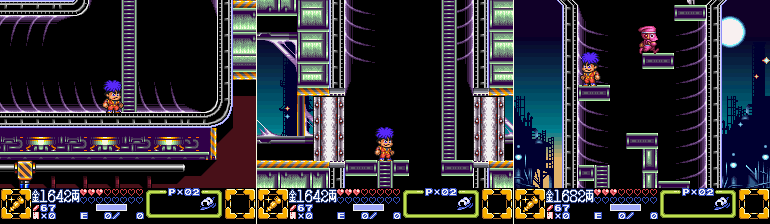 We reach a ladder climbing up. This also happens to be the room where saw that Bimmy running around in the smog from earlier. Just above there is a room with two locked doors. We have no keycards though. Though if we climb up to the next screen... Last edited by SpoonyBardOL; 12-09-2017 at 06:34 AM. |
|
#66
05-23-2015, 09:31 AM
|
|||
|
|||
 ...we manage to collect one at the top of the, uh... smokestack? That's an interesting bit of level geography. Anyway, we have a choice between two doors at the moment. I'm a southpaw, so left door! I choose you!  Dead end! Actually not really. There was a Fortune Cat there, and I was certain I got a screenshot of it, but when I checked my folder it wasn't there. I could have just faked it and added the sprite to one of the images, but that would be cheating. LP cheating. Anyway, with nothing more to do on that end we return to the larger room we were in earlier and climb them ladders. More flamethrowers slow us down before we can climb up to the platform that has two non-spinning Springmice trapped on either side. Now, I mentioned earlier in their description that once they start spinning they won't stop unless they're forced to, and at that point they explode. That wasn't just pointless flavor text, if they can't spin around freely they DO explode, and there's not much room for them to spin around in their little nooks, now is there? Pime Taradox Count: 11 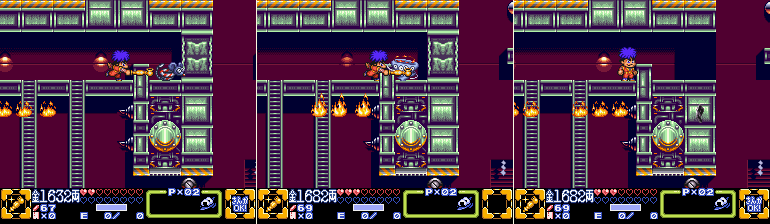 Keep smacking them with your weapon and they eventually flip out and start spinning, and with nowhere to go, well, it only takes a few moments for them to explode, taking part of the wall with them. Snake Kills Ocelot Count: 12 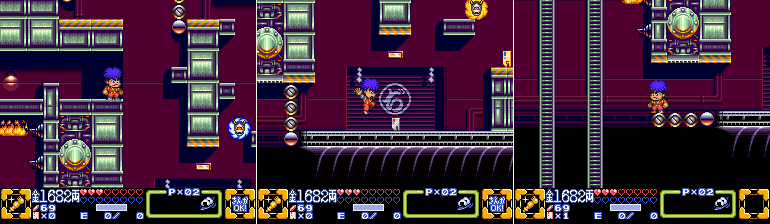 We jump down and grab another keycard, and at the same time we spot a golden one! It's out of our reach now at the moment, though.  Incidentally if we return to the smokestack and take the other locked door we just get a sparkling Dango (and a Bimmy which just happened to drop a regular Dango) for our trouble. Darnit! 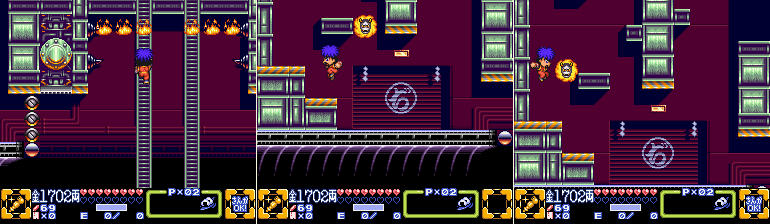 Anyway, this time we take the left path from the middle platform in the large room, cruelly murdering another innocent Springmouse to get through, and climb up the left side. That enemy looks like a Mr. Onizooma, but it doesn't ricochet around the room like the others do, it circles the platform it's attached to, and it's invincible to boot! 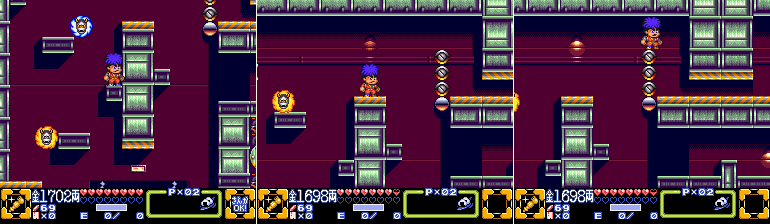 While you could switch to Ebisumaru and fling a Super Shuriken over this barrier so that it gets hit from the other side and lowers, you can easily just jump on top of it. You just need to remember to be holding the attack button while using Goemon or Ebisumaru, so they can get that extra distance from their jumps. Sasuke and Yae can make this easily.  No such luck with this next one, though. I mean, maybe it might be possible to use Sasuke and get a frame-perfect jump and make it across here, but if you want to take the path of least resistance just use Ebisumaru's Super Shuriken.  Fanfare However you do it, you're rewarded with the Gold Keycard for your troubles! 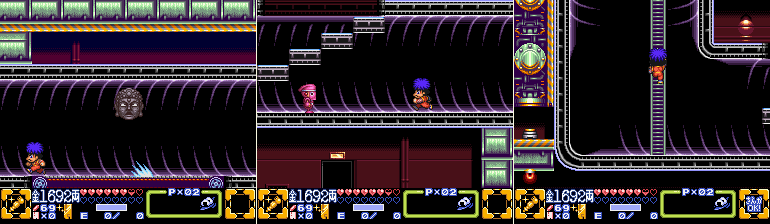 Stage 4, Part Two We head back to the room where we entered the smog pipe to begin with, and take the ladder going up. Last edited by SpoonyBardOL; 12-09-2017 at 06:35 AM. |
|
#67
05-23-2015, 09:34 AM
|
|||
|
|||
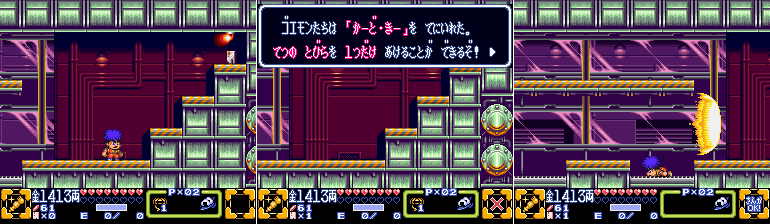
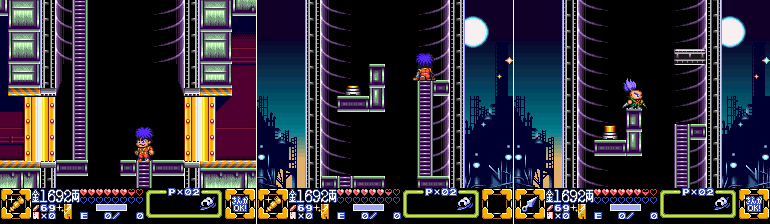 And here we have two golden doors. Don't worry, though, the Gold Keycard functions like the Big Key did in A Link to the Past, you only need to collect one and it can open every big/gold door in that stage. If we go to the right here, by the way, we'll be taken back to that room I pointed out earlier which leads right back to the start. For now, though, we go up!  Here we have a switch we can hit with Sasuke's Firecracker Bomb, and doing so toggles two platforms on and off. What we have to do is toss a Bomb and then jump to be in position to land on the second platform once it appears. For our troubles we get the third Fortune Cat for the stage.  And since we collected one out in town in the last update we get that delicious new heart added to our life meter. Sweet!  After heading down and opening the gold door to the left, we enter a room with another crane claw. Control is taken away from the player at this point as the camera pans to the left for a brief little scene.  A panel opens and the crane reaches down into it and pulls out a fresh new Walker mecha. As soon as that happens the barrier disappears and the player can move again. 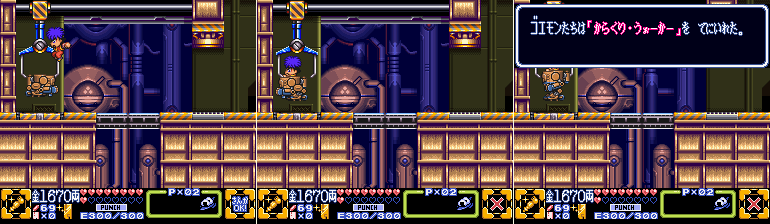 Let me just say, hopping into the Walker here is surprisingly tricky! You have to be far more precise in your jump than you would think, you have to jump into it from the right for it to register. If you just walk under the Walker and jump up nothing happens. 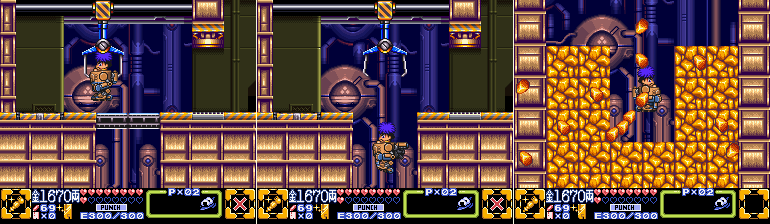 The crane then drops us down the pit before we can do anything, the Walker crashing through the stone blocks as if they were styrofoam. It must be pretty dang heavy! 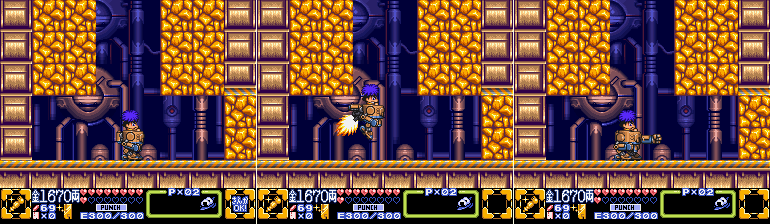 Once we land, we got control of the Walker for real. It can punch, and while it doesn't properly 'jump' it does have some jets on its backside which propel it upward which functions kind of like a jump. 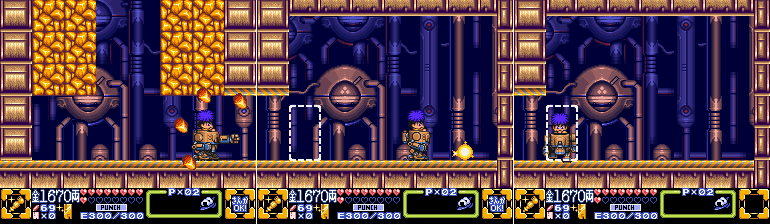 We smash some stone barriers with the punch and reach a new room, which has a glowy energy ball and an oversized door. The energy ball restores the Walker's energy, though that's not really an issue right now because of reasons. The oversized doors are your indication whether or not the Walker can enter. Your characters can enter any door on foot, but if they're riding Walkers they can only go through the taller ones.  The door takes us back to that door that was closed off by blocks we saw way back at the start. The Walker can't make it across that gap, so no matter what you do from here you're heading down. Last edited by SpoonyBardOL; 12-09-2017 at 06:35 AM. |
|
#68
05-23-2015, 09:40 AM
|
|||
|
|||
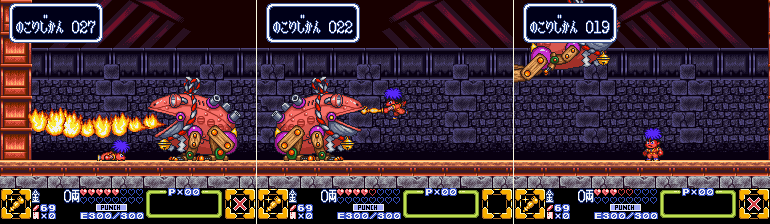
 Stage 4 - Walker Factory Fortunately, once we return to the lower area with the Walker the BGM finally changes back to its original tune. Incidentally, the Walker has one other function. Much like how Goemon and Ebisumaru can dash after holding down the attack button, the Walker can as well. Though it's less a dash and more... um.... Y'know how in Smash Bros Melee Bowser didn't so much run as propel himself forward on invisible tank treads? It's like that. 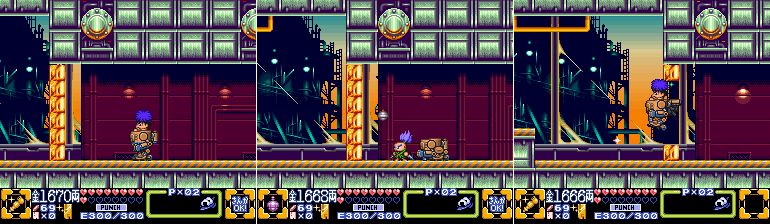 We cannot use our own main or sub weapons while in the Walker, so we need to hop out and switch to Sasuke to remove the wall here.  We get to see Juurokubei's smug face again just as we try jumping on the rope. As we saw much earlier in the stage, the ropes can't support a whole lot of weight and this thing just smashed down through some rocks. Suffice to say, we go plummeting. 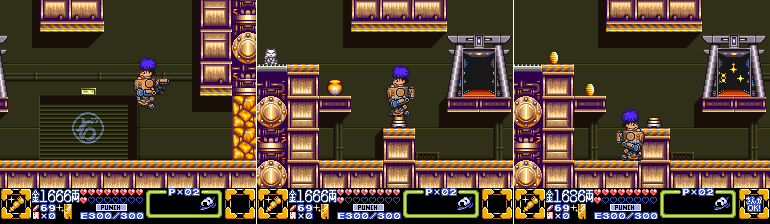 Fortunately there isn't really bottomless pits in this game, per say, we just fall into a new room. On the left side of the room is the stage's final Fortune Cat, and a weird little portal device. For now this does nothing, since we have our Walker on us. If we dropped it somewhere else in the stage and came across one of these portals, hitting the switch would instantly teleport the Walker to us. On the one hand it's smart of the game to introduce us to this concept, as later stages rely on it quite heavily. On the other hand, it's impossible to be in this room without being in your Walker to begin with, so the portal here can't show off its function anyway. Kinda flubbed the delivery on this a bit, Goemon 3.  Anyway we keep progressing to the right, destroying stone blocks as we go, and come across another rope. 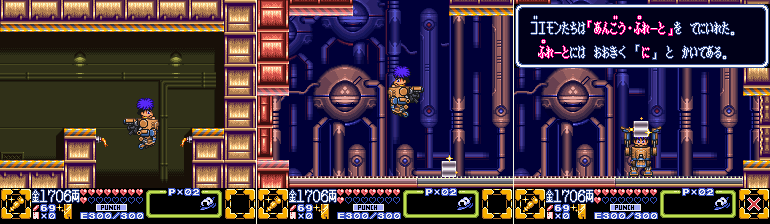 Fanfare Fortunately there's nothing on the other side so we can safely crash down through it. We enter a smaller room that has nothing at all in it besides a mysterious plate. As soon as we collect it we get the item fanfare, as the game tells us we got the 'Ni' plate.  The Omikuji Siblings And once we grab it our Walker disappears (don't worry, it's not permanently gone, it's just getting out of the way because cutscene) and a guy who looks a lot like that Omikuji person we saw earlier, except dressed in green, shows up.  Omikuji: The 5 Omikuji Siblings's Factory Manager, Kichi, is here! If you think you can get away from us so easily you're gravely mistaken! Goemon: Pft. You think I can't escape? Ha ha ha, that's rich! Ebisumaru: I heard you guys were stupid, but I never imagined you were actually this stupid! After a few insults, the arrow in Omikuji's helmet catches fire. Omikuji: Oooohhhhhhhh! I'd better keep quiet about my deep fried food before you idiots steal that too! Yae: Aha ha! You're talking about fried food now? How dumb are you? There's no tofu here! Sasuke: Don't waste your time with this moron. It's pointless to even try and talk to him. Let's just get out of here, quickly. Omikuji: Dammit! You tell me I'm stupid, but I think you're the stupid ones! You can't escape from here, nor from us! There are many traps, and the Band of Mechanical Thieves have a door that requires 8 flat objects known as Code Plates to open! You have to set the plates correctly or else you can't enter our hidden base! You idiots don't know anything about the door, so... Sasuke: Aha! I see! If we collect the 8 Code Plates and set them in a door correctly something good will happen! Goemon: Well we just picked up one of the plates. Omukuji: What?! The Code Plate?! Argh, I can't do this alone! I have to leave for now, Farewell!  After blurting out what we basically need to do, Omukuji the Green leaves in a huff by flying straight up through the ceiling. 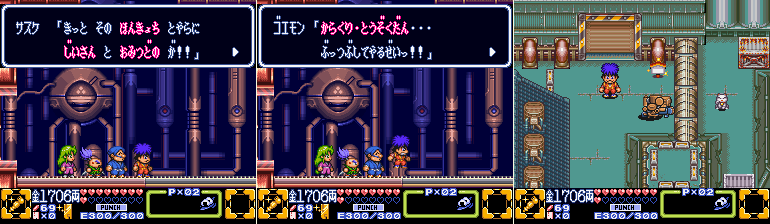 Goemon: Okay! Our objective is clear now, let's go! Sasuke: The Wise Ol' Man and Omitsu must be in their secret base! Ebisumaru: The problem is figuring out the location of the remaining code plates... Yae: We'll just have to search their hideouts one by one. Goemon: These Mechanical Bandits... I'll take them all apart one by one! From there the game asks us if we want to save, which is probably unnecessary since it spits us right outside the stage, and the sparkling save sign is still right there. And hey, our new Walker is waiting right there for us too! This is as good a place as any to end this update. Next time we explore the new paths open to us now that we have our own walking mechanical tanks! Last edited by SpoonyBardOL; 12-09-2017 at 06:40 AM. |
|
#69
05-25-2015, 05:12 AM
|
|||
|
|||
|
Hi there
 First timer here, and wanted to show appreciation for your series (the Ganbare Goemon 2 one got me in the game series in the first place!) Kind of late to the party, but wanted to share a bunch of trivia here since nobody seems to pay attention to this series anymore. You missed this reference:   It's Pastel from the Twinbee series, who also made an appearance in the second game. The Neo O-Edo future era has the girl from the Tokimeki series as mentioned here before, of course :P  And from Ganbare Goemon 2 SFC, the blue haired boy NPC was actually Koryouta, one of the protagonists of the second RPG spin-off on the original Famicom (first RPG spin-off had the first appearances of Koban the cat -not Korubei, as in the inaccurate hg101 article- and Yae, as playable characters no less). As for Ganbare Goemon 3, there's a really nasty glitch in the fifth dungeon area, in the vertical room where you must outrun fire after bashing some machine with Ebisu's face or something.. there are some platforms obstructing the passage before you need to, but if you go through them, you're just ... stuck there. I lost the will to continue because of that. I relied on save states rather than saves, and dying sent me waaaay back... but I'm still looking into glitching my way out of this nasty situation though... For Ganbare Goemon 3 has a beta version! It was a "sample" intended to show just up to before the mode-7 sky area in the first dungeon (the exit data for a room was deleted). And it has a free movement code, meaning you can examine places you're not supposed to. However, most of the game is actually finished -no idea to which extent though- but with significant differences (Yae's mermaid minigame will crash the game, dungeon 3 has no water and two rooms are impossible to escape, the one with the triton shell is really nasty to escape -requires free movement debug feature AND heavy glitching-, and the jelly monster in dungeon 7 just absorbs Goemon and causes the game to hang) The trick to play past these roadblocks in the "Sample" version is to use the in-game save feature and name both the normal rom and demo rom the same thing... and you can explore the world of GG3 to your liking with the free-movement code! It's really interesting  Well, and that aside, there's a fart show, ability to enter women's bathrooms and a stripper in the first game, all of which of course disappeared from the localization. Localization of Ganbare Goemon 1 SFC / LotMN was horrendous, even draconian censorship aside. Not even the lowercase font was used (incomplete, though because of misguided design choices "we must prevent kids from putting bad words in the password screen - solution: remove the vowels... not from the password input, but from THE FONT"). The fart show appeared in some guidebooks and reviews, but the room data was never used in the final game. However, a partially working debug menu left in the game can still cause it to appear, and it's fully intact and identical to the Japanese version, which goes like: ほよ!~ ゴエモンはん わてのぷりていなおどりを みておくんなはれ Emulator screens from the removed scene (I couldn't stand "Kid Ying/Mr Yang" names, so I changed all of them on my own with a hex editor, alongside making the tanuki dialog shorter like in the Japanese version, otherwise, it's identical to the US version)     If you try forcing this room in the German version, which removed the dialog (actually they overwrote it), the text box appears and disappears instantly but the scene proceeds normally. (gives me hope the stripper one might work normally). As for the strip show (which is a continuation of a stripper jankenpon minigame in one of the NES RPGs), which is in the sixth town in one of the three minigame houses, no text was left at all from either the scene or when you go to the stripper's house, except for this:  Nothing left from the text, but the soundtrack is still there. And the scene itself might work. The strip show dialog goes something like this: レディス アンド ジェントルマン アーンド おとっつあん おっかさん !! これより LETS さゆりちゃんSHOW の はじまりです さゆりちゃん はりきってどーぞ ! (stuff happens, then something flashes for 2 (1 in GBA version) seconds) ちょうで、おじかんと なりました またのおこしを おまちしております And the bath house doesn't even ask whether you want to enter the male (otoko) or female (onna) booth in the US version, but VRAM graphics for excited grandmas still exist. If someone wants to check them in the JP versions (in non-JP versions they were replaced with duplicates of other minigames): * Fart show one: third area (with octopus boss), very first area in theme park (with "Karakuri Island" sign in the JP version only) to the left, with the green curtain and the white Konami logo * Stripper show: sixth area (with tengus), past bridge near restaurent selling dangos, house with red curtain. Stripper house is in the same town, still accessible but the text ("do you want to see more?") butchered beyond recognition. * Mixed-Gender Onsen: sixth area. First game needs a retranslation badly. To this very day, I can't understand what's the whole business with the otafu zombies or the ghost lady. Can't wait enough for you doing this game and the other ones, especially the fourth :P 
Last edited by SiegLagaffe; 05-25-2015 at 05:43 AM. |

|
#70
05-25-2015, 06:53 AM
|
|||
|
|||
|
Oh, so that's where Koryouta originated. I've never really given the NES Goemon games much time. Though I did read summaries of the RPGs I must have missed the stuff about Koryouta and Yae.
|
|
#71
05-30-2015, 09:50 AM
|
|||
|
|||
|
Huh? Goemon 3? Well OK, if you insist.
Last time, Goemon and pals stormed the Walker Factory and got themselves some brand new mecha! They also learned of the existence of eight code plates that they will probably need to access the secret base of the Band of Mechanical Thieves and rescue Omitsu and the Wise Ol’ Man.  Future Overworld So here we are, just outside the factory with our new toy. The Walker will allow us to destroy the Little Metal Boxes we’ve seen around the Overworld.  Like-a so. 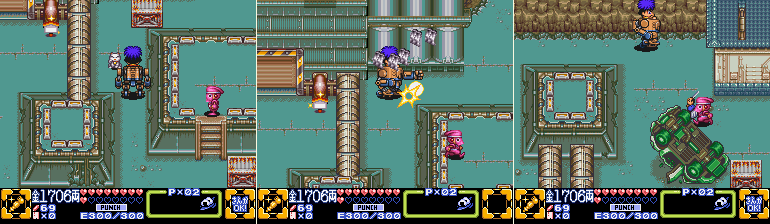 This allows us to get that Fortune Cat we saw earlier, and open up a quick shortcut back to the start of this area. 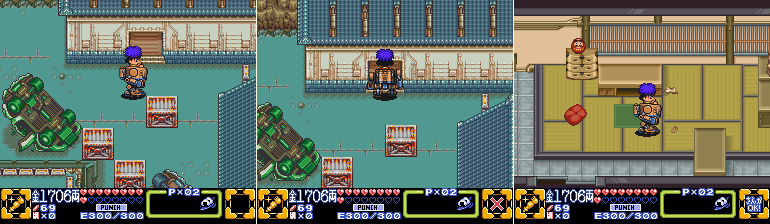 I know I said in the last update that Walkers could only enter doors that were taller than normal, but that’s only for side-scrolling areas. Out in the overworld they can enter any building they please. 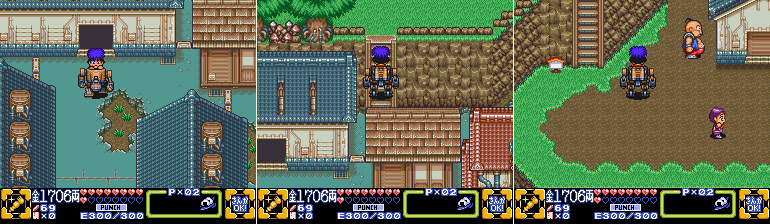 First thing we want to do with the Walkers is return to the area just outside the Prison, where this big guy is ramming the side of a building.  Takosuke: Oh! That machine might be able to get my kite down! Please help me! >Okay Takosuke: I'm going to body slam the wall as hard as I can, and right after that I want you to punch it with the mecha. Get ready! So we help him get his kite down by punching the building after he rams it? OK. 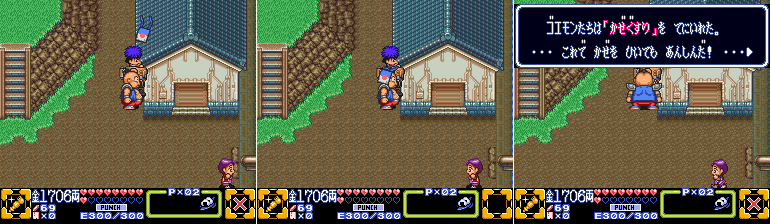 (Not picture: Punching animation) Takosuke: Yay! My kite is back! And my cold is better too! I know, I'll give you and your friends my cold medicine so you can feel better too! Narrator: Goemon and his allies obtained Cold Medicine. With this, they won't have to worry about colds anymore! So we got ourselves some cold medicine? Weird trade-off, but sure, why not? 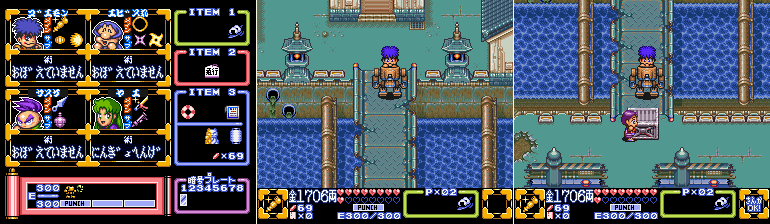 It replaces the ‘Go’ sign that was in our inventory up till now, so this may be the start of a new item swap chain. Next we want to head to the little bit of land that lies between the north and south ends of town that until now has been blocked off by boxes on both ends.  I should also note, these boxes on the overworld stay destroyed, so that’s a little convenience the game offers us. I open up both ends of this area, I may not ever need to walk through here again but it may be useful.  First off, there’s another shop in this part of town, but it’s totally empty.  There’s a kid right next to the door, though. Yorozuko: My father has a really bad cold, so we can't open the store. (sniff) I wish we had bought some cold medicine before... Ah! That medicine! Do you think it could help my father? Can I have it, please? >Of course! Yorozuko: Thank you! Yorozuko is so thankful! I want to give you something to thank you, so wait right here. 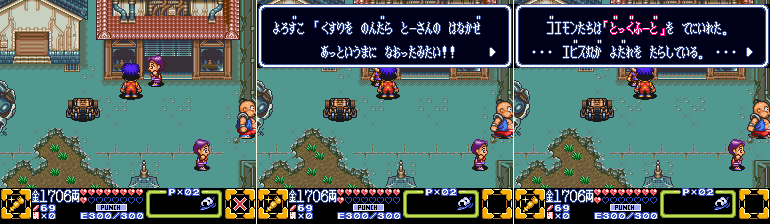 Yorozuko: If my father drinks this medicine his head cold will be cured in the blink of an eye. This delicious dog food will be my way of expressing my gratitude. It's very tasty! Bye! Narrator: Goemon and his allies obtained Dog Food. ...Ebisumaru is drooling. 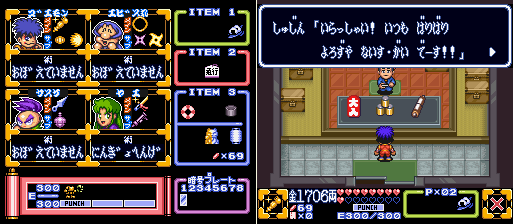 Futuristic Store And now, Cold Medicine for some… Dog Food? Oooooookay. (Dangit Ebisumaru, you were just eating grass a few updates ago and now you’re drooling over canned dog food? How can you even recognize this as food anyway? Do canned goods exist in your time? Shouldn’t it just be a metal disc to you? Why am I spending time analyzing the anachronisms of this game?) Anyway, the medicine seems to be super fast-acting, as the shop owner is now back to work. He sells uncommon items rather than the usual armor and riceballs. His inventory consists of a 1-up, fuel for the walker (which is still unnecessary since at the moment nothing it can do actually consumes any of its energy) and scrolls. I mentioned awhile back that scrolls are spent on special abilities, but right now the only special ability we have is Yae’s Mermaid Transformation, which is free to use. They’ve just been building up since the start… 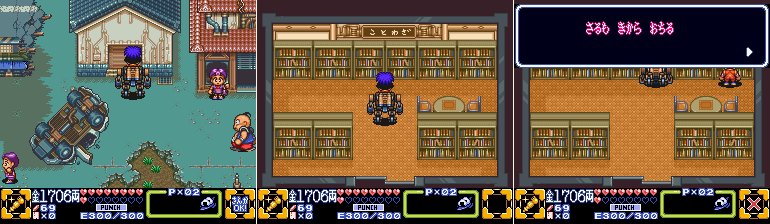 Future Overworld Next door to the shop is what appears to be a library. It’s entirely possible there’s a wealth of info regarding the plot, the future itself, and what we need to do in here, but without a translation it’s pretty pointless. Except for one shelf… Last edited by SpoonyBardOL; 12-09-2017 at 01:05 PM. |
|
#72
05-30-2015, 09:53 AM
|
|||
|
|||
 This shelf in particular gives you a choice, and selecting the first option gives you something pretty important.  World map get! And wooooow that is some A Link to the Past map action right there. Told you guys the game gets pretty dang Zelda in the future. It’s not visible on the last image there since the icons are spinning and were almost invisible when I took the shot, but the world map also points out the location of the other code plates. Well, five locations, at least. With the one we got that still leaves two unaccounted for. Hmmmmmmmmm.  Leaving the library, the only other thing to do in this part of town is exit to the east. But, like the other eastern exits we’ve been able to take so far, we’re immediately blocked. These metal drums aren’t budging, even with our Walker. Maybe that button that’s out of our reach has something to do with them?  Futuristic Store Before I do anything else I visit the other two shops in town and purchase a Straw Cape, and Metal Helmet, and a better Rice Ball.  Futuristic Travel Center I also stop in on the Travel Center in the north end of town to point out a new function it now has. Once you get the Walker you can select the new second option in the Travel Center, and for 10 Ryo it will teleport the Walker to you. The Walker’s location is persistent in the game, you see, so it may be entirely possible that you abandon it somewhere and straight-up forget where you left it. The Travel Centers will bring the Walker right back to you. Of course I just left mine outside so that means I paid 10 Ryo to teleport it a whole 20 feet, but whatever. 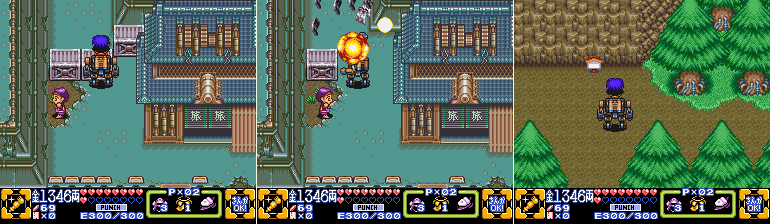 Future Overworld Just to the left of the Travel Center is the town’s north exit, now free of obstruction! Will I have better luck exploring north than I have east?  Immediately to the west is an open mining tunnel. I’m not sure what the foreman here is saying exactly, but he’s basically telling us this tunnel won’t be done yet until we have a plot coupon later.  And just to the east our way is blocked by a statue of one of the Omikuji Siblings. Beautiful. 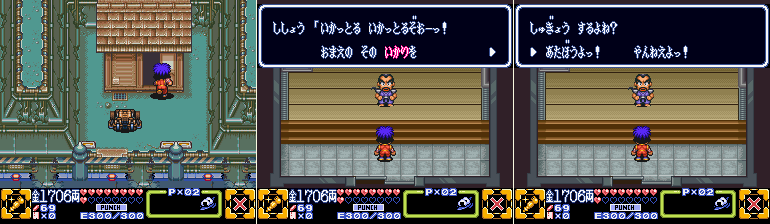 A Challenge for Power The only other way open to us now is the northeast exit from town, but before we hit that I run inside this building with Goemon. I pointed this place out in my first run through town when I arrived in the future, and I could have come back here as soon as I gained access to Goemon, but I decided to skip it because that update was already running long, and I didn’t need this in Stage 4. But here we are now! Mr. Trainer Dude here can give Goemon his special ability if he can survive a gauntlet, much in the same manner as Yae’s. 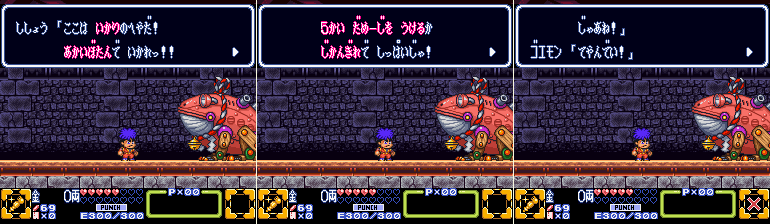 Though with less swimming around collecting orbs and more smacking a recolor of the first boss five times. You can’t just hit it normally, though, you need to hit this thing with Goemon’s new special ability activated. And just what is that ability, exactly? 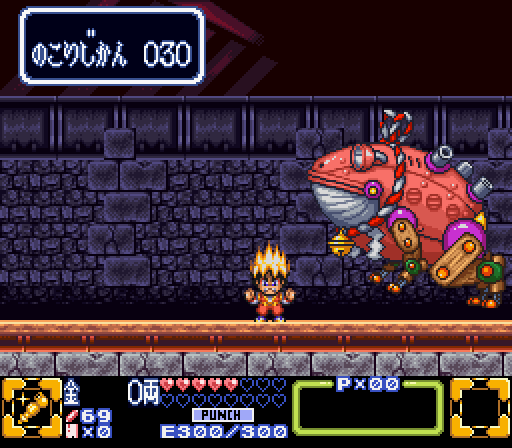 It’s OVER NINE THOUSAAAAAAAAAAAAAAAAAND! I had to. Don’t you judge me. Last edited by SpoonyBardOL; 12-09-2017 at 01:05 PM. |
|
#73
05-30-2015, 09:57 AM
|
|||
|
|||
 Actually it’s the same special ability he gets later in Mystical Ninja Starring Goemon, called Sudden Impact in the North American release and something else entirely I’m sure here. It doubles his attack power at the cost of ten scrolls, so now they finally have a use. Even better it doesn’t cut his defense in half like it will in later iterations. On the downside he does not keep the golden spiky hair used in its activation frames, and instead has the much more underwhelming red skin tone. Can’t win em all. Anyway, the red frog behaves in much the same way the first boss did, except it does not fire out Tadpole Bombs. It will hop around and occasionally stop to breathe fire, which is your opening to smack it.  Sometimes instead of breathing fire it will just belch out some smoke, but it’s just as vulnerable regardless. After five hits you win this little mini-game and are officially awarded with Goemon’s special power.  Which I guess is ‘Isshyoukusokuhatsu’, whatever that might actually mean. I’ll just keep calling it Sudden Impact. The sad thing about it is, aside from the novelty of the totally-not-a-dragon-ball-z-reference in its activation frames, there’s actually little use for this ability. It isn’t really worth breaking out against random mooks and there’s really all of ONE boss battle in the entire game where this is actually useful due to boss mechanics and what-not. You’ll see as I go along. And unlike the N64 game where it resurfaces, it’s an optional power and not required to complete the game as it has no secondary characteristic. So no pushing around super heavy blocks or anything, it’s just a straight-up damage boost.  Future Overworld Anyway, it’s time to finally leave Neo Hagure Town from the only other exit we haven’t tried, just a bit south from that trainer. Don’t worry, this route shouldn't actually lead to a dead end.  More wildlife assaults us from all directions through this forest path. A quick look at the map shows a dead end just north of us (what did I JUST say???), and checking that out shows another one of those oddly-colored trees. 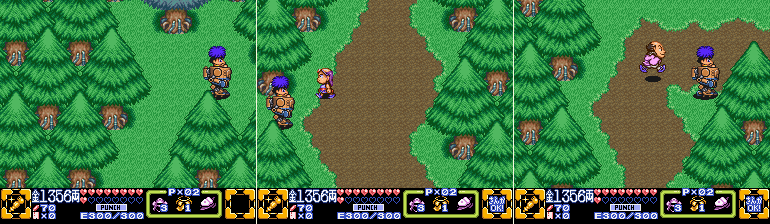 And it’s REALLY easy to overlook, but just to the right of the tree is a small gap, and that gap is actually a screen transition! Though we can reach this screen easily by going east instead of north from the earlier fork so it’s not exactly a hidden area. But that’s not the last suspicious gap in the forest we’ll see. Also on this screen we see someone… familiar. Haven’t we seen that guy before? Hanging around the seedier towns of the last game? Quote:
 Neo Fumbles: The Fumbles family of thieves have persisted through the generations, and they’re just as active in the future as they were in the past. They do no damage, but coming into contact with one lets them swipe 50 Ryo from your wallet. Even worse, while you can hit them and get them to drop cash, they’ll only drop half of what they stole so you’re always out at least 25 Ryo every time you touch one. Beware their sticky fingers.  Just a bit north of here is another fork in the road, and I go north first, which leads to a slightly darker part of the forest…. 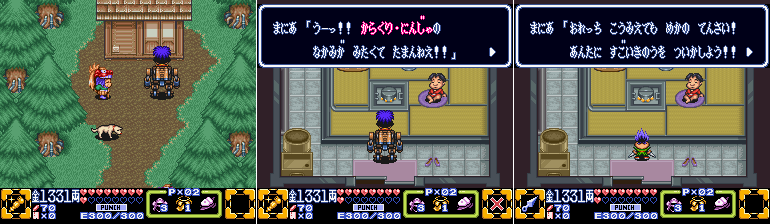 …and a dude who only seems interested in talking to mechanical ninjas. So I swap to Sasuke. 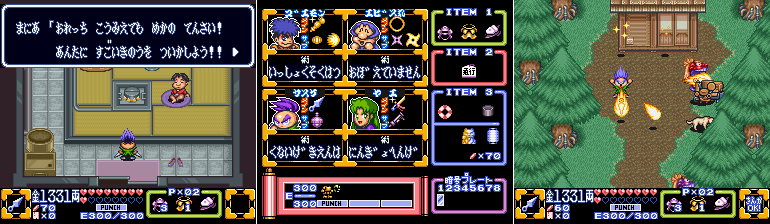 …and once I talk to him again he straight up hands over Sasuke’s special power. No mini game, no messing around. Just, bam, special power. As for what it does, well if you were thinking the game would continue being the beta version of Mystical Ninja Starring Goemon, which it has in many ways thus far particularly with Goemon and Yae’s special abilities, well sorry to disappoint. Instead of getting a super-jump like he does in the N64 title, his special ability in this game is an attack where he fires off a round of kunai missiles in a clockwise circular spread around himself at the cost of 10 scrolls, called ‘Kunaigekienha’. Not bad, but not really worth the scrolls in my opinion. Much like Goemon’s ability, it’s not required to beat the game, just a little optional power.  Returning back to the main path and heading all the way south, in case you were curious, brings us to a dead end, so instead we return to the fork and head east, where we are taken to the foot of a large dam.  As an aside, the Bloo J. Byrds are total assholes when you’re in the Walker mecha. I haven’t mentioned this before, but you cannot ‘jump’ with it while on the overworld, so if you insist on attacking these enemies without jumping out of the Walker then you can only actually strike them when they swoop, they’re otherwise out of range of the Walker’s fists. Heading north up into the damn I’m attacked by another enemy, one that’s apparently hard to screenshot correctly. It’s another returning face from the old game, quite literally at that! Last edited by SpoonyBardOL; 12-09-2017 at 01:08 PM. |


|
#74
05-30-2015, 09:58 AM
|
|||
|
|||
 Neo Mr. P’Tooie: Freed from the rising and lowering stick that chained his ancestors, Neo Mr. P’Tooie has developed the ability to pop up and down whenever he damn well pleases. Preferring to hide out in water and pop out to fire projectiles at wayward heroes, like some sort of river-dwelling fish man, Neo Mr. P’Tooie can be frustrating to deal with in large numbers and is best avoided.  Heading to the west on the dam leads to a fortune telling elephant and a dead end, so our only path is even further to the east, which leads us down off the dam. Don’t worry, there will be no shenanigans like diving off the dam to hunt for bombs in poisonous seaweed like some other Konami game I could mention.  We head due south after climbing down, passing by a dried up waterway as we go. Just a few screens down there’s another easily-missed hole in the wall of trees, which hides another screen transition. 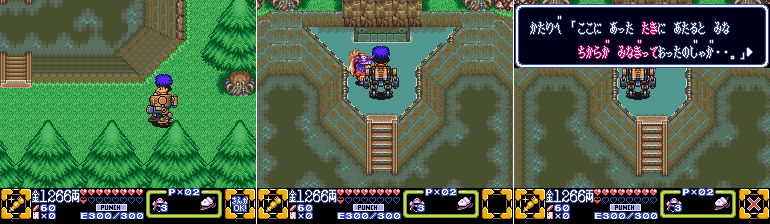 My very first time playing this game I actually missed this area since it’s just so easy to overlook. Nothing we can do here just yet, though, but keep it in mind for later.  Back out to the path we continue going south until we can go no more. Looks like we have to return to the path leading down to the dried up waterway and go from there.  Heading to the east here just takes us to a dead end, so further south it is!  We eventually pass some NPCs, could it be a new town?  We spot some stairs to take us out of the waterway, but pass them up for a moment to see where this leads us. Turns out there’s a Fortune Cat just out of our reach. There’s no way to get to it just yet, hmmmm, if only there were water in this waterway….  We return to the stairs and climb out. Before heading east into what looked like a town, I head west into this clearing here. Turns out we’re just a short distance from those obstructing metal barrels we spotted earlier. 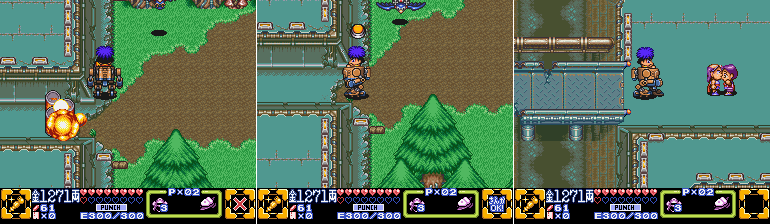 For whatever reason punching the button causes the barrels to explode. Don’t think about it too hard, at least we have an easier way back to Neo Hagure town. Heading back we cross a bridge and enter Kagami Town. Last edited by SpoonyBardOL; 12-09-2017 at 01:09 PM. |
|
#75
05-30-2015, 10:02 AM
|
|||
|
|||
 Just a bit north of the entrance to town is a large gate we can’t do anything about just yet. And just a bit to the east is a lone dog. Say, didn’t we get some dog food earlier?  Taruyama: Grrrrrr ('m so hungry!) Woof woof woof (...you have something good!) Woof woof! (Give it to me!) >Give Taruyama: Bark! (Thank you very much!) Woof woof (I want to thank you) Howl! (By giving you some treasure). Whoa, telepathic doge. Much food. Such gratitude. So amaze. Wow. 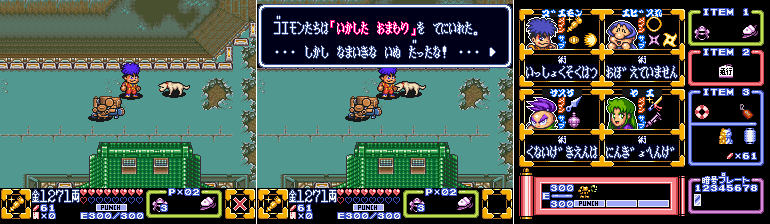 Taruyama: Woof woof (Look, you can use this!) Narrator: Goemon and his allies obtain a Charm. But this dog is a real smart aleck! Must have been more lost-in-translation humor. Oh well. That’s another item swap. Much Thank, Telepathic Doge.  Heading south and around some skulking Neo Fumbles we find the Inn. No need for it at the moment. 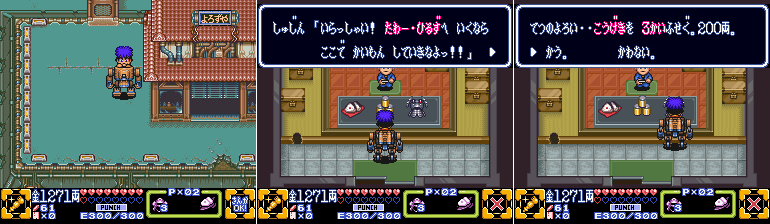 Futuristic Store Just south from there is a new shot which sells new stuff! The Metal Armor is a pricy 200 Ryo, but absorbs 3 hits for me instead of only 1. 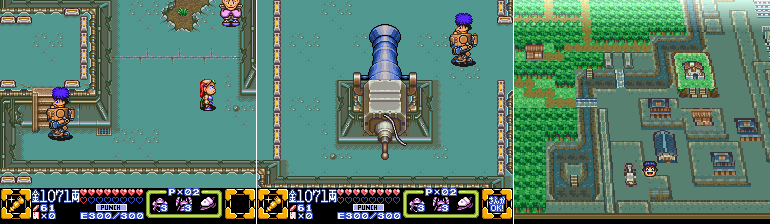 Future Overworld Down in the southwest corner of Kagami Town is a large suspicious cannon. It just so happens to be positioned in such a way that it’s aiming at that large metal barrier we saw at the entrance of town. Can’t do anything with it yet, though, with no means to light it. 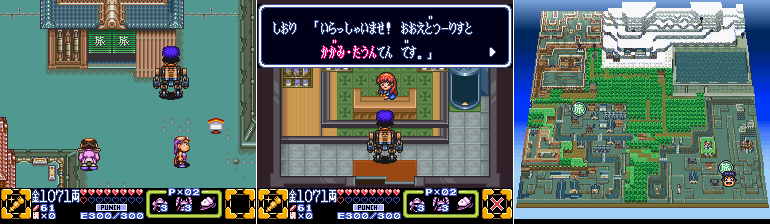 Futuristic Travel Agency And just a bit east of the item shop is the Travel Center for Kagami Town. Now we can instantly return to Neo Hagure Town, which means that shortcut we JUST unlocked is kind of pointless but what are you gonna do? That’s just about everything in the town itself, except for that building in the grassy plateau which sticks out like a sore thumb on the map… 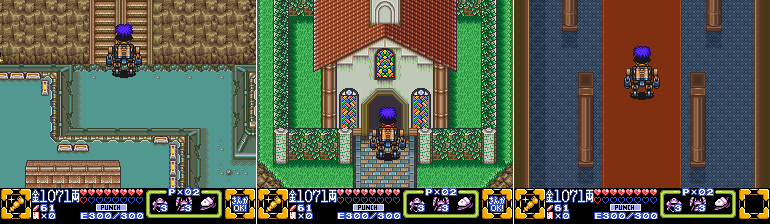 Church And it’s a…. church? On the one hand this might look a bit out of place, but Bisumaru IS an evil nun after all so I guess it stands to reason there would be a church around somewhere in the future. 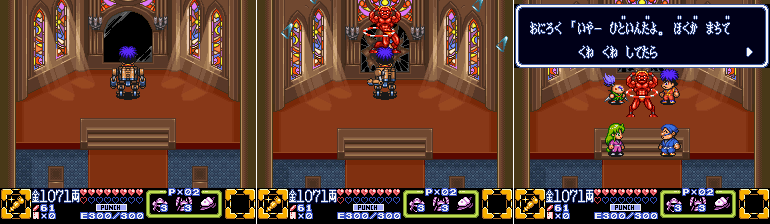 At the back of the church is a large mirror, and punching it with the Walker results in—WHOA NELLY! A hula-hooping oni with some hypnotic hips suddenly busts out.  Dancing Oni Oniroku: It's so terrible! The nuns in this town locked me in there because of my swaying hips. I didn't do anything bad. To express my gratitude I want you to have my treasured performing hula hoop! Narrator: Goemon and his allies obtained a Performing Hula Hoop. Push up on the Control Pad while pressing Y to stick to pegs! Oniroku: Good luck with your bending hips! Well then, Bye Bye~~! Goemon: Hmph! Goemon, the greatest thief in the world, will be bogged down with a hoop like that! Here, Ebisumaru! Ebisumaru: Is that so? Well then this is my specialty. I can move my hips better than anyone else! Back and forth, back and forth... Goemon: ... Umm. Ok then. (Oh hey here’s the first instance of another music track that keeps popping up in the series, along with the Dancing Oni) Last edited by SpoonyBardOL; 12-09-2017 at 01:11 PM. |
|
#76
05-30-2015, 10:04 AM
|
|||
|
|||
 Future Overworld So Ebisumaru now has a more better hula hoop, because he’s the only one in the party with the hips for it. S’cuse me, mind bleach. Anyway, using it on the overworld just shows off the snazzy new red and white stripe pattern. We won't find any 'pegs' to use it on until we get to the next 2D Stage.  With nowhere else to go in town (well that’s a lie, there’s an area to the north but A: I forgot about it while taking screenshots, and B: It’s a dead end for the moment anyway) we head further east. There’s more NPCs milling around and I’m sure they say important things about this region of the game’s world but at the risk of sounding like a broken record I only have a translation for the main story beats so I just ignore em as I make my way up this area.  There’s no foes around here besides some Neo Fumbles, though, so the only threat is to my wallet.  Eventually I reach the top of this area and find a shrine-looking place. Both sides of the doorway have the likeness of Juurokubei carved into the wall. Before we go inside, though, we go a bit to the right and spot a Fortune Cat we nearly missed! I’ll be taking that.  Right inside the shrine is an empty room. The entire floor is cracked and dilapidated, except for one spot. I’m sure one of the NPCs in the area tells you about this, but the only NPC I need is Mr. Walkthrough. What you need to do here is toss a Firecracker Bomb at the clean-looking part of the floor.  It explodes spectacularly, revealing a staircase leading down. That’s where I’ll call it for now. It was hard to spot on the map earlier, but this building is the location for one of the Code Plates, so we’ll tackle that next time! See ya’ll then! … … … 
Last edited by SpoonyBardOL; 12-09-2017 at 01:14 PM. |
|
#77
05-30-2015, 10:46 AM
|
|||
|
|||
|
Quote:
Quote:
|

|
#78
05-30-2015, 10:59 AM
|
|||
|
|||
|
Quote:
|

|
#79
05-30-2015, 05:36 PM
|
|||
|
|||
 This guy's saying they've been digging for treasure there for the last 10 years. |
|
#80
06-09-2015, 06:16 AM
|
|||
|
|||
|
Sorry for the delay, folks, I've had a kinda busy week, and that's not letting up so it's gonna be another few days before the next update is ready.
|
|
#82
06-13-2015, 06:36 PM
|
|||
|
|||
|
A bit late with this update, I got super distracted this week. Also Stage 5 is kind of a thing.
If Stage 2 was my least favorite part of the game, Stage 5 is just a bit behind it. It's not really bad in the same manner as Stage 2 but, well, I'll get to it when I get to it. 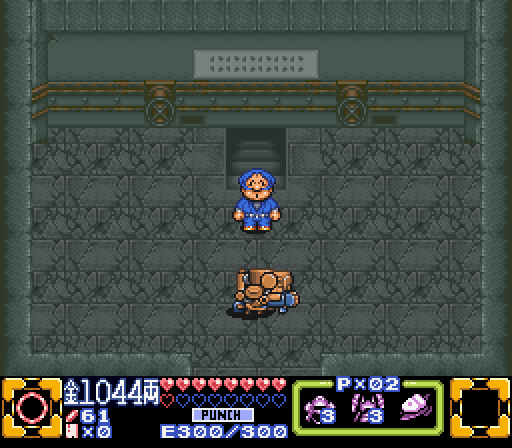 Future Overworld So when we last left off we blew open a hole in this otherwise nondescript room and revealed a staircase leading down.  Stage 5, Karakuri Tower Welcome to Stage 5, Karakuri Tower. This basically means 'Mechanical Tower', but in this context it more means 'a tower belonging to the Band of Mechanical Thieves' than a tower that itself is particularly mechanical. Anyway, right off the bat we're greeted with two new baddies!  Sir Specky BlockClap: Specky is a fairly common enemy type, he walks back and forth and periodically stops to fire a projectile in the direction he's facing. Somehow he has figured out a way to fire his projectile by clapping two blocks of wood together, a puzzling feat indeed!  Spindive McCaw: Spindive very slowly walks along the ceiling towards any foe, and as soon as said foe is in its sights, it dives downward spinning so fast as to pierce through the ground. Zealous, kinda suicidal, not terribly dangerous.  Just a little ways into the stage we get stopped by a message, which I think basically tells us that the pegs that you can see in the last two images there are sturdy enough to allow you to hang from them, and it just so happens that Ebisumaru just got a new sturdier hula hoop! This is the main gimmick of this stage, lots and lots of hanging from pegs. That's not all Stage 5 has to offer though. 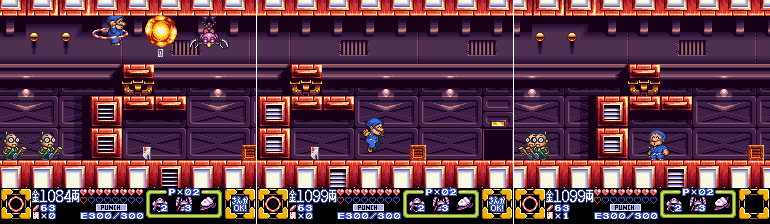 A keycard is just lying around, so I grab it. Kinda feels pointless, a bit, like they could have just not put down this keycard along with the first locked door, it's not like you're given a choice of doors later on. Oh well!  I bypass the open door for a moment to scout ahead a bit more, and come across a Walker teleporter, and a new type of door. It's a darker shade of grey than the standard locked door, and nothing I can do to it right now affects it. What on earth can we do about it? A question for later.  Returning to the door we go inside and we find the other main identifying feature of this stage: long vertical segments. It is a Tower, after all. The platform in the center is activated once you hit the button on the left. Though this is primarily an Ebisumaru dungeon, I use Goemon for this vertical segment for reasons which will become obvious in a moment. 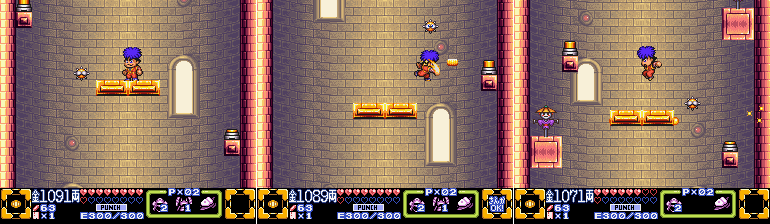 You see, the platform stops as it ascends, requiring you to hit the buttons on the left or right to get it going again. All the while it's raining spikey urchin bombs on you. The catch is the platform usually stops a ways above the switch, and that means your only way to hit it is to either knock an urchin into it with an attack, or use Sasuke's Firecracker Bomb, which falls when thrown. But nuts to either of those methods. You can ALSO hit each switch before the platform comes to a stop, and if you do that it just keeps on going till the next switch. This is why I use Goemon, since he has the only straight-shooting, screen-spanning secondary weapon. Ebisumaru's flies off in weird angles, Sasuke's goes straight down, and Yae's doesn't have enough reach. 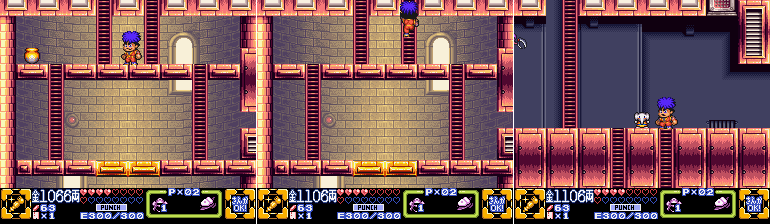 After a series of switches we reach the top. There's a rather suspicious one tile high hole in the wall on the right there, but we can't do anything with it. On the next screen up we get the Elephant Map!  Looks less dense than Stage 4 at first glance. Also, yes, I cut off the very top of the highest room on the screenshot on the right, but it was the only way to fit the rest of the map in there, and there's only one more row of beyond the cutoff. Last edited by SpoonyBardOL; 12-16-2017 at 10:48 AM. |
|
#83
06-13-2015, 06:39 PM
|
|||
|
|||
 To the left is a Walker teleport, but there's nothing I can do with it for now. Up the ladder is a new room and the start of a new vertical segment, but again, I can't do anything in here yet. I do spy a new enemy though.  Octoturret: Octoturrets hang around on wooden ceilings and are effectively invincible. Unless someone can find a way to activate the fuse they're attached to, thereby blowing them up. But what are the odds of that ever happening?  Trying to hit the switch-looking thing on the wall gives you a message that probably says something like the fuse needs to be lit. Another dead end, then. Back down and to the right!  And down, apparently! I didn't get a shot of it on this attempt, but there's a disappearing-reappearing platform in the center of the gap there that I just missed. It's a good thing, though, because at the bottom is a Golden Fortune Cat! This functions as four regular Fortune Cats, effectively a full heart container. Which means this stage does not have four to collect. Which, well, it's an odd choice. On top of removing the fun of finding Fortune Cats four at a time, they didn't even hide the Golden Fortune Cat all that well. It's just kind of sitting out in the open in a little side path that most people will probably check out if only to see what the deal is with that little gap from a few screens ago. Oh well!  We return to the previous room and hop across properly this time.  Just ahead we find some Bimmies manning some flamethrowers. We would probably be stuck here, but fortunately enough wood in the future doesn't burn, apparently. We can just push these wooden crates forward and block off the blazing fire.  We block off a few more to drive the point home, and then hit some ceiling-mounted flamethrowers. 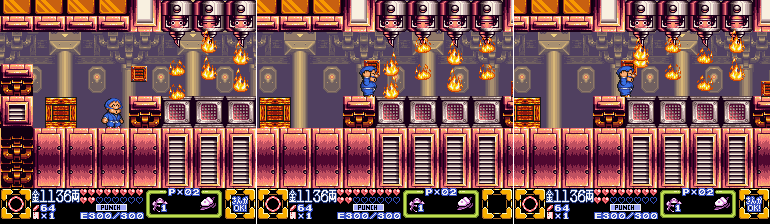 Good thing there's a smaller, carry-able crate sitting right there. This needs to be handled with a lighter touch than the ground-mounted flamethrowers, though. If you pick up the crate and run forward expecting it to shield you from the fire like a wooden umbrella you'll take a hit. You have to inch forward, wait for the flame to get 'caught' by the box, then move forward to the next one, rinse and repeat.  Get impatient and run froward like I did on the last one and you just take a stupid hit. 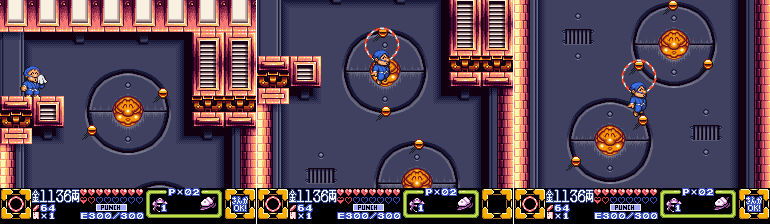 Next room has the predictable evolution of the pegs we saw earlier: moving pegs! The moving pegs have clearly identifiable tracks, so you can easily see where they go. The downside here is that every time I take a screenshot the emulator forgets my button inputs, and since you need to be holding down Y to hang off a peg, Ebisumaru falls off of them every single time I get an image. Luckily the screenshot itself is of the frame right before the buttons are unpressed so I can GET screenshots of Ebisumaru hanging from pegs just fine, it's just that I'm often in a bad spot immediately after, so I don't get quite as many peg images in this stage as I'd like. 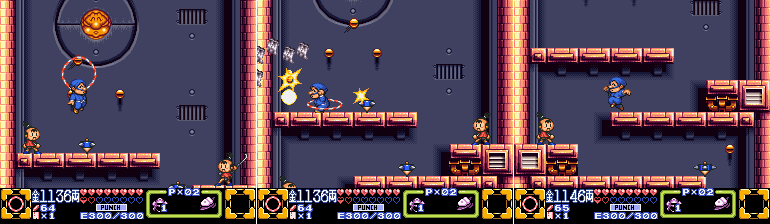 This section is all about going downward, though, so I don't really need to bother with the pegs too much, aside from controlling my descent. And hello there new enemy! Last edited by SpoonyBardOL; 12-16-2017 at 10:49 AM. |
|
#84
06-13-2015, 06:41 PM
|
|||
|
|||
 Tyson Kinomiya: Tyson has one dream, to be the world 'spinny discs with blades on them what are used for attacking' master! But the name of his contraption is such a mouthful and there is just no short, snappy alternative he can use so he got laughed out of every professional sporting organization of the future. So he and his many robotic clones work for Juurokubei, using his discs to attack intruders. They're sadly just as fragile as he is. 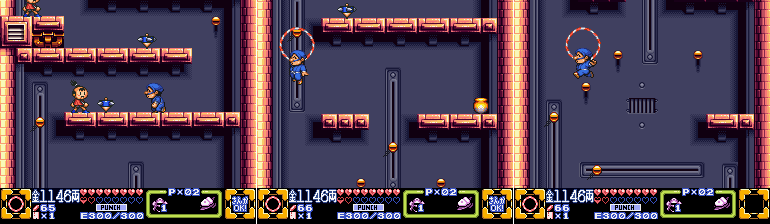 Tyson periodically tosses out his spinning discs, but they're easily dispatched and hardly get in Ebisumaru's way. 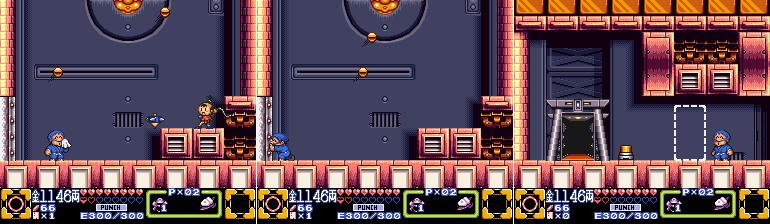 Down at the very bottom is a locked door, and we did pick up that one key that was sitting out in the open earlier. They could have just not had that key, and removed this locked door as well and it would not have changed one iota, but w/e. Inside is a Walker teleporter and a door. 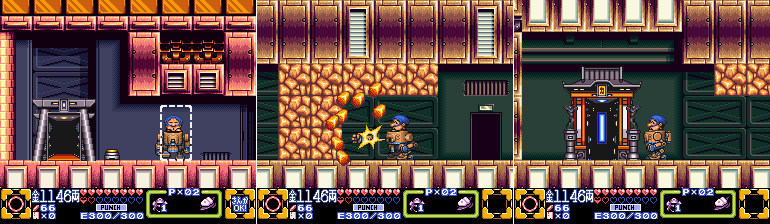 In the new room are some stone blocks sealing off a strange looking device. Kinda looks like a technological shrine....  Standing in the middle of it with the Walker causes the screen to flash and the Walker to obtain a new ability!  Pressing L or R will cause the Walker to turn red. It still punches when you hit attack, but when you hit special attack it fires out a flamethrower. The flamethrower also costs energy to use, so now that Energy bar has a meaning! With that new ability gotten, it's time to climb back up.  Not super difficult, again it's harder to get decent screenshots of this area than it is simply play through. 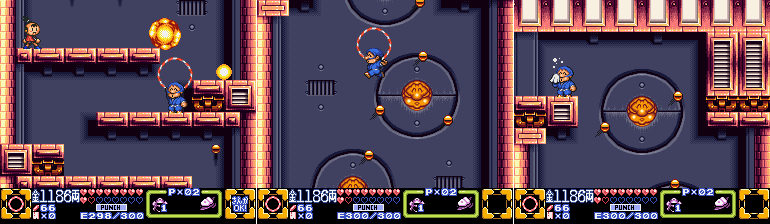 I may have neglected to mention, but now that Ebisumaru can hold his hoop over his head like this, it kinda functions as both a shield and an attack. Even though he's just kinda calmly holding it up, any enemy that touches it will be destroyed (assuming it's a foe that just takes one hit). Ebisumaru cannot walk while holding it up like this, but he can hop, so if there's an area in a 2D stage with a lot of aerial enemies then the hula hoop umbrella technique is super effective.  Little Wooden Crate Umbrella Technique is also super effective and I don't donk it up this time either! 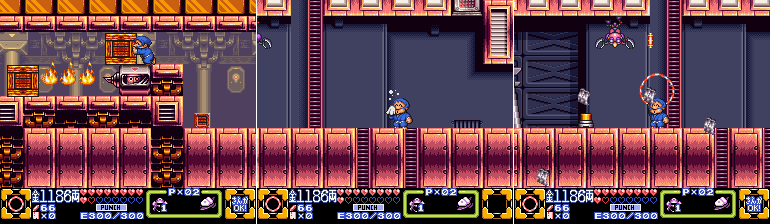 We make our way back to the first part of the upper area and let a Spindive harmlessly explode itself on our deadly plastic hoop.  Our Walker is summoned back here and we use it to melt the thick steel door with the flamethrower. You'll notice that my energy didn't decrease like at all. It's one of the weird design decisions of the game, honestly. If you tap the special attack button quickly enough you'll activate the flamethrower just long enough to melt the door, but before the game registers any energy loss. Just about everything you NEED to use the Walker's special abilities on are like that, they only require the lightest touch. So a low energy drain coupled with the fact that enemies drop energy-restoring spheres fairly often means that 300/300 Energy bar might as well not even be there. Last edited by SpoonyBardOL; 12-16-2017 at 10:50 AM. |
|
#85
06-13-2015, 06:44 PM
|
|||
|
|||
 The new room beyond the melted door heads downward, and along the way we're assaulting by some archery-inclined foes.  Bo-Wynne A. Rowe: The Bo-Wynne line of mechanical minions might be the deadliest sharpshooters in Juurokubei's army, and no one will give them credit for it. It's certainly not her fault they place her and her comrades in places where the arc of their arrows typically sail over intruders heads. "Just stand there and fire at a 45 degree angle, that's fine" they say, then they take the heat when intruders get a way. However some DO get wise and stand on a slightly lower platform so their arrows suddenly become a real threat...  We continue our trip downward and come across yet another foe in this room! (....wait is that an E-Tank?)  Lobes Kabuking: Life is tough when you're literally just half a head stuck to a wall. Lobes might be the only robotic minion to envy Mr. P'Tooie, at least he gets to be a whole head! So Lobes takes out his frustration on anyone he sees the only way he knows how, by shooting gunk out of his over sized ear in the general direction of anything he notices. He can't exactly look around to get a good aim, you see.  Anyway, as I observed before the enemy profile, the item here is indeed an E-Tank... or, Energy Canister. Whatever you want to call it. They basically function like Fortune Cats, collect four of em in a stage to get a thing. You can see the icon next to the Fortune Cat icon on our start menu how has 1/4th of it filled in. We reach the bottom of the room and, yikes! ANOTHER new enemy, that's three in one room!  Kerokero Kettle: This kettle constantly spews out little frog robots that are entirely harmless to anything that's not Walker. If they happen to latch onto a Walker, however, they will begin draining energy at a fast... well a quick... well a steady.... well, a leisurely pace. They're not a huge thread, honesty..  The new room at the bottom has a Walker teleporter and an iron door. Kinda generous of the game to put a teleporter down here, they could have just NOT and forced you to go through the A. Rowe/Lobes/Kettle gauntlet with a big clunky thing, it might have actually made that room a threat. I honestly kinda wonder if that thing was just left there for the developer's purposes and they just forgot to delete it. Not likely, I know, but still, the previous room just makes so much more sense as an actual challenge if you have to take your Walker through it. More weird design. Anyway there's a key right beyond the door.  Diving off the ledge to the left takes us back to the start. That's fine, we want to be back here anyway.  We melt the iron door we saw way back when and go beyond it to find another new foe!  Roll-E: Roll-E always insists he was destined for stardom, that he should have gotten the role as the star in a heartwarming animated movie, but that someone screwed up the offer letter and a typo landed his distant cousin in the part. It's fine, he didn't want to be a movie star anyway, he'd so much rather be a slow-moving minion in Juurokubei's army that curls up into a convenient platform as soon as the slightest bit of fire grazes him. It's fine, this is fine. It's not like he cries himself to sleep each night.  You need to roast the Roll-E fairly close to the platform. If you mess up and force it to curl up too far away you have to leave the room and re-enter, as just moving Roll-E offscreen won't cut it. Last edited by SpoonyBardOL; 12-16-2017 at 10:51 AM. |
|
#86
06-13-2015, 06:46 PM
|
|||
|
|||
 This is the biggest mystery in this stage. I do not know why these four Firecracker blocks are here. Is it to remind you that Firecracker blocks exist? I can't see any other reason, destroying them nets you nothing, there's no hidden passage behind them. They're just kinda there.  Aaaaaaand here we are. I wasn't looking forward to this sequence. Oh well, here we go! You'll see that your way up is barred, as the yellow blocks lining the top of the screen are un-jump-through-able. The only thing you can do here is push that oddly Omikuji-shaped statue into the little depression in the center of the room, and once you do... 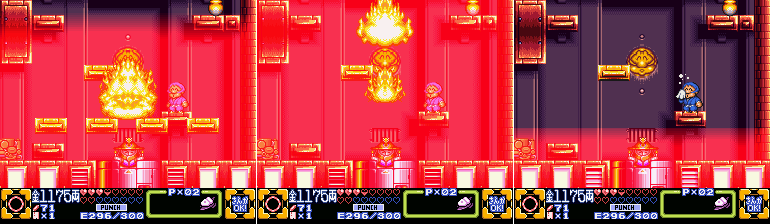 ALL OF THE FIRE! ALL OF IT! Ok so the gimmick here is that fire repeatedly rises through the center of the room, forcing you to wait around for it to go away to move forward as you criss-cross your way up the tower. The flames are screen-dependent, so they don't travel up and down the entire span of the area, they will start at the bottom of the screen and rise to the top of it, then lower again at the same pace no matter how much distance you put between yourself and the Omikuji statue. Never has Ebisumaru's idle face-wiping animation been more appropriate. 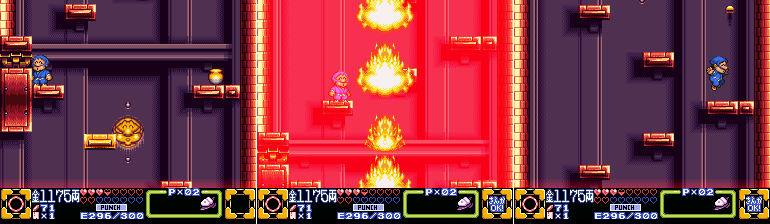 The fire also destroys the blocks that were in our way, so it's not like we could not place the Omikuji statute and climb up unimpeded. It's just a lot of progressing a little, waiting for the fire to stop, then move on. To the gimmick's credit it does do a couple of interesting things much later on, but overall I'm not a huge fan. Though it might be the aesthetics, I honestly kinda hate the wavy screen effect that accompanies the fire, along with the red hue. Just makes the situation that much more irritating. 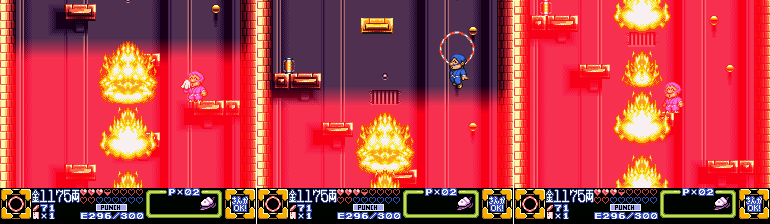 We pass by another Energy Canister, I reach it by climbing up a bit further then jumping down. It's not easier or more efficient, but it's just how my movements were dictated by the fire at the time. It was just as easy to go straight up than wait for the flames to lower and move to the left. 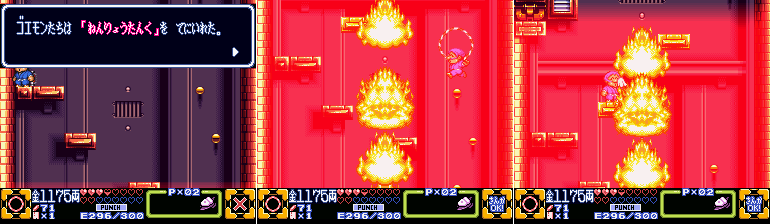 2/4 E-Tanks! The rest of the room is more of the same, climb-wait-climb-wait. Though I should point out that you can stand surprisingly close to the fire without damage. It's important to keep in mind later on.  About half-way up there's a side-room, which I eagerly duck into to get away from fire-tower. Even if only for a moment. 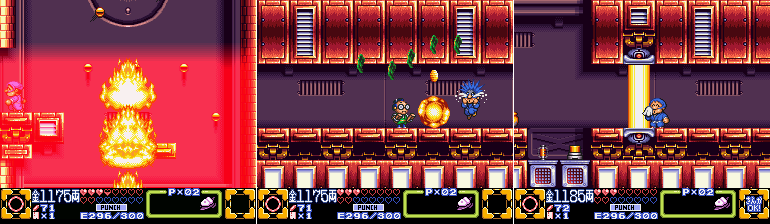 ...dead-end though, dangit! And it's one where a Specky is waiting just inside to ambush us. Double-dangit!  Back to the climb, more elaborate peg setups enter the picture. Why yes you DO need to time your jumps across the circular-moving pegs carefully so that they don't take you straight into the flames.  Finally the top. A new room with a Walker teleporter, which I ignore for now for reasons, and a large pit that I cross via hula hoop.  I was a second too late on the screenshot button there, but Ebisumaru is standing on top of a keycard in the second image. Last edited by SpoonyBardOL; 12-16-2017 at 10:52 AM. |
|
#87
06-13-2015, 06:47 PM
|
|||
|
|||
  NOW I grab the Walker and dive into the pit. It takes me to the other side of the barrier I saw earlier, and the stage's third Energy Canister.  Fortunately the way back down is so much easier, as it tends to be. 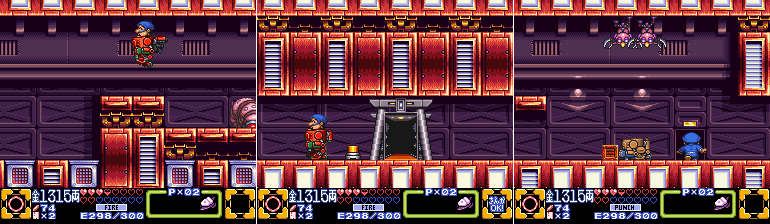 We've done all we can back in the starting area, so we return to the door leading upward. 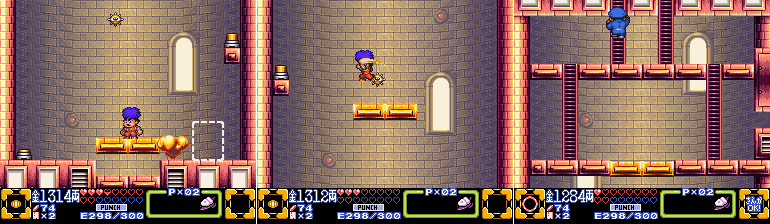 Yup, this room again. We handle it the same way as before, use Goemon to preemptively hit the switches as we pass them so that the platform keeps moving.  And now that we have the flamethrower attachment for the Walker we can finally do something about THIS room. That Octoturret has been taunting us for long enough, I light that fuse on the side of the room with the Walker.  The fuse climbs along the wire until it hits the Octoturret, at which point it turns blue and eventually explodes. Strange color change there but whatever, the way upward is open! The platform in the center starts moving upward if you're standing on it once the Octoturret is out of the way.  Next room is another Octoturret. Ok. Same deal here. 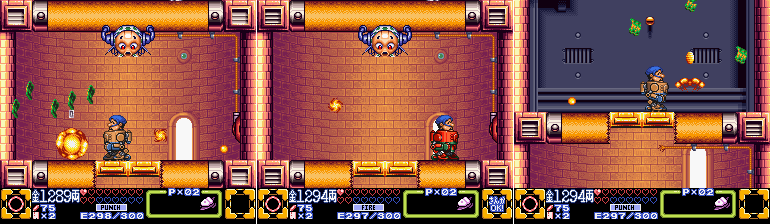 Another Octoturret! Though this one is accompanied by a Specky, not that it matters a whole lot. Last one though, we finally reach the top!  Well, not really. There's a bit more climbing to do. Now we get introduced to pegs that retract into the wall on a timer just to make our jumps even more harrowing. Last edited by SpoonyBardOL; 12-16-2017 at 10:53 AM. |
|
#88
06-13-2015, 06:49 PM
|
|||
|
|||
 The pegs don't alternate seamlessly. The pegs on one timer will have extended out again before the other set of pegs retract, giving you enough time to see them out and jump so that you don't need to really guess the timing. 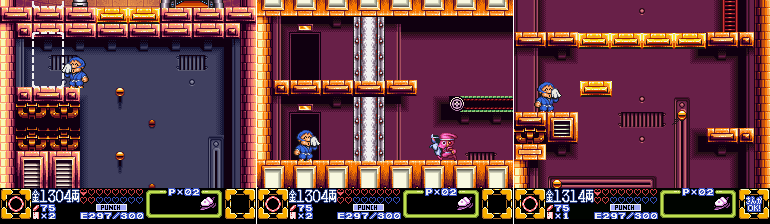 At the top we spy what looks like another one of those platforms that rises once an Octoturret is defeated. The next room reveals another door just above us so it looks like we'll be continuing our climb upward after a brief detour. The next room is fairly brief and has an upper area we cannot access just yet, there's another vertical area just beyond it, but first a new enemy!  Spooky Puppetmaster Bimmy: While his puppetmaster brothers concern themselves with using a sword-wielding puppet, this spookier variety uses a special ghost puppet, which fires ghostly blue flames instead of flailing around with a toy sword. It might be super dangerous if not for how long it takes for one of those flames to appear, this Bimmy is usually scrap before it gets a chance to attack.  This new area has another quick trip down, we'll probably have to climb it later on. The last screenshot there actually has an opening on the left which leads to a new room. 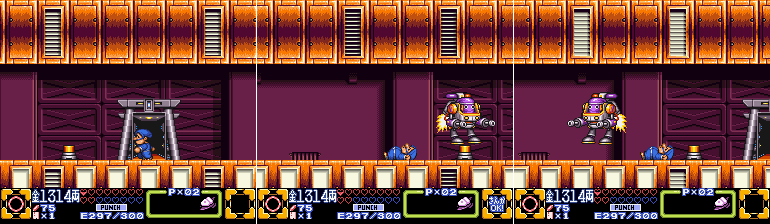 The new room has a Walker teleporter, as well as the return of the police robot we saw way back when Goemon woke up in the future. It's now a standard foe.  Bimmy Walker: The Bimmy Walker is fairly durable, and a tricky foe to handle until you learn the trick. In 2D stages it will always hover in the air and charge forward after being struck. The charge is super easy to avoid by ducking, so it's simple enough to bait the Bimmy Walker into an easily-avoidable attack, just remember to duck every time you hit it. Had Juurokubei kept the Bimmy Walkers confined to the overworld where ducking is impossible it might have been a more deadly foe... 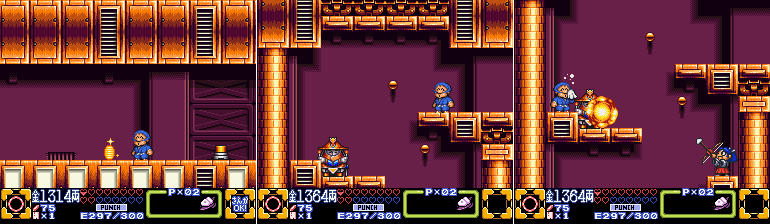 Also important to note, Bimmy Walkers tend to drop giant Ryo upon dying, which awards a whopping 50. They're by far the best foes to grind on if you ever need the cash. Anyway in the next room we find--- goddammit! Another Omikuji statue. Along with a treacherous series of Bo-Wynne A. Rowes, this time they're placed in much more dangerous positions. The last time we saw them we could dodge the arrows just by standing in the right spot, this time though they NEED to be ducked, and the entire time we'll be slowly pushing the Omikuji statue down.  Again, ducking is mandatory here. Even if we didn't have to push the Omikuji statue the enemies here would still get to fire an arrow off before we got within striking distance, so we have to play it smart. Honestly, even though it has the 'start and stop' nature that I disliked about the flame pillar room, I don't hate this section. I can't begrudge the game escalating a familiar enemy's threat in a smart way.  This room could have stood to be a level or two shorter though. Oh well!  Pushing the statue forward we encounter a Blue Bimmy Walker, which doesn't deserve its own profile. It's a Blue Bimmy in a Walker instead of a Pink Bimmy. That's all. Last edited by SpoonyBardOL; 12-16-2017 at 10:57 AM. |
|
#89
06-13-2015, 06:51 PM
|
|||
|
|||
 Next room brings us back to the vertical section from earlier, and the depression for the Omikuji statue. Alright then, flame pillar section #2! Let's go!  We pass a large door in the wall on the way up. We can't enter it from this side due to the lack of footing, which suggests we'll be exiting it later on, which means we'll probably have to repeat this fiery climb again! Yay! The flame pillar eliminates the yellow blocks that would have blocked our way if we tried to pass by the side-room which led to the Omikuji statue. 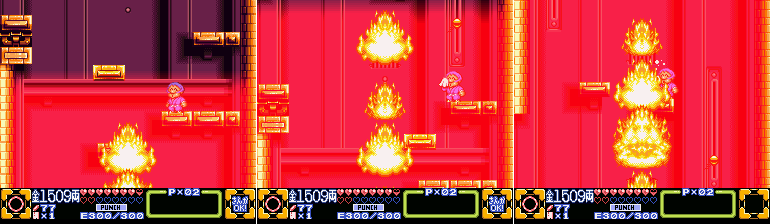 Up and up we go. And, just to drive the point home, you can stand REALLY close to the fire without taking damage. 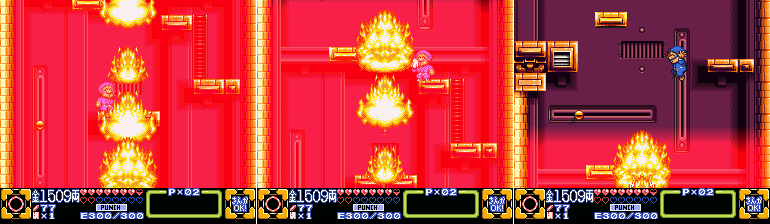 We finally approach the level where we entered the vertical section....  ...and the fire destroys another set of yellow blocks, just in case you were wondering why I had to bother with this section at all. We need to go even higher. 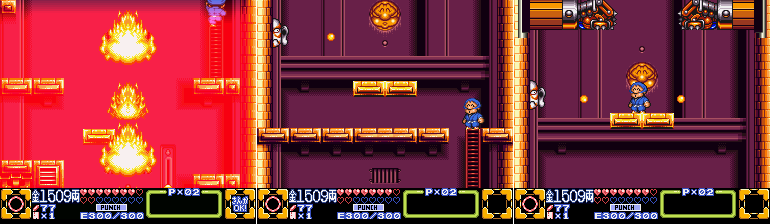 The next room up, mercifully, does not contain the fire. Looks like it stops at area boundaries. It does, however, have another platform heading up with a new kind of obstacle: spiked fists which try to crush us as we go upward. They're not super hard to avoid, and you can safely land on the 'arms' and most of the hand, but don't touch the edge of the fist, even from the top, or you'll take damage. 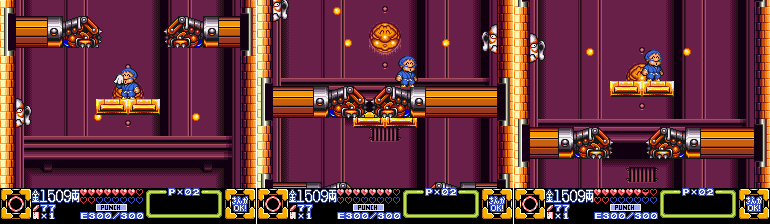 Some Lobes Kabukings take potshots at us as we go up, but they're not super hard to avoid, or destroy if you're willing to spend the ryo on a ranged attack. 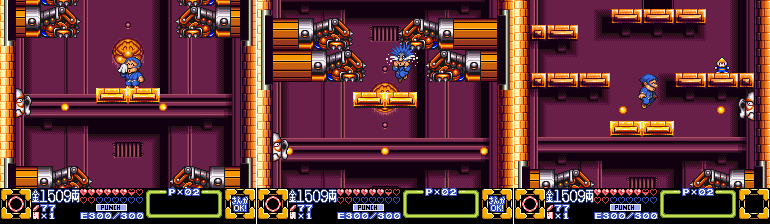 The fists start to gang up on us, and I take a stupid hit, but the section ends and we see something we haven't seen in a long time. It's Mr. Compass! We haven't collected one of those since way back in Stage 1! Does that mean this is a 2D stage with a proper boss at the end?  The map shows a red circle at the bottom of a tower to our left. I guess we'll see when we get there! The next room drops us off into another vertical section, this time with some ominous spikes on the ceiling and Firecracker blocks on the floor. 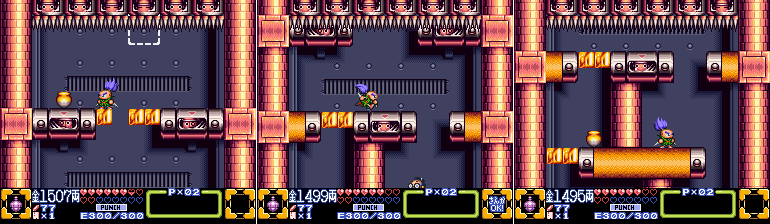 The spikes start to lower, so I quickly swap to Sasuke and clear a way for me to go down. The screen itself is moving as well so I can't outrun the spikes here. I have to keep moving down at a gradual pace. If I get too far ahead I re-appear on the last ledge I stood on with half a heart gone, as if I jumped down a pit. Last edited by SpoonyBardOL; 12-16-2017 at 10:58 AM. |
|
#90
06-13-2015, 06:53 PM
|
|||
|
|||
 A lot of Speckys stand in our way on the way down, but they're not a huge threat. Especially when they walk right in the path of Firecracker Bombs I toss from above. 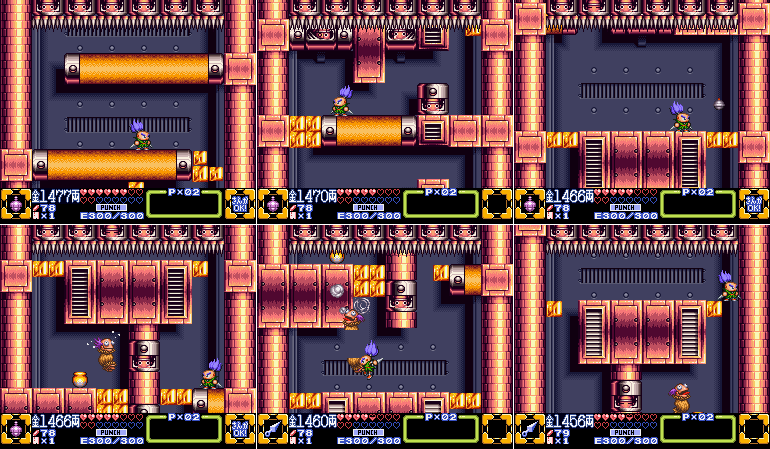 This whole section is like a microcosm of Stage 5, slow-moving vertical sections that require just enough of your attention so that you can't just veg out, but are still kinda dull. A few Speckys break up the tedium, but beside that there's nothing really special about this room and --what... what is that? I don't even... WHAT IS THAT?  WHAT IS THIS???: Seriously I don't even!  Well whatever it is it hops around and dies in one hit so they're easy enough to remove from the screen. Even when a bunch of em appear at once they can all be taken out by the same Firecracker Bomb. We finally reach the end of the slow-moving drop and grab what we came for: Another Keycard.  Aaaaand then we're dumped out of the door we saw earlier and, like I feared, we have to climb the flame pillar section again. Hooooooray.  We finally reach the first room from this level of the stage, from the upper area this time, and make our way to the left side. We finally reach the upper door and can advance.  Ok it's another Octoturret room, but honestly after the past few areas this is a breath of fresh air. And hey, the ceiling is lower here so the Octoturret's shots are a bit harder to avoid in the bulky Walker. Sure it dies just as quickly, but again, no complaints here.  The Kerokero Kettle is quickly dispatched before it can spew some energy-sapping frogs on me. Using them in a room where you have to use the flamethrower is the smartest thing this stage has done. It's just a shame that, as I said earlier, you can easily manage your energy usage without worrying about ever running out, even with energy-sapping foes around.  Like all the vertical segments of this stage this area just barely wears out its welcome. And like the last Octoturret room we have a peg-climbing section right after it.  This time we have flamethrowers getting in our way, so we have to time our jumps onto the moving pegs just right so we don't get knocked off. Last edited by SpoonyBardOL; 12-16-2017 at 10:59 AM. |