
-
Welcome to Talking Time's third iteration! If you would like to register for an account, or have already registered but have not yet been confirmed, please read the following:
- The CAPTCHA key's answer is "Percy"
- Once you've completed the registration process please email us from the email you used for registration at percyreghelper@gmail.com and include the username you used for registration
Once you have completed these steps, Moderation Staff will be able to get your account approved.
4x4 = -wait, what's the title? Let's Play Ganbare Goemon 3!
Back to Let's Play
< 1 2 3 4 5 >
< 1 2 3 4 5 >
|
#91
 06-13-2015, 06:54 PM
|
|||
|
|||
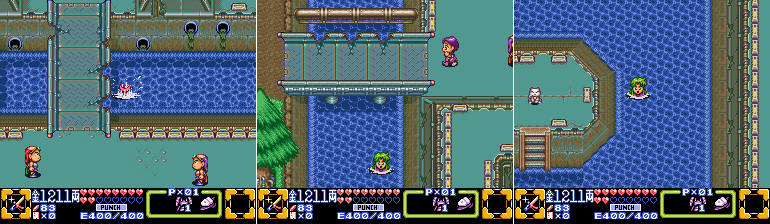
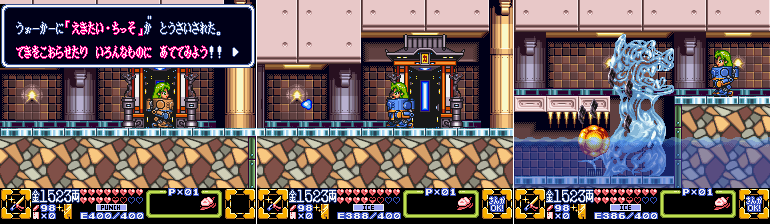
 The top of the section takes us to a giant outdoor room. Have we reached the top of Karakuri Tower? 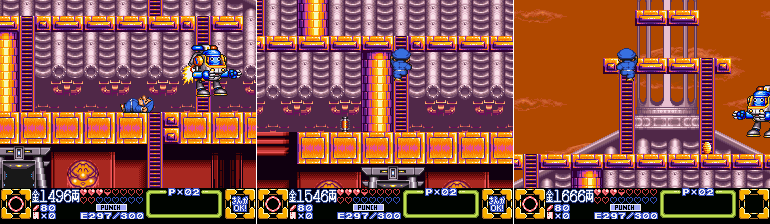 A few Blue Bimmy Walkers make pests of themselves, but they're easily avoided or killed. 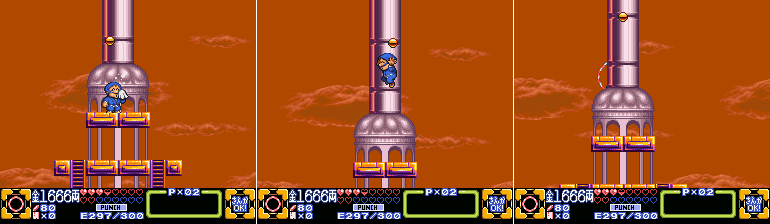 At the top of the room is rather ominous spire with pegs that rotate around it all the way up. I dunno about you guys but I'm getting some Battletoads flashbacks here. 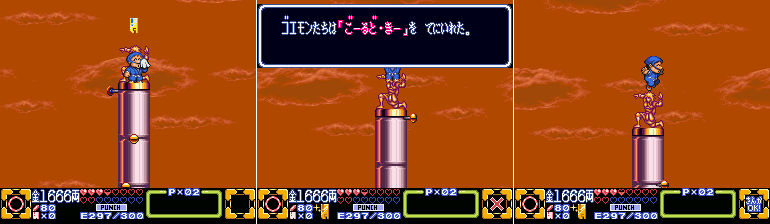 Ok I'll come clean, I completely failed to get any further screenshots of the climb up due to the aforementioned issue with getting screenshots while holding onto pegs. The climb here requires a lot of attention, too, since you have to make sure you jump off of a peg and have one to land on at the same 'layer' you're on. By the time I reached the top I realized 'oh crap, I didn't get any images along the way!', so uh, sorry! But hey, I finally get the Gold Keycard, which was hovering just above a statue of Juurokubei at the very top of the tower.  Stage 5, Karakuri Tower Getting the keycard also changes the music back to the BGM from the start. And hey, I may not have gotten images of the climb up, but the drop down is easy enough. Just trust me when I say this climb is pretty dang long. 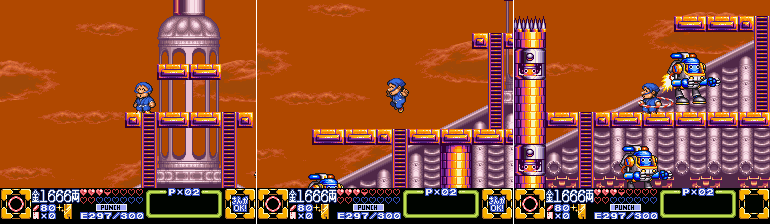 With the Gold Keycard in hand I climb down the left side of the area, dodging some foes along the way. The end of the stage is in sight so I'm in no mood to entertain some mooks.  Though they seem determined to make me their entertainment so fine, I destroy a few. I also spot the fourth Energy Canister of the stage! 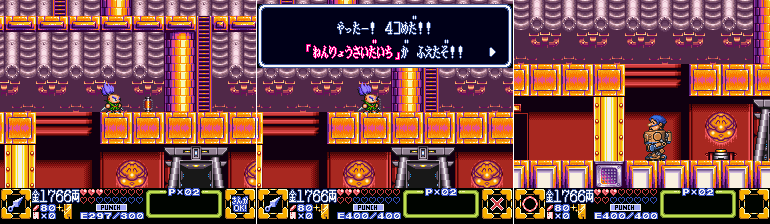 I use Sasuke just to make the jump a sure thing, and grab it. As you might expect, getting four Energy Canisters increases our Walker's energy by 100, bringing it up to 400. A nice gesture, but as I've been saying energy isn't super hard to manage. Honestly I would have replaced the Golden Fortune Cat from the beginning of the stage with an Energy Canister which immediately gave us 100 energy, and spread four normal Fortune Cats around the stage in their place, it would have made getting this last one feel more rewarding anyway, not to mention restore my health which I kinda sorely need right now...  Behind the gold door is a simple drop down. This is another weird decision since it's the only gold door in the stage. Stage 4 had multiple golden doors which meant the Gold Keycard's unique ability to be used multiple times had a use. Here though there's just one and it's at the end after all the normal keycards have been used up, the Gold Keycard at the top of the tower could have easily been a normal keycard, with the gold door being a normal locked door, and it would have changed nothing. Again, Stage 5 is just kinda weird. Last edited by SpoonyBardOL; 12-16-2017 at 11:00 AM. |

|
#92
06-13-2015, 06:57 PM
|
|||
|
|||
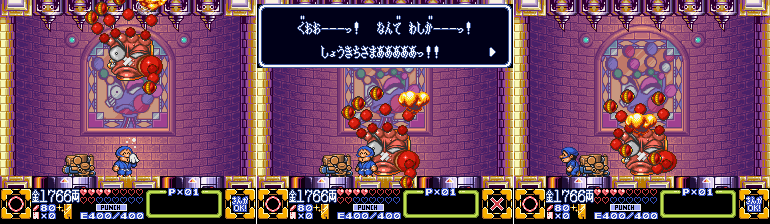
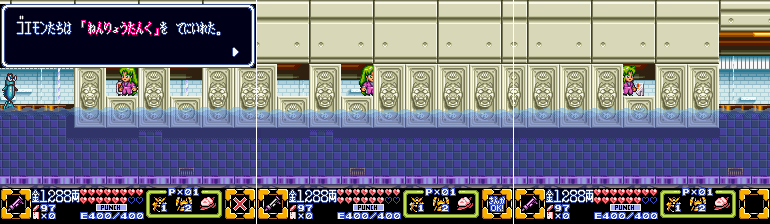
  Fearsome Hand Wowzers! As soon as we transition to the next screen we see a stained glass window of a weird hand-looking thing, and then a moment later said weird hand-looking thing breaks through it! The Hand assaults us the entire time down, though we can punch it away with the Walker's attacks. 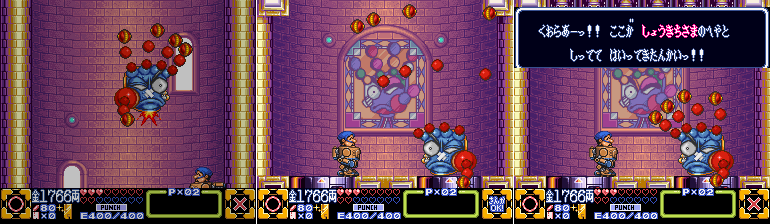 Once we land The Hand says something or other. Despite the fact that the script I've been following supposedly covers all the main story beats, the dialogue from this boss isn't included. Probably not important... 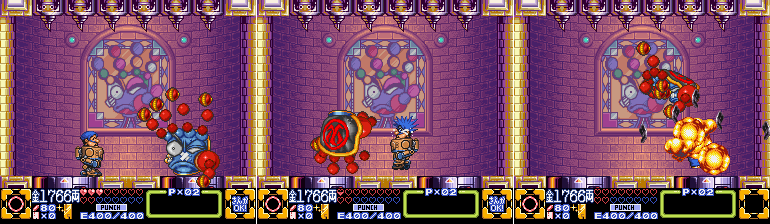 Boss Battle Boss Time! Which, uh, doesn't last long. I only had like three hearts going into the boss arena and no items to fall back on. I probably could have made my way to the exit of the stage, stocked up in town, and came back in, but it's just as easy to lose a life. 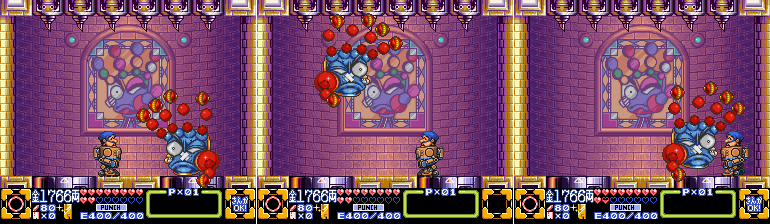 I restart the fight with full health anyway, so Boss Time Take 2!  The Hand: An odd mishmash of random technology, The Hand guards the upper level of the Karakuri Tower. It can fly around the room, flicking its dreadful index finger at opponents and forming a fist to try and crush them. Occasionally it will latch onto the wall and crawl onto the ceiling, only to try and flatten his opponent with an open palmed smash. The Hand is also backed up by some Bimmies, operating ceiling-mounted lasers. 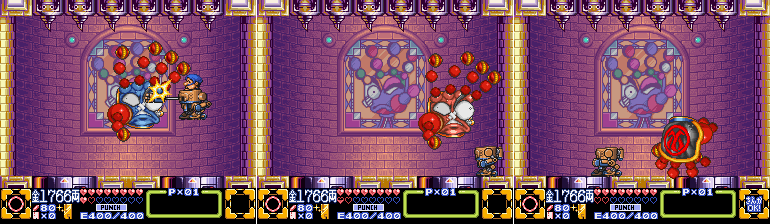 Now, you might be thinking, why not swap to Goemon and use Sudden Impact on this fight? I did mention that there was all of one boss battle in the game it was useful on, after all. This one isn't it, though. You have your Walker with you, and its punches do more damage than even Goemon's powered up attacks. I haven't tested the numbers, I admit, but I do know that the Walker's punch does roughly 3x the damage of a normal attack, and Sudden Impact merely doubles attack power, so no matter how you slice it you're better off using the Walker to attack.  There is, though, one moment you want to leap out. Whenever the hand starts clinging to and climbing the wall, you'll want to get out on foot. 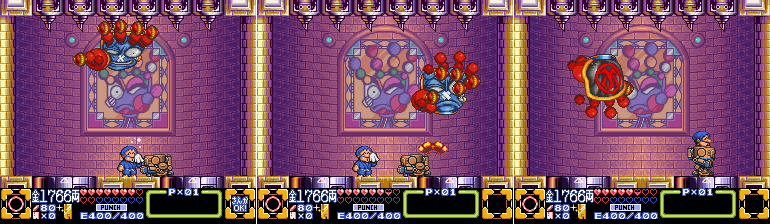 I flubbed the screenshot timing here again, but suffice to say Ebisumaru's Hula Hoop Umbrella Technique works wonders against The Hand's slam attack. You'll need to jump up and hit it a few times as its descending, but you can break it out of the attack and avoid damage. Since the Walkers cannot attack upward on a 2D stage, and move too slow to dodge the slam, it's really your only strategy. 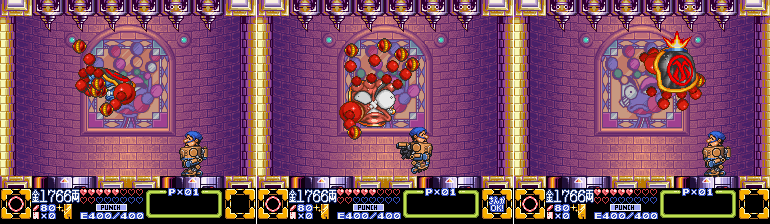 Once again the game never fails to provide amusing goofy damage frames.  The Hand's attack pattern is fairly short, and thanks to the flickering nature of the lasers it turns out none of my screenshots actually captured any. But hey, here comes slam #2! Last edited by SpoonyBardOL; 12-16-2017 at 11:01 AM. |
|
#93
06-13-2015, 07:01 PM
|
|||
|
|||
  Another series of attacks later, The Hand falls! I apologize for the rubbish assortment of screenshots against this guy, I must've been off my game while fighting him.  But he does a cute little countdown prior to his explosion. When you're nothing more than a giant hand, your means of expressing yourself are kinda limited... 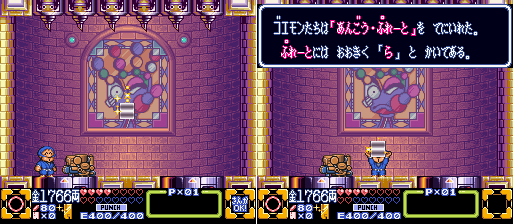 Fanfare But hey, we get the second Code Plate for our troubles! This one is 'Ra'. 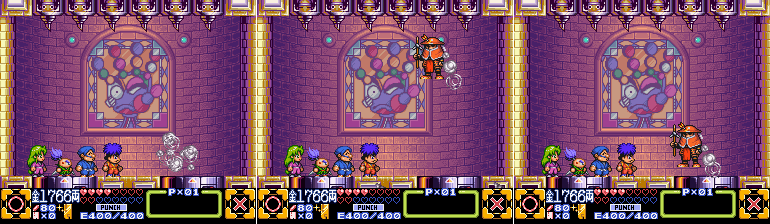 The Omikuji Siblings And as if right on cue, one of the Omikuji Siblings pops out of thin air to stupid at us. 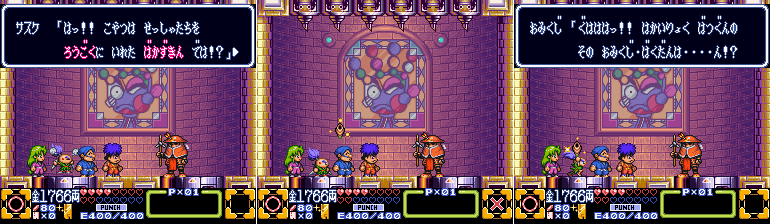 Omikuji: The Five Omikuji Siblings "Burning Man", Shokichi, is here! Sasuke: Hey! Isn't this the hooded halfwit that threw us in prison?! (laugh track) Yae: Heh, Hooded Halfwit. Well said, that's a clever title. Omikuji: Ohhh, how rude! When you snuck out of prison I never thought we would chase you all the way to this place! You disrespected the great Shokichi! But I have a secret weapon that will give me the upper hand here. Prepare yourselves for the Omikji Bomb! (Omikuji tosses the Triton Shell at Sasuke) Omikuji: Guahahaha! Prepare to experience the destructive power of the Omikuji Bomb---?! What the?! (laugh track) Goemon: That was lucky! Thanks for giving us back the Triton Shell! Omikuji: Damn it! That Triton Shell was a vital part of L-Lord Juurokubei's plan for the Giant's Revival! His plans will fail with it! Damn it, why didn't I remember I had that? (laugh track)  Embarrassed at the fact that he apparently mixed up the Triton Shell for his 'Omikuji Bomb' and completely donked up his master's plans, Shokichi flees in disgrace via flying through the roof so he can't mess things up further. Probably the smartest thing he's done so far. 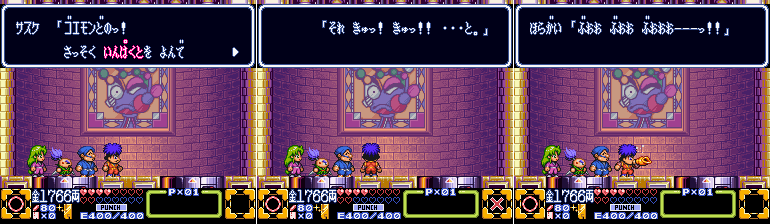 Ebisumaru: 'Plan for the Giant's Revival'? What do you mean by that? Yae: Ebisumaru, he's not here anymore. Sasuke: Goemon! Call Impact right away so we can go destroy the dam! Goemon: Damn it, I forgot all about that! We have to destroy the dam so we can save the two towns! Okay. It's been a long time since I used the Triton Shell... (squeak squeak squeak) Goemon: ...there! Sasuke: Why are you wasting your time polishing it?! (laugh track) Goemon: Hey come on! I know I don't usually act like this, but this calls for a change in attitude! Ignoring the likely lost in translation joke at the end there, there's two things to take note of in this conversation. First off is the 'Plan for the Giant's Revival', which seems to be Juurokubei's endgame, and something we'll surely hear more of as we continue. Second is the whole thing about the dam and the two towns. I believe this is something that is elaborated on through talking to NPCs only, thus the script I have doesn't mention it at all until now. The gist of it, that I've been able to piece together myself, is that the big dam we saw earlier is cutting off the water supply to Kagami Town, which explains the dried up waterways we saw on the way there. But not only that, Kagami Town also has a number of refugees from another town we haven't seen yet, and it just so happens that town is submerged in the reservoir of the dam. It's, uh, probably beyond saving really, but we're going to try anyway! Let's summon GOEMON IMPACT! 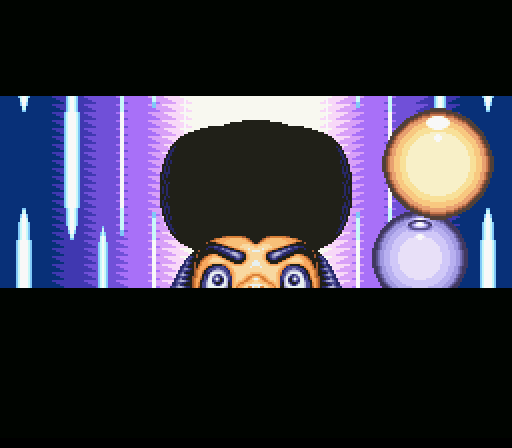 .......next time. This update was already super long, and took super long, and I just need to stop it here for my own personal sanity. So we'll pick up at awesome Impact times next update. Stage 5 man, I honestly didn't expect it to be so exhausting to put together in LP format. I think I still dislike Stage 2 more just for how bland it is, but Stage 5 just goes on for so long with a lot of retreaded ground and numerous segments where the game forces you to slow your pace. Yet it's still not very complex, it has a simpler design than Stage 4, so much so that with a bit of tweaking you could probably eliminate all the Keycards from the stage entirety and not really miss anything. It makes a lot of strange structural decisions and overall it's kind of a step down from Stage 4. But at least it has some interesting enemies, and even the worst sections have a few things going for it. Stage 5 kinda hurts my case when I insist Goemon 3 is my favorite of the SNES Games, but I can confidently say that the game is all uphill from here, so I'll see ya'll when I continue! Hopefully it won't take two weeks this time! Last edited by SpoonyBardOL; 12-16-2017 at 11:02 AM. |

|
#95
06-20-2015, 06:12 PM
|
|||
|
|||
|
Hey hey, folks, let's play some more Ganbare Goemon 3!
I left off last time with a bit of a cliffhanger. While I normally like to break between updates in a more natural way, the length of Stage 5 just meant I had to cut the last update before the big Impact sequence. Speaking of which, let's pick up there!  Impact's Theme Much the same as last time, but still I can never bring myself to skip these boarding sequences.  Starting Up... Sasuke: I'm glad the Triton Shell has been returned to us safely. Goemon: Well, we have to head north towards the Wicked Dam! Ebisumaru: Wicked Dam is such a terrible name... Goemon: Hey! I came up with that name! Everyone: Argh! Yae: ...well, let's hurry over there. Sometimes I wonder how these lines would have been translated in an official localization. But anyway, we have a goal here, to blow up the 'Wicked Dam'! We got a lot of stomping to do before that though.  Impact Goes to Battle! This Destruction Sequence plays similarly to the last one, though we're stomping through buildings rather than a forest. Your priorities remain the same, destroy enemies before they can damage you, the more destruction you commit the better your rewards are going into the boss fight. The enemy types are different this time around too. This foe appears in groups of four and moves towards Impact in a circular pattern. They're usually at head-level so Nasal Medals work best. 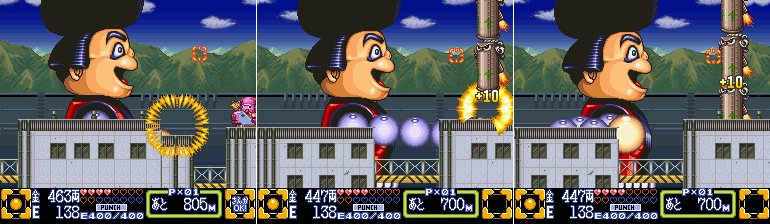 These guys are probably the newest sort, as they appear as a sort of wall, all stacked on top of one another. They would each do individual damage to Impact if they collide with him so obviously you need to take em all down. It's possible to strike em all at once with an uppercut, but you have to get a bit close for that and it's safe to just use punches and Medals. 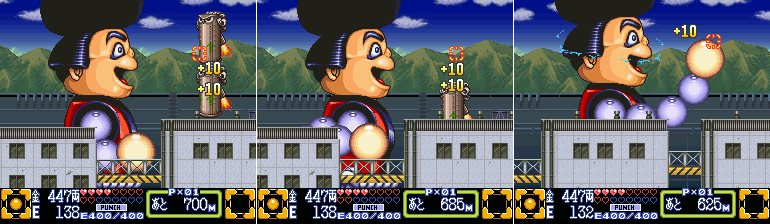 But if there's any left once you are close enough by all means, uppercut away.  And much like in the first Destruction Sequence we have these Bimmy jerks that hang out just out of range of punches and Medals, and you have to turn Impact's head to fire at them. The Medal on screen in the last image there does hit the Bimmy, but Impact's head had turned back to facing forward the frame before I got the screenshot.  This is a better series of shots of that 'turn your head and fire' action. 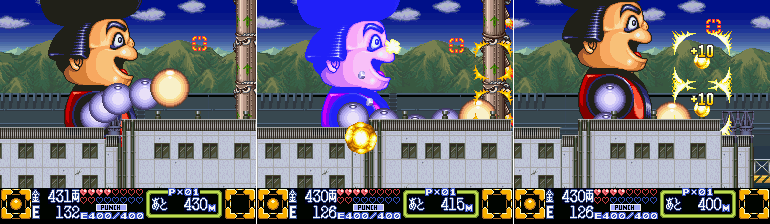 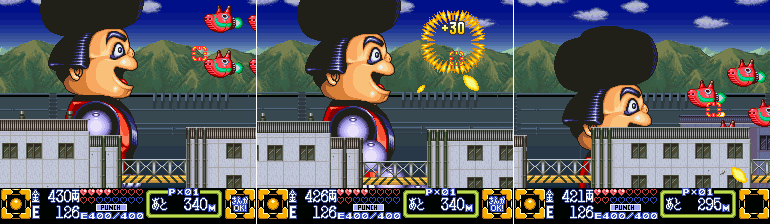 More shield jerks and flying guys. They do sometimes appear appear lower and right in range of your fists, so go ahead and spare the Nasal Medals whenever that happens, it's basically a gimmie.  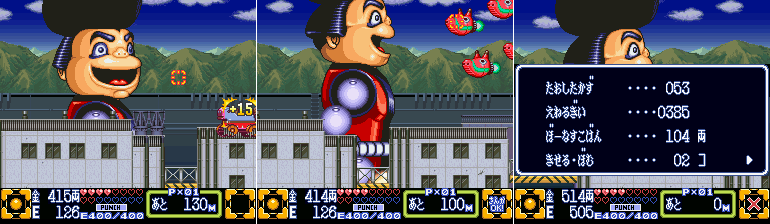 That's about all this Destruction Sequence has to throw at you. Once it's all said and done I get to enter the boss fight with two Pipe Bombs and about 500 energy. That's plenty. Last edited by SpoonyBardOL; 12-16-2017 at 02:43 PM. |
|
#96
06-20-2015, 06:16 PM
|
|||
|
|||
 Impact Boss Because it's time to fight the Wicked Dam! Well, 'fight' may not be the best word here. Impact slowly approaches the Dam while dealing with a barrage of projectiles that knock you back whenever they hit. The first phase of this fight is just a lot of shooting down missiles and big yellow balls. This is probably the most unique Impact Boss, at least in the SNES games. They tried something a bit like this fight again for the penultimate boss in Mystical Ninja Starring Goemon (big stationary thing with a lot of little bits that shoot at you which you need to destroy individually), but much more elaborate. Also Ebisumaru says a thing, no idea what.  So for the first phase of this fight multiple turrets open periodically and fire at you. You can either shoot down the projectiles with your own, or punch em out of the sky and earn more ammo for yourself. I prefer punching at least at first, since it's about as effective and you get to see your reserves go up and not down, but honestly if you come into the fight with enough Ryo in stock you can probably just go crazy with the Nasal Medals and not really worry. You DO need to switch to Nasal Medals eventually, though, since the closer you get to the Dam the easier it is to actually hit the individual turrets. It's nearly impossible when the fight starts since you're too far away to have any hope of hitting them, but once you get close enough that you can start hitting them reliably you want to unleash the Medals.  You can also unleash a Pipe Bomb to clear the screen for a few moments. That might have seemed like a waste, since the Boss's HP indicator didn't decrease at all, but even though this didn't hurt the Dam directly any turret that was 'open' during the explosion was taken out, and they don't exactly stop opening even when there's a giant death explosion going on, so this takes out quite a few. 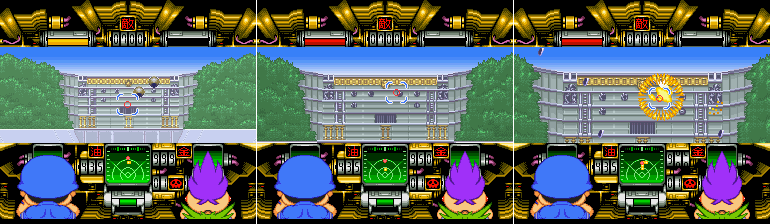 And as you can see, as we get closer it becomes much easier to tell when a turret is open and shooting at you. 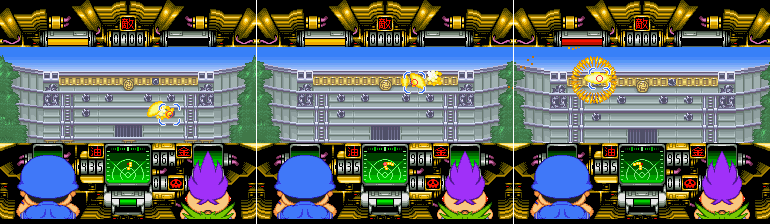 Eventually we take out all the turrets on the lower part of the Dam, and then the guns on the golden top area start opening up. 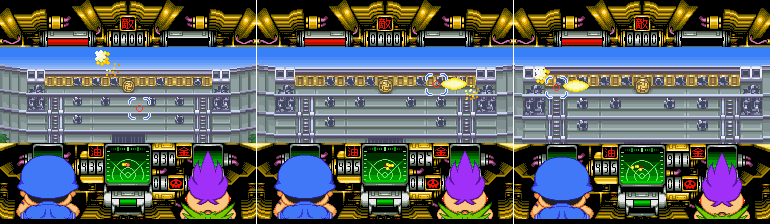 ...wow there are a LOT of guns in there. That's really gotta mess with the structural integrity of this thing 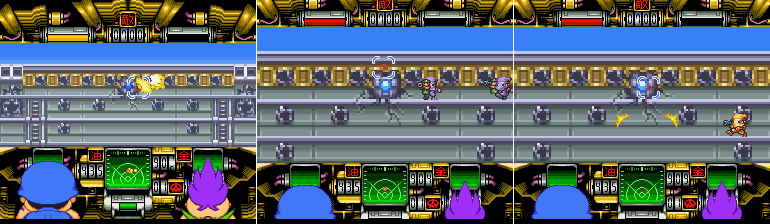 Finally, once all the turrets are destroyed the blatantly obvious weak point of the Dam opens up and we can start doing some actual damage. Of course every Bimmy in the world takes this moment to jump out and start shooting us as well. 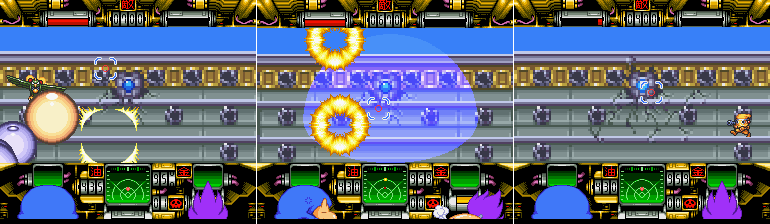 I use my last Pipe Bomb just to clear the screen and do some big damage to the Dam, though you would think it would be close to breaking now just from the assault it has been weathering all this time. 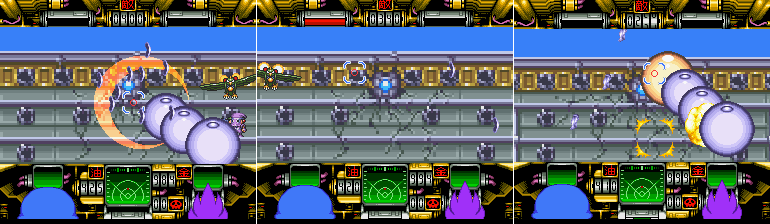 Your best bet for doing the remaining damage to the Dam is your Strong Punch. Nasal Medals do no damage to the core and even your Quick Punch is too flimsy. While I decide to be dramatic and only throw out the Strong Punch once its meter is fully charged, you could easily just hammer the Strong Punch button at this point and probably win, as long as you have enough HP to withstand the Dam's guardians wailing on you. 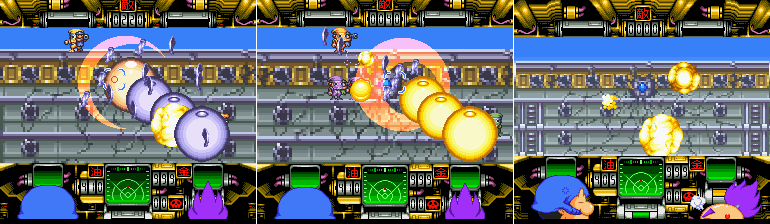 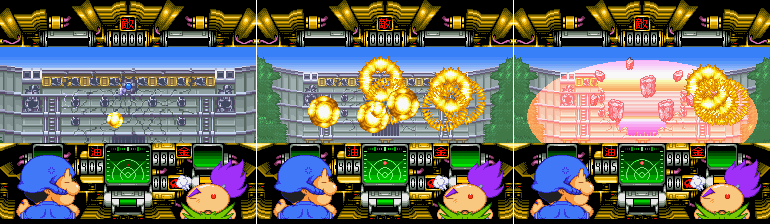 Many punches later the Wicked Dam is defeated! It explodes and, we can assume, the reservoir is drained! Now the people of that poor town can return to their water-logged and likely ruined homes! And Kagami Town can deal with the aftermath of the uncontrollable flood that probably overflowed over their waterways and caused unspeakable havoc! We're heroes! Last edited by SpoonyBardOL; 12-16-2017 at 02:44 PM. |
|
#97
06-20-2015, 06:18 PM
|
|||
|
|||
 Future Overworld Actually everything's probably fine. For now, though, we're ejected from Impact and asked to save. And just for posterity's sake, I bring up the map and do a bit of editing to point out where the remaining Code Plates are being indicated, since it can be kinda hard to see their spinning icon in still images. You might be wondering why there's only four on the map when we still need six. Reasons, that's why.  RIght now we to make our way back to Kagami Town through Impact's path to the Dam, which is kind of a neat touch, honestly. We have to knock slabs of pavement over to make bridges across the grooves left by his giant skates. 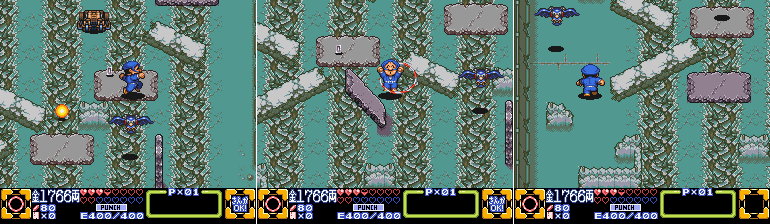 Though with all the Bloo J. Byrds hanging around it's far easier to ditch your Walker and go on foot, as I have said before they're much easier to hit with your normal weapons than the Walker's fist. 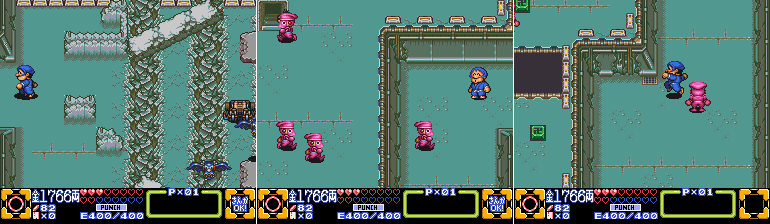 Just a bit west of here is the area north of Kagami Town I mentioned, but didn't visit, a few updates ago. The upper area seems to be littered with, uh, Manji blocks?  More as we go down. I still can't do anything in the upper area so we move on. 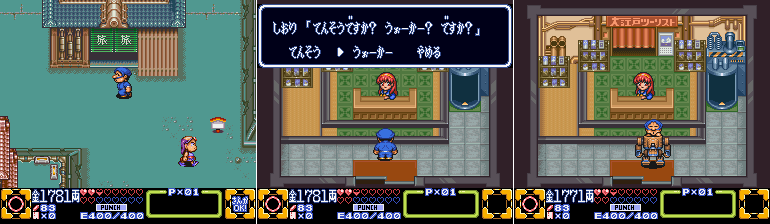 Futuristic Travel Center I quickly run inside the Travel Center and get my Walker back. Yes I was perfectly happy spending the 10 Ryo to teleport it back to me, far easier than taking it through Bloo J. Byrd hell. 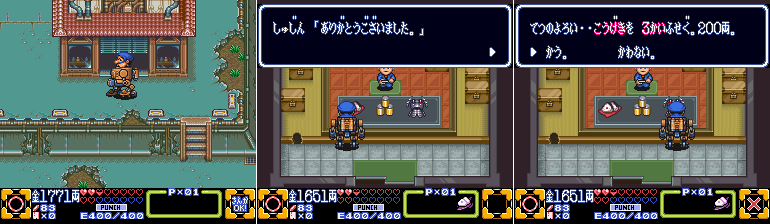 Futuristic Store I also buy some more supplies. (also did you notice that suspicious hole in the floor there? I didn't point it out last time I was here but gosh it sure does stick out doesn't it?) 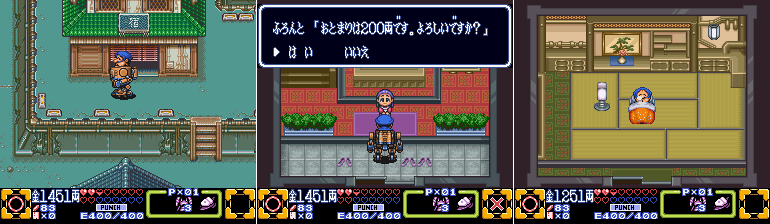 And finally, a night at the Inn to restore them hearts. 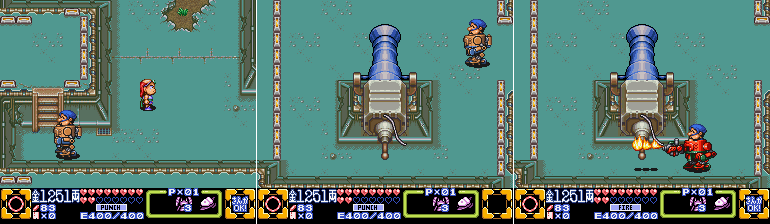 Future Overworld Now then, to get to what I need to do. Remember this cannon? Well now that we have a flamethrower attachment what we need to do here is kinda obvious isn't it? Last edited by SpoonyBardOL; 12-16-2017 at 02:45 PM. |
|
#98
06-20-2015, 06:20 PM
|
|||
|
|||
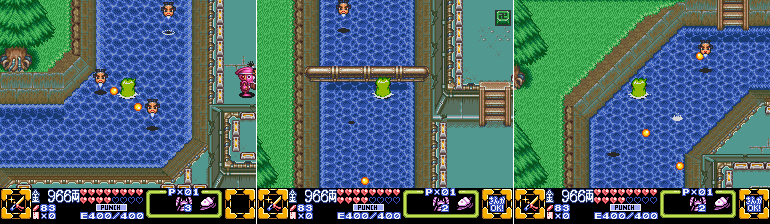
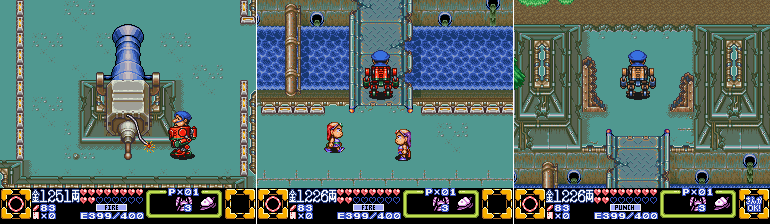 There's a flash and a bang, and if we go examine that gate that's due north of the cannon we find a convenient hole now in it! 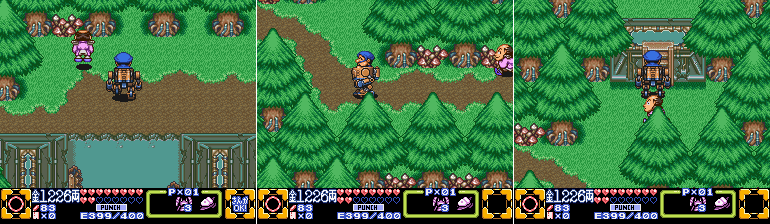 This area is just lousy with Neo Fumbles, but there's also this little platform here. It's kind of a one-way jump back to the northern area of the forest, we passed the other side of it on our way to Kagami Town several updates ago. 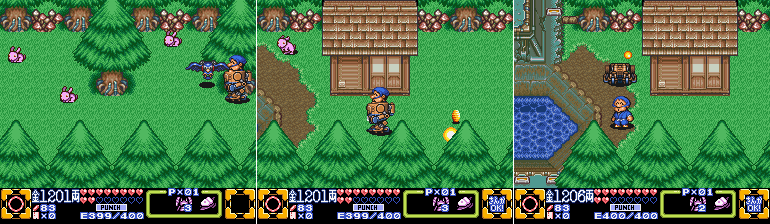 Finally we reach this house, which is another thing we saw even earlier, back when we had Yae initially exploring the waterways of Neo Hagure Town. So we finally get to see what's inside! 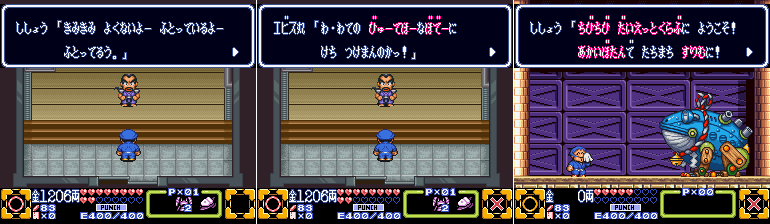 A Challenge for Power Training guy! Time to learn the final special ability, it's Ebisumaru's turn to play a mini-game.  Ebisumaru has to avoid the frog robot and survive for 30 seconds. That would normally be impossible given the small arena size here, but Ebisumaru's new power shrinks him down so he can squeeze between the frog's attacks easily! 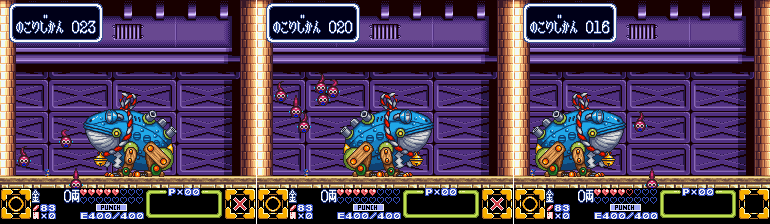 I usually hide out in the left corner for most of this sequence, since the frog itself will never land on you there and you usually have enough space to squeeze between the tadpole bombs. Of course I take some hits anyway, but as long as you don't get hit five times you're fine.  Ok I take more than a few hits... 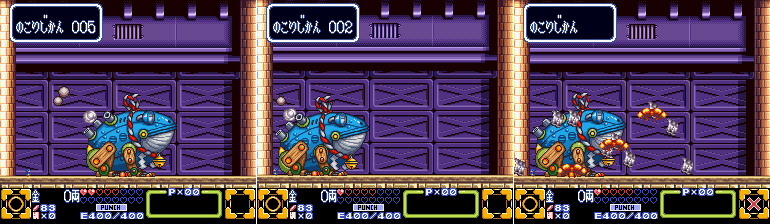 .....Ok so I cut it closer than I'd normally like, but I still won!  For my trouble I get Ebisumaru's 'Mini-Ebisu' ability! This is another ability the series revisited in the N64 game, so all of the characters besides Sasuke get to use their special powers again after this game. Poor Sasuke, his special power here really was an afterthought. 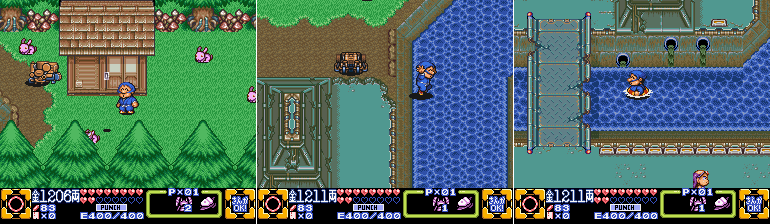 Future Overworld Before I go back to the shop in Kagami Town and examine the painfully suspicious hole in the floor I return to the waterway and dive in. There's something I need to get in the southwest. Last edited by SpoonyBardOL; 12-16-2017 at 02:46 PM. |
|
#99
06-20-2015, 06:22 PM
|
|||
|
|||
 Because now we can reach this Fortune Cat! 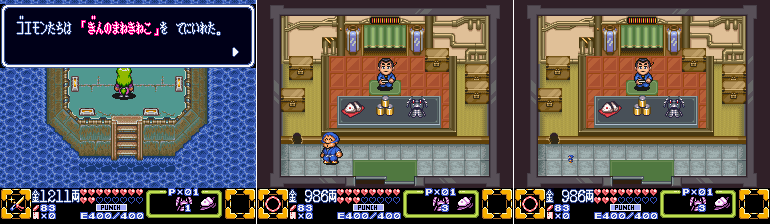 It's enough to give me an extra heart too, score! I also run back to the Kagami Town shop because, let's face it, that hole in the floor is suspicious as heck.  Inside is another one of those strange dragon-hatted old ladies who hands over another Fortune Cat. Alrighty then! Hey, everyone has their special power in the menu now. We're not done collecting thingamajigs, though.  I quickly hop back to Neo Hagure Town...  ...and head up to the northeast area of town, just south from the trainer who taught Goemon Sudden Impact. There's a little path here obscured by the broken highway. Well it turns out this is hiding a path to a hidden area. 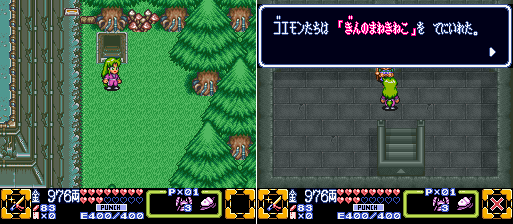 And for our troubles we get what is probably one of the most hidden Fortune Cats in the game. It's not as easily missed as that one from the Shrine Cavern, but that's only because this one is never locked behind a point of no return, this one can be gotten at any point until the game ends, assuming you stumble upon it. 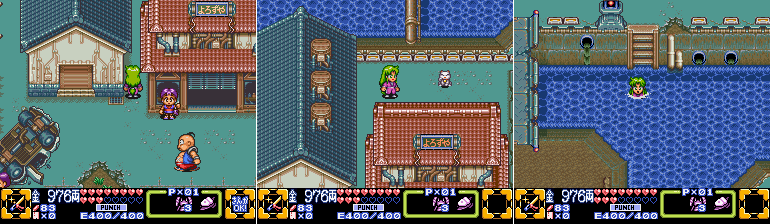 I also return to the shop on the center island that had that one kid who needed cold medicine for his Dad. Well if you squeeze between the two buildings here there's another Fortune Cat just sitting out in the open. I could have easily gotten these two Fortune Cats last time I was in town here, but I forgot about em decided to save them for this update.  While I'm here I quickly return to the area where I first arrived in the future. As you might have noticed Impact has now moved from here to just beside the Dam, and just under where Impact was standing is another Fortune Cat!  I warp back to Kagami Town and jump in the waterway and swim northward back towards the Dam. Last edited by SpoonyBardOL; 12-16-2017 at 02:47 PM. |
|
#100
06-20-2015, 06:24 PM
|
|||
|
|||
 The waterway is now lousy with Neo Mr. P'Tooies, and unfortunately I have no way to attack from the water on the overworld so I just have to avoid them.  Before I go any further though I make a detour south. You guys remember this little hidden area beyond the barely-noticeable path to the left? 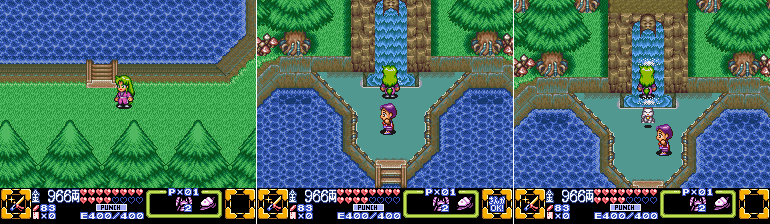 Well now that the water is running again this little waterfall/shrine thing is active. If you stand under the running water for a few moments a Fortune Cat falls from the sky! That's another one! 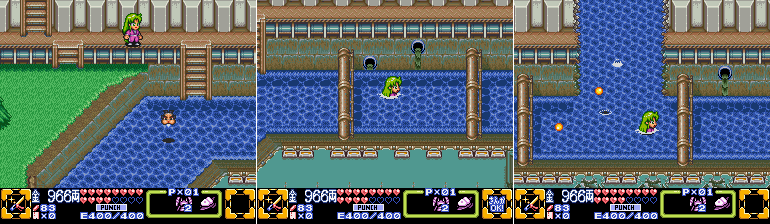 Ok, back on track. Rather than going back up the Dam from how we came down here before, the way forward is actually in the dead-end to the east. Except the end isn't so dead anymore. That's where the hole that Impact blew open in the Dam is. 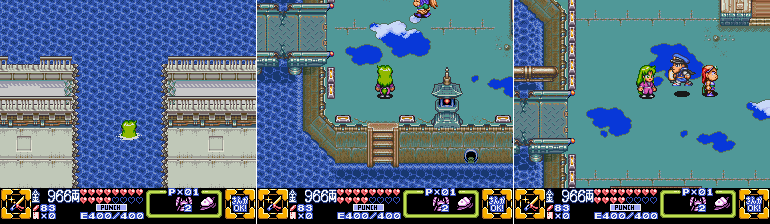 ...it looked bigger in the battle. Oh well! This is 'Deipu' Town. (Deep Town?) The town honestly doesn't seem much worse for wear despite being submerged in the Dam's reservoir for who knows how long. There are puddles here and there reflecting the sky, which is a neat background layer effect.  I'll save the tour of town for later, though, there's things I need to do first. I head to the northwest part of town and climb the steps here and head back around to the east. 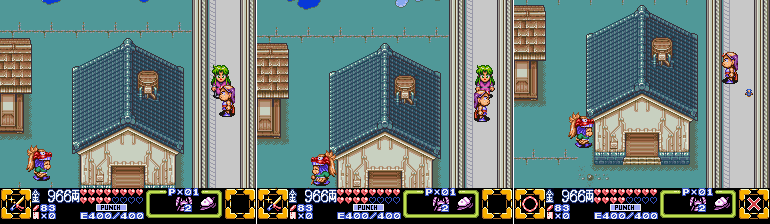 Aaaaaaand here's the Most Obnoxious NPC In The Game. This jerk wanders around this very tight space, and if he's not all the way on the left or all the way on the right there's no passing him. This isn't like RPGs where NPCs move from tile to tile, he can hang around in the dead center of the path here for as long as he damn well pleases. Just the biggest jerk. Or I could just switch to Mini-Ebisu and sneak by him. Which I do, because I'm not dumb, but I still like to complain.  'nother Fortune Cat! Now if you remember the map from earlier in the update you might remember there's a Code Plate just to the north of here.  And on the next screen we have a puzzle. Well, a 'puzzle'. The solution here is 'make sure you got Mini-Ebisu, then use it dummy'.  Hitting the switch causes the Snake blocks to move and, I guess, eat the Frog block, opening the way forward. Time for the next stage! ...Next time. And just a head's up, next update might also be late, I'm going to be traveling for most of next week so I may not get to work on the LP as much. But I'll try not to take quite as long as I did for the Stage 5 update. See ya'll then! Last edited by SpoonyBardOL; 12-16-2017 at 02:48 PM. |


|
#102
06-28-2015, 08:19 PM
|
|||
|
|||
|
Quote:
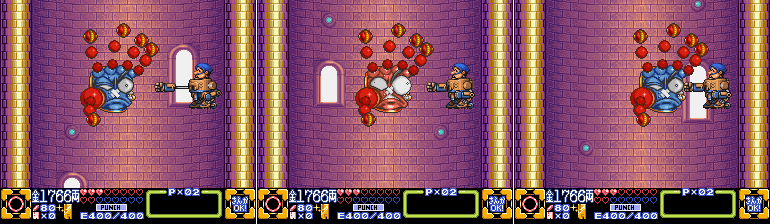
Or maybe it IS just a bandit's mask and he just has plain old black hair. The series still has to have some mysteries! And now on to the update: This is something of a shorter update, I was traveling all week and had zero time for LPin'. I was originally going to wait another week or so to update, but instead I'm going to crank out shorter update now, and another shorter one in a week or so. Anyways, where did we leave off?  Stag 6, Lion Stronghold Ah right, we were about to head into the mysterious stronghold under Deep Town. Turns out it's the next stage! The music here is very reminiscent of the music from the first part of Stage 4, though with different instrumentation and truncated a bit from that version. And we're immediately greeted with a brand new enemy that just has the goofiest darn expression upon being hit I've ever seen.  Flutters McGhastly: Poor Flutters has very poor eyesight, and his only means of attack is to float lazily towards anything he thinks is an enemy. Getting thwacked with a weapon clears his vision right up, strangely, and his behavior changes to become much more aggressive when that happens. Probably helps that he finally opens his goshdarned eyes whenever something hits him. Sure he gets reduced to a floating head upon taking a hit, but that won't stop him once he can actually SEE his prey. 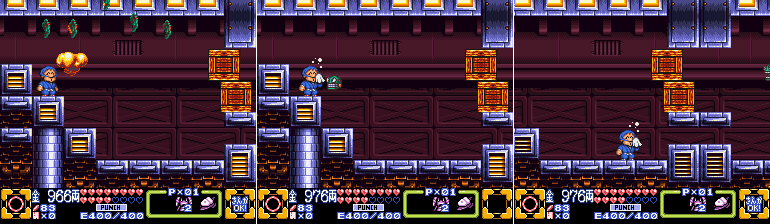 So yeah, this foe becomes quite ticked if you smack him one, but another hit takes care of it easily. Just ahead from the entrance are some boxes we cannot reach, and a teeny-tiny opening. Seems kinda redundant since we needed to shrink to even open the door to this place... 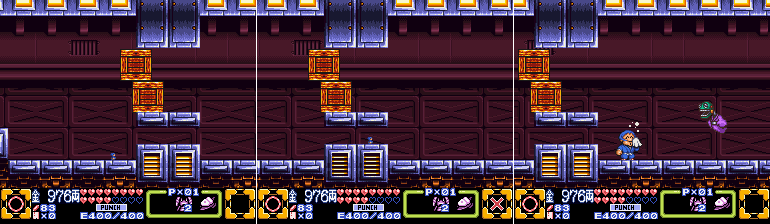 Mini-Ebisu sneaks through easily, and I quickly dispatch the McGhastly waiting for me on the other side. 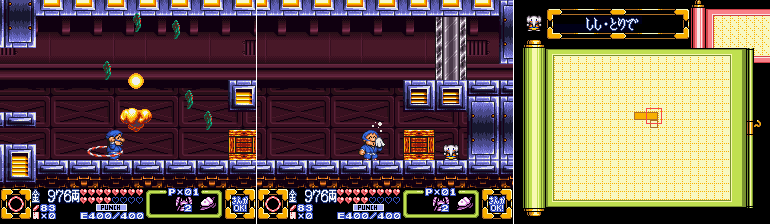 And there's the map already! I need to go Mini to reach it, but besides that it's no problem, and...wow this is a short stage! Like, it barely even qualifies as a stage! This is another example of Goemon 3's weird structure, we just finished with the really dang long Stage 5, and Stage 6 is barely a thing. 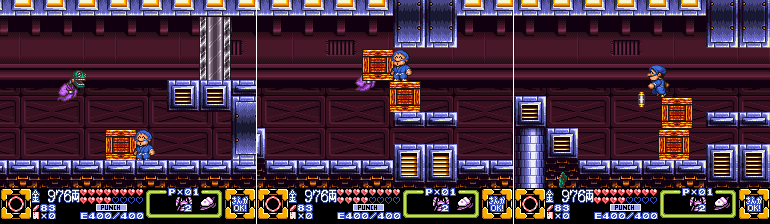 However in my rush to get in here I forgot to take my Walker in with me. I abandoned that just outside of Kagami Town due to the swimming involved in reaching Deep Town, so I need to run outside real quick, find the Deep Town Travel Center and teleport my Walker to me...  Futuristic Travel Center This'll juuuuuust take a sec.... 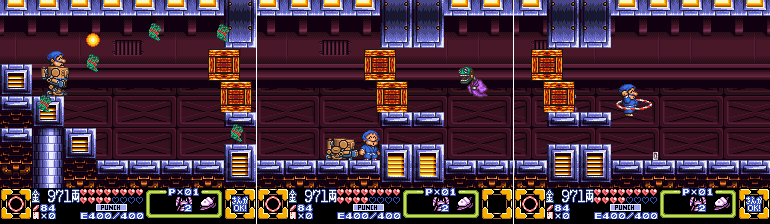 Stag 6, Lion Stronghold Alright, take two! 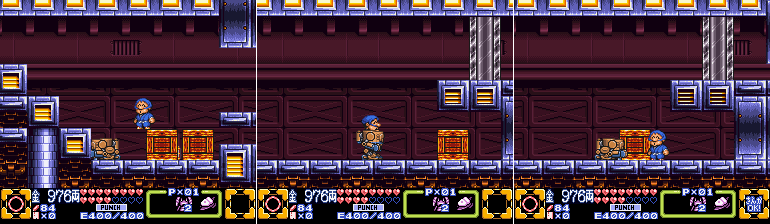 I push the crates down to make a path for the Walker, then push the other crate which was in front of the Elephant Map earlier to make a platform for the Walker to reach the iron door. 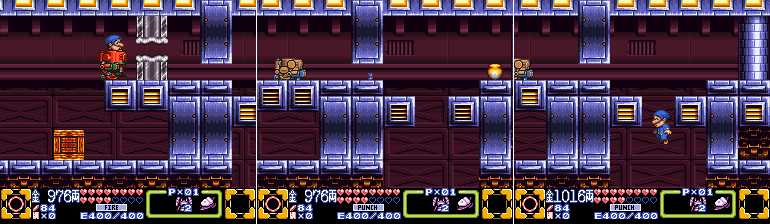 And just like that I have to abandon the Walker again anyway due to a small tunnel. That seemed... kinda pointless. Like I said, Goemon 3 can be weird at times. 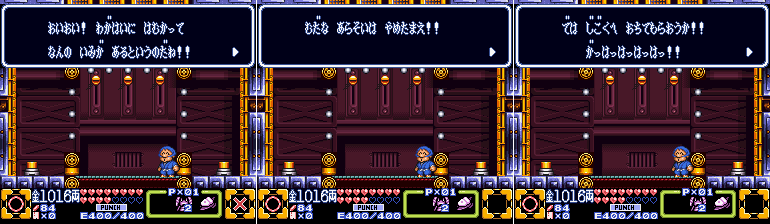 I fall into an odd room and a text box appears and says things at me. Definitely some kind of villainous laughter I guess, whatever, boss time! 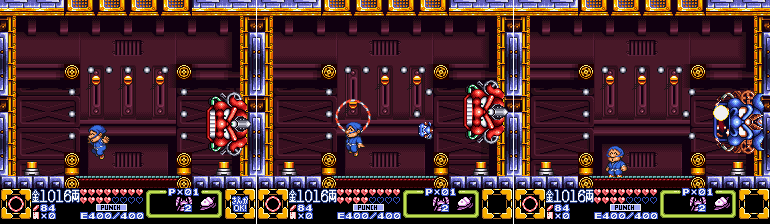 Boss Battle A big red face appears and crawls along the inner wall of the room, while I'm confined to the small space in the center.... Last edited by SpoonyBardOL; 01-02-2018 at 06:03 AM. |
|
#103
06-28-2015, 08:21 PM
|
|||
|
|||
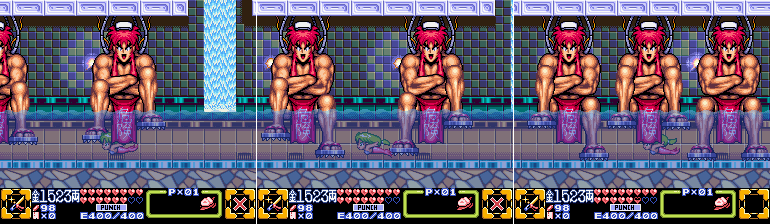
 Wall-Face: He crawls along the wall, he's a face, he's Wall-Face! Wall-Face keeps any intruders locked in a small cage in his room, and attacks by spitting smaller versions of himself on top of the cage to pepper the intruders with bullets. Unfortunately the cage is built in such a way that it's incredibly easy for the intruders to bend the outer barrier and snap it back, shooting the Mini-Wall-Faces back at the main body. Something of a design oversight there...  So yeah, the three pegs inside the cage all affect one of the three main surfaces, and when Ebisumaru hangs off of one with his Hula Hoop it causes the connected surface to pull inwards, and once he lets go it snaps outwards again, slingshotting any little baddies that happen to be on it off of it. So the method of attack against Wall-Face is kinda obvious, huh? 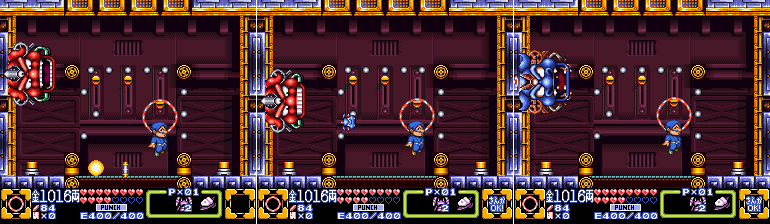 I do like Wall-Face's damage frame. Such goofy spritework in this title...  There's not much else to cover in this fight, since Wall-Face's only means of attack is via his little buddies, and they always take a few moments before they start shooting at you so they almost never get the chance to even start due to how easy it is to fling em off the barrier....  That middle image there is the only screenshot I got of an enemy bullet on-screen in this fight, and I think I waited around a bit to get that one. It is a very non-threatening boss, and quite a change of pace from The Hand from Stage 5. 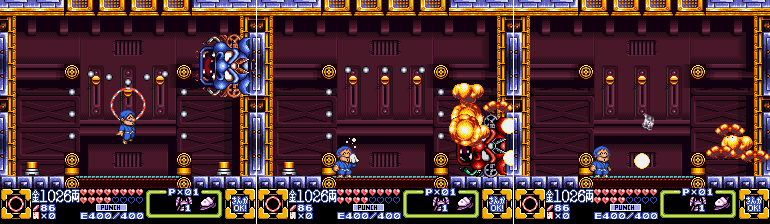 Smack Wall-Face enough and it eventually explodes, a speedbump of a boss for a speedbump of a stage.  But hey, we got the next Code Plate! This one is 'Na'.  The Omikuji Siblings And of course one of the Omikuji jerks has to show up. Omikuji: The 5 Omikuji Siblings own Mr. Refreshing, Chukichi, is here! Grrr, you destroyed the stronghold in the dam, like you destroyed this place's boss! From now on we will call you the Quartet of Hooligans! Goemon: Quartet? That's for sure! Ebisumaru: It definitely has a nice ring to it! Omikuji: Lord Juurokubei tries so hard to save society, but you always ruin everything and make things difficult for us, the 5 Omikuji Siblings, the Allies of Justice! We always have to go to the Karakuri Hot Spring in the snowy mountains to relax because of you! If you go there we'll beat you till you're black and blue! Remember that! Ebisumaru: Oh! Where is this Karakuri Hot Spring? Sasuke: I love taking hot baths! I can't wait another minute, I want to go! Yae: Yes, we should definitely go there! Goemon: (Ulp!) 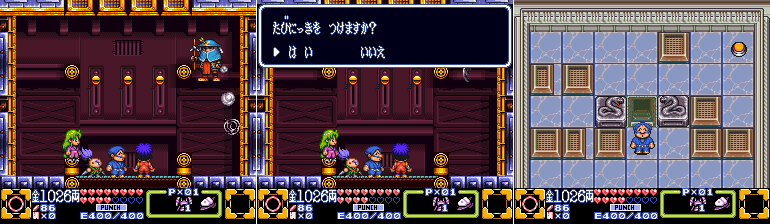 And with that, Chikichi exits without another word. Well we're no further ahead in figuring out what Juurokubei is up to, but we have an idea where to go now! The map had a Code Plate indicator somewhere in those snowy mountains, so that must be our next objective!  Future Overworld With five Code Plates remaining, though, it still seems like a long road ahead. Maybe there's more micro-stages like Stage 6? Anyway, before I leave Deep Town I got a couple of things to do here first... Last edited by SpoonyBardOL; 01-02-2018 at 06:05 AM. |
|
#104
06-28-2015, 08:23 PM
|
|||
|
|||
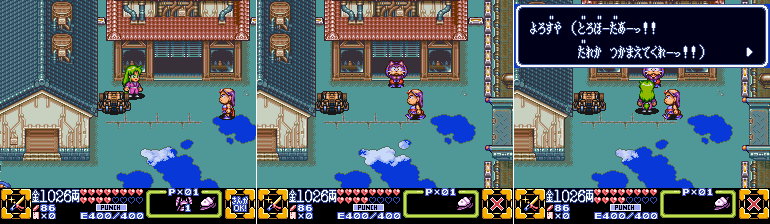 I head to the item shop and am immediately knocked aside by the Cat Burglar! We haven't seen that jerk in awhile! Merchant: Thief! Somebody please catch him! Cat Burglar: That's still impossible! What happened last time won't happen today-meow! Today I won't be eating the fish and leaving it as evidence-meow! Catch me if you can-meow! So we have to track this jerk down again huh? Alright!  He leaves a trail behind him much like last time, but instead of fishbones it's just a load of junk. Rather than image-spam, the trail goes like this:   He gets caught up in picking up after himself that he leaves himself wide-open to attack! 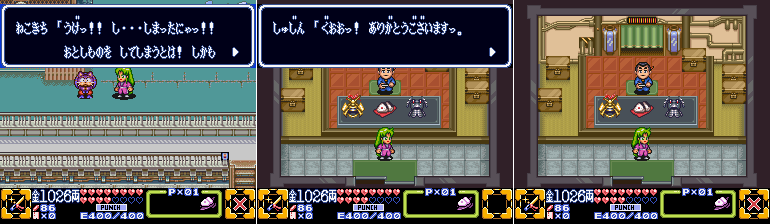 Cat Burglar: Ow! D-damn it-meow! I lost everything I worked so hard to gather, and then you caught me anyway! My life is just one mistake after another-meow! Merchant: Oh! Thank you very much! You took care of that sneaky little Cat Burglar for us! I'm so happy, see how the tears of joy fall from my face. I'd like to give this item to you as thanks. Narrator: Sasuke received the Surge Kunai. Lucky! Such a nice color... 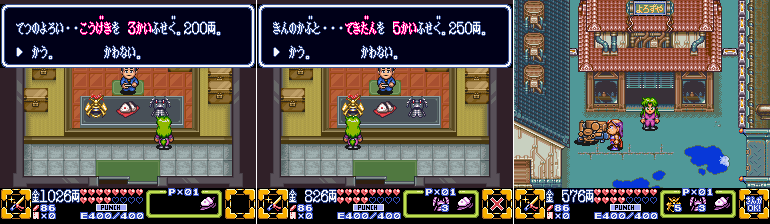 So we got a new thing! While I'm at the store I also pick up some new armor. One more thing to do in town, I just need to find the right house... 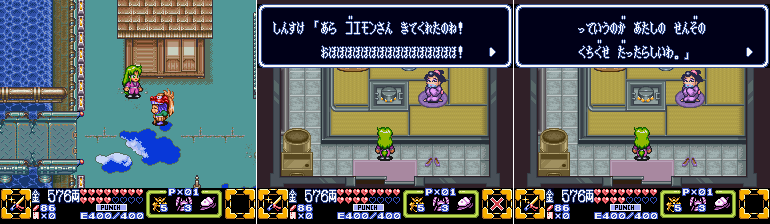 ....oh, it's Kensuke Shinsuke. Hi Shinsuke. Let's try another house...  Oh right, now I remember, it's the one house in town you need to swim to get to. 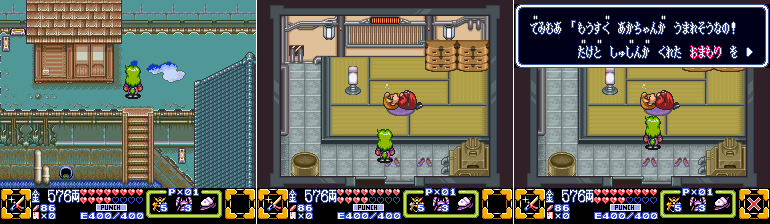 And inside is an NPC. The old walkthrough for this game assumed this was some overweight dude with an upset stomach, but it's actually a pregnant lady who is pretty dang close to giving birth! Demimua: I think my baby is going to be born soon, but I lost the charm my husband gave me so I'm very nervous. ...Ah! You're holding the charm my husband gave to me! Please, let me have it at once! >Of course! Demimua: Oh, thank you so much! With this, my heart is at ease! I'm sorry I can't give you much, but please accept this. Narrator: Goemon and his allies obtained a lemon. It's extremely sour. So that's the next step in the item chain and what I think is a reference to Demi Moore. This game came out in 1994, and she had her third child the same year. Maybe she was popular in Japan at the time? Name-dropping celebrities isn't terribly uncommon in this series, both James Dean and Marilyn Monroe were mentioned in the intro to Goemon's Great Adventure, after all!  Anyway, with a new lemon sitting in our inventory we're done at Deep Town! You can also see the new golden Surge Kunai in Sasuke's inventory, you'll see that in action coming up. It's time to move ahead to a new area! ...which I'll do next time. Like I said at the start of this update, this one is short and sweet. See ya'll then! Last edited by SpoonyBardOL; 01-02-2018 at 06:07 AM. |
|
#105
07-04-2015, 09:11 AM
|
|||
|
|||
|
Hey folks, it's time for the second of the mini-updates, hopefully after this one I'll get back to my typical pace. I actually wanted this out earlier in the week but I got sidelined by other stuff, not to mention working on STTB3.
...wait, how did my very first post in this LP go again? Quote:
Don't worry, though, my main goal is still to get this LP done, I won't get distracted by another project when I'm getting close to the end. Anyway! Last time I fought a boss under the dam and did some errands around Deep Town, now it's time to do more stuff! None of it is in Deep Town though, so our first goal is to skedaddle out of here.  Future Overworld Bye Deep Town! 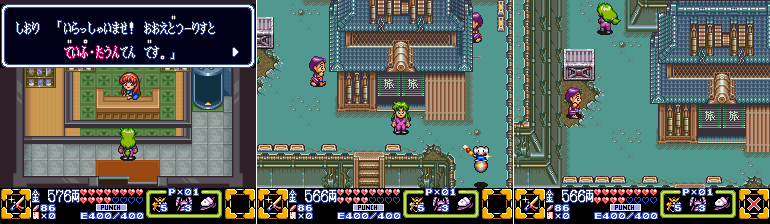 Hi Neo Hagure Town! Our first stop is just outside the north exit of town, conveniently right next to the Travel Center.  Underground The miners, while they are no further ahead in their tunnel, decide that now's a good time to hand over a spare Chain Pipe. I'm not sure what beating the boss under the dam has to do with them deciding to do this, but they'll only hand it over once that's done. 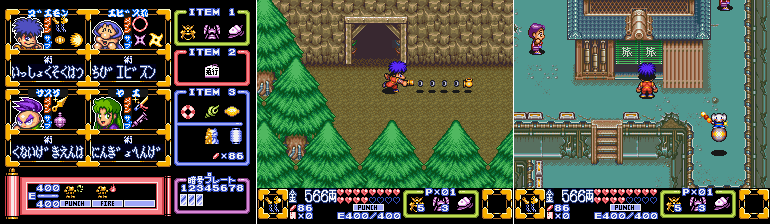 Future Overworld In Ganbare Goemon 2 the Chain Pipe was just Goemon's max upgraded weapon, and didn't have any special properties besides a longer reach and higher damage output. If you played the N64 game, though, you'd be more familiar with the Chain Pipe as being a Hookshot wannabe. And it is here, too! The second one, the Hookshot wannabe. 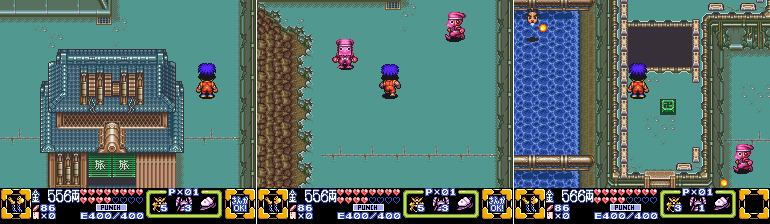 Next on my list is to swing back by Kagami Town and take the exit out of town just north of its Travel Center. You might remember I passed through here after the last Impact Boss Battle and I pretty much ignored everything since I didn't have the means to do anything here. Well now I gots some means. 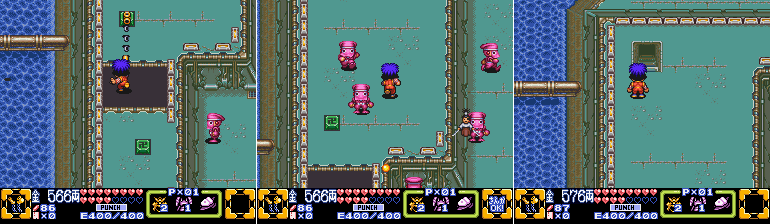 Those green Manji blocks are the only surface in the game that makes the Chain Pipe react like a Hookshot. I can finally cross the pit here now and enter the stairs in this area. What's inside?  If you guessed 'Another Crazy Fortune Cat Lady' you'd be right. Ahh what the heck, there will be a few in this update so how about another counter? Fortune Cat Count: 1 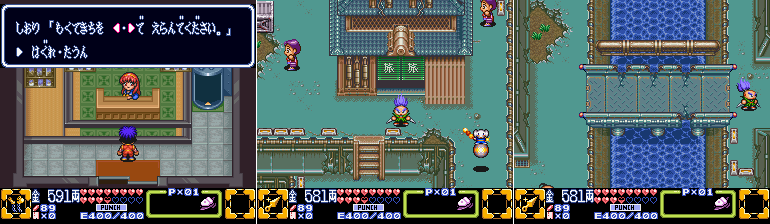 Back to Neo Hagure Town we go, and this time to the southwestern exit! Also, I've been cutting out a lot of the travel time from the screenshots in this update, at least of areas you've already seen. Mostly I've done this because I'm thinking my screenshots are getting kinda..... I dunno, what's 'wordy, but with images'? Image spammy, I guess. It was fine for the earlier updates since it was all new territory and, in the case of the Past areas, ground we'd never see again. Now we're at the point where we're running over all creation for things so I wanna spare you all some repetition, not to mention my own time editing the images. Also I made the silly mistake of playing this session with my keyboard instead of my controller and wow was getting screenshots ever obnoxious. Not doing THAT again...  You might remember this odd blue tree from several updates ago. Well thanks to Sasuke's new Surge Kunai, which he got in the last update, he can now make this tree freaking explode.  A look at the severed trunk reveals it to be some kind of robot tree. Or, at least a cyborg tree? Can trees even be cybernetic? The future is weird! Anyway, you know the drill, another old lady living in a hole in the ground, another free Fortune Cat. Fortune Cat Count: 2 Last edited by SpoonyBardOL; 01-02-2018 at 06:09 AM. |
|
#106
07-04-2015, 09:12 AM
|
|||
|
|||
 Also it's hard to get a perfect screenshot of it, but the Surge Kunai also increases the reach of Sasuke's primary weapon just a tad. This is more helpful than it sounds since he had the shortest reach out of all the characters until now, and this brings him closer to par with the others. Back to the northern exit of Neo Hagure Town, and this time we go right from the mine. You may remember the last time we tried to go through here our way was barred...  But lucky for us the Surge Kunai can also slice apart butt-ugly statues! Haha! A new area is open! Granted it's another forest with the same asshole rabbit and bird enemies, but still, it's a new region!  Just north of here is a shrine. What you need to do here may be obvious to Japanese players, but it isn't too tough to figure out. We need to donate some cash to the shrine, and we just so happen to have someone that throws money as a sub-weapon... 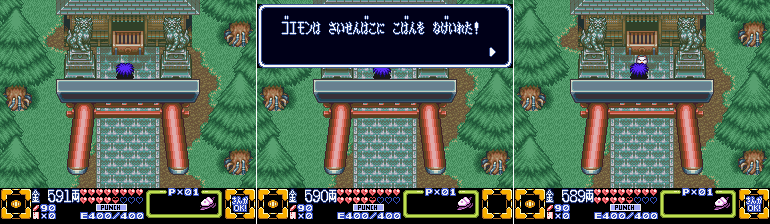 You need to do it twice to get anything out of it. Throwing one Ryo into the box just gets a message, throwing two gets you a Fortune Cat. Awesome! Fortune Cat Count: 3  (wow this is image #800, I've been wondering if I could finish the LP before I hit 1000, I'm not sure...) We hit another fork in the path, let's try right... 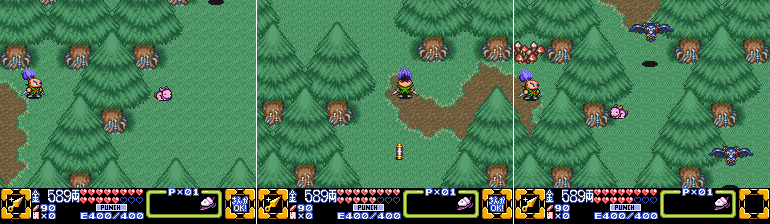 Dangit... Ok, let's head up and try right again-- dangit.  Going all the way up leads to a new screen with another fork in the path. Ok, let's head right again. Allll the way right.  It's a dead end, but there's a super suspicious monkey in the tree there. You can't do anything with it on foot, but if you bring your Walker here you can punch the tree and shake the monkey out of it. It then starts hopping around the screen until you hit it. It gets dizzy, then runs off and leaves a Fortune Cat. Hooray for animal abuse? Fortune Cat Count: 4 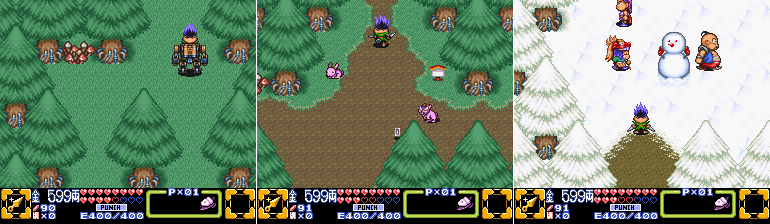 We head back to the initial fork in the path, ignoring all the other paths to the south. They all lead to dead ends, except for the one just before the monkey area which leads back to one of the earlier forest areas near the dam. I'd need to blow up another blue tree to access it, though, and it won't let me from this side since the tree is right on top of the screen transition in the next area and I get sent back as soon as I try to cross. I head north into a new town! What's that? You want to know what's to the left? Well there's sure something over there, but it's not something we can do anything with yet so you'll just have to wait in anticipation!  There here is 'Yukinko Town' (I dunno, Snowy Town?). Just next to the town entrance is its Travel Center, so we don't have to worry about trekking through the forest of asshole rabbits and birds again. Just to the right of the Travel Center is a house with this totally not suspicious lady inside... Last edited by SpoonyBardOL; 01-02-2018 at 06:11 AM. |
|
#107
07-04-2015, 09:14 AM
|
|||
|
|||
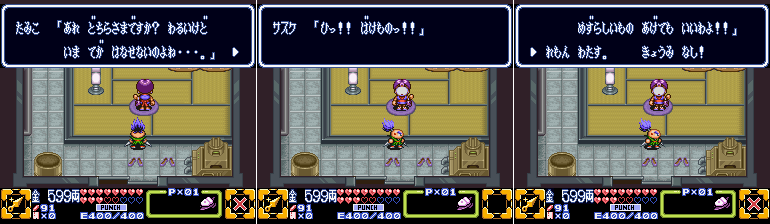 However 'Tamiko' has no face and Sasuke freaks out. Tamiko: Who's there? I'm sorry, but I can't help you right now, I'm busy with something. Sasuke: Eeek! A Ghost! Tamiko: Eh? Ah, the face. I just packed this white wrinkle cream on my face, but I'm not really satisfied with it. I need something more.... Oh! You have a great thing there! If you let me have that Lemon I'll give you something rare and wonderful! >Hand over the Lemon Tamiko: Thank you! With this, and a beautiful face everything will be perfect! Ohohohohohoho!! ---oh right, the rare gift. Yes, this, a cucumber seed! Nowadays they are very rare indeed. But if you want to eat it you'll have to find a field to plant it in. Narrator: Goemon and allies obtained a Cucumber Seed! ...do they not have fields in this age? I don't know if the Narrator's comment changes on whether or not you completed the brief item chain in the past or not. It's not required, but I've also never not done it. Hmm. Anyway, we got the next part of the item chain, but finding a field to plant it in the future will be no easy task. But that's a concern for later.  It's kinda hard to make out, but the black specs are cucumber seeds. Following the path along the lower area to the right we reach the Inn...  ...and a dead end. Back we go! The stairs just next to the town entrance take us to the second level, and the first building we see is an item shop. This has the Gold Armor and the most best Rice Ball. Y'know in hindsight I really shouldn't have bought new armor in the last update, I've already lost it all. It would have been much better to just tank the damage in the forest and heal up at the inn and save the money to buy armor right before the next Stage. Oh well!  Next to the Item Shop is another cave with another Crazy Fortune Cat Lady. This one complains about the cold a bit before handing one over. Fortune Cat Count: 5 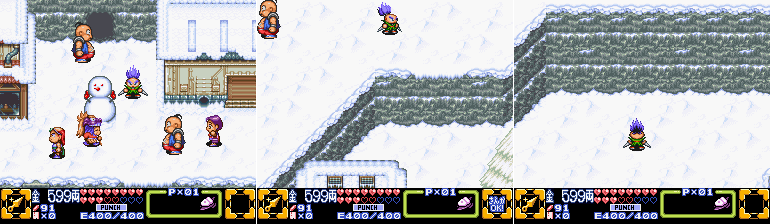 We pass by the house with the suspicious hole in the wall for now and head to the northeast exit of town, which takes us to some snowy cliffs. 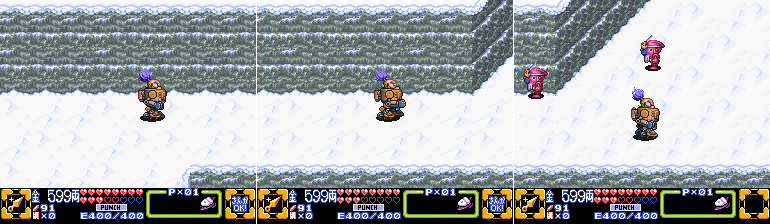 I grabbed my Walker because I couldn't remember if I needed it or not (I didn't) and head to the right. I pretty much ignore the Bimmies at this point, while it's true I could use some money I'm not going to grind for it here.  We reach a cave that has some oil drums set up inside and a statue of a bunny girl sitting on top of them. I don't really know what to make of this cave you guys. You know, besides EXPLOSIVES! 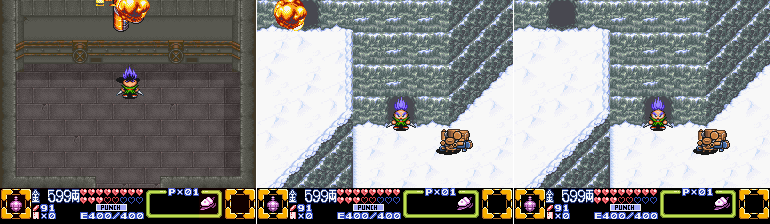 ...huh, I don't know why my Ryo counter didn't decrease there, I didn't notice that while playing. Maybe it was because I was right on top of the statue when I threw my Firecracker Bomb, the Bomb didn't get a chance to spawn and land, the statue just kind of instantly blew up as soon as I pressed the button. Weird. Anyway the statue and the oil drums rocket through the ceiling. As soon as I step outside I see a cave entrance on the ledge above me open up. I'll deal with that later... 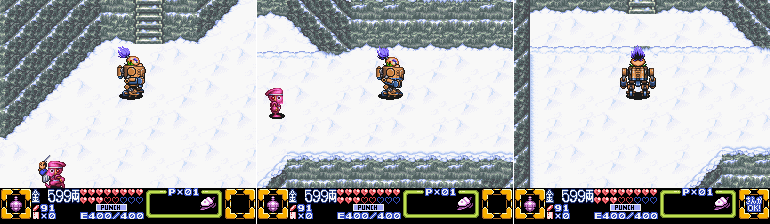 We continue in a northeasterly-ish direction and come across this ledge. See the slightly discolored part of the ground just above Sasuke's head? That's a point where you can jump down. 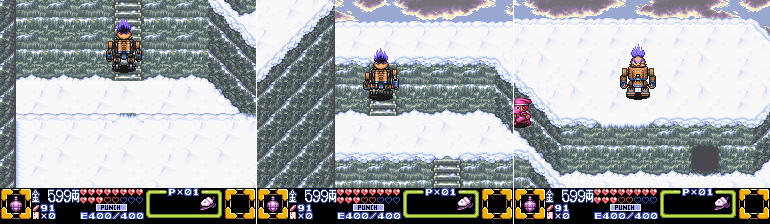 We reach the most northeastern part of the map, and jump down another ledge to find another cave. Last edited by SpoonyBardOL; 01-02-2018 at 06:12 AM. |
|
#108
07-04-2015, 09:16 AM
|
|||
|
|||
|
Ignore the Bimmy that spawned in the wall there. They do that sometimes in the snowy mountain, it's odd.
 Oh wow another Crazy Fortune Cat Lady inside of a random cave in the middle of nowhere who could have seen this twist coming? I shouldn't complain, at least none of these crones ask me to pay a door repair fee. Fortune Cat Count: 6 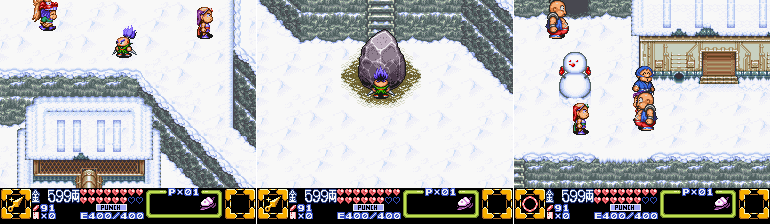 Back town! This time I take the northwestern exit, just to the left of the item shop. The path here is barred by a giant stone, though. But there IS that tiny hole in the side of that one house..  Police Robot This room plays the music from that one forgettable miniboss from way back when. I guess it was the only thing suitably goofy? Anyway, meet John. Who is very little. Muscleman: Huh! I am the famous muscleman and hidden, unsung hero! Everyone calls me John! What do you want from John? >Move the rock! John: Alright, if you give me 100 Ryo I'll think about it! >Pay John: Alright, let's get going! 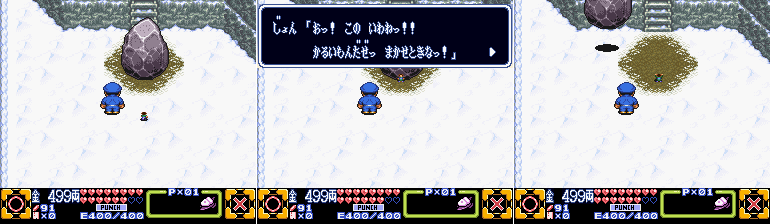 Future Overworld John: Oh, this rock is very light! This will be an easy problem to deal with.  John: Well there you go, goodbye! Huh, well that was easy! We got a tiny man to toss a giant rock out of our way and we didn't even have to go over all creation for the Overcoming Shyness book. Take THAT, Stonehenge!  More Bimmies await us as we climb up this new area, though it is fairly open and they're easy to avoid. 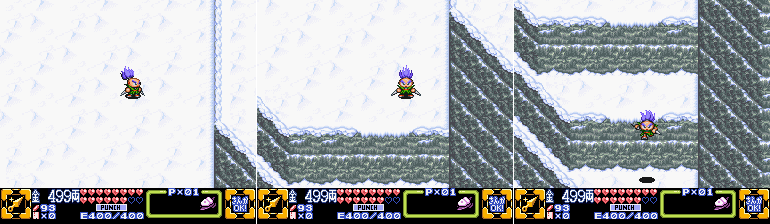 Eventually we have to jump down some ledges...  And we come across some Manji blocks. This is where your progress would stop if you didn't find Goemon's Chain Pipe. Luckily we knew to talk to those guys in the tunnel at this point in the game. 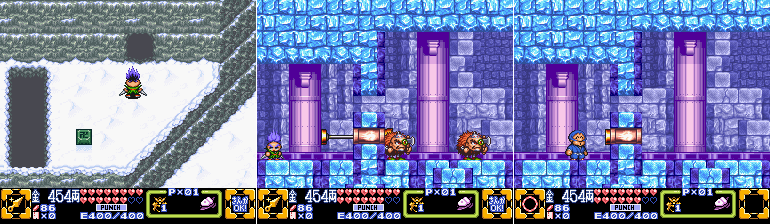 Frozen Cave We enter another cave and, ohhh, is this Stage 7 already? No, actually. It's just a frozen cave. Actually I think this might be the only side-scrolling area in the whole game that isn't one of the game's proper stages. Another example of the game being kind of weird with its structure. Honestly I think the game could have used some more non-stage little sidescrolling zones, instead of just this one near the end of the game. First thing we encounter is this tube which fires a cork at the enemies on the other sign of the wall when you push in on the plunger. When it pops it makes the exact same sound as Yae's Bazooka, this may or may not be important. Hey, new enemy.  Cyber Dwarf: Cyber Dwarves love to hang out in the cyber mountains and dig cyber holes with their cyber axes. Despite liking to think of themselves as being hardy mountain people, the Cyber Dwarves tend to explode if the smallest attack touches them. They are also sick and tired of people asking them if they have basketball skin. They don't, they don't know why anyone would think that, stop asking them. Last edited by SpoonyBardOL; 01-02-2018 at 06:14 AM. |
|
#109
07-04-2015, 09:18 AM
|
|||
|
|||
 Anyway the Frozen Cave is super short and despite not being an actual Stage-Stage it still gets a map. 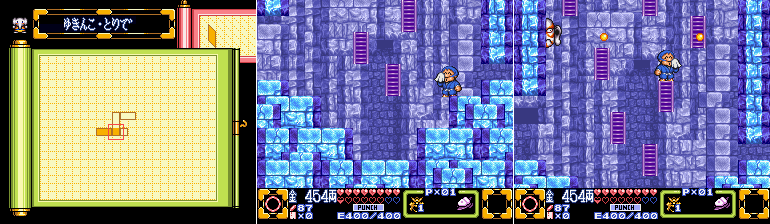 See? Not that long! The room immediately to my right is an exit to the stage, but it's not the exit I'm taking right now. Instead I'm climbing a ladder while we get assaulted by some Lobes Kabuking. The ladders here are tricky, because while it's possible to just land straight on top of them, most of the time the game won't register that you've landed on them without holding up to grab them and even then sometimes you'll just fail to even grab onto them even when you're holding up. What I'm saying is that these ladders are frustrating, and thank god the section is brief.  Not quite brief enough, but still brief.  In the next room we see more of those cork-plugged rubes, but without a plunger on the other end so we have no way to fire them. Well, if you weren't paying attention anyway. The game did clue us in to a way to open these up, if you recall the plunger made the exact same sound as Yae' bazooka when it popped. (Well, you would have noticed it if you were playing and had audio, here you're relying on me pointing it out, but I did, so...) With her bazooka Yae can uncork these easily. That also makes this the only room in the whole entire game where Yae's bazooka is necessary. It's just a bog-standard ranged weapon for the rest of the game, granted one with a neat flavor but still just a ranged weapon and nothing more. Goemon's can charge up and bypass barriers, Ebisumaru's can fly off and hit things at weird angles, Sasuke's can blow up certain blocks throughout the game, Yae's ranged weapon uncorks tubes in one whole room. Poor Yae.  But dangit she'll enjoy her bazooka's moment in the sun while it lasts. At the end of this room is a Walker teleporter, and the upper exit. 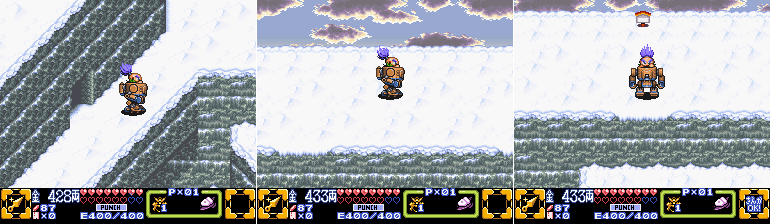 Future Overworld On this top-most ledge outside we come across several jumps leading down. If you're expecting some of these to just lead to the path back through the Frozen Cave instead of the proper way forward, you'd be right! First thing you want to do is jump down the ledge right next to this sign.  Then the ledge right under that one, this leads you to another Fortune Cat! Fortune Cat Count: 7  Though when we jump down we're just outside the lower exit to the Frozen Caves, which I ignored earlier. We could go back inside and climb back up, but there's one more thing I need to do. I jump down another level and start heading over to the right.  And this takes us to the cave entrance I exploded open a little while ago. Gee I wonder if there's a Crazy Fortune Cat Lady Inside--of course there bloody well is! Fortune Cat Count: 8  I'll spare you the trip back since from here I have to jump back down to town, climb back up the left side, re-do the Frozen Cave, and come back out the top exit. You've seen all that. Once I make it back I go all the way to the right on the top ledge before jumping down.  And once I do I'm right outside the Hot Springs! There's a glowing save sign just next to the entrance so this must be the next real stage! And I'll be honest guys, Stage 7 is pretty big. I'm not yet sure how I'm going to tackle this, if I do it all in one update it'll probably take another two weeks. I could break it up into two updates, but that may be awkward if we don't find a good stopping point within the stage. I guess we'll see when it happens! I may also do some grinding off-camera, so to speak, and get re-equipped with some armor, because I'll need it. See ya'll next time! Last edited by SpoonyBardOL; 01-02-2018 at 06:15 AM. |
|
#110
07-10-2015, 05:50 PM
|
|||
|
|||
|
Oh man you guys, are you ready for the next stage? I sure am!
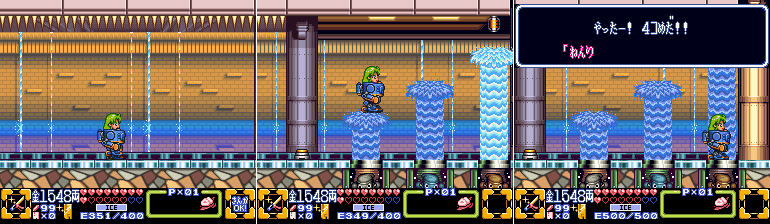
I originally thought I would have to split this stage up into two updates, but I managed to do it all in one. Partly because it wasn’t QUITE as long as I remembered it being, and partly because I just had more free time this week than I have had in previous weeks. I even got a bit ahead of schedule! So hey, I benefit, you benefit, we all benefit! 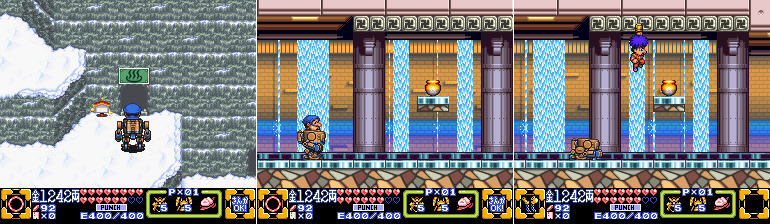 Stage 7, Karakuri Hot Springs So here we are, the Karakuri Hot Spring. Right away we have some Manji blocks greeting us at the entrance, just to remind us that Goemon has a new ability that we’ll be needing to make us of. Actually, in this stage we’ll be making use of just about all our characters, they all get a chance to shine in Stage 7.  I do love Goemon’s expression when you latch onto a Manji block from the side in a 2D stage. We come across some robotic fish flopping around, which you may remember from Stage 3, along with a few more Omikuji statues. We already know what to do about these.  Surge Kunai’d. These obstacles feel just a tad pointless, since it’s impossible to even get here without destroying that other Omikuji statue from earlier, but hey, sometimes it’s just fun to wreck stuff. The middle image there is a better indicator of how far Sasuke’s reach now extends with the Surge Kunai. Without it he had the shortest reach of the four characters, and now he has the second-longest. For the brief period of time between getting the Surge Kunai and the Chain Pipe he did have the longest. Quite a substantial improvement, and at the very least it makes the Surge Kunai a bit more than a rather sharp key for an Omikuji-shaped door.  In the next room we come across an iron door, as well as a rope. We can cross the rope easily, but we still need the Walker to melt the door. But, of course, once we try to cross the rope with it we go plummeting down. There’s no way to actually make it across from the top, and once we fall there’s no way back up. Some pesky enemies line the shaft, but we can’t use them as footholds. And weirdly enough this is the only room in the whole game these unique enemies appear in.  Jimmy-Copter: One of the Wise Ol’ Man’s older designs, the Jimmy–Copter patrols back and forth in the air, but otherwise doesn’t attack. 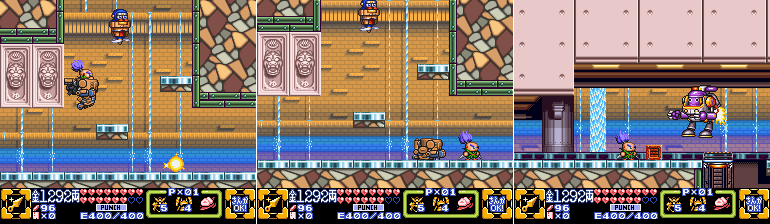 At the bottom we have the option of going left or right, and I’m going right. We see a Bimmy Walker on the next screen, there’s actually two of them there but I had already dispatched one.  There’s an elevator leading down, but I go further to the right first. I quickly run through some falling spikes and hit a switch at the end, which stops them. What you’re supposed to do here is use that small box from earlier and shield yourself from the falling spikes, much like you used a box to shield yourself from flames back in Stage 5, but nuts to that. Takes too long. Despite how the last image looks, you cannot jump on top of the rising water, that E-Can is out of our reach for now. Back we go!  Heading down, we come across a new type of block. None of our weapons can affect it at all, it just sort of wobbles a bit and retains its shape. Neither pipe, nor blade, nor explosive, nor fire, nor hula hoop can damage it.  On the right side of this room we see the Elephant Map, but we’re blocked by a barrier, so our only way forward is through the door. 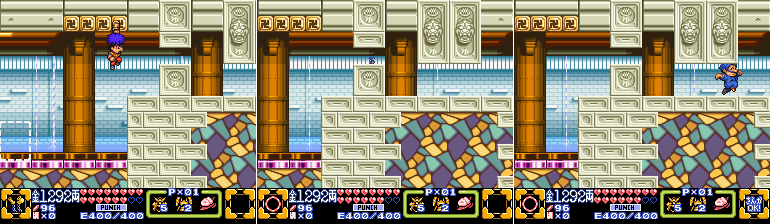 I Goemon my way up the Manji blocks and Ebisumaru my way through the small opening. Verbing things is fun!  On the next screen we’re immediately attacked by a new enemy!  Barrage Trout: This robot fish hops out of the water and hovers in the air just long enough to open up its chest cavity and fire a series of tiny tiny missiles at its foes. You have to at least admire how gung-ho it is about its job.  With the jerk-fish taken care of, we spy an E-Can inside of the wall. We can’t enter from the side, though taking a quick look at the shadow placement under neat the platform handily reveals where you’re supposed to go. Last edited by SpoonyBardOL; 01-02-2018 at 06:18 AM. |
|
#111
07-10-2015, 05:53 PM
|
|||
|
|||
 We grab the E-Can, first of four for this stage, and before jumping back in the water we run to the right to get a Keycard.  Pressing onward we leave the water and enter a door on the next screen. Incidentally, those Barrage Trout? Only ones in the whole game. I’m not even kidding, we’ll never see them again. Farewell forever, jerk-fish! 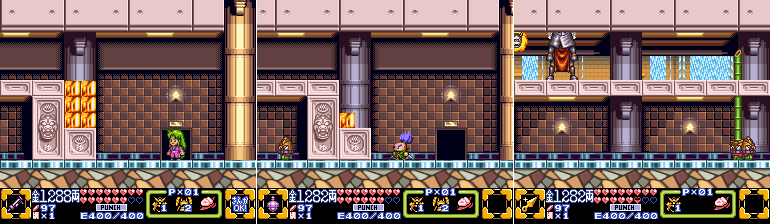 Next room, Firecracker blocks, you know the drill. And there we see ANOTHER enemy that exists in all of one room in the whole game. Dangit Stage 7, stop hogging all the unique enemy designs, or at least use them throughout the stage!  Wheels Bamboo: Ol’ Bamboo is a crafty one, it patrols in an area where they cannot possibly be attacked by intruders, but are still able to attack them with their extending bamboo spear they manage to hide inside their body. Sure it has to burst through their head every time they use it, but that’s the price you pay for such an effective ambush.  A few more butt-ugly Omikuji statues stand in our way just begging to be sliced apart, along with some Firecracker blocks to clear out. The next room has a choice of left or down, so let’s try down!  We reach a Walker teleporter, though the switch for it is all the way across the gap. Goemon’s turn!  A bit further down we have a golden door, and a path to the left, so I guess left it is!  Thaaaaaaaaaaaaaaat is a water dragon. Ok nevermind! We can’t actually hurt this thing, and it just keeps spitting spiky balls at us (which appear to be floating into its, uh, hindquarters from the water before going up through its body so uh, ew) so there’s nothing more we can do down here. Back up and across! 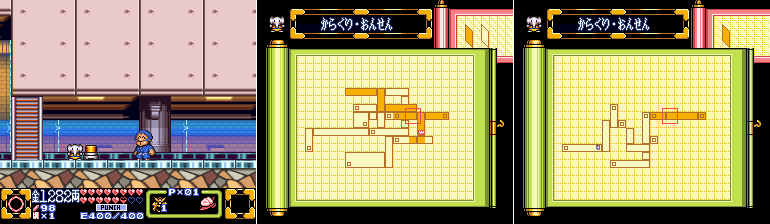 Finally we come back around to this room, and pick up the Elephant Map we saw earlier, getting us a look at the stage. It’s fairly large, but more compact than Stage 5. There are no huge vertical segments, for starters, so that’s already a huge plus. 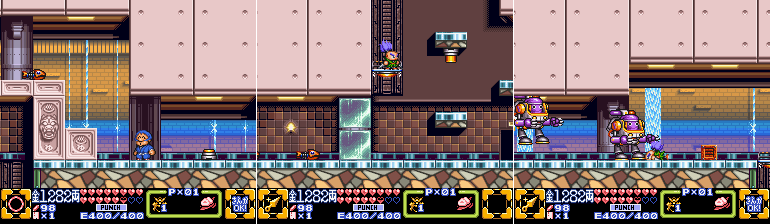 So after all that what we really got was the Keycard, so we can take the elevator back up. And yes, we could have just turned around after getting the Keycard and saved a bit of time from that loop, but the map was worth it.  Back to this room, we finally go left and engage in some more Chain-Pipe/Mini-Ebisu shenanigans before hitting the locked door. Last edited by SpoonyBardOL; 01-02-2018 at 06:21 AM. |
|
#112
07-10-2015, 05:55 PM
|
|||
|
|||
 An E-Can sits just out of our reach, there’s no way we can reach it from here so all we can do is jump down to the next room. 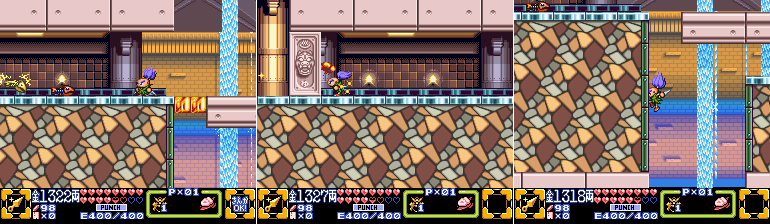 Just to our left is a dead end with more flopping fish, so down we go! You can just barely see a ledge to our right as we fall, there’s no way to reach it right now though. 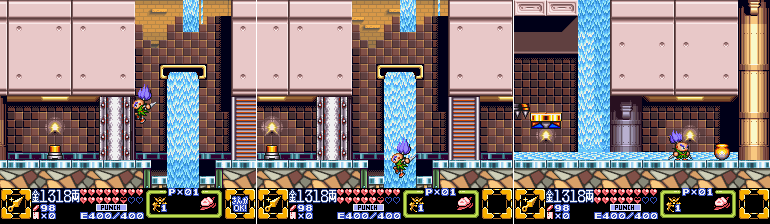 Next room has a locked door which we can’t enter and a barrier which we can’t do anything about, so we keep going down! 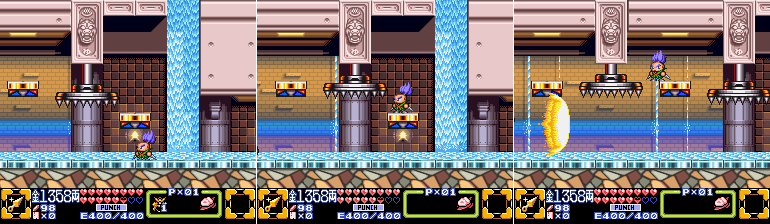 Here we have to run on the top of some spiked crushers and leap from platform to platform avoiding the floor wherever possible, since some large energy blasts keep coming from off-screen. Sasuke works best here due to his smaller size. You could use Mini-Ebisu as well, but his weird jumping physics would be a hindrance.  I still take a hit even with Sasuke, sometimes the timing just doesn’t line up, but I eventually reach the end of the stompers.  Wow, we haven’t seen a Future Version of Sass You Kay in awhile. It was guarding a sparkling dango, which would be where Goemon is standing in the last image. I wasn’t super low on health but it was appreciated. 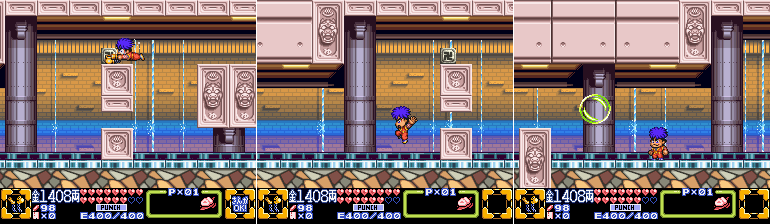 Climbing our way around the top we encounter… bubbles? 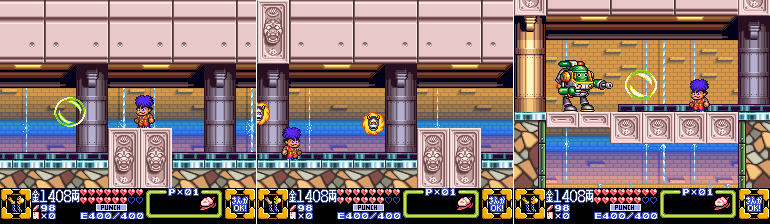 As we approach the end of the room some of the bubbles start to come with Mr. Onizoomas inside. It’s possible their appearance is random and I just got lucky that none appeared until I hit the end of the room though. In the next room we hit another recolored Bimmy Walker and… eh, Ok. This one is different enough to merit its own profile.  Bimmy Bubbler: One Bimmy got the idea to re-purpose its Walker to fire toxic bubbles instead of standard issue projectiles. It gets points for creativity, at least, but it forgot to consider that the toxic solution that the bubbles were made of was also just a tad explosive… 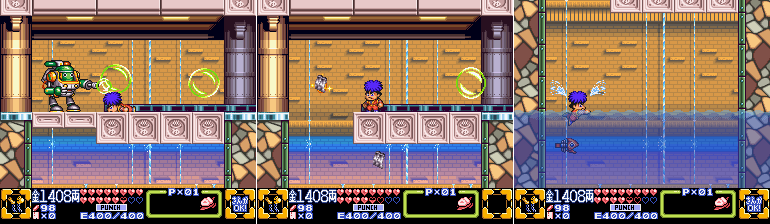 I’m not even kidding, defeating the Bimmy Bubbler causes it to explode so hard it also destroys the floor it was standing on. And yes, that’s yet another enemy that appears on only one screen in the whole game. Gosh Stage 7, you’re being awfully selfish with your minions. Last edited by SpoonyBardOL; 01-02-2018 at 06:23 AM. |
|
#113
07-10-2015, 05:57 PM
|
|||
|
|||
 The pool we land in has a switch which lowers the water, we cannot leave the room through the door until the water is gone. I feel like they could have just not had the water there, honestly. You might think the game is reminding you that you can strike switches underwater, and that would be great except for the fact that you never have to hit another underwater switch again after this one. But maybe I’m analyzing it too much. 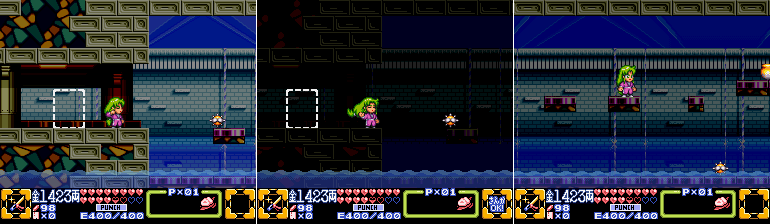 We have a lighting gimmick in the next room. The lights slowly go out whenever we stand anywhere but the floor on the bottom of the screen. It’s kind of reminiscent of that one area in Wily Stage 1 in Mega Man 7, except that it’s not as obvious where you have to stand to keep the lights on.  Also, if you haven’t figured it out by now, if you attack the little stationary spiky balls they fly up into the air. This will be important in a bit. For now it just gets them out of the way without us having to jump.  There’s a Keycard on the ceiling suspended over some spikes. We’re really in no danger of jumping too early trying to get the card and taking damage, since we can plainly see the one safe spot in the ceiling is where the card happens to be and since the card is a sprite it doesn’t fade out. 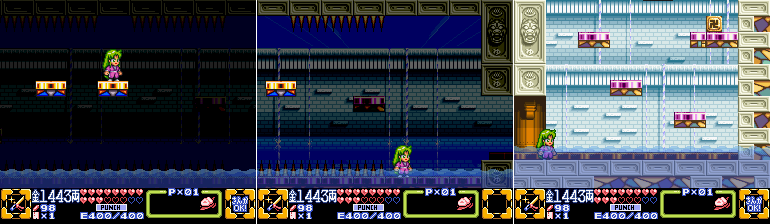 Card in hand we keep going and put the darkness gimmick behind us. That’s another thing we never see again. 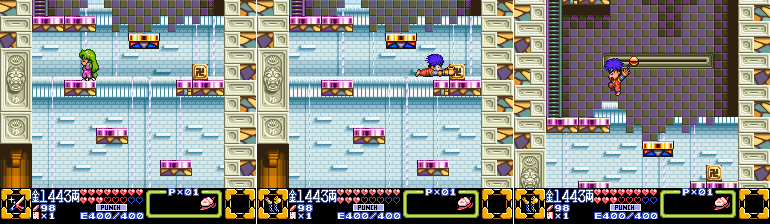  The climb up here has us switching between Goemon and Ebisumaru to make use of the Manji blocks and hoop pegs.  Thankfully these don’t retract and extend so it’s lower stakes than most of the sections like this in Stage 5. 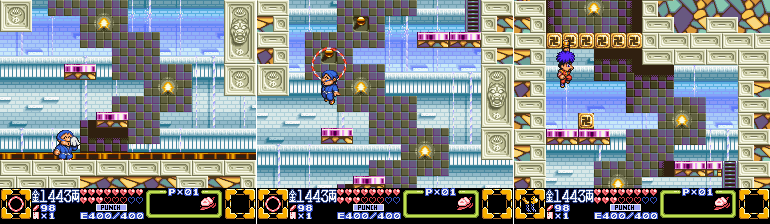 Here we have the option of continuing right or going up and, this is important, we have to go up first for reasons that will be apparent soon.  The last part of this climb might seem confusing at first until you realize that all the Manji blocks you’ve encountered so far were all background objects and not actually solid. Last edited by SpoonyBardOL; 01-02-2018 at 06:24 AM. |
|
#114
07-10-2015, 06:00 PM
|
|||
|
|||
 And we’re rewarded with that E-Can we saw earlier. From here we can either jump back down or return to the previous room and fall down and continue right, it’s all the same. 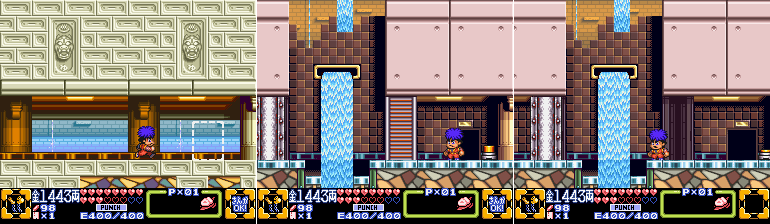 Both paths lead back to this room one way or another, though if you just fall from the E-Can’s platform be careful not to keep going through the pit in the center or you’ll have to do that entire loop all over again. 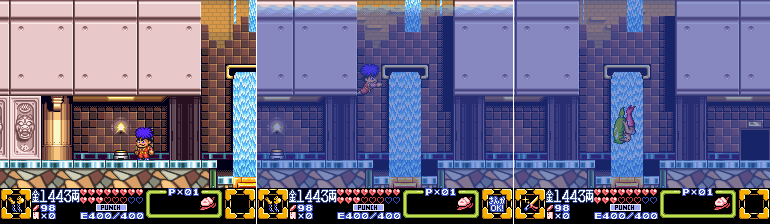 After unlocking the door we hit the switch which causes the water to rise. It also causes a block to appear over the pit which prevents us from taking the path down there again. If you didn’t get the E-Can and hit this switch then you wouldn’t be able to get it again without leaving the Stage and re-entering. 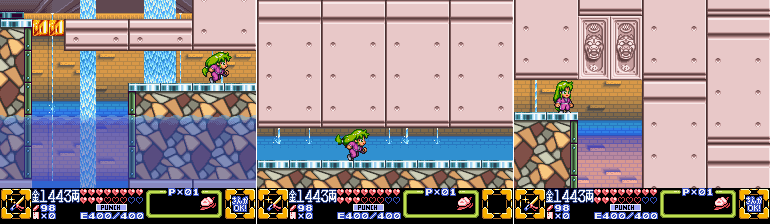 Anyway now we can reach that ledge we saw earlier, so we move on! Beyond it is a totally empty hallway followed by a totally empty drop. These filler rooms are kind of odd since no other part of the Stage is so empty. 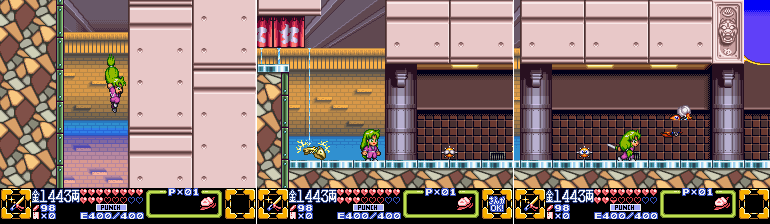 After the drop we’re in another room with more fish helplessly flopping about. There’s a ledge to our left we cannot reach, and just to our right is a weird blue thing.  Remember when I mentioned a little while ago that you can hit the spiky balls with your weapon and send them into the air? Well if you keep hitting them while they’re in the air they go higher. Send this one high enough and it collides with the blue thing which turns out to be a reservoir of water seemingly held up by a sheet of plastic or rubber. The spiky ball punctures it and the water all spills out. 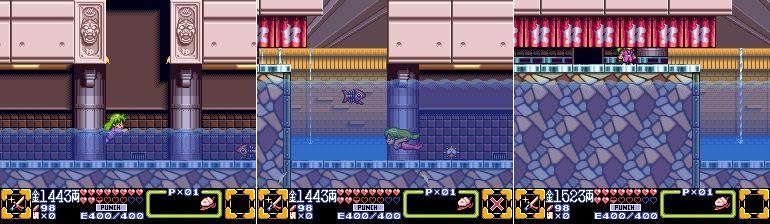 The room is flooded as a result and we can explore the area to the left. We could go to the right, but all we’ll find there is a path that loops back around to this room from the elevator in the center. No need for that, so we enter the left door. 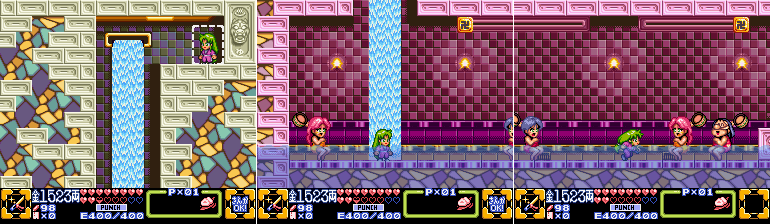 Another drop takes us into what looks like the ladies baths. Or, the robot ladies baths? It is the Karakuri hot springs, after all, so there’s a good chance all of these upset gals are just more mechanical minions. They’re just mechanical minions programmed to act like the stereotypical hot springs episode from some anime, but still, they’re totally mechanical! Uh… p-probably. Either way, they (along with Bismaru, or at least a Bismaru look-alike) pelt you with buckets the entire time you’re in this room, and no not even using Yae will stop their ire. I think the moving Manji blocks on the ceiling implies the game wants you to use Goemon to bypass the buckets but, nah. It’s just as easy to run on through. 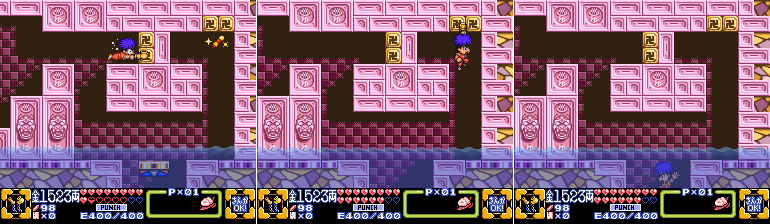 But I will take the time to get this Sparkling Dango. Those buckets hurt. In one weird little inconsistency, the water at the bottom of the screen here doesn’t act like water, it’s just a water layer without any actual water effect. Normally characters always float to the surface of water and the only way to descend is with Yae’s Mermaid transformation, but here you just fall on through. 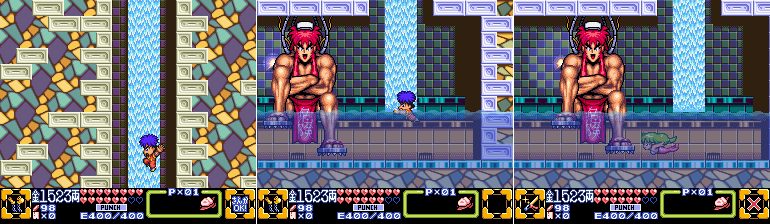 After a brief plunge we enter the next room and finally come face to face with Juurokubei! And he’s massive! And currently bathing! …nah it’s just another robot. Last edited by SpoonyBardOL; 01-02-2018 at 06:25 AM. |
|
#115
07-10-2015, 06:03 PM
|
|||
|
|||
 Wow he keeps a lot of giant robot clones of himself around, doesn’t he? I mean, I can’t blame him, wouldn’t you if you could?  Once we get through the Thwomp-leg gauntlet we enter another room that has water-as-decoration (gosh this stage would need some revisions if it were submitted to one of our SMBX projects…). It seems kind of empty at first… 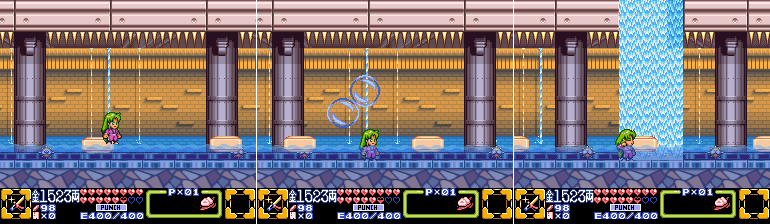 …but we start encountering bars of soap floating along. If we stand on them bubbles fly out, which we can jump on and ride for a few moments before they pop. Of course, with a spike-lined low ceiling that’s a bad idea. At least until we see an opening in the ceiling and figure that the game must have something up there. 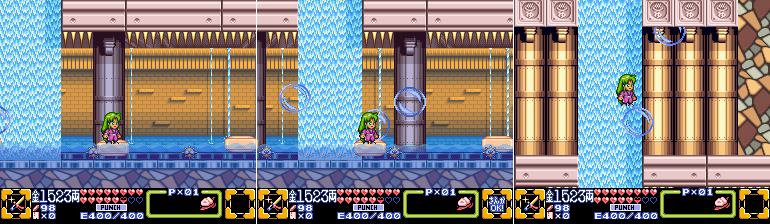 The proper way to deal with these soap bars is to jump on them ahead of time, since it takes a few moments for bubbles to fly out. Also, the bubbles don’t seem to pop quite as fast if you keep jumping off and on them, rather than just standing on them. Once you get high enough from your starting point more bubbles start floating up automatically, so you only need create enough from the bar to get you going.  Fanfare At the top we have the Gold Keycard! Also, since I never had the chance to show it off before now, Yae has a unique animation frame for attacking downward and it’s pretty bad-ass. All she needs is an upwards stab and she could stand in for Link. Lady Ninja Link. With a Bazooka.  Stage 7, Karakuri Hot Springs In the next room we’re not quite ready to leave the soap bubble gimmick behind, as the bars get continuously spat out of the opening there and create a load of bubbles when they do. It’s not super hard to climb up here since there’s bubbles all over the place at all times, you just have to remember to keep hopping on them as you ascend. 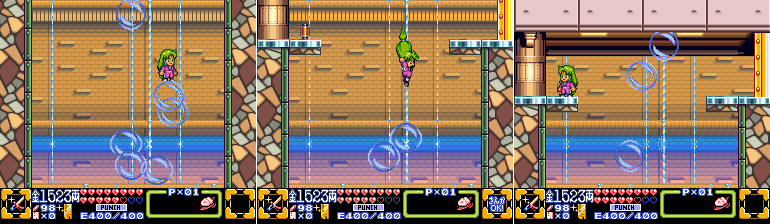 At the top of the room we find the third E-Can of the Stage, and we already know where the fourth is. 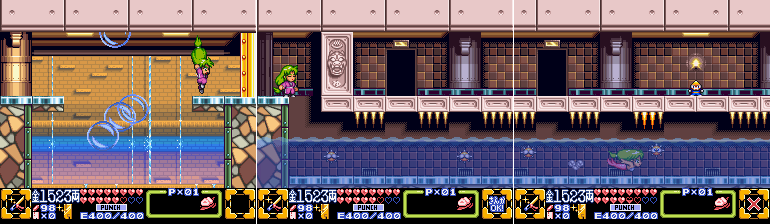 Through the golden door we enter a room with a shallow water way with a low spike-lined ceiling and a lot of spiked balls floating around. Something about this place seems a tad familiar… 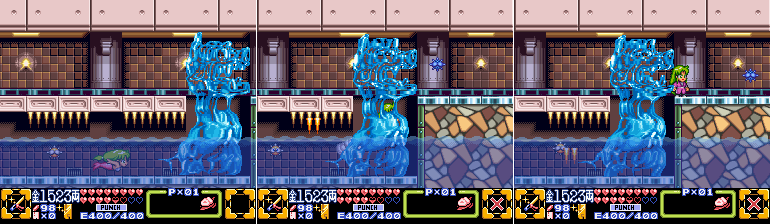 Oh crap Water Dragon! We get sucked up through its, uh, hindquarters and get spat out the mouth like all the spiked balls. Fortunately it doesn’t’ damage us but still. Ew. Just ew.  But hey, we’re back where we left the Walker and now we got the Gold Key for the Gold Door! Just beyond it is another power-up station like we saw in Stage 5? What sort of power does it grant us? Last edited by SpoonyBardOL; 01-02-2018 at 06:26 AM. |
|
#116
07-10-2015, 06:05 PM
|
|||
|
|||
 If you guessed ‘Ice’ then congrats! You know videogames. Of course we were going to get an Ice power after getting a Fire power. With it we return to the Water Dragon room and convert it to an Ice Dragon and start pounding away on it.  It will turn back into water a couple of times while you’re wailing on it, that’s fine, just freeze it again. Eventually it will shatter and you will be free to move on.  Hey it’s Mr. Compass! Looks like we’ll have a boss on our hands soon. The indicator points back towards the beginning of the Stage, looks like it’s right beyond the iron door we couldn’t reach earlier.  Through the door here I enter a room where I’m utterly surrounded by flopping fish. I take them out and just a bit further I encounter more of those weird gelatinous blocks from back at the start of the Stage. 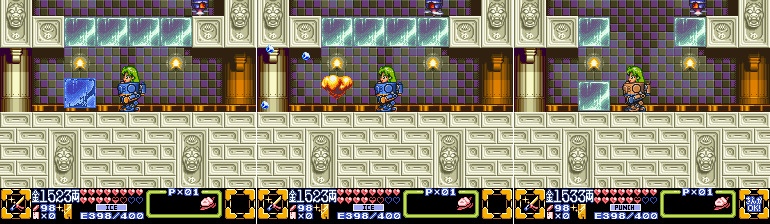 Ice Blast is Super Effective against them, though, and once they’re frozen they can be shattered with any ol’ attack. Thankfully they respawn when you exit and re-enter a room, so even if you destroy your footing you’re not stuck.  As I climb up I eventually have to use these guys as footholds. They resemble the enemies from the first shaft in the Stage, but a bit different. A bit more modern.  Bimmy-Copter: Unlike their prototypes, the Jimmy-Copters, Bimmy-Copters are invulnerable to all damage. They can still be frozen, but after a few moments they’ll harmlessly thaw out and resume their aerial patrol.  So this becomes Metroid for a bit as we keep freezing enemies to make footholds for ourselves as we climb the shaft.  Eventually we reach a section that’s just enemies with no blocks to wait around on so we have to be careful here. The Bimmy-Copters will thaw out, sooner than you might expect too, so you have to be quick. Unfortunately the Walker doesn’t have half the speed and maneuverability that Samus has so it can be tricky to aim the Ice Blast and the jump that follows. You also have to be careful not to freeze the second last enemy too far to the left or you’ll be unable to actually jump from it.  Once you reach the top you’ll find yourself back in the room that had the first gelatinous cubes you encountered. We’re almost back at the beginning! 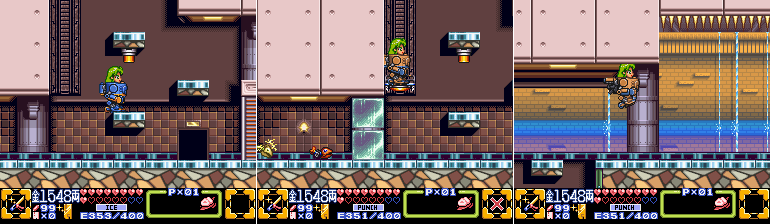 We have to hit the switch to call the elevator, and once we’re back up I take a quick detour to the right before heading to the boss. Last edited by SpoonyBardOL; 01-02-2018 at 06:27 AM. |
|
#117
07-10-2015, 06:08 PM
|
|||
|
|||
 Because now I can get the last E-Can by freezing the water spouts, bringing the Walker’s energy up to 500. It should be noted that the Ice Blast takes a bit more energy than the Flamethrower, if only because you can’t just tap the special attack button to get the full effect of it without actually costing energy. Though even then you still will never spend nearly as much energy as you have in reserve. 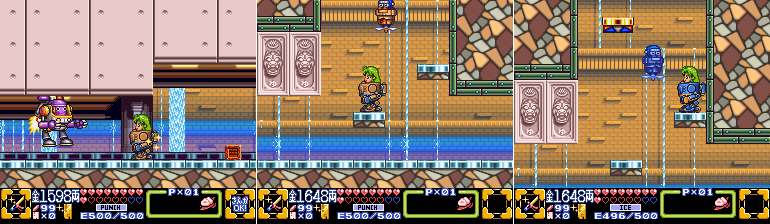 Finally I return to the first shaft in the stage and start climbing the Jimmy-Copters. These guys CAN be destroyed, though, and if you destroy your footholds you’ll have to leave the room and re-enter to get them to re-spawn. So just keep your fingers away from your basic attack, all you need going up is the Ice Blast. Let’s Metroid it up!  Yae’s green hair even reminds me of NES Samus. Though the climb here is not quite as riveting as the escape from Tourian, I’ll admit.  In the final room of the Stage we have a few more water spouts we need to freeze, which is no problem, and a rope which we need to break through with the Walker. Though be sure you jump out of it and cross the rope first. It is actually really easy to miss that Golden Fortune Cat since you could be plummeting through the rope in the Walker before the screen scroll catches up to you and brings it onscreen.  I nab the Golden Fortune Cat and we get a new heart instantly. Now there’s only two regular Fortune Cats left to find in the game, and both of them are in the last area we have yet to explore. But enough about cats, it’s Boss Time!  Ancient Ship Battle An ancient ship, surrounded by a barrier of ice, floats onto the screen and the boss music starts up! Well, a Boss Music starts up. For some reason this boss has its own unique battle theme. I mean, The Hand had its own theme too, but only for the pre-fight. Weird, but whatever!  The Ancient Ship: This ship looks like something from the Parodius universe, especially once it starts summoning penguin bombs. It starts the battle encased in ice, but once that ice is broken away it starts its attack for real, sending out explosive robotic penguins, flailing around with a pair of spiked limbs, and occasionally firing a massive laser. 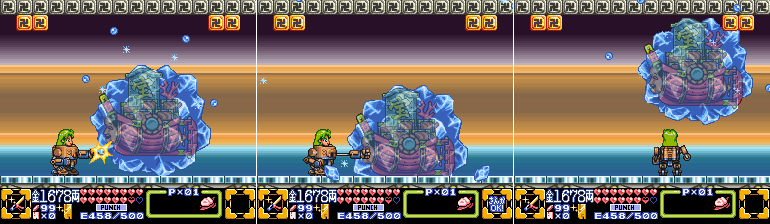 We have to spend the first phase of the fight punching away at the barrier of ice, causing it to shrink bit by bit. Right now the Ancient Ship doesn’t attack directly, aside from trying to crush us from above from time to time. 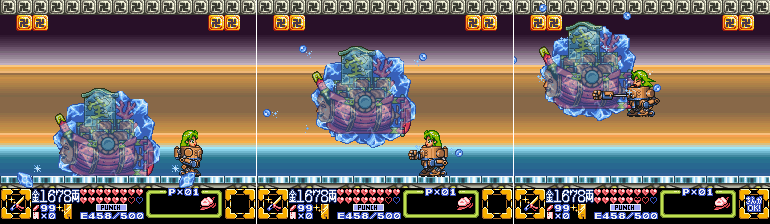 Aside from that, it spends most of this phase in the air, and it can be tricky to jump up and hit it without taking damage yourself. You cannot alter the Walker’s airborne momentum once you jump. You can affect its vertical movement, but you’re committed to your horizontal momentum until you land, so take care not to jump right into the thing you’re trying to punch.  Eventually the ice barrier shatters and the fight begins for real. Last edited by SpoonyBardOL; 01-02-2018 at 06:28 AM. |
|
#118
07-10-2015, 06:12 PM
|
|||
|
|||
 The Ancient Ship grows a pair of clawed limbs, and penguin bombs start jumping up from the bottom of the screen. Your only means of damaging the ship at this point is by freezing the penguin bombs with the Walker’s Ice Blast, and then hitting them with a punch to send them flying and, hopefully, crashing into the ship. It cannot be hurt by any other attack.  Occasionally it will latch onto the ceiling with one of its spiked arms and spin around, firing a laser. I think the game wants you to jump out of the Walker and latch onto the Manji blocks on the ceiling to avoid it, but the timing to actually do that is so tight I just prefer to tank the hit. I had full health coming into this fight and I have a super best Rice Ball to fall back on if I need to, I’m fine. 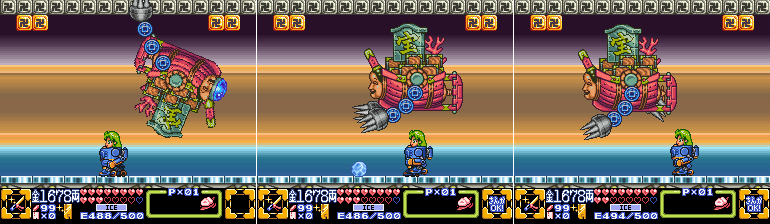 Freezing the Penguin Bombs in the right position to actually hit the ship is the trickiest thing about this fight now. The ship constantly moves from right to left at an even pace, but the bombs pop up randomly. The bombs fly up when you hit them, but then fall off screen if they don’t actually hit the ship so you only get once chance to use them. Also, once frozen the bombs are actual obstacles you can’t just walk through so if you find yourself needing to get to the other side of one, either to dodge an attack or to get a better position to hit the ship, you risk taking a hit as you jump over due to hitting the ship. 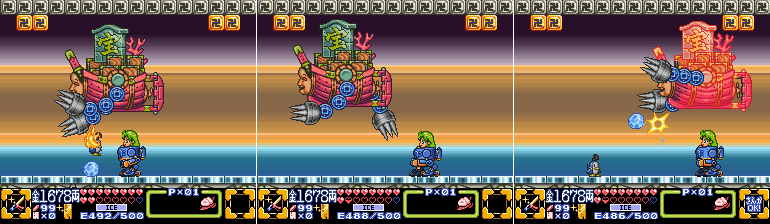  Occasionally the spiked arms will swing in your general direction, but they’re the least threatening thing about the fight, honestly. 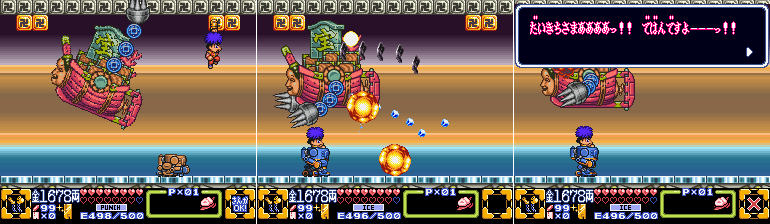 I make an attempt to dodge a laser with Goemon, but it just isn’t worth it. The fight ends with the next hit after that attack anyway, so farewell Ancient Ship! It seems to call out to ‘Daikichi’ as it blows up. 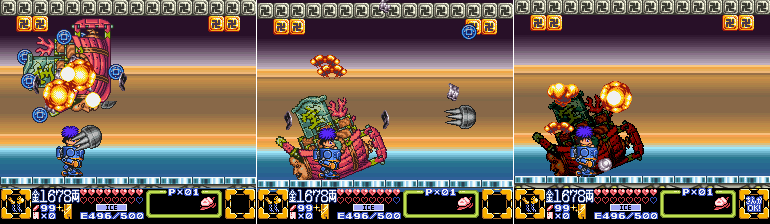 It crashes to the ground and explodes to bits. 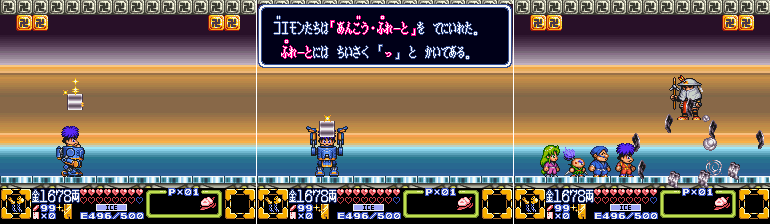 Fanfare We get another Code Plate for our trouble, that’s number four! It’s the, uh… I think it’s called a sokuon? It’s the little Tsu symbol which signifies the next consonant is pronounced with a stronger emphasis, anyway. And, right on cue, another visit from one of the dumbass brothers. Omikuji the White enters!  The Omikuji Siblings Omikuji: The Five Omikuji Siblings' bath lover, Daikichi, is here! Grr! The Code Plate again? Furthermore you have no manners, coming here just as I get out of the bath! As soon as I get out of the bath I like to drink Fruit Milk. That's really the only thing you should do! (laugh track) Goemon: What?! I think Lemon-Lime Soda is better! Then I turn on the electric fan, put my hand on my hip and drink the soda, while relaxing in the cool air. It's really heavenly! (laugh track) Omikuji: H-hand on your hip? I never imagined you could be so stubborn! Anyway I don't have time to take this slowly, I have to head back to Karakuri Park before I get the chills! (laugh track) 'Karakuri Park', huh? 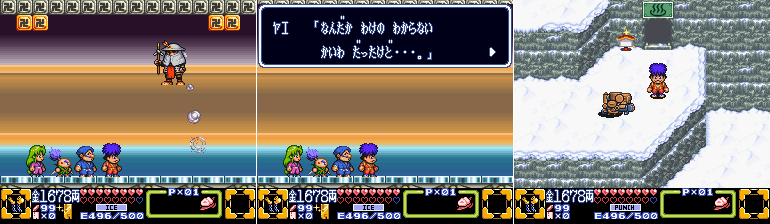 Yae: I don't really understand what that conversation was about... Sasuke: Was that really a conversation between adults? Ebisumaru: Goemon, I like coffee and milk the best... Yeah, uh, I don't get that conversation either. But, like all the others, the 'Bath Lover' abruptly leaves in a huff and we’re left wondering where to go now, besides this mysterious 'Karakuri Park'. Four Code Plates remain, but there’s only two indicators left on the map. Don’t worry though, it won’t be a mystery for long. Next update we’ll see what’s up with all the remaining Code Plates. So that was Stage 7. It was a vast improvement over Stage 5, not to mention Stage 6. It was just the right length, and had you use all of the characters throughout instead of focusing on one obvious one. It’s not an Ebisumaru Stage or a Yae Stage, it calls on everyone. It’s probably the best Stage in the game, really. Not to prematurely condemn what remains or anything, but it IS true that as far as actual stage design goes Stage 7 is the high point of the game. It’s the most well thought out and put together, and it has enough interesting and one-time gimmicks to stay memorable. There’s still more to do, though, so we’ll be putting the Karakuri Hot Springs behind us and moving on to take the fight to Juurokubei’s doorstep next time. See ya’ll then! Last edited by SpoonyBardOL; 01-02-2018 at 06:29 AM. |
|
#120
07-10-2015, 08:45 PM
|
|||
|
|||
|
That's a bit harsh, but I'll elaborate more on my thoughts on the game as a whole once I'm finished.
It is fair to say that it is, at least, an uneven experience. |