
-
Welcome to Talking Time's third iteration! If you would like to register for an account, or have already registered but have not yet been confirmed, please read the following:
- The CAPTCHA key's answer is "Percy"
- Once you've completed the registration process please email us from the email you used for registration at percyreghelper@gmail.com and include the username you used for registration
Once you have completed these steps, Moderation Staff will be able to get your account approved.
Spring forward? Fall back? Let's Play The Legend of Zelda: Oracle of Seasons/Ages!
Back to Let's Play
< 1 2 3 4 5 6 7 8 9 10 11 12 13 >
< 1 2 3 4 5 6 7 8 9 10 11 12 13 >
|
#151
 03-15-2009, 05:51 AM
|
|||
|
|||
  One cutaway later, and it's as good as new. GONG!  You're welcome.    My, my, aren't we sentimental? This, of course, gets elaborated on more in Oracle of Ages, but we'll get to that later.   For now, we're off to sea!    Huh, I'm impressed. The ship's buried between the border to Subrosia and Holodrum and they repaired it in under a day. These must be the famed Stalfos Engineers who can turn rocks into replicators. Er, ramparts.   Anyway, to the sea! |

|
#152
03-15-2009, 05:52 AM
|
|||
|
|||
   You know, I don't want to be "that guy", but how are you guys even pushing through the sand to begin with? Are you using engines? Pulleys? Wait, don't tell me... it's Syldra, isn't it?    Don't worry, my good friend. Believe in me who believes in you, and our ship will be the one to pierce the oceans!    Aye aye!    After long last, we've made it out to sea once more. It should be smooth-sailng here on out, right? ...Right?   Oh. |
|
#153
03-15-2009, 05:52 AM
|
|||
|
|||
   Seems like they've been on land too long and got sea sick. Heh.    Wait, you died when you got stranged in Subrosia? ...How long were you down there, anyway?    ...It's?   Not even the captain's immune to seasickness, it seems.  Before you ask, that entire sidequest we went through was just to bridge this gap here. Why Link didn't just hire someone to build a bridge around it, or, hell, just swim past it himself, is beyond me. But whatever! We're done now, so let's move on.   The Captain and his crew will be here for the rest of the game getting their sea legs.  Heading east, I find another ring. If this location looks familiar, it should - we passed through here at the very beginning of the game to get to the Hero's Cave, as you may remember. |
|
#154
03-15-2009, 05:52 AM
|
|||
|
|||
  Heading north of the S.S. Skullduggery leads us to an abandoned house. Burning up the bush beside it reveals another hermit den, and this time we hit paydirt.   Once inside, we just engage in some impromptu demolition to reach the stump in the backyard...   ...And we can climb the vines to reach the graveyard squirreled away in the west. That Piece of Heart pictured on the right is tempting, but we won't be able to pick it up for now so let's just ignore it.    For now, it's time we explore Level 7: Explorer's Crypt.  If the dungeon's name and this episode's theme haven't given it away yet, this dungeon revolves around a more macabre theme than the previous ones, with Stalfos and other similar enemies taking the brunt of Link's assault this time around.  It's also pretty dark in here too.   And, uh, cursed at certain points. I'm pretty sure it'll only just send us back to the beginning, but that doesn't change the fact that it's creepy as hell.  Cheese it! RUN! |
|
#155
03-15-2009, 05:52 AM
|
|||
|
|||
   After running through the cursed room, we pass through here. Killing the wizzrobes nets us a Small Key.  Eep.    Time to move on. Killing all of the enemies in the next room over reveals another chest containing a Magic Ring for us to appraise later on. Not that I'm particularly optimistic about it, but eh. Whatever.  One small trip later, and we're back in the dark room from before. Let's light those torches and shed a little light on this situation.   Whoops. Bad idea?    Not that it matters ,since Ms. Poe here goes down in two hits. Weak. With the curse gone, we can move on through the next room and up the stairs. And up there we shall go!   Only one of the Armos statues here is real while the rest are fakes (or is that the only fake and the rest are real?) so, uh, hope you get the right one on the first try? Heh. |
|
#156
03-15-2009, 05:53 AM
|
|||
|
|||
   Not that it matters right away, since we'll want to drop by the room to the west first to pick up a key. Note the return of the trampolines - this ain't the last we'll be seeing of them.  We luck out right away when it comes time to head south - managed to get the right statue on the second try, I did.    Pushing the blocks aside here lets us move that trampoline a bit further. Jumping up through the hole brings us to a chest containing a Dungeon Map.  Well, that's all we can do on this floor for now. Time to head further into the crypt and down this set of stairs here. Watch out for the Anti-Faerie, which can be knocked out of the way by the Magical Boomerang, thankfully.   The Goddamn Bats are really out in force in this room. Flying around the room on a high-speed platform while trying to avoid being knocked off is a pain in the butt.   Isn't this tricky. The bridge will break apart and try and attack you as you enter the room, but you've got to make it across to move on. Hope you've got good reflexes!  I kinda like this puzzle. No block-pushing, no bullshit - just straight up problem solving and pattern recognition. So let's get to it, shall we? |
|
#157
03-15-2009, 05:53 AM
|
|||
|
|||
 First, we'll move this row over here over like so...  Then slide this one down...  So we can move these ones over without derailing anything...   And hitting the last one wraps everything up. Done like dinner.   Anyway, with another Small Key in our hands now, we'll just double back a floor and open up a locked door we passed by earlier.    You'll have to chew on a Pegasus Seed in order to light all of the torches in the room. Anyway, the second Poe sister makes her appearance now, threatening us for trying to break her curse.    Just like her sister, she goes down in two hits as well. As I said earlier: weak.  With her out of the way, we're free to swim our way past these obstacles here without that darned curse coming into effect. |
|
#158
03-15-2009, 05:53 AM
|
|||
|
|||
  This part stumped me for the longest time, until I figured out you're supposed to take out the Darknuts on the other side to advance. Silly, silly me.    Once we hit the switch on the other side to get the spinners spinning, we pull out our Magnetic Gloves and begin shoving our way across the room. Some of the switches between spinners are tricky, but pretty doable; as long as you cut the charge at the edge of a square instead of in the center, you should be able to align yourself with the next pretty easily.   After we're across, we jump on the trampoline and take out the Stalfos present and take them out to unlock something.    Next, we'll just fly up via the red trampoline, which throws up an impressive two floors instead of one, and head on north to the next room.   The gimmick for this room is that we'll have to jump on the platform mid-move to make our way to the center while the Keese present fly around trying to knock us off. Normally this would be annoying to me, but...   ...the fact that this room houses the very best item in the game more than makes up for it. The Roc's Cape, as you can imagine, let's you do a double jump by holding down B or A when you jump. The uses for this should be obvious; outside of significantly increasing our time flying, not only does this make it much easier to dodge some attacks from bosses but also makes jumping over gaps easier to pull off. An item of many uses, the Roc's Cape will probably end up glued to our A slot for most of the remainder of the game. |
|
#159
03-15-2009, 05:53 AM
|
|||
|
|||
  While that's all well and good, we still need another Small Key to get in order to move past this point. Time to backtrack a bit, I suppose.   Hidden off to the right side of the bridge room are a series of pits we'll have to leap over. Best part of the Roc's Cape? You can shift direction mid-jump more easily, making it so we can pull off some pretty sweet moves like this.    Next room over is another trampoline puzzle. This one brings us back to near the beginning, just east of the Armos Knights.   Now that we can make our way up onto the ledge, we can push the Iron Ball onto the switch and grab the key hidden away in the ceiling.  Heh.  Anyway...    With both the Roc's Cape and Roc's Ring equipped, the section just beyond the locked block is a breeze to fly past. Yep, nothing to see here. |
|
#160
03-15-2009, 05:53 AM
|
|||
|
|||
  So's this part too. I'm guessing it would have gotten tense without the ring, but otherwise it's okay I guess.  Once we're through, we'll just hit this switch here...    And it's onto the mini-boss(es).   The fight against the Poe Sisters revolves around managing the torches around you while fighting them. Just like with the curses they had before, once the torches go out you'll be kicked back to the beginning of the dungeon so having the Seed Satchel equipped is pretty much a given for the fight. Annoying since we can't really use the Roc's Cape just yet even after we just found it, but whatevs.   They're as fragile as ever thankfully, so they go down quickly enough. That's the last we'll see of them, trust me.   Cramped quarters? Wizzrobes phasing in and out? Yeesh. Though the boss door is literally just right there, we still don't have the Boss Key yet! Since we've explored pretty much everywhere else, the last few rooms on the map are where we'll find the key surely enough.  Same deal as before with the spinners. Magnetic Gloves, switch in mid-air, yadda yadda yadda.   Mm-hm. |
|
#161
03-15-2009, 05:54 AM
|
|||
|
|||
  This one's a bit tricky to figure out. You have to hit the switches in the right order to move on, but in order to make the jump you'll have to combine the Pegasus Seeds and Roc's Cape to make the five-panel jump.    Once that done, it's time to catapault our way up a few more floors. Up, up, and away we go!   Next we'll just hit these switches here to open the door. The solution is to keep the top-left one blue while the others are red - any other combination won't work.   After that, we just take out the Stalfos inside and the Boss Key is ours.  And that's it. Time to take on the boss.   Gleeock's back for the first time since the original game, and he's much nastier than in his first appearance. He breathes fire like he did in the first game, however his volleys are wider than before and sometimes stay on the screen for seconds at a time. In addition to that, once you cut off a head from Gleeock, it'll fly around the room and attack you before eventually rejoining the body a minute or so later, so you'll have to take out both heads close to simultaneously in order to move on.   Even then, that's not the end of it. Once you take out the heads, Gleeock's body goes berserk and charges around the room. Every time it hits the wall, the room will begin to shake violently and stun Link, which is where the Roc's Cape comes into play. By double-jumping throughout the affair and charging the Noble Sword in mid-air, you can narrowly dodge most of his attacks and take him out once and for all.  Gleeock's probably the toughest boss in the game, all told. His durability coupled with the damage he deals and the fact that you'll have to risk putting yourself into harms way to attack him makes for a very close, very tense fight, and it's not often for someone new to the game or weakened after the dungeon's gauntlet to lose to him a few times figuring him out. As such, he's also probably my favourite boss in the game, and really shows off the kind of nailbiting action I've been left wanting for later entries in the series. |
|
#162
03-15-2009, 05:54 AM
|
|||
|
|||
  Anyway, with the two-headed dragon out of the picture, it's time we pick up our seventh Essence of Nature, the Seed of Life!     Yes, I know what you're thinking, but don't say it. Don't you dare.     With the acquiring of the seventh Essence, the Maku Tree drops by and notifies us of his progress. This time, however, he's completely unhelpful with his advice this time around, his hint boiling down to "go find it yourself". Fine, I think I will. Jackass. But that will have to wait for the next episode.  Next time: The Sword & Shield Maze and the Changing Seasons! |
|
#163
03-15-2009, 11:06 AM
|
|||
|
|||
|
Quote:
|

|
#165
03-15-2009, 05:28 PM
|
|||
|
|||
|
Quote:
 This is, of course, the only reason he'd need. |
|
#166
03-15-2009, 07:08 PM
|
|||
|
|||
|
Quote:
|
|
#167
03-17-2009, 12:55 PM
|
|||
|
|||
|
Quote:
 Anyway, last time we helped a bunch of pirates out, got lost in a desert and went out to sea only to find ourselves back in port when the entire crew lost its lunch. After that, we went a-graverobbing and took back the seventh essence for ourselves.   But first, we're going to pick up that Piece of Heart we passed by earlier. We'll just change the season to Autumn first in order to deal with those mushrooms blocking it before heading over to this ordinary-looking cave.    We couldn't get through here earlier before, but now that we've got the Roc's Cape we can jump the gap with energy to spare. Climbing the stairs brings us back outside in the cemetery, after which it's no problem at all grabbing the next Piece of Heart.  The pirates are still at port, so you can say hello to them if you want. They'll be there until the next game when they're back sailing around the oceans.   Oh, and Maple drops by with her new vacuum again. We don't pick up anything of note, however...   It looks like that, with our journey around Holodrum, we've managed to cull the monster population down by 1,000. As a reward, Vasu gives us another ring to appraise for him. Sounds like scam to me...  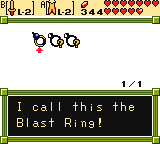   Anyway, the appraisals. Aside for the Slayer's Ring (which, like the Friendship Ring, only exists to act as a marker for something), we've got a pretty good haul this time around. The Power Ring boosts our sword's power slightly at the expense of defense, similar to how the tunics in Link's Awakening worked, while the Rang(e) Ring and Blast Ring boost the power of our Boomerang and Bombs respectively. All in all, a nice selection and much better than the majority of the rings we've picked up so far. |
|
#168
03-17-2009, 12:56 PM
|
|||
|
|||
 Before we move on with finding the dungeon, we've got a few spots on the map that we missed exploring the first time around. Being a completionist, I'd rather have the entire place filled out just to make sure I haven't missed anything. Don't worry, this shouldn't take too long.   On our way through to Spool Swamp, we come across this sign here on top of the cliffside which I forgot to pick up once we got the Spirit of Summer.     After changing the season, we climb the vines and realize just how resourceful Vasu and his jewelry operation is.   Heading over to the Woods of Winter now brings us to this little nook in the corner here. We find a Gasha in the chest inside, which should help us out with the final Piece of Heart. ...I hope.    The last little bit of map I've got left to explore is a small bit of land on the southern half of Mt. Cucco, which reveals a shortcut between the mountain and the Sunken City. I, uh, never really knew about it unti I found it just now (which is kinda embarrassing since the Diving Master who gives you the Flippers mentions this spot), so... yeah. The More You Know.   Anyway, with the map finally all but completed, it's time to explore the last chunk of map we have yet to touch. We've climbed the highest mountains, explored all four corners of the map, and there's only one last square of empty space that we have left to explore.  It's time we explore the Temple Remains. |
|
#169
03-17-2009, 12:57 PM
|
|||
|
|||
  The Temple Remains (or, formerly, the Temple of Seasons) is lousy with tough enemies, with monsters like these Lynels, some Darknuts and the occasional Ball-and-Chain Trooper riddling the area. Generally it's a good idea to enter the area with a good stock of hearts before entering, as these enemies can and will take off a significant amount of hearts if you get cocky and let them. It's interesting to note that, despite the fact that the Temple of Seasons has sunken underground, the general structure of the temple still remains. Though oddly enough the portion of Subrosia where the real temple is is located in the east instead of the west where the Remains are, which is strange since the general layout of the underground mimicked that of the overworld. An oversight, perhaps?    In any case, The Temple Remains, like the Tarm Ruins, are an environmental puzzle involving the four seasons at our command. It's more labyrinthine than the previous area, with a large amount of dead-ends and some red herrings, which makes some of it a little confusing to explore but nothing too bad.  First things first, we'll have to head east with Autumn in effect. Thanks to the fallen leaves covering the S-shaped row of holes, Link can traverse this section with relative ease.    Next we'll switch the season back to Winter in order to pass over the wall of rubble here. This is all we can explore for now, but the path leads us to Subrosia where we'll find our next goal.   Once underground, we head inside to the nearest house and meet this Subrosian here trying to make fireworks. His methods leave little to be desired, tossing in everything but the most obvious ingredient to start his fireworks show.  Let's help him out a little, shall we?   The ensuing chain reaction causes an eruption in all of Subrosia's major Volcanoes... |
|
#170
03-17-2009, 12:58 PM
|
|||
|
|||
   More importantly, the erupting magma spills over into the Temple Remains, removing most of the obstacles that were in our way.  Kids: don't try this at home. Link has years of experience that keeps him safe and so you don't have to.  While we're here, we might as well explore the last few bits of Subrosia we've passed by earlier. Note that tossing the boulder here clears open the path to the portal permanently so we won't have to end up retreading the entirety of Holodrum to make our way back to the Temple. Handy!  A nearby cave brings us to yet another Gasha Seed. Also handy!  To the west of that brings us to ol' Googly-Eyes here. He's mighty suspicious looking, if you ask me.    Rosa's still hanging out by the beach and is willing to go out on a date whenever we'd like. There's one last door in Subrosia left to unlock so we take her up on her offer and bring her there to pick up one last Gasha Seed.   With that, we've pretty much fully-explored the entirety of Holodrum by now. Time to head back to the Temple Remains and work our way through it a bit more.   Inside the now-reachable cave is the final Piece of Heart that isn't Luck-based. All that's left is the Gasha Seed one, though I've got a feeling that it won't go down without a fight... |
|
#171
03-17-2009, 12:59 PM
|
|||
|
|||
  Well, that can be left until later. Now that the trees in the north have been burnt to a crisp, we can pass through the area now after climbing up to the spot during summer.    Entering into the nearby cave brings us to the roof of the Temple Remains' walls where a pair of Lynels are waiting to beat us up. Thanks to the opening though, they'll be evaded for now.   At the far end, we reach the top of the Remains, bringing us to another Subrosian portal. Well, time to go through the looking glass again.   The portal brings us to the last section of Subrosia and back in front the Googly-Eyes from before. Wait, you don't mean...   ...it is. Well then, introducing the eighth and final dungeon of the game, Level 8: Sword & Shield Maze. It's puzzling that it'd be frozen over, seeing as how Subrosia is a Lethal Lava Land and the convection from the heat alone would be enough to melt it. Not to mention that the entrance to the dungeon is wide open, so there's nothing insulating the dungeon from the heat in the first place. So how- Quote:
 Noting that it's also the final dungeon, the game's going all-out and throwing everything it has at us at this point. Hence: Wizzrobes, and lots of 'em. None of the blue kind thankfully, but still a cause for alarm if you tend to have trouble with these kinds of dungeons.   We'll head off the beaten path at first, heading to this room here. Shooting the statue in the eye (which should be a little obvious since its lack of an eye gives it away) drops down our first key for the dungeon. So far, so good.  We'll have to do the same here to reveal the chest, but we lack the means to hit all three at once right now so we'll have to come back later for it. |
|
#172
03-17-2009, 01:00 PM
|
|||
|
|||
 The magnetmonsters from Unicorn Cave are back again, and now we'll have to deal with them on ice as well! Sigh   The solution to this room isn't really obvious at first, since Hardhat Beetles are usually dealt with by knocking them into holes instead of killing him (the glaring exception being A Link to the Past when they first appeared) however a single blow from the iron ball present is enough to take him out.   I'm surprised I haven't mention this yet, but you know those annoying sparks that line the walls and circle them endlessly? Just like in Link's Awakening, you can use the Boomerang to take them out and reap the faeries hiding inside them. This room's especially packed full with them, so if you wanted to you could fall back to this room here to restock on hearts whenever you get low.  We pass by this locked block to explore the route we're on for now...  ...But that turns out to be in error. Downstairs it is!  Hmm, notice the change in color scheme. It doesn't seem like much, but the reason behind it should become obvious once we explore a bit more.   Oh geez, rolling pins and wallmasters. They really wanted to bring the traps out in force for this dungeon, didn't they?   After heading into and through a passage along the route we're on, we pop up in another section of the dungeon where the reason behind the change in colour is revealed. Yes, just like in Snowfall Temple in Majora's Mask, though to a larger degree, S&S Maze is split into two different parts that we'll have to pass through. The top (or "shield") have of the dungeon is frozen over while the bottom ("sword") half is brimming with magma, resulting in two distinct, contrasing halves that we'll have to pass through. Whether it gets pulled off well is a matter of opinion, but it was an interesting concept at least.  Anyway, despite that, the lava section of the dungeon is probably the more preferable one; the lava present is usually off to the side or arranged in a way that you can jump over it easily with the Roc's Cape so it's not as frustrating to deal with as, say, the upper half's frozen floors.   We pass by another set of stairs, bringing us back into the frozen half of the dungeon and up to the compass. Woo. |
|
#173
03-17-2009, 01:01 PM
|
|||
|
|||
  Oh look, another spinner puzzle. This one's not as insidious as the one back in the Ancient Ruins and is solved... pretty much right away. The top path loops back to the room we just came from so it's only a few seconds before we head down into the room below.    This room's a puzzler. The staircase upwards is blocked by a lone Armos Statue, however touching it or otherwise trying to provoke it doesn't result in it waking up. In addition to that, the only hint we're given is a rather vague clue, so it's not hard to expect to find yourself stuck on this section.  The solution, for those having trouble at home, is to exit the screen and re-enter, stopping yourself at the entrance once you're back in the room. So long as you don't move, the Armos Statue will wake up, letting you get to the stairs beyond.    For our troubles we pick up the Dungeon Map in a nearby chest. To be honest, I really don't like S&S Maze's theme, or most of the others. I know it's following in the tradition that the original game and Link's Awakening set, but it seems too artificial for the map to "coincidentally" match up like this. This might be because I cut my teeth on A Link to the Past but I personally prefer it when the dungeon design is more haphazard and, well, natural. Could just be me, though.   Anyway, the important part of reaching this part of the dungeon is that we can drag the iron ball to the north around to the switch from here, thereby revealing the bridge to the right of us.   After heading back downstairs and up via another flight of stairs nearby, we reach the dungeon's treasure - the Hyper Slingshot! The weapon's upgrade allows us to fire three seeds at once for the cost of one, allowing us to hit the triad of statues we've been coming across so far. Other than that it's nothing special , but hey.  Now that we've got that, we can head further into the dungeon with our head held high. Hooray! |
|
#174
03-17-2009, 01:02 PM
|
|||
|
|||
  After a little bit further in, we come across the first trio of statues requiring the Hyper Slingshot. Hitting all three reveals a staircase for us to head up through.    Once we're up there, we pick up a small key from the chest which allows us to head into the next room where the mini-boss is waiting.   Introducing Frypolar, pardon the pun. The trick to damaging him is to alternate between hitting him with Mystery Seeds to change him blue, and Ember Seeds to damage him. Since this requires a lot of menu navigation and since Frypolar's moving and attacking the entire time you're taking aim, needless to say this gets really fucking tedious.    No, seriously. Almost the entire fight consisted of these three screens. Worst. Mini-boss. Ever.   Anyway, with him down for the count and our hearts restored thanks to our Magic Potion, we head further into the dungeon and get to work on these torches without too much worry.  But then this all changes when we reach the sliding block puzzle. This dungeon really wasn't as well-thought-out as the others, was it... |
|
#175
03-17-2009, 01:02 PM
|
|||
|
|||
 Anyway, at least it isn't too hard to figure out, as our top-down perspective at least gives us a good angle on the situation. First things first, we'll want to push this block here to the right.    Next we'll want to push the other two blocks into position like so, using the first block we shoved over to prevent it being knocked into an unsolvable situation.    Finally, it's only a matter of sliding the remaining blocks into position and onto the switches. That wasn't so bad, huh?    Heading down into the path created by solving the puzzle (which is filled with ice and conveyor belts, neither of which are very conducive to platforming) brings us back to the room with the gap we were forced to turn back from earler. Now that we're on the other side, we can hit the switch and activate the bridge, giving us a convenient shortcut.  Doubling back to the beginning for a second, we nail the three statues we passed by at the beginning with our slingshot and pick up another Magic Ring. What's in it will have to wait until later, however.   With that done, we'll just head back onto the path we were dropped onto earlier. There's nothing really interesting of note here, outside of a few wizzrobes and a switch requiring the boomerang.   Once we're past that we come to these rooms here. The switch and, subsequently, the door on the right are red herrings, leading to a dead-end with a Ball-and-Chain Trooper. |
|
#176
03-17-2009, 01:03 PM
|
|||
|
|||
  Rather, we'll want to head through the left door instead, which opens after killing the enemies in the room and leads us to the Boss Key. We're just about done here, I think.   I passed by this section here earlier, which turns out to be in bigger error than I thought as I pick up a small key from the room.    With the key in hand, we move further on into the dungeon, bringing us to this room here. What are these crystals here for, you ask? That... will have to wait for a second, as I head through this cracked wall here.   Inside is a memory puzzle, requiring you to trace the path outlined by the ghostly Armos Knight that appears. There are only about three or four different solutions however, so you can just keep startscumming until you get an easy one and solve it that way if you want. Figuring it out nets us another small key, which we'll need later on.    Anyway, so! Those crystals from earlier? We're supposed to carry them around for the last few rooms and toss them into the pits shown in order to freeze the lava below and make it possible to cross. It's a clever little bit of an environmental puzzle, as it changes things around in a bit that's more about creating a path rather than opening one.   Anyway, next up is the second pit in the northwest corner, which we'll have to ride a cart to get to it. Dropping it into the pit below freezes another quarter of the bottom floor. Two down! |
|
#177
03-17-2009, 01:04 PM
|
|||
|
|||
   The third one requires a little bit of trickery, requiring you to change the direction of the tracks in order to reach it. It's nothing terribly confusing, however.    The last one, however, can get confusing if you don't explore the bottom floor a bit first. In order to get the crystal over to it, you have to climb the staircase over to its side and ride both minecarts back to the start in order to create a direct path to it. Since the second cart is locked away in the same room as the pit, you can't make a direct line for it from the start.   Once that's done however, the rest of the lava freezes and the path to the boss door is now fully formed.   Heading up another set of stairs on the floor below brings us to a small key that we'll need for a locked block before the boss door. Inside are also a group of sparks, giving Link the much-needed healing he'll want for the boss ahead. Convenient!   Anyway, we're pretty much done at this point. All that's left is to unlock these last two doors/blocks and we're onto the boss.    The boss for the dungeon, Medelock (or Medusa Head, according to ZeldaWiki), is one of the fastest enemies in the game, warping around the room and moving at an incredibly fast clip. In addition to that, it will also keep its distance from Link until it attacks, at which point it'll warp to the top-left and either strafe the room with Laser Eyes or fire a volley from the center around the room. Thankfully, most of these attacks can be dodged easily with the Roc's Cape (gotta love it) and you can trap Medelock into a corner to get a bunch of easy hits in, so it's not as difficult as, say, Gleeock was. The high-paced nature of the battle tends to make the fight a bit of a nailbiter anyway, but you shouldn't have too much trouble regardless. As you probably have already noticed, Medelock is a completely new boss to the series and, unlike the last seven bosses, hasn't appeared in any of the other titles in the series. Which is all well and good, but a bit odd since there was still one other boss from the original game that could benefit from an appearance. I guess Patra's not much a favourite with Capcom? Then again, it might count more as a mini-boss, depending on how you look at it. Still, I'm all for new material when it's due, and I can't say I wasn't happy with how Medelock turned out. Last edited by PapillonReel; 03-21-2009 at 06:25 PM. |
|
#178
03-17-2009, 01:05 PM
|
|||
|
|||
  Anyway, with MH down for the count, we pick up the last of our boss-won Heart Containers. Woo!    Along with that we pick up the last Essence of Nature, the Changing Seasons!        This is probably the only Essence in the game that doesn't feel as shoe-horned into the game as the others, but that's not saying much when it's up against competition like the freaking Seed of Life. Honestly, I'm surprised they managed to get that crap past the radar.   Anywho, now that we've got the Eighth Essence, the Maku Tree is back to full power and has something that we could use for the final battle. What is it, you ask? That... will have to wait for another time.  Next time: Showdown with Onox, the General of Darkness! (Provided the Gasha Seed Piece of Heart doesn't kill me first. Oy.) |
|
#179
03-17-2009, 03:54 PM
|
|||
|
|||
|
Quote:
|
|
#180
03-17-2009, 04:43 PM
|
|||
|
|||
|
Quote:
|