
-
Welcome to Talking Time's third iteration! If you would like to register for an account, or have already registered but have not yet been confirmed, please read the following:
- The CAPTCHA key's answer is "Percy"
- Once you've completed the registration process please email us from the email you used for registration at percyreghelper@gmail.com and include the username you used for registration
Once you have completed these steps, Moderation Staff will be able to get your account approved.
Spring forward? Fall back? Let's Play The Legend of Zelda: Oracle of Seasons/Ages!
Back to Let's Play
< 1 2 3 4 5 6 7 8 9 10 11 12 13 >
< 1 2 3 4 5 6 7 8 9 10 11 12 13 >
|
#91
 02-27-2009, 01:56 AM
|
|||
|
|||
   Rule of Acquisition #98: Every man has his price. This hermit's turns out to be a whopping 300 rupees, maxing out our wallet almost immediately. Are you excited? 'cause I sure as hell am.     We make our way a little ways off the beaten path for now, in order to pick up something special. Note that the enemies we're passing by here, the Lynels, are much too strong for us to deal with at this point - if I didn't have the Roc's Feather to use to dodge over their attacks, odds are Link would've died at this point.     Anyway, after going all that way across Goron Mountain, we come across a hermit Goron willing to expand our ring box just for saying hello. Should we accept his offer?   Yes, yes we should. Granted, we can only really equip one ring at a time, having easy access of up to three at once should help us expand our abilities much more easily.   Yeah... I can sympathize. |

|
#92
02-27-2009, 01:56 AM
|
|||
|
|||
  Anyway, now that we've passed through Goron Mountain, we head east now to its cousin, Mt. Cucco. And only just a few screens in we find the next Subrosian warp. As warps aren't won't to appear outside plot-induced reasons, I'm guessing we're due for another trip to the underworld.  Time to make like Crono and jump into the warp. Geronimo!     Of course, five seconds in and a duo of Subrosians not only mug us of our Roc's Feather, but replace it with Fool's Ore instead. I'm guessing this is karma for something we did earlier, or...?    ...The funny thing is, the Fool's Ore is actually pretty good - the best weapon in the game, believe it or not. Forget the Master's Sword or the Magic Boomerang or other weapons you can find, the Fool's Ore can kill pretty much anything in the game in one or two hits and is endlessly reusable. Problem is, it's only available for this brief sequence, so the might of the Fool's Ore is only available if you're willing to hack or shark it into your collection, so this kind of use never really comes up in normal play. Personally, I'd be happy to show it off at some point if you guys'd like, but for now we'll just have to get our Feather back.     A rather suspicious lot, aren't they? |
|
#93
02-27-2009, 01:57 AM
|
|||
|
|||
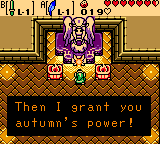
   After another annoying stealth sequence, we follow Red and Blue here to their burial spot.    Once they're gone, we dig up our feather and put it back in our possession. The Fool's Ore sadly disappears with it (under the guise that we "returned" it) so the ultimate weapon is gone forever.     Anywho, with that done, we pick up a few nearby Gasha Seeds and start making our way through a platforming sequence just east of the portal we came through. It's relatively easy to overlook if you're not looking for it - my first playthrough, I managed to explore almost the entirety of Subrosia before I picked up on it and finally went below.   Anyway, the path isn't too long, and before long we're brought before the next tower.    Ah, Spring. Probably my favourite of the four seasons and just beating out Autumn. It's a beautiful time of year, isn't it? And now we'll be adding it to our own. |
|
#94
02-27-2009, 01:57 AM
|
|||
|
|||
  And there we have it. Season #3, Spring, is now in our hands.    Pulling up a rock east of the stairway leads us back to the parts of Subrosia we haven't explored yet. Technically, we're not supposed to be able to cross this part until we complete the fifth dungeon, however a combination of the Pegasus Seeds and Roc's Feather help Link make the jump.     We stop by the Marketplace to pick up a few items. The important item here is the town shop Member's Card, which will let us pick up a few goodies from the shop in question.     Exploring a bit more of Subrosia brings us to a maker of fine Lava Soups who seems excited when he spots the iron pot we picked up earlier. |
|
#95
02-27-2009, 01:57 AM
|
|||
|
|||
     A few seconds later, and the miracle chef gives us a serving of Lava Soup. How Link is holding that without receiving second or third degree burns is beyond me.     Anyway, that's it from Subrosia for now. Let's go and take that new Member's Card for a test drive, shall we?    First on the list of items we'll pick up is an upgrade to our Seed Satchel. Unlike the new Bomb Bag, the increase in capacity is not an insignificant jump - being able to hold 50 of each seed type up from 20 means we won't have to ration our use of them from now on.   We also pick up another Gasha Seed and a Treasure Map as well. The latter is useful for finding the location of certain items we'll need later on, however it's not strictly necessary - a FAQ can just as easily divine their location as well. |
|
#96
02-27-2009, 01:57 AM
|
|||
|
|||
    On an unrelated note, now that we've got the Roc's Feather we can finish up the game's trading sequence here and now. Heading back to Goron's Mountain briefly, we pass by good ol' Biggoron, who seems to have come down with a slight cold from the sudden winter. However, that Lava Soup we picked up is all that we need to pick him up.    With that, our Lava Soup becomes... a vase? Who do we know that would want a vase?    Why, Ingo of the Sunken City, of course. It seems Biggoron's burned him out of a deal and he's still fuming about it.     In thanks for that, he gives us a fish for the vase. This trading sequence is just getting stranger and stranger. |
|
#97
02-27-2009, 01:57 AM
|
|||
|
|||
     Just north of Horon village is an elderly man trying to coax his cat down from a tree, and the fish we just got is what he needs. In exchange, he hands over the megaphone he was using to yell to his kitten mittens.    Outside of the trading sequence, we take the time to take advantage of Summer's warmth to drain the nearby waters and uncover another Piece of Heart.    While we're at it, we drop by Spool Swamp as well and use our newfound Spring powers to grab another. You'll need to use Dimitri to get the Piece of Heart easily. 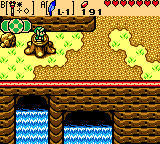   Anyway, so! Heading back to Mount Cucco, we change the season to Spring and head for a cave further up the cliffside. |
|
#98
02-27-2009, 01:57 AM
|
|||
|
|||
  Hey, it's Talon. Seems like he's fallen asleep and refuses to be roused.    Good thing we still have that megaphone on hand! GO GO GO     Seems he was trying to make it to the mountain summit while it was still winter for reasons that have yet to be explained. Oh well, at least we manage to snatch a mushroom from him.  Oh, and a ring as well. Nice.      Before we go, we just stop by the cliffside to the east and pick up another Jewel and our fourth Piece of Heart. That's eight out of twelve so far, and the Gasha and Maple pieces are already accounted for, albeit not acquired. |
|
#99
02-27-2009, 01:57 AM
|
|||
|
|||
   Heading to the Sunken City, it seems old witch Syrup is looking for mushrooms to make her potions with. Say, didn't we just pick up a mushroom?    We end up trading the mushroom for a... wooden bird. Why does Syrup have a...   Anyway, the important thing is that she opens the shop now and we can purchase Magic Potions and Gasha Seeds from her whenever we need to.   Stopping by Vasu's briefly, we get our new ring appraised and rearrange our rings a bit. The Roc's Ring is the only one I'm really using right now, since there aren't any other reasonable prospects at the moment.     Stopping by the clock shop guy in Horon Village, he takes a liking to our bird (!) and offers to trade for it. |
|
#100
02-27-2009, 01:58 AM
|
|||
|
|||
  In return, he gives us some Engine Grease for it. At least this makes a little sense... right?    East in the Woods of Winter, we run into our old pal Guru-Guru playing the Song of Storms by a windmill. However, he wishes he had the means to make it go faster.   Surely that Engine Grease we just got should help him out.    With that, we've finished the trading sequence. What this means for us, however, will have to wait until later.   Hello, what's this? Another Subrosian portal?   The portal drops us off on the far east of the underworld, just outside a lava flow. Curiouser and curiouser... |
|
#101
02-27-2009, 01:58 AM
|
|||
|
|||
  A bomb flower? Here? How did it grow without exploding form the heat?   Lifting up another boulder in the north, we'll just explore a bit to see if anyone needs a bomb of sorts.    Just outside the fourth tower, a particular Subrosian seems intent on breaking the boulders. You know what they say: if at first you don't succeed, bring out the explosives.     The Subrosian turns out to be the head of the metallurgists in the ore furnace to the east. He offers to help us out with our ore-melting needs in the future, then heads off with the loot he just blew up.  Just a quick jump across a few lava flows...    ...brings us to the final Season spirit. |
|
#102
02-27-2009, 01:58 AM
|
|||
|
|||
    Spring's my favourite season, but damned if Autumn doesn't come close. It's a beautiful time a year, isn't it Talking Time?   And that's all she wrote. The Rod of Seasons is fully blessed, and we've got the full power of the seasons under our command. Time to head back and experiment a bit.   First things first, we warp out of the portal we came through and head for the nearest stump.  Heading north from that brings us to a peculiar dungeon. With autumn in effect, pulling up the rock mushrooms is no problem, which brings us to...  ...Unicorn's Cave!? That's weird, we're not supposed to be here yet. If you couldn't guess, it is apparently possible to sequence break Oracle of Seasons. The item we get from dungeon for is not needed at all for level 5, so it is possible to explore and complete the dungeons out of order, a rarity in later-gen Zelda games. I came across this recently, and found it interesting that this was possible, though I've never really had the chance to practice with it.    Anyway! We've dilly-dallied long enough and it's time to get this show on the road already. Stopping by Mt. Cucco again, we find a winged bear searching for a Spring Banana to eat. The rock flowers, apparently, won't bloom until spring...  ...but really, like that's going to stop us. |
|
#103
02-27-2009, 01:58 AM
|
|||
|
|||
   Grabbing a Flying Rooster, a short flight brings us in range of the Spring Banana we're looking for.    Along the way down, we also stop by a cave to pick up another ring.    ...Sheesh, don't worry yourself sick over it. It's not like I didn't just risk life and limb to retrieve it for you, because I didn't.   Anyway, with that the third animal partner, Moosh, lends his power to our own.     Moosh's big power is his ability to fly over pits with his ability to hover. By tapping A, he can flap his wings and fly for up to 5 or 6 tiles, making pit puzzles like these an ease. By holding down A, he can also charge up a body slam that hits enemies around him and crushes obstacles like snow or grass. However, the downside is that he has no other attacks aside from his charge so combat is a little bit annoying, and he's afraid of water so travel with him isn't as easy. In addition to that, pits tend to be rare on the overworld and the ones that do appear are easily jumped over by the Roc's Feather and/or Pegasus Seeds. For these reasons, I tend to consider Moosh to be the weakest of the three partners, but not by much - you can use him if you want, and more power to you if you find a way to use him. Personally, I dump him at first opportunity. |
|
#104
02-27-2009, 01:58 AM
|
|||
|
|||
   Anyway, with the Dragon Key in hand, we start to climb for the summit. Unfortunately, a Like Like eats Link's shield before we can do anything else. Which is infurating! But we'll have to wait for now to replace it.  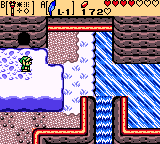   One small hop, skip and jump around and we've reached the summit. But why are we going to the effort of going up here, you ask?   The keyhole is hidden up here of course, and that's where we need to go for the next dungeon. Turning the key, the waterfall shuts off (?) and the dungeon is revealed.   Might as well take the time to stock up on a few things while we're at it. The Green Joy Ring, like the others, isn't particularly useful, but we'll definitely need the Shield at some point.   Anyway, a few seasons later and we can climb our way into the next dungeon...   I introduce you Dancing Dragon Dungeon, one of my favourite dungeons in the game for the music alone. It's really quite catchy, honest. |
|
#105
02-27-2009, 01:58 AM
|
|||
|
|||
  Anyway, first things first is that we'll have to head north for now. The eastern half of the floor is locked off for now, so it's not like we have any choice in the matter. We manage to swipe some bombs from the first chest in the area.  Told you these would be coming back. Of course, with only two ways for the track to go, they're nothing more than a fun obstacle to cross at this point.    Heading north, we come across the first switch puzzle of the dungeon. The trick here is that you have to toss out two pots to get to the middle, then push them one-by-one to cover seven of the switches. After that, all you have to do is step on the eighth yourself and the key is yours.   Hitting the switch to switch the railtracks, we head east and make our way through there.    Making our way downstairs, we come across Wizzrobes for the first time in the game. They're not nearly as oppressively brutal as they were in the original game (I bet OctoPrime still has nightmares from the encounter), but their ability to disappear at will makes them annoying to deal with. They're at least vulnerable to sword swings this time around, as opposed to in Link's Awakening when you needed to fire Bomb Arrows at them to take them out. Oh, and we pick up a dungeon map from a nearby chest, but that's not nearly as interesting.   Heading downstairs brings us to an underground passage full of magnetic blocks. Crossing them is no large feat, since they stay on screen long enough to get your bearings. |
|
#106
02-27-2009, 01:59 AM
|
|||
|
|||
   On the other side is a torch puzzle, but interestingly enough at 2x view and a good pair of eyes you can see the path without having to light the torch. This isn't as feasible on an actual Gameboy Color of course (though I do remember doing the same with Rock Tunnel in the original Pokémon Red), but it's interesting to point out nonetheless.  Along the way, I, uh, get sloppy and fall off the platforms. Thankfully we had a Magic Potion in our backpack for such an occasion, but that was calling it a little close huh?   Anyway, key(s) in hand, we make our way back to the beginning and unlock the door.     After a few narrow jumps over lines of spikes (hate these so much), we bomb through the wall before heading north to pick up a compass. 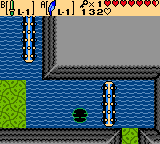 The puzzle here is a little trick that Link's picked up with the Flippers; by hitting B, he can dive below the water, making dodging these rolling pins easy as pie.     Anyway, beyond that is another railcart puzzle, the goal being to head west first. Going the other way will bring us deeper into the dungeon without something we need, and we can't have that can we? |
|
#107
02-27-2009, 01:59 AM
|
|||
|
|||
  That something being another Small Key. It drops into the water once you finish off all of the enemies in the room, so you'll have to go swimming for it.   After that, we make our way past the block and up the stairs and head down for the next floor.  A series of torches that we can't light from this distance? How mysterious.  We manage to pick up another key along the way, this one hiding right out in the open. No puzzle, nothing - it's just sitting there...  Anyway, there's nothing we can do for now, so we'll just head south...    ...and we run into the mini-boss, Agahnim.   Agahnim's appearance this time around is a little... well, different. While fans to A Link to the Past may remember that you have to deflect his shots back at him to hurt him, this time it won't work. Rather, in order to hurt him, you have to light the torches in the center of the room to flush out the 'real' one, that being the one with a shadow, and hit him with your sword directly. He goes down quickly enough when you figure this out, however this little mix-up can cost you a few hearts figuring it out.  Huh, another old man. This hint is related to a certain thing we'll need, so unlike the last guy it won't go to waste.   Anyway, we just take the next railcart south, ignoring those switches for now. |
|
#108
02-27-2009, 01:59 AM
|
|||
|
|||
   A few rooms and a collapsing floor later, and we pick up the dungeon's treasure, the Slingshot! This game's projectile weapon, the Slingshot uses the seeds we've been collecting in our satchel as ammunition, and as such expands our range with them considerably. While it's not as cool as the weapon you get in Ages, it will come in handy nonetheless.    First things first, we'll be passing by the switches we've missed to pick up a few things that we've missed along the way.   It's tempting to hit the switch here and go on ahead through this path, but it is the wrong way! There's still one thing we need left to pick up, and as such we'll be heading in the other direction for now. (Before you ask, yes I went this way. I'm only human, after all.)    Heading down the other path, we come across a room full of water. Remember the hint the old hermit gave us? The *boss key* is hidden in the eye of the skull symbol on the floor, which is very easy to overlook if you don't know what to look for. Hence, the need for a hint.    With everything in order, we hit the last switch, heading downstairs and over the bridge after lighting the torches. That key we picked up in the other room earlier on that was easy to miss came into play earlier on the last locked block.  After passing through one more room on a platform, we open the door and move in for the boss. |
|
#109
02-27-2009, 01:59 AM
|
|||
|
|||
   Gohma is a complete bastard this time around. She's constantly moving, blocks her eye with that claw of hers, and her only opening is when she moves in to grab you or by beating it away with the sword. In addition to that, you can only hurt her with the Slingshot and it takes something like eight hits before she goes down and he can dish out a lot of damage in the meanwhile when she grabs you. It takes quite a bit of skill to take him out, however the Pegasus Seeds and Roc's Feather help mitigate the threat somewhat. Gohma is probably the first truly hard boss in the game. Unlike Dodongo who can't touch you once you've deduced his weakness, or Aquamentus or Mothula who go down relatively quickly and are always open to attack, you have to be able to react quickly and work with your inventory in order to take the insect queen down. It takes some real effort on the player's part in order to win the fight, and this level of tension is what I tend to look for in boss fights.   Anyway, with her down we pick up Heart Container #4, refilling our hearts completely. Ah, that hits the spot.   In addition to that, we pick up the fourth Essence of Nature, the Soothing Rain. We're halfway there, folks!     Yup.    Once we leave the dungeon, the Maku Tree tunes in as usual and tells us where to go next. However, this update is already much, much too long so I'll end it here for today.  Next time: Unicorn's Cave and the Nurturing Warmth! (EDIT: Jesus Christ, that took 26 posts. Um... admittedly, this update was considerably longer than I had intended, however I'm pretty sure we've got all of the big stuff over with already. As it is, I doubt things will get as out-of-hand as they have today so, uh, look forward to smaller posts in the future.) |
|
#110
02-27-2009, 05:38 AM
|
|||
|
|||
|
Fall's actually my least favorite season, since it turns everything the same color. With every other season, you've still got some variety.
Also, yes, Wizzrobes still fill me with a cold dread. Luckily at no time have they ever been nearly as bad as they were in the original game. |
|
#111
02-27-2009, 05:55 AM
|
|||
|
|||
|
Quote:
Granted, it's monochromatic in comparison to the oh my god flowers everywhere phenomenon some regions experience in spring. |

|
#112
02-27-2009, 06:06 AM
|
|||
|
|||
|
Quote:
And I also hate the real Autumn too, since it's the gateway to winter. And winter sucks. |
|
#113
02-27-2009, 10:33 AM
|
|||
|
|||
|
Reading this just makes me want a DSware update so much more!
These games + Minish Cap graphics + save system instead of passwords = WIN! Of course, if we do get the games again, it'll probably just be a straight port, and they'll still be separate games. Assuming we ever get a GB VC. Boo. |
|
#114
02-28-2009, 03:35 PM
|
|||
|
|||
 Welcome back. Last time, we went on a trip across Holodrum to pick up pretty much everything we'll ever need, which will make this one of the shorter, if not shortest, updates in the thread. So let's get to it.    While off to grab a few things, we run into Maple pretty much right away.  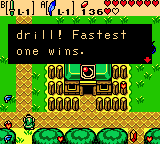   Ah, rivals. It's funny how they've grown so used to their daily encounters that it's become a routine at this point. The moment they run into each other, it's a race to the finish to pick up what fell out. It's this nice, subtle kind of characterization I like, and one of the reasons why games like Persona 3 or Bahamut Lagoon endear themselves to me so much. Anyway, she doesn't really drop anything much of note, so let's move on.  Switching the season to Autumn briefly we just drop by this spot in Horon Village to grab a little more cash.     Heading to the south shore brings us to this island. Lighting the torch and reviving the mini-moldorm nets us a third jewel, this one X-Shaped. But what are they for, I wonder?   Lastly, we'll just replant a few more Gasha Seeds by the village and end there for now. |
|
#115
02-28-2009, 03:36 PM
|
|||
|
|||
   Heading north from there brings us back to the fifth dungeon, Unicorn's Cave.   Unicorn's Cave is probably the first really expansive dungeon in the game so far. Unlike the last four, there's not as much linearity with solving the puzzles and you have to focus more on the big picture while making your way through the dungeon. As such, always make a note of obstacles and chests you've had to pass up so you don't overlook something and get lost as a result.   Technically you're supposed to circle around the room and slowly make your way to the chest in the center, however it's generally more efficient and easier to pull off jumping to it instead. Inside the chest is the dungeon's first item, the compass.  A little further north, we come across a peculiar iron ball with a large "N" written on it. Hmm...  The railcart puzzle is back yet again, and this time it's a little more devious. Some of the paths these carts go to are dead-ends at the moment.   Heading straight down the left track brings us to an empty room with a block path on the north side. Pushing a nearby block drops down another one of those odd, iron balls we saw earlier. I'm sensing a theme here.    Moving further along the tracks (flipping the switches all the while to save time) brings us to a chest containing a small key. That'll be all we'll do for now with them, at least until we grab the dungeon item. |
|
#116
02-28-2009, 03:36 PM
|
|||
|
|||
  We hit the right switch one last time and head down for the east end of the dungeon now.    There's a fork in the underground path here that's pretty easy to miss on the first pass, and the far left exit is where we'll want to go at some point.   A little bit of a mirror puzzle, the statue on our side moves the statue on the other side and we'll have to push it around the blocks to cover the switch. Nothing too hard.  Hey, we're back where we just were before.   Hell yes I am!   Another Kaepora fun-fact, and an important one as well. Keep it in mind for now...    ...as it'll come into play right away in the next room. The order you kill the Armos Knights determines the order you have to open the chests in; pick the wrong order and you'll have to exit the room and start over. Thankfully, it's not too difficult to figure out so long as you take them out one-by-one, but it can get annoying very quickly if you don't know what to look for. |
|
#117
02-28-2009, 03:36 PM
|
|||
|
|||
   The other chests don't really contain much of note, but the last one has a small key that we'll most certainly need.    Anyway, that's everything we'll need from that end for now. Time to head through the middle route we passed by earlier.   We're pretty much railroaded into a specific path the moment we enter this side of the dungeon, but that's all well and good because something great awaits us at the end of it.    Namely, the Magnetic Gloves! Alterating between positive and negative polarity with each use, the Magnetic Gloves will let us push those large iron balls we've been coming across our path so far. In addition to that, there are a variety of blocks and obstacles we can use to push ourselves off of to make our way across pits and waterflows, which will come into play over the course of the game. The only thing to keep in mind is basic physics; opposites attract and the same repel (of course,if physics actually did play a role in the use of the gloves, then they'd only be effective within a few centimeters of the magnets they're reacting to, but that would just get in the way of the fun). |
|
#118
02-28-2009, 03:36 PM
|
|||
|
|||
     With the Magnetic Gloves in hand, we'll just pop by a few of the magnetic poles we've passed by earlier. Capcom really went all-out with the magnetic tricks you can pull off in the game - the sheer variety of the puzzles you have to use them with really shows that they thought through what they could do with them. For something that could have been as situational as the Magnetic Gloves, its potential isn't at all wasted.    Anywho, once we've gathered the last few keys, we cross over into the section of the dungeon we haven't touched yet and... pick up yet another key. Honestly, I haven't seen this many keys since Misery Mire.    Is... is that Spikey Tiger!? No. No he isn't. Rather, he's Syger, the mini-boss of the dungeon. As you have probably already figured out, his weakspot is on his tail, however, he spends most of the battle rolled up into a ball spinning around the room. He's pretty easy to dodge with the Roc's Feather though, so simply wait for him to pop out of his attack and slice at his tail. He should go down quickly enough.    Moving further on brings us back to the other iron ball we triggered earlier. Using the gloves, we drag it onto the switch, however the sea of flames in the next room make it so we can't pass through quite yet. Last edited by PapillonReel; 02-28-2009 at 03:53 PM. |
|
#119
02-28-2009, 03:36 PM
|
|||
|
|||
   Heading through the east path brings us to the other side of the room from before. Using the Magnetic Gloves, we'll just drag the iron ball in the corner further down so we can drag it along the west side.   There's a locked block in the center of the room we've been passing through, however the stairway leads to the boss room which we have yet to find the key for.   Anyway, with the iron ball now in reach, we'll just use it as a make-shift shield and push our way through the searing heat which... Link manages to miraculously survive unharmed. What a guy, eh?    With that out of the way, we head down the stairs and get to work dealing with the platforming in this section. The platforms here have conveyor belts on them, you'll have to keep moving in one direction so as not to fall off of them. But not too fast! Otherwise you'll just run off the other side instead. Anyway, a few magnet-pulls later, and the Boss Key is ours. Time to wrap this up.   With everything else over and done with, we'll just pull ourselves over to the boss's room now... everyone ready?    Unlike his pals Dodongo and Gohma, Digdogger has since resolved his weakness to certain kind of sound since his appearance in the first Legend of Zelda. However, in turn he's left himself open to magneticly-charged balls of iron instead, and it just so happens that there's one of those in this very room! The strategy here is simple: drag and push the spiked ball into Digdogger until he splits apart, and then use it to take out his smaller parts. Since the ball tends to move based on your relative position and the mini-doggers move erratically around the room, the battle can either take a long time to resolve hunting down the mini-doggers... or it can be over very quickly, sometimes in as low as under a minute. With all of the mini-doggers running into the southwest corner towards me, the fight pretty much ended before it could begin, making this one of the fastest fights against Digdogger I've done yet. |
|
#120
02-28-2009, 03:36 PM
|
|||
|
|||
  Anyway, with the last Digdogger dealt with, we pick up the Heart Container from its ashes and add it to our own. Yum.    And with that, we also grab the Nurturing Warmth, the fifth Essence of Nature!     Hmph.     You know, I've been thinking a lot about the Maku Tree and Sokra's rolls in guiding you through Holodrum, and now that I've considered it, it's not really Sokra's fault that he ends up so redundant. In fact, they were probably aiming for something similiar along the lines of Kaepora Gaebora's roll in Link's Awakening, dropping in whenever you'd pick up something and elaborating on hints or fleshing out their background. However, the primary reason why the latter never got really annoying and actually worked was mostly because of how vague the hints were that you got between dungeons - whenever you got an Instrument of the Sirens, the most you'd be told would be something along the lines of a destination, like a swamp or a mountain. With the vagueness of the hints given, Kaepora's appearances were usually welcome as they'd help you piece together where you'd need to go or bring up information as to what you need to reach there. However, Oracle of Seasons is more generous with information, and as a result it doesn't end up working that way - with the Maku Tree essentially spelling everything out for you, any attempts with him guiding you along fail because he's got nothing else to fill in. As such, he ends up going to waste by repeating information you already know and eventually just vanishes from the game when they get fed up with him. Really, now that I've considered it, it's a bit of a shame; if they weren't as liberal as they have been with information throughout the game and if the Maku Tree hadn't had usurped the roll from him from the get-go, he could've ended up as a pretty interesting meta-character and a rather clever callback to his pseudo-predecessor, Kaepora. Instead, he gets in the way and gets thrown to the wayside to be ignored. It's almost kind of tragic, really. Anyway, just thought I'd throw that out there. In the meantime, the Maku Tree tells us to go look for a castle somewhere and goes back to sleep. So now that we've wrapped up the Unicorn's Cave, we'll go look for that... next time.  Next time: The Ancient Ruins and the Blowing Wind! |