
-
Welcome to Talking Time's third iteration! If you would like to register for an account, or have already registered but have not yet been confirmed, please read the following:
- The CAPTCHA key's answer is "Percy"
- Once you've completed the registration process please email us from the email you used for registration at percyreghelper@gmail.com and include the username you used for registration
Once you have completed these steps, Moderation Staff will be able to get your account approved.
All aircraft report! Let's Play Star Fox!
Back to Let's Play
< 1 2 3 4 5 6 7 8 9 >
< 1 2 3 4 5 6 7 8 9 >
|
#211
 11-25-2008, 12:40 PM
|
|||
|
|||
 It was a slow day today, so here's another update coming right at ya. Anyway, last time we had successfully navigated the treacherous terrain of the asteroid belt, dodging possessed meteoroids and taking out the space station situated at the tail end of it.  Next stop is Fortuna, the dinosaur planet.* It was a fairly peaceful world, devoid of any colonies or civilization and left untouched by both Corneria and Venom, but Andross has apparently managed to find a way to drive the inhabitants of the world wild and any attempts to build a base on it by either side has met with failure. We'll have to pass by this world in order to continue on our route, so on we go. (*Not that dinosaur planet - that's another world entirely.)  Fortuna must be smaller than the other planets, since the horizon is much closer than what we're used to. Hence: we fly closer to the screen. I wonder if that's Meteor all the way up there in the sky...   Constant movement and a quick trigger finger is the name of the game on Fortuna, as you'll have to be prepared to dodge sudden obstacles and shoot down your enemies as soon as they appear.   Halfway through the stage, we shift onto flight over what's presumably a lake, where a school of flying fish and a flock of pelicans start to take aim at our Arwings. They go down easily, however.  The bigger danger, however, are the sea serpents that pop up around the halfway point. You will definitely want to take them out as soon as you can - the sea serpents here are one of the very few enemies in the game who fire fast enough to hit you from behind, so you'll want to clear them out before you pass over them.  You'll get a shield around this point as well, but good luck keeping it!  Primitive Dinosaur -MONARCH DODORA- The big, bad brute himself, this guy's all that stands in front of us as we pass through the area. He's a bit tough - you have to shoot his heads and/or tail down to a stump before you can adequately damage him, which can be difficult when he's busy charging you head-on.  Thankfully, Nova Bombs save the day again here, being capable of rendering them vulnerable to fire very quickly. It takes a steady aim to pull it off, but you'll make your life a lot easier if a bomb connects.  Heads reduced down, the body becomes vulnerable and open to fire. It will most likely take you two or more tries before you finish him off, though I once saw a TAS where the player managed to kill M.D. here in something like 5-odd seconds.  Anyway, the boss is nothing too tough, and goes down pretty easily once you learn its patterns.  Yesssss. Nearly makes up for the horrid score last stage, doesn't it? All in all, I kinda like Fortuna, and it always marks a high point on my way through the game. Next time, it's off to Macbeth the hollow planet to really throw a wrench in Andross's plans. |

|
#212
11-25-2008, 06:36 PM
|
|||
|
|||
|
If you're wondering why Fortuna is a tropical planet in this game but a snowy planet in Star Fox 64, it's because said snowy planet was supposed to be a new locale entirely: Fichina. The localization staff just changed it to the similar-sounding "Fortuna" for familiarity's sake, I guess, even though any Star Fox fan worth his salt would be wondering where all the dinosaurs and sea serpents had gone.
Then Star Fox Assault, where you visit Fortuna and Fichina, came along, and they had no choice but to change it back. |
|
#214
11-26-2008, 11:09 AM
|
|||
|
|||
|
That's pretty much the sole reason Route 3 is my least favorite --or, if I attempt it, I do it via Black Hole. I don't wanna blow the dinosaurs into luggage! Even if they do their level best to swat me down. Dodora is just defending his turf, that's all.
Is this where one inserts an "Andross must PAY!" quote with righteous shaking of fists? |
|
#215
11-26-2008, 12:40 PM
|
|||
|
|||
|
|
|
#216
11-26-2008, 12:43 PM
|
|||
|
|||
|
Quote:
|

|
#218
11-26-2008, 05:03 PM
|
|||
|
|||
|
Quote:
|

|
#220
11-26-2008, 07:23 PM
|
|||
|
|||
|
Quote:
|
|
#221
11-26-2008, 08:49 PM
|
|||
|
|||
|
Man do I hate those serpents. One of the hardest parts of the game imho.
I always switch my view back to 3rd person for the space stages. Maybe it is my imagination, but I think you can get off crack shots at wide angles more easily in 3rd person. |
|
#222
11-28-2008, 05:38 PM
|
|||
|
|||
|
Quote:
|
|
#223
11-30-2008, 01:31 AM
|
|||
|
|||
 Welcome back. Last we left off, we had stopped by the tropical planet, Fortuna, and shot up a bunch of dinosaurs just 'cause that's the way we roll.  Next on our list of targets is Sector Z, another area where Andross is building a base. Like Sector X, it, too, is still in the midst of construction, but unlike its cousin it's also significantly more well-defended.   Sector Z is one of the hardest courses in the game because of how many different obstacles you have to avoid, as they come at you fast and are often moving, making it difficult to maneuver around them without taking a hit. As I mentioned earlier in this thread, Sector Z is usually the breaking point - once you master it and the Asteroid Belt, pretty much everything else falls into place.  Our allies also come under fire a lot here, making it all the more of a pain in the ass to navigate. At least Peppy here was polite enough to lure him in front of me.  This span of space looks innocent enough, but...  Once you fly into it, a swarm of invisible, indestructable girders fly out of nowhere and crash into repeatedly. Quick reflexes will save the day, but other than that I got nothing - just pray you don't get hit too many times.  Slippy's a right asshole about his bogey here, drawing attention to himself just as I'm getting pummeled.  Here's the primary station here. You can try dodging the bars in the middle, but it's actually much easier to just fly off to the side and avoid them entirely.  Whelp, in we go.   Same deal as all the other courses - dodge the bars and duck under the doors.  Halfway through, we run into a bunch of enemies whose sole purpose is to refuel our ship. Sucks to be them! |
|
#224
11-30-2008, 01:32 AM
|
|||
|
|||
 Invasion Troop Carrier -ATOMIC CORE II- He's back, and badder than ever. Though instead of being designed to scour planets of all life, this version's role is to act as a port/base of operations for the invasion fleet itself.  The difference between the previous model and #2 is that the wiring can regenerate, meaning that the core can close up while we're blasting away at it. This is mostly a nuisance, honestly, as the core is still nothing to worry about - open it up and take it out.   See? Easy-peasy.   Another 100% Odd that I would get it on Sector Z, since it's one of my least-favourite stages, but what the hell. I'll take what I can get. Next time: It's off to Macbeth to blow Andross's munitions warehouse sky-high. |
|
#225
11-30-2008, 01:48 AM
|
|||
|
|||
 Why not have another? Anyway, last time we blew into Sector Z and, after nearly being wiped by space debris and free-floating girders, proceeded to blow apart another Atomic Core.  Macbeth's a bit of an oddity of a planet - sometime during its development, the core shrunk dramatically, leaving a very large gap between the upper crust and the mantle and hollow as a result. Pouncing at this naturally-occuring storage space, Andross packed the planet full of extra munitions, ships and supplies, essentially turning it into a large powder keg waiting to explode. This is why Route 3 is so heavily fortified, by the way. The whole backbone of Andross's war effort is stored here, and taking it out effectively cripples his forces. Even if the Star Fox team were to fall here, the advantaged gained from taking Macbeth would be so huge that General Pepper and the Cornerian fleet would most likely be able to win anyway. As such, Andross constructed so many defenses, both natural and artificial, to prevent us from making it here. Sucks that he failed, doesn't it?   All told, I find that Macbeth's not as hard as everyone makes it out to be. You're given a lot of room to maneuver, and the enemies are spaced out enough that you can barrel roll from one to the next and not have to worry about taking too many hits. As long as you anticipate attacks from both above and below and react accordingly, you should be fine.  The enemies aren't too tough, either - usually one or two shots is enough to take them out.   Well, okay. I guess you're not given THAT much space to move, but it's still a heck of a lot more than what Sector Z gave us near the end. Just keep firing, assholes!  The volcanoes on the ceiling are a pain, until you clue in that they only erupt when you fly under it.  Somewhere along the line, we pick up a Shield. It's a very nice Shield, to be honest.  Light Speed Revolution -SPINNING CORE- ...is a pushover. Don't believe me? Then read on.  The first stage of the fight consists of him spinning around, firing plasma balls at him. Simply fire away while Barrel Rolling to take it out.   Once you take out the outer cannons, the Spinning Core will leap into the air and transform into this form. The metal balls around the spinner will eventually spread out as it spins around before retracting back to the center again.  The trick here is to stay the hell away from the metal balls - don't weave between them, don't try to accelerate ahead of them, don't do anything to get in their way. Stay near the sides and snipe at the center as the balls spread out and you should be able to take out Spinning Core without too much trouble.  If it wasn't for an unlucky hit, I probably would've made it through the battle untouched. Alas. |
|
#226
11-30-2008, 01:49 AM
|
|||
|
|||
 93% ...Not bad, to be honest. Since there're enemies on both the ceiling and floor, you're bound to miss a few weaving around the screen. Still, at least it isn't a stinker like some of the others. Next time: It's off to Venom to settle things once and for all! |
|
#227
11-30-2008, 02:00 AM
|
|||
|
|||
 Hey there, welcome back. Last we left off, we had just destroyed Andross's main supply depot and effectively crippled his war effort as a result. As such, we won a decisive victory for the Cornerian forces, shifting the battle in our favour.  Well, this is it. Just this stage and the next, and we'll have finished off Andross once and for all. Are you ready gang? Then let's go!   The missiles are back with extreme prejudice, appearing in much larger swarms as well. Just shoot them down like we did last time and the time before.  This looks like a trap, but barrel roll through it anyway...  ...As picking up that Nova Bomb drops us a Twin Blaster and Shield as well. Sweeet.  Slippy comes under fire again in the stage, but it's nothing the Star Fox team can't handle.  The boss makes his appearance, assembling piece by piece while circling the area...    Final Battleship -GREAT COMMANDER- Note that, if you're playing this game on a keyboard, this guy is a really nasty boss, since a lot of it depends on how well you can barrel roll.  The battle plays out like a dog fight, with you and the G.C. circling around shooting each other as you pass. You have to blow off the six ports plating the top of the ship in order to win, but that's easier said than done - they open and close at regular intervals, and once you blow off three the ship starts rapid-firing Plasma Balls at you. This is where the barrel roll comes in. In order to shoot at the ship with any safety, you have to be able to deflect those shots in order to get enough of an opening to blow apart the rest. If you don't know how at this point, you'll have to rely on Nova Bombs to finish the boss off, and that gets annoying very quickly.  Like with Phantron and the Galactic Rider, the Great Commander flees to the surface once you've trounced him enough. I guess it's natural for Andross's greatest fighters to know when to fight or flee, huh.   Damn, so close too. Ah well, a credit's a credit, though odds are we won't be using it during this run. Score's doing fine so far, so... yeah. No real complaints. Next time: It's down to the Venom surface to challenge Andross face-to-face! |
|
#228
11-30-2008, 02:15 AM
|
|||
|
|||
|
Man, I'm updating like the dickens here, aren't I? I am a man possessed.
   Welcome back to Venom, by the way. This is the first time we've been on the surface proper since the first route, so seeing the polluted skies and barren ground again is... well, not reassuring, but you get the idea.   The obstacles are out in force again, with old favourites like the trap maze and carrot sticks making a return. It feels nice to be back.  More bogeys on their sixes. And lots of them.    You better believe that Andross is pulling out all the stops here. This is his last line of defense - expecting anything less would be absurd, don't you think?  I make it this far into the game...   And this happens. Fuck! Our twin blasters, gone in an instant... Can things get worse?  Oh yeah. They just got worse. |
|
#229
11-30-2008, 02:16 AM
|
|||
|
|||
 Final Battleship -GREAT COMMANDER- He's back, and in a different form than before.  The battle itself is pretty simple, he'll fire metal balls at you in an arc while you try and shoot at the hatch at the bottom. Halfway through he'll start firing them at a much more rapid clip, but that's remedied simply by ceasing fire during this period.  Once you take out the bottom part, the arms start spinning while the head circles around shooting at you. While you've got a harder time dodging here, the head's much easier to hit so you can deal damage to him much more quickly.  Of course, I take one hit too many, and after such a successful run I meet my first end here. Sigh, so close, too.   Things go much better the second time, thankfully.  It's time...    As it should - it's so heavily defended that the fact that we made it here is practically a miracle.   Low blow, man. Low. Blow.  Final Boss -ANDROSS- The battle against Andross plays out just as it did last time - shoot the eyes and destroy the core, blah blah blah.   However... |
|
#230
11-30-2008, 02:17 AM
|
|||
|
|||
 During the second half of the battle, Andross takes on a much, much meaner form. In this mode (which looks distressingly like Satan �_�), Andross will be spewing a constant stream of blocks at you, forcing you to keep moving and keep dodging. Worse yet is that you still have to aim for the eyes, making every shot a close call.   However, at this point Andross is already near-dead, and one more Nova Bomb is enough to finish him off. And with that... we've finished Route 3.   All three averages were above 90% in this run, which is perfectly fine by me. An A average is still an A average, no matter how you slice it.   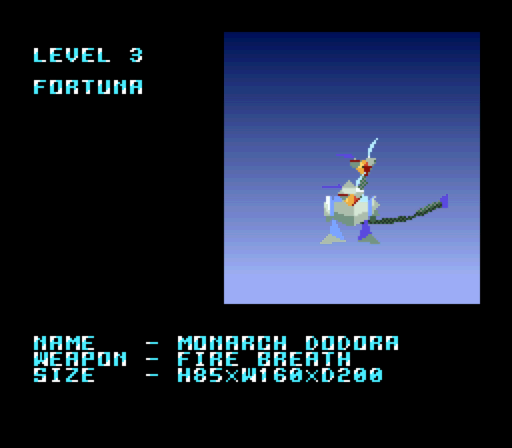       And that's all, folks! Thanks for reading. Next time: "Sorry, Papillon, we're not done yet - we've still got other worlds to explore!" |
|
#231
11-30-2008, 02:29 AM
|
|||
|
|||
 Meanwhile, in an alternate universe...  Huh? Is that a bird? A space-bird? Strange.  I wonder what would happen if I flew into it...  OHHHH SHHIIIIIIIIII-  WHOOOAAAAA!!!  Pepper, come in, I can barely hear you! Pepper? Pepper!? PEPPER!!   Where in the fuck am I? Moons with faces, paper airplanes... it's like I flew out of this dimension!  These bastards blow apart into more paper airplanes when I shoot them as they form, but shooting them after they've finished works better. Maybe I should try that?  One-Armed Bandit -SLOT MACHINE- Oh God, I'm fighting a slot machine. And... is that "When The Saint's Go Marching In" playing in the background!? Good gravy.  I guess the point is to shoot at it until I get Lucky 7s? Guess I'll be here for a while.   Scratch that, he's gone. Weeeiiirrrd....  Oh lord, now the credits are playing in space. What the hell is going on heeeerrree.... Last edited by PapillonReel; 11-30-2008 at 03:53 AM. |
|
#232
11-30-2008, 02:30 AM
|
|||
|
|||
 Huh? It's scrambled... maybe if I shoot at it...  Ah, there we go.  Just a little more...  There! Woo, go credit roll!  Wait what? Again!? Oh God damn it. THANKS FOR PLAYING! Next time: Nope, not yet. Just one more thing left to do... |
|
#233
11-30-2008, 02:33 AM
|
|||
|
|||
 Didn't think I'd go without mention this, did you?  During training, Pepper will test you on your reflexes and skill by having you fly through hoops... literally.  Training can be a fun way to perfect one's flying ability by challenging yourself to get a higher and higher score. By increasing one's ring count gradually, you'll be improving on your skill flying and learn how to pull off the moves needed to beat Route 3.  Just for a bit of fun, I'll set the bar a bit low at 120 Rings. Can you beat my record, Talking Time? Show me.  And with that, this LP finally draws to an end. Thanks for reading along, everyone! ~FIN~ |
|
#234
11-30-2008, 02:35 AM
|
|||
|
|||
      Is this tradition? Maybe, maybe not, but here's a bunch of avatars I cropped that I was going to use. Thanks again for reading! |
|
#235
11-30-2008, 06:23 AM
|
|||
|
|||
|
Quote:
Anyway, great LP, Pap. I never thought an action-oriented game like Star Fox would be suited to a screenshot-based LP, but you really made it work. |
|
#237
11-30-2008, 11:56 AM
|
|||
|
|||
|
Quote:
|
|
#239
11-30-2008, 05:04 PM
|
|||
|
|||
|
Quote:
|
|
#240
11-30-2008, 07:35 PM
|
|||
|
|||
|
Quote:
I use it just because of this game. |