
-
Welcome to Talking Time's third iteration! If you would like to register for an account, or have already registered but have not yet been confirmed, please read the following:
- The CAPTCHA key's answer is "Percy"
- Once you've completed the registration process please email us from the email you used for registration at percyreghelper@gmail.com and include the username you used for registration
Once you have completed these steps, Moderation Staff will be able to get your account approved.
Breakfast time: Let's Play Super Demo World: The Legend Continues!
Back to Let's Play
< 1 2 3 4 5 >
< 1 2 3 4 5 >
|
#91
 03-16-2009, 09:11 PM
|
|||
|
|||
 Pipe Fortress is another one of those remake levels; this one of one of the fortresses in Mario 3’s Pipe World, the deserted one. At least they’re nice enough to admit it.  As it happens, I do remember how to find the exit: By flying up in the dead room. Incidentally, said flying up is a good deal more difficult here than it is in the original. Mario World’s Cape is stronger than Mario 3’s Raccoon/Tanuki suits in a lot of ways, but one of the ways in which it isn’t is precision. With a tail, you could readjust your direction every time you pressed the button, allowing you to get up to the pipe easily, but you can’t do that with the Cape. Instead, you have to position yourself just right so that you can fly up to the pipe in one straight shot.  Oh, and you have to fight Reznor again at the end, but that ain’t no thing. Pipe World 3  Finding the normal exit in Pipe World 1 sets you on a route that goes Pipe World 2-Pipe Fortress-Pipe World 5-Pipe Castle. The secret exit’s route goes Pipe World 3-Pipe World 4-Pipe Fortress-Pipe World 5-Pipe Castle. The only reason I mention this is because it’s a deviation from the way Demo World usually numbers its levels: Typically, it goes through and numbers all the levels on the main route first, then continues on through the secret levels. Here, though, some of the secret levels are given higher numbers than a main-route level…  You can’t take Yoshi in this level (because there are a ton of screen-scrolling pipes that he can’t enter)… This little introductory screen here is just a reskinned castle/ghost house entrance.  Pipe World 3 is another pipe maze, but it’s not as bad as Pipe World 2. At least here you can sort of figure out where you’re supposed to go, and there’s more to the level than just entering pipes.  I actually rather like the way Pipe World 3 is laid out. It just does something for me aesthetically. It’s not a particularly good level to play, but it looks cool. Maybe the Donkey Kong Country 3 background is getting to me. Not that there isn’t the usual assortment of P-Switch puzzles, but still. Pipe World 4  Pipe World 4 is the ultimate in P-Switch fetching. The goal is actually just beyond this wall of brown blocks near the start point. What we have to do is descend into a mostly-vertical dungeon of pipes, head all the way down to the bottom to find a P-Switch, then lug it back up here so that we can exit.  Of course, to do that we’ll need to build more coin-block bridges.  We’ll also have to negotiate a few segments where there are a ton of pipes, but only one that will actually move us forward.  We do eventually retrieve the P-Switch down at the bottom. Climbing back up is significantly harder than getting down, requiring us to fly a few times.  We make it back up, though, and exit. Pipe World 5  Pipe World 5 is a thoroughly frustrating level all around. It introduces these Muncher-like things from Mario 3, and like in Mario 3 they enter and exit their pipes at a pretty good clip. They’re quite a bit more difficult to deal with than in Mario 3, though. In Mario 3, these things wouldn’t hurt Mario until they had fully emerged from the pipe, but here they’ll hurt him as soon as they begin to emerge (and the hitbox is fully emerged when they do so, so even though it looks like they’re just barely poking above the edge, they actually act as though they’re fully extended). On top of that, these things are one of the few obstacles in the game that will hurt Mario directly even if he’s riding Yoshi.  This is important because, early in the level, we discover a baby red Yoshi. Not only is this the only baby or colored Yoshi in any of the regular levels, I believe it may be the only Yoshi in any of the regular levels period… and we’ll need him to get to the secret exit in this level.  As you no doubt remember from Mario World, a baby Yoshi will grow into an adult one if you feed it five enemies (or a power-up). With all the Piranha Plants around in this level, that’s easily done. |

|
#92
03-16-2009, 09:13 PM
|
|||
|
|||
 Dodging the mini-Munchers in this level is nerve-wracking enough, but, because FuSoYa hadn’t completely destroyed our faith in his grasp of basic level design concepts yet, there’s a section near the end where you basically have to take damage and force your way through to the end with mercy invincibility. (In this shot, Mario is still on Yoshi, but I caught him in mid-flash from the mercy invincibility.)  The reason we need Yoshi is because the key lies at the end of a vast field of Munchers. We cross, going slowly so as to avoid the mini-Munchers…  …to find a rare 3-Up Moon and the key.   This is important: Jump off Yoshi before grabbing the key. See, Mario can carry items through pipes, but Yoshi can’t. If you try, you’ll lose the key and have to try the level again, and believe me, you don’t want to play this level any more than you have to.  As with many levels in this game, the regular exit is just a short distance beyond the secret one, so there’s not a lot to say about our second runthrough. Pipe Secret  Pipe Secret’s gray block contains a vine, of all things. We’ll need one to get to Pipe Castle’s secret exit, but don’t get too excited: When you release the vine from the item block with select, it starts out near the top of the screen, so it doesn’t break as many level designs as you’d think. Pipe Castle    They do, however, destroy Goomba blocks for some reason, allowing us to find the Pipe Castle’s secret exit with ease. Okay. Pipe Castle’s gimmick, like so many others in this game, is that you have to endure a long gauntlet of spikes, enemies, and tough jumps to find a P-Switch, then bring in back to near the beginning of the level so that you can uncover a Spring, which you can then use to jump to the boss door. I’m tired of hunting for P-Switches, though. I’ve played FuSoYa’s game enough times; I think it’s about time I played one of my own.   With that in mind, we take the shortcut back to World 3, head on over to World 4, and enter the Crystal Secret. There, we crack open the gray block to get our hands on a Spring. 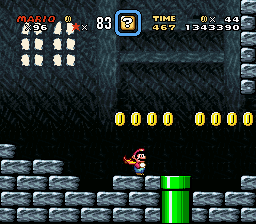 You see where I’m going with this: With our own Spring in hand, we can skip most of the Pipe Castle’s ridiculous P-Switch hunt and head straight for the exit.  After negotiating a small pipe maze, we arrive at the boss door in record time.  Larry Koopa, the boss here in World 7, has added some Podoboos to the mix, but he is in all other respects identical to Iggy, who we crushed back in World 1. |


|
#94
03-16-2009, 09:21 PM
|
|||
|
|||
|
Quote:
you're a stronger man than I! |


|
#95
03-17-2009, 03:12 AM
|
|||
|
|||
|
You know, until now I've actually forgotten how much dirty rotten sadism FuSoYa poured into this hack. People decry hacks like Kaizo World for being filled with twitch-reflex instant death segments, surprise punishments and rampant glitch exploitation, but at least those are over quickly. Meanwhile, Pipe World is the antithesis of fun. It's a slow, badly-paced, boring and sometimes even grating onslaught of failed level design masquerading as quality work. Only once you play it do you realize it was most likely built this way on purpose.
By the way, here's some tricks you could have tried, but didn't in this update: When you're carrying an item, you can still swipe the cape with the X button, and if you're running fast with a cape, you can execute a super-high Spin Jump with A for more control. (You can also abuse it to retain your speed when you land again.) |
|
#96
03-17-2009, 09:09 AM
|
|||
|
|||
|
Quote:
Quote:
Quote:
|

|
#97
03-17-2009, 12:16 PM
|
|||
|
|||
|
I don't recall there being any surprises or anything terribly difficult about World 8. Save for the fact that Bowser's Castle has two exits, not counting the battle with the big guy himself.
Part of me is giggling with glee, knowing that Star Road is after that; especially since you'll have to do each stage twice. It may not amount to much extra time in the LP, but I don't envy you having to do Misty Star World one time, let alone two. Those mini-munchers be evil, evil things. |

|
#98
03-17-2009, 12:22 PM
|
|||
|
|||
|
Tanto, why do you do this to yourself? That Pipe Maze looks like it's about the worst thing ever.

|
|
#99
03-20-2009, 07:43 PM
|
|||
|
|||
|
Welcome back to Let’s Play Super Demo World. We’ve reached the end of the main adventure, with just one more World to go. Fittingly, it’s World 8 — Bowser’s World.
 Bowser’s World 1  This message box is presumably referring to the décor of Bowser’s World (which is taken from Flame Stag’s stage in Mega Man X 2, with the background coming from the All-Stars version of Mario 3), but it could just as easily be referring to the level design. Bowser’s World 1 is the shortest, most boring level in the whole game. Not only is it easy — I got through without getting hit once — but it lacks any sort of level-specific gimmick to keep things interesting. It’s just a few enemies, a few pits, and the exit. They couldn’t have made a more generic level if they’d tried.  About the only place that formula gets shaken up at all is this short stretch of Munchers towards the end, intended to be crossed via Note Blocks. Multiplying Chucks also infest the latter part of this level. Bowser’s World 2  The boring keeps on coming in Bowser’s World 2…  …Because it consists almost entirely of a ride on these slow-moving skull rafts across lava.  I don’t recommend taking this level without Yoshi, because there a ton of these low-ceilinged areas with Blaarghs. Yoshi can stomp on Blaarghs without sustaining damage, but it can be tough to dodge them on foot.  These skull raft levels are really weird-looking, in general. The lava forms the most unintuitive shapes imaginable. I’ve actually seen lava lakes with tiny little one-block columns of lava that look just bizarre. In addition, you have to be really careful about the placement of obstacles in these types of stages. A lot of romhacks include skull raft stages where you have to climb over floating blocks while keeping up with the raft, but if the player lets the raft go offscreen (or gets too far ahead of it), it disappears, rendering the level uncompletable.  One of the really odd things about Demo World is that you can see it running out of level ideas as the game progresses. The final three worlds of the game are absolutely littered with really short, boring levels with no real hook. This doesn’t make them easy, necessarily — Big Boo’s World, in particular, has about three levels that are gigantic pains in the ass to beat but are thoroughly uninteresting in terms of layout. It’s almost as though FuSoYa felt committed to eight full worlds and two hidden ones despite not actually having enough level ideas to fill a game of that size. As a result, late in the game, when the really cool, challenging level concepts should be coming into play, you find yourself drowning in filler instead. Let that be a lesson to all aspiring romhackers: Don’t bite off more than you can chew. If you want a really huge, epic game, you have to actually have enough ideas to justify the length. SMW has a pretty robust engine, but the engine is not strong enough to hold up boring levels; if you’ve only got enough ideas for 20 levels, don’t force yourself to make a 50-level game instead.   Bowser’s World 2 has a hidden exit, which — of course — requires you to play through the whole stupid level in its entirety again so that you can do something slightly different at the end. In this case, you have to ditch Yoshi if you still have him and fly left, to where the key and keyhole wait. Red Switch Palace  Bowser’s World 2’s secret exit leads to the fourth and final Switch Palace, the red one.  In this Palace, you have to grab a Star and run across a really long field of Munchers, killing enemies as you go. It also has a few of those blocks that contain Stars only if you’re already affected by a Star.   The four Switch Palaces are required to get to a few exits in the Star Road and Big Boo’s World, and make a room in Bowser’s Castle much easier to traverse. Romhackers from time immemorial have been trying to find a really good way to reward the player for finding all four Switch Palaces, but I haven’t been able to find a good one that isn’t either negligible or so important that you can’t really afford to not find them. |
|
#100
03-20-2009, 07:44 PM
|
|||
|
|||
|
Bowser’s World 3
  Bowser’s World 3, like Sky World 3, is an airship level. This one, however, autoscrolls, and it does so extremely quickly, meaning that you constantly have to stay on top of things at all times in this level. There are Bullet Bills, Torpedo Teds, Bob-Ombs, and rocket jets going every which way, there are several blind leaps, and the autoscrolling is constantly forcing you to stay near the right of the screen, where you’re least able to dodge. While it’s definitely not the hardest airship level I’ve ever seen, it’s still no picnic to play through.  Twice during the level you have to descend into the interior of the ship. These areas don’t autoscroll, but they do require you to make precise jumps from chains and around the rocket jets. Reznor’s Fortress  Awful, awful level. More on why after we find the secret exit.   The first half of the level isn’t too bad, despite the out-of-place Yoshi’s Island graphics. You do have to take a blind leap to find the key, though.  Next, you have to lug the key all the way through this area, dodging Magikoopa and Balls ‘n’ Chains.  Once you’ve reached the end of the second area, fly up and over to reach the keyhole, allowing you to access Bowser’s Secret. While you’d think that Bowser’s Secret would house some really awesome item, all it’s got is the red shell.  The level really heats up in the area following the one with the keyhole. Here, you’ve got moving platforms on layer 2 (think the second half of Morton’s Castle from the original). This is simple enough, but then…  You’ve got moving vines on layer 2. These vines work non-intuitively, because Mario can’t “ride” them like he can a moving rope. If he remains stationary, the vine will move out from under him, so in order to climb these vines while they’re in motion, you actually have to move diagonally up.  Next up, we’ve got this annoying little puzzle. What we have here are a huge mass of moving brown blocks on layer 2, and a few platforms of stationary brown blocks on layer 1.  “Aha,” says the player, “you can’t fool me. I’ll hit the P-Switch and then collect as many of the coins in layer 2 as I can, being careful not to grab any of the coins in layer 1. That way, when the P-Switch wears off, the moving blocks will be mostly gone, and I can use the stationary ones to climb up to the next level. I’m so sly!”  Once the player does this, however, he’ll find that he can’t actually proceed through here.  The entire moving brown blocks section is a red herring designed to trick you into using your P-Switch prematurely. (Of course, if you fall for it, you can’t complete this level, and have to kill yourself to get another go.) What you actually have to do is ride the moving blocks like this…  …carry the P-Switch up to the next platform… |
|
#101
03-20-2009, 07:46 PM
|
|||
|
|||
 …and then hit it, creating some platforms you can use to continue. Needless to say, this solution is in no way alluded to, so a player who thinks he’s got the first part solved will find himself stymied here.  The worst part is that that isn’t even the end of it. You’ve still got a few more “don’t even bother without savestates” jumps to make before you can reach then end.  Then, of course, there’s Reznor. Bowser’s Castle  Bowser time! Are you excited? I’m excited!  Bowser’s Castle is like the Pyramid on crack. There’s no P-Switch hunting to deal with (Thank God), but it is an absolutely enormous level with a lot of doors. Worse yet, much of the level is completely irrelevant, included mainly just to throw you off the scent.    Like the other seven castles, Bowser’s Castle has a secret exit, found by entering about half a dozen very specific doors in a very specific order. Thankfully, it’s not too far removed from the main route, and it’s fairly straightforward if you know what route to take.  Bowser’s Castle, Take Two!  Hello, what’s this?  There’s a P-Switch across the way here, and if you bring it back and press it, you can duck under the one-block space on the left there.    Well, how about that? Bowser’s Castle has two secret exits! We’ll get into the significance of this in the next update.  Bowser’s Castle, Take Three! |
|
#102
03-20-2009, 07:49 PM
|
|||
|
|||
 If you somehow got this far without finding a Switch Palace, guess what level you can’t beat? You only need one Switch Palace to get through here (although it’s difficult enough with all four), but you do need at least one.  One of the hazards most romhackers fall into is making levels too long. The main exit of Bowser’s Castle is extremely long, and even though none of the obstacles are notably difficult, it’s still extremely tough just because of its length. The longer the level, the more opportunities the player has to screw up, and hence the more tries it’s going to take him to finish it. Even the best players aren’t going to get past all the obstacles all the time. Even if the individual obstacles are manageable, including tons of them in a single level raises the difficulty of that level exponentially.  Screw these jumping Bowser statues, though. They appear in exactly one room in the original SMW, and for good reason — they’re tough to deal with. Between the fire-breathing statues, the jumping ones, and the low ceilings in this area, it’s near impossible to get through here without getting hit unless you’re using savestates.  Dun dun dun!  Actually, Bowser doesn’t really merit a “dun dun dun”. This is probably one of his more difficult 2-D appearances, but it’s really hard to take him seriously in that ridiculous Clown Copter.  Anyway, you know the drill. Wait for Bowser to release Mechakoopas, then chuck ‘em at him.  Bowser, meanwhile, will be attacking with fireballs, these giant marble things, and the ship itself, but his attacks are usually easy to dodge.  After six hits, Bowser goes down, leaving Mario and the Princess just enough time for breakfast.  Hm, apparently I’ve been under a misapprehension in saying that FuSoYa was directly in charge of level design for this game. Evidently it was this Zero-G fellow instead. Since I’m a firm believe in credit where it’s due, consider all my venom in this LP retroactively spewed on Zero-G instead.  Ah, play-testing incest. All romhackers should hand their game to someone who’s never seen it before and request input before releasing it to the public. I imagine a bad level design seems much better when you start out knowing the solution.  Let it not be said that they don’t have a sense of humor, though.   To wit!  …Dude, that’s not right.  Next time: Star Pieces |
|
#103
03-20-2009, 08:08 PM
|
|||
|
|||
|
Quote:
Quote:
|
|
#104
03-20-2009, 08:29 PM
|
|||
|
|||
|
Quote:
|
|
#106
03-24-2009, 08:19 PM
|
|||
|
|||
|
Welcome back to Let’s Play Super Demo World. With the main game done, the only places left for us to explore are the game’s two hidden worlds: The Star Road and Big Boo’s World. Since I’ve been hyping the Star Road for pretty much this whole LP, and we have to go through it to get to Big Boo’s World anyway, that’s where we’ll be starting.
 Let’s hit the switch!  Looks a bit different than you remember, huh? Okay, here’s the deal with the Star Road. Each of these red stars is a level, and each of those levels has two exits. If you find the normal exit in the level, the path opens up to the next level in the chain (going in the same order as the regular worlds). If you find the secret exit, that level transforms into a warp point, taking you to that level’s counterpart in the main game. What this means for us that we have to find the regular exit first. If we find the secret exit first, not only will we “break the chain” and be unable to continue, we won’t be able to reenter the level to find the normal exit. Finding the secret exit first forces you to reenter the Star Road further up the chain. This is where the “Demo” part of Super Demo World comes in. Frustrating as it might seem, the Star Road was intentionally designed this way in order to show off one of Lunar Magic’s features: Its ability to cause your actions within the levels to change the map. The original game only used this part of the engine to open up alternate paths, but with Lunar Magic, finding certain exits can completely change the map and the levels therein. The problem is that while I’m glad this feature exists, I can’t actually think of any way to use it that isn’t incredibly irritating. TSRP2 uses it to block off a few bonus areas to keep them from being abused, which is about the best you can say about this feature… Big Boo’s World has an even more annoying trick along these lines. As for the levels themselves, they tend to be based around the same general themes as their respective worlds. Problem is, most of the interesting ideas were used in the worlds themselves, so their Star Road counterparts are generally featureless and boring. Let’s get started! Misty Star Road  Of course the Star Road starts off with one of the most obnoxious levels in the game. We all know that the best way to encourage exploration and creativity is to force the player to complete an incredibly difficult level twice the very first time he veers off the beaten path.  This level autoscrolls, and you constantly have to switch between fireballs and the Cape in order to keep from being crushed by the walls of ice-bricks and breakable bricks that are continuously closing in. This is much harder than it sounds, because there’s very little room for error.  Because of this level’s gimmick, one hit is basically fatal, because you need both the Cape and fireballs to proceed and power-ups are few and far between. This more or less requires you to a) use savestates or b) be very, very careful around enemies like these jumping Paratroopas. In addition, there are quite a few blind leaps in this stage, made worse by the autoscrolling.  The worst part of this level, though, is that it’s so long. Every thirty seconds or so you find yourself thinking “I must be getting pretty close to the end” but it just keeps coming and coming.  This stratum of blocks I’m in is a dead end, by the way. Nothing like traps that can’t be anticipated in an autoscrolling stage… Desert Star Road  Sorry, but I can’t be arsed to find the secret exits in this world. The levels are just so tedious. I’m getting close to the end and I want to move on to other things, so you’ll have to forgive me for not playing through these stupid levels again just to activate the warps…  Desert Star Road has a lot of these large, pyramid-shaped hills to traverse. This isn’t much of a challenge to overcome even if you don’t just fly over it. The only really hard part of this stage is a section towards the end with a lot of Thwimps, but even those can be cleared with Koopa shells.  It’s worth noting that the secret exit in this stage is incredibly annoying to get to. The keyhole is in this small tunnel, and it’s completely blocked off by Pokeys. You have to throw the key up, spin jump off the Pokey, then catch the key and run like hell to the right. You’ll notice that I took a couple hits getting through here. Water Star Road   Water Star Road is another of these ridiculous Jelectrode swarms, but this one has even faster autoscrolling. Nothing to see here… Crystal Star Road   Another boring stage; getting the regular exit in the Crystal Star Road is a matter of jumping over some small pits and not getting hit by Swoopers.  Even the secret exit is just another “get a P-Switch and the key and take ‘em to the keyhole” exercise. |
|
#107
03-24-2009, 08:21 PM
|
|||
|
|||
|
Sky Star Road
 The Sky Star Road is challenging, but the layout is, again, pretty pedestrian. The first half of the level is little more than a flat expanse of clouds with columns of Super Koopas flying in occasionally. The second half is more difficult; you have to fly a fair distance over a long, bottomless gap. And just flying isn’t good enough, either, because Super Koopas will fly in and knock you into the pit if you stay at one vertical level for too long. The best bet is to try and fly off the top of the screen and hold your altitude, but if you can’t then this section is a crapshoot at best, because Cape flight isn’t precise enough to dodge incoming enemies on command. Ice Star Road  Ice Star Road is beyond easy. As difficult as the Ice World was, that’s how easy its Star Road is, and it doesn’t even have any gimmicks to help you forget. Just jump across some slippery platforms and you are done. Even the secret exit is easy; the key is directly above your head at the start point, and the keyhole is along the main path. Seriously, it’s like they’re not even trying anymore. Pipe Star Road  Pipe maze… Not even much of a maze, really, because you’re railroaded onto the correct path fairly early on. About the only highlight of this level are some excessively (and unnecessarily) long screen-scrolling pipes towards the end. Bowser’s Star Road  Bowser’s Star Road is another of those skull raft levels, and it’s every bit as exciting as the last one was. At least this one dispenses with the low ceilings, allowing you more room to jump the Blaarghs.  Here’s one of those bizarre lava formations I mentioned in the last update. A perfectly rectangular lava block — I wonder how often those show up in nature?   This level requires you to climb over stone block formations while still keeping pace with your skull raft, but the final one is a red herring. If you climb on this one, the screen will scroll up too far and your raft will disappear, leaving you stranded. Backdoor Star Road  Do... Do I really want to go here?  The Backdoor Star Road is a sort of catch-all level for the castle/fortress-type levels… Other than Misty Star Road, this is by far the hardest Star Road level. It’s got a bunch of really obnoxious Grinder/spiked column setups that are a pain to negotiate. This is not helped by the fact that Grinders reload as soon as they scroll off screen, meaning that you’ll often get two Grinders coming at you from either direction while you’re trying to dodge rapidly moving spiked columns. Secret Star Road   It’s a little difficult to figure out what to do at the start point in this level, but once you've got that down it pretty much plays itself.  The trick is that you need to bring a shell into the level so that you can hit the breakable brick on the top right of the first platform. (You can also do it with the Cape, but it’s annoyingly difficult.) This reveals a P-Switch…  …which you can then use to cut through the wall of breakable bricks to the right. If the P-Switch is still active once you get to the end, you can collect a star…  …allowing you to cut through a field of mini-Munchers.  Once you reach the end of the line, spin jump up through the bricks to reach the exit. |
|
#108
03-24-2009, 08:24 PM
|
|||
|
|||
  Incidentally, you might be wondering where the Secret Star Road warps you. It turns out that it’s here: A hidden patch of land in World 5 with a hidden secret. This hidden secret is just like all the others, except that its gray block contains a Star. …?  You might recall that there were two secret exits in Bowser’s Castle. The first unlocked Bowser’s Star Road, and the second allows us to move up from the Secret Star Road to this secret, hidden level. It’s by far the coolest level in the whole game.  Not that you’d know it from the first part of the level. You have to fly up to find a P-Switch, then carry it to the right, past a whole mess of fake doors.   Use the Switch here to reveal a hidden blue door. (This is not as arbitrary as it seems: If you use the P-Switch and then fly up, arrows of coins will point you to this location.)   In the next area, things start to get… strange. Enemies walk backwards, and blocks flicker into static.  Heh?   Okay, I’ve been ragging on Demo World a lot, but this is genuinely cool. A lot of romhacks have a really great, perfect moment hidden somewhere in there, past all the amateurish level design and insane difficulty. Finding those unique moments, the stuff that you’d never see in a real game, is why I play romhacks, why I put up with all the bullshit.  At the end of this level, you’ll find a ? block that isn’t quite what it seems. You can grab it, and if you do so and carry it into the next room…  You’ll find that it isn’t a ? block at all, but the key!  We grab a Star as we fall and, safely invincible, fall through a chasm of Boos.  At the end, we find a keyhole. Completing …? once turns it into a red star, and you know what that means: Back in we go. |
|
#109
03-24-2009, 08:25 PM
|
|||
|
|||
 In the first zone, you’ll find a lot of doors, pipes, and pits with arrows pointing at them. This is of course just bait…  What you need to do instead is find a pit where the arrow points away from it. Dropping into this pit takes you into the Boo chasm again…  …with the change that this time some of the forks lead to dead ends.  With …? beaten again, the star turns into a warp point, leading us to parts unknown…  Next time: Who ya gonna call? |
|
#111
03-24-2009, 08:36 PM
|
|||
|
|||
|
Quote:

|
|
#113
03-25-2009, 04:04 AM
|
|||
|
|||
|
Quote:
|
|
#114
03-25-2009, 07:25 AM
|
|||
|
|||
|
Quote:
Last edited by PapillonReel; 03-25-2009 at 07:36 AM. |
|
#115
03-26-2009, 09:21 AM
|
|||
|
|||
|
Tanto, did you figure this all out on your own? I would be shocked and astonished if you didn't use a guide.
|
|
#116
03-26-2009, 09:44 AM
|
|||
|
|||
|
Quote:
|
|
#117
03-26-2009, 06:57 PM
|
|||
|
|||
|
Welcome to the final installment of Let’s Play Super Demo World. With nine worlds down, there’s only one left to go, but it’s a tough one: The hidden world of Big Boo. It was opened when we found the secret exit of …? on the Star Road, so let’s proceed…
 For all that Big Boo’s World is really hard, there isn’t much to look at on the map. Despite the fact that every level in this world has two exits, there are no alternate routes, shortcuts, or secrets to uncover. The tower there in the middle is Big Boo’s Tower, this world’s final level and Super Demo World’s marquee stage. To get there, though, we’ll have to beat all the other Big Boo stages first. Big Boo’s Star Road  Red herring alert. The presence of the key and keyhole right at the very start of this level might cause you to be a bit suspicious, and rightfully so: If you’ll remember the mechanics of the Star Road, finding a level’s secret exit turns the level into a warp point and prevents you from reentering. If you, in a burst of enthusiasm, activate this exit right off the bat, you’ll be locked out of Big Boo’s World permanently.  As for the rest of the level, it’s filled with platforms like this that switch rapidly from regular blocks to Boos. It’s novel at first, but gets annoying after a while…  Especially when you consider that most of the level looks like this, repeated over and over. Big Boo World 1   What? This level again? Come now, guys, you’re not even trying. All right, whatever, find the switch and head for the gray platform…  OH MY GOD WHAT JUST HAPPENED  Seriously, though, the trick with the Boos is about the extent of this level’s creativity. The main room is moving again, with Balls ‘n’ Chains and those hopping flames in the candles…  But the exit is still in the same place. Big Boo tries to taunt you into killing yourself right before the end; he spends most of this world mocking you via message block. Big Boo World 2  …Hmm? But… but… No. Wait!  As if the Big Boo World wasn’t cruel enough, collecting the regular exits in this world deletes paths further back, preventing you from exiting the world. Rather than open up new levels or routes, the secret exits in this world restore the paths, allowing you to escape.  Big Boo World 2 is similar to Pipe World 5, the one with those annoying mini-Muncher things. Although that level was pretty tough, this one is even worse, with Boos chasing you through the level and Piranha Plants and mini-Munchers exiting from the same pipes.  Setups like this one don’t look too horrid, but they’re tougher than they look. In addition, the ceiling of this level (like most of the levels in Big Boo’s World) is lined with Munchers, making hanging out near the top dangerous.  This line of green blocks actually forms an arrow pointing to this level’s key. It can only be accessed if you’re small Mario, though. |
|
#118
03-26-2009, 06:59 PM
|
|||
|
|||
|
Big Boo World 3
  Surprisingly tame world. Big Boo World 3 is just a collection of platforms encircled by Boo rings. It also has some Boos that are invisible when not moving, and can blindside you on some jumps, but mostly this level is pretty easy if you’re patient and watch your jumps..  For some reason there’s a stationary Boo ring towards the end. Big Boo World 4  Big Boo World 4 is like Big Boo’s Star Road on crack. All of the blocks in this stage are potentially Boos, and switch between being safe and being “live” approximately every half-second. This makes walking virtually impossible, and jumping hazardous. The floor does shift in patterns, though, so you can make safe jumps if you pay attention.  Later in the level, the Boos become more erratic, but other enemies appear, and you can safely cross by bouncing off them. Big Boo World 5  Uh, I kind of forgot to take any screenshots of this stage. It’s pretty simple, though. Its gimmick is that most of the objects — blocks, coins, even doors — are actually Boos, revealing their true nature if you get too close. Again, though, if you’re cautious, this level isn’t that challenging. To find the exit, you have to fly up towards the end. Big Boo World 6  Okay. There’s a large field of Munchers just to the right that can (theoretically) only be crossed with all four Switch Palaces and a star. So, what you’re supposed to do here is backtrack through Big Boo’s World at this point, finding all the secret exits, then grabbing a star and coming back. I’m not having any of that, though.  Instead, I’m going to climb up this ! block wall…  …And save state right here. Then, I’ll release my captive feather manually with select and wait for it to drift down. Once it gets close, I’ll jump onto the Munchers, then leap up and grab my other feather. Then, I’ll use my mercy invincibility to build up flight speed and fly over the rest of the Munchers, to the exit.  His trick overcome, Big Boo challenges us to challenge his tower if we can. Big Boo’s Tower  A huge, huge level, Demo World’s most famous and most unique stage, Big Boo’s Tower is 100 floors of pain.  It’s a vertically-oriented stage where the object is to climb to the top. Some of the floors are filled with enemies, others are mazelike in structure, and still others are vast expanses of floating platforms and chains. The timer resets to 999 every twenty-five floors, and the entire stage is littered with power-ups, but completing the whole thing is a grind, virtually impossible without savestates.    To their credit, the designers did a fairly respectable job coming up with enough obstacles to keep the stage interesting almost the whole way. That said, my comments earlier about the hazards of overly-long stages go double here, and the stage is not improved by the inclusion of several dead-ends that force backtracking. (Oh, and those candle flames will hurt you, and they’re on almost every floor, so be careful.) |
|
#119
03-26-2009, 07:01 PM
|
|||
|
|||
 They at least restrained themselves with the P-Switch puzzles… but you do have to find and hang on to a Fire Flower at some point so that you can get past this area, and the Cape is virtually required for the platform jumping segments.  Floors 51-59 are an elaborate pipe maze.  Floor 66… Cute.  After about 80 floors, the lights go out, forcing you to finish the stage in darkness. (Think the last area of Bowser’s Castle in the original.) At least you can climb on the candles now. The disco-ball-esque light switch is somewhere in the stage, but I can’t be arsed to look for it.  And, of course, since this is Demo World, we’re not getting away without one last P-Switch fetch quest. Once you reach level 99, you have to drop down a long shaft to level 91, collect this P-Switch, then climb back up and clear away some brown blocks.  At least they’re nice enough to give us a midpoint to help us if we screw up against the Big Boo.  Big Boo is the same as the one at the end of the Donut Secret House, but we have only three grabbable blocks to bean him with and his room is filled with Podoboos and Boos, forcing you to keep moving. Eventually, though, Big Boo goes down, finishing the longest and most deadly stage in Super Demo World. Big Boo’s Secret!  Clearing the Tower opens up Big Boo’s Secret.  Unlike all the others, though, it’s empty and deserted… seemingly.  In the center of the Mushroom House, however, we find an invisible pipe…  …Dropping us into the Big Boo’s hidden treasure horde! Not only do we have the typical Top Secret Area selection here…    …But we’ve also got all the potential gray block items, including two new ones in a Lakitu’s Cloud and a key (!).  Plus, there are three pipes that allow us to collect colored Yoshis. |
|
#120
03-26-2009, 07:02 PM
|
|||
|
|||
  But wait, that’s not all! In a room to the right, we find a new power-up that allows Fire Mario to toss Yoshi fireballs.   One more thing. If we collect a Lakitu’s Cloud and release it in the main room, we can fly through an invisible ceiling and off to the right.   Eventually, we uncover blocks spelling out SMA2, and a door…    …Leading to versions of several original SMW levels with the Super Mario Advance 2 palette. Sure, these levels are incomplete, and they’re riddled with glitches, but still.  For example, message blocks all have the same messages as the ones in Big Boo’s Secret. Plus, if you hit a midpoint and then die, you’ll die instantly every time you try to reenter Big Boo’s Secret. Finally, hitting a multi-item block can cause the game to glitch up.  Still, though, it’s pretty cool being able to bring your flashy new firepower into Forest of Illusion 1.  And so this LP comes to an end. Nothing more to see here. There are fourteen exits I failed to show, and I’m not gonna. Maybe we're ending on a whimper rather than a bang, but I still showed off everything I set out to, and you can’t ask for anything more from an LP, can you? Thanks, as always, to everyone who read and commented on this LP. Join me next time as I explore the depths of a children’s card game. Fin. |