
-
Welcome to Talking Time's third iteration! If you would like to register for an account, or have already registered but have not yet been confirmed, please read the following:
- The CAPTCHA key's answer is "Percy"
- Once you've completed the registration process please email us from the email you used for registration at percyreghelper@gmail.com and include the username you used for registration
Once you have completed these steps, Moderation Staff will be able to get your account approved.
My writing can beat up Camelot's honor student. Let's play Golden Sun: the Lost Age!
Back to Let's Play
< 1 2 3 4 5 >
< 1 2 3 4 5 >
|
#1
 08-13-2016, 02:03 PM
|
|||||
|
|||||
 We're back, kids! 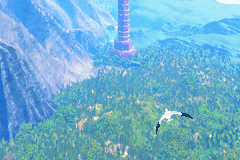 Let's Play Golden Sun: the Lost Age!  As you probably know from my prior LP, I've taken a weirder approach to the Golden Sun games than I do for most. The games are charming and part of my Gamer's History, but at the same time, their writing is... not the best. So just like my old LP, I'm going to be rewriting the story here a lot. In fact, I'm going to be doing that far more drastically in the Lost Age than the previous game. In the first game I mostly just shot from the hip and went with what sounded right. This got a few happy accidents, like Ivan misinterpreting his prophecy because I changed it around, but it also led to a few problems, like not having any idea what to do with Iodem, Faran, or Hama. Here, I've gone through and brainstormed a lot of the possibilities for what's down the road, so I'll have a much cleaner framework for what I'm writing, and hopefully what to surprise True Doom Alchemyheads with. That doesn't really help us with the big problem, where the Lost Age's story is far more backloaded than the first game. Get ready for a bit of a slog to start us off, because outside of recapping the story of the first game... we're not going to be doing anything. Like, at all. We will wander to remote locations where nothing of consequence will happen, and then we will do this six more times. For this reason, I'm still doing the five-update backlog before I post anything here, just to prove to myself I have the gumption to do this all over again.  The Lost Age starts us off as Felix instead of Isaac. At the conclusion of the first game, Felix stood in direct opposition to Isaac in wanting to light the lighthouses, despite Saturos and Menardi taking a short walk down a long lighthouse. In my rewritten version, of course, Felix is already more or less on decent terms with Isaac. This will impact the story of this game precisely not at all. 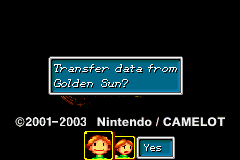 As mentioned in aturtledoesbite's LP, you can transfer your clear data from the first game to the second when starting a new file (or at any time during a normal game if you haven't done so yet and haven't cleared Jupiter Lighthouse).  Unless you're using a GBA Link Cable to do this, you have three levels of password you can go with. Gold requires 260 characters, while Bronze asks only for 16. The advantage to Silver is that you get character stats (as increased with Mints and Apples and other such healthy items), while Gold also imports your inventory and dosh.  I cautioned aturtledoesbite in his LP to just go with Bronze, because any items you could import get outclassed somewhere in the vicinity of immediately after your parties rejoin (spoilers, by the way. Spoilers as mentioned in the Lost Age's manual). I, however, am going with Gold, mostly because I really like the Cleric's Ring and I want to see it actually used. For reference, here is my password, with the Bronze password for my old savefile for comparison.
 This is the only way to get the Cleric's Ring into the Lost Age. The Cleric's Ring is also the only item, in my opinion, necessitating the 260 character password, and even then that's only if you want to used cursed items. You could totally get by with just a Bronze password, no problem.  Since I've beaten the Lost Age once before, I have the options to start in Easy Mode (why)... 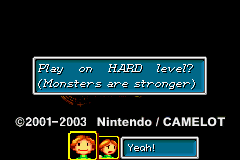 Or Hard Mode. I've never done Hard Mode before, and I recall complaining about the difficulty in Golden Sun before this point quite a bit. So y'know what? Sure! Bring on Hard Mode.  Before you start the Lost Age, you get treated to a blisteringly slow text crawl outlining the backstory of the series, including a synopsis of the first game.  Here's the only actually relevant thing of the lot. The entire reason Alchemy was sealed in the first place was because people fought over all of this power and stuff. Bear that in mind as we move on, because that's gonna be central.  Anyway, let's do a quick bulletin point summary of the first game for the newbies. This is all taking my editing into account, of course.
 Let's get a bit of prologue to ease ourselves into the new perspective.  We meet up with Felix, Jenna, and Kraden en route to Idejima. Felix is going to double back to the top of the lighthouse for the scene we've already seen. Quovak suggests paying attention to Felix's story in this, but I don't personally see the point, since the lighthouse top scene from the first game already does that.  So instead, the focus is on Jenna and Kraden. Note that they're left completely unattended here: their role as hostages is basically forgotten from the first game, since Saturos and Menardi don't actually appear in the Lost Age ever. Needless to say, I'm keeping that element while it's actually useful. Quote:
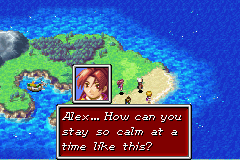
 Right on cue, Alex warps in with his fancy new animation.  Alex, you'll recall, is basically the accomplice of Saturos and Menardi. Quote:
 There's a bit here where Jenna lashes at Alex for implying that she's insensitive, but I took it out for the same reason I excised most instances of Garet being ignorant and abrasive in the first game. Quote:
 Quote:
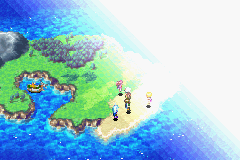
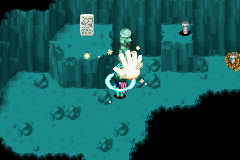
 Remember: in the previous game, Alex wasn't really trusted by his allies at all. This trailing off here is supposed to be the hint going into the Lost Age that you shouldn't trust him either... but all of the conversation, even my edited conversation here, mostly just shows him as a guy with a bit of a low opinion of others, masked by a silver tongue. More importantly, he doesn't act like someone who's captured you at all. It's a bit awkward, honestly. But I'll see what I can do about this going forward.  Anyway, Alex cuts himself off, and we can move on.  For this first area, we can play as Jenna in the lead. While Kraden and Alex have joined our party, Kraden is unable to fight and Alex is mostly unwilling. Not that it matters, as Venus Lighthouses is totally empty of encounters right now. 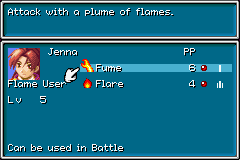 In the Lost Age, they try to mix up the archetypes established in the first game, where the Sol adepts are physical fighters and the Luna adepts are casters. Jenna's Flame User class still gets the same class sets Garet would via Djinn abuse, but her Flame User class set is heavily dependent on its Psynergy. Her equipment classes are also identical to Ivan's, which puts her (and one other character) at a weird midpoint between physical and Psynergy-based, but overall the earlier game's meta (SOL ADEPTS SKRONG OP FLEXXXIN) stands. Fume is a new Psynergy in the Lost Age, which I'll show off later.  First things first, let's speed up the text and change the color. Crimson background best background. Last edited by Kalir; 07-29-2017 at 03:53 PM. |

|
#2
08-13-2016, 02:05 PM
|
|||
|
|||
 This chest held the Lucky Cap in the prior game, which was excellent endgame material.  I don't know if you can weird reverse sequence break by leaving it in.  Welcome to the outside of Venus Lighthouse! 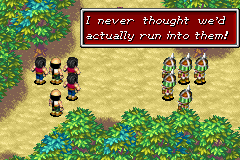 PLEASE SUBMIT TO THE COPS. 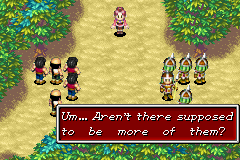 Hey, they could just be behind. And by behind, I mean RIGHT BEHIND YOU LOOK OUT ITS A GHOST BOO. 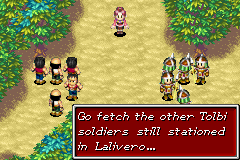 One of the soldiers goes to get reinforcements... 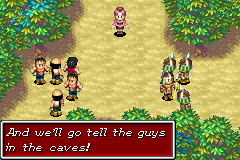 And one of the workers... goes to the caves in the Suhalla Range? Why? Like, really, why are your workers THERE of all places? Wouldn't it make more sense to guard the ruins under Babi Lighthouse, since that's where you KNOW Sheba went? And if you're both going to get reinforcements, why wouldn't the Tolbish soldiers go to Suhalla Gate for the detachment there, while the workers head for Lalivero?  Quote:
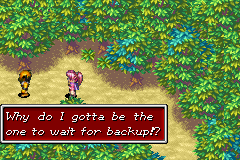
 I can't even get into my first fight without falling into a PLOTHOLE STEW. First up: Kraden and Jenna treat this ambush as though its meant for them from the start and resolve to fight their way through almost instantly. They are, you'll recall, hostages taken at Alex's recommendation.  Alex is perfectly happy to let them go off on their own for a not-insignificant amount of time. Granted, this is in character for him, but he's also literally the only person here who could reinforce that if you get captured, he and his companions will slash and burn their way back to seize you, just so they can hang that axe over Isaac's head. 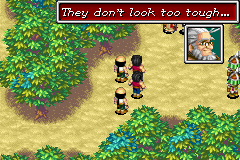 So we're going to fight our way past all of these workers. Remember: these guys saw their holy child, Sheba, captured from them to force them to build a lighthouse for Babi, and then captured again by terrorists who blasted their way through their village like it wasn't even there. This is not only needlessly villainous, it's also the same kind of needless villainy Alex (and Felix, while we're at it) explicitly avoided during the last game. 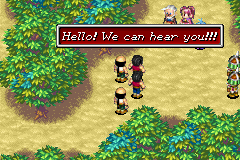 I guess you could argue that Stockholm Syndrome is in full swing again, but there's an awfully huge gulf between "we have been captured as a bargaining chip to force Isaac into capitulating" and "we're going to punch through a bunch of effective slaves to escape our own rescue". Screenshot mostly unrelated, where said slaves call us "just plain rude", and rightly so. 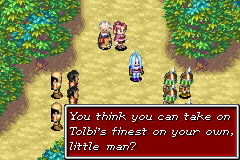 At least this scene gives Alex a bit of nice characterization. 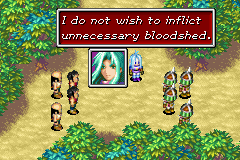 It's a bit diluted by the group deciding to fight their way through, but I kind of like that he makes a very, VERY token attempt to negotiate.  He honestly gives off the air of a noble who stumbled into a military drill session and is trying to ask the sergeant for directions to the drawing room. 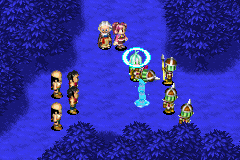 And then he launches Tolbish soldiers into the forest beyond with weaponized geysers. 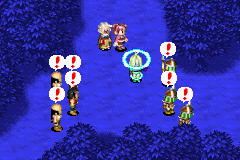 Needless to say, that gets EVERYONE'S attention. 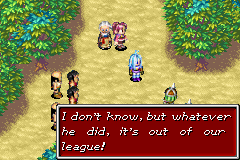 The soldiers try to pass the buck off to the workers... 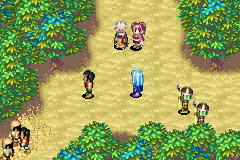 Who immediately do the sensible thing. 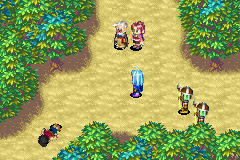 COMEDY! 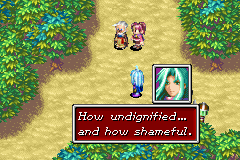 Like, in all honesty, Saturos and Menardi barely got characterization in the first game. Dodonpa could've been a better overall villain than either of them through sheer ham alone. 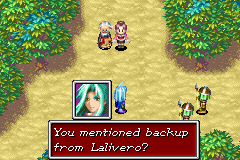 And then you have Alex here. He doesn't try to start fights, he barely even does his job, and most of the time he's just talking about how he wants to see Alchemy restored, which on the surface sounds like a good thing. 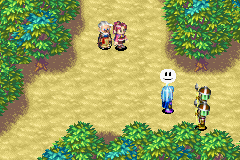 But when it really comes down to it, this guy is probably the most dangerous in the lot. If Golden Sun was a much better written game, this guy could be on par with Kefka for memorable villainy.  And when pressed, there is no doubt whatsoever that he values only himself. He won't go out of his way to cause harm to others, but if you stand between him and what he's going for, you won't be standing for very long.  But again, Golden Sun only has so much room for good writing. Remember, not moments ago, Kraden was advocating we fight our way past Laliveran workers. |
|
#3
08-13-2016, 02:06 PM
|
|||
|
|||
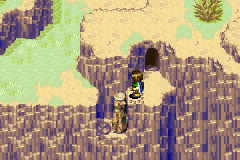
 This guy drew the short straw, so he's the one blockading us from the Suhalla range. 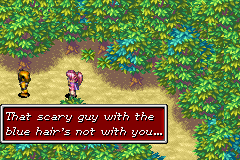 But once he sees we're alone, some of his confidence comes back. 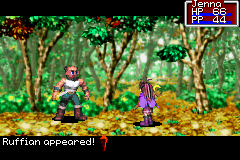 Go Jenna go! Beat up that worker who only wants to rescue Sheba and would probably actively help you! I haven't really touched on it, but Golden Sun as a series has really solid music. In the first game, the music for fighting Saturos, climbing Venus Lighthouse, sailing across the Karagol... all some of my favorite tunes. (Saturos' fight song is really upbeat and high energy, which doesn't fit with him stalling you after you failed to stop him, but details.) The Lost Age has a bunch of different songs for normal fights, and Jenna's solo fights have their own music. Compared to the fight themes for Isaac and Felix that form normal random encounter music, it's a kind of quieter, more thoughtful fight theme. I really like it. 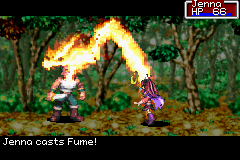 Anyway, Hard Mode or not, you can win each of these fights by casting Fume once. It's not a physical Psynergy, the Flame User line doesn't get one. 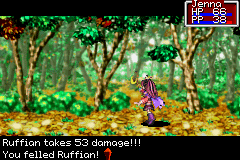 It kind of doesn't need one. We can oneshot every enemy here with it.  Okay bye. 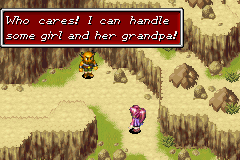 You guys aren't making a very good case for yourselves either. Just saying. 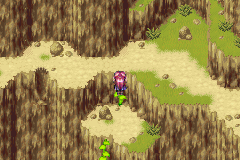 Anyway, this area is the same as it was in the first game, but without the random encounters that would instantly murder solo Jenna. If we try to head to the desert, Kraden stops us, because he's not very good at this hostage thing. 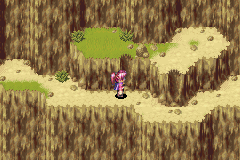 You might remember this ledge as the place where the last Mercury Djinni was in the first game. If we didn't get it then, it'd be there now (and we couldn't get it, because Kraden). 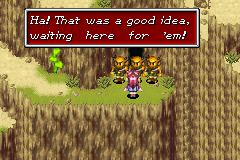 Oh no an ambush whatever will I do. Note that these guys promise to take us back to Iodem. Not Faran. They say Iodem. You are REALLY BAD AT THIS, Camelot. 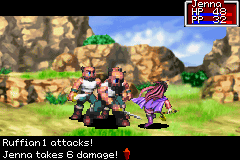 With three Ruffians, you're still better off picking them off one-by-one with Fume.  Casting Flare takes more than three turns anyway to drop them, and if the RNG doesn't like you it might not even do that. 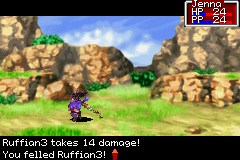 This might just be Hard Mode though. On normal, I think you could just Flare twice and call it good.  This was clearly the factor in your defeat.  Into the Idejima cave! We didn't go here in the first game, but if we did, we'd have found this here and gotten a PP restore in Suhalla, rather than needing to book it past Venus Lighthouse and to Lalivero for the inn. My bad. 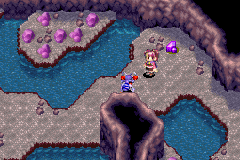 DANGER: PUNCH ANT 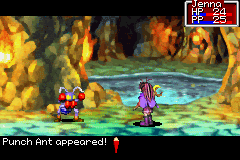 This guy is even weaker than the Ruffians. 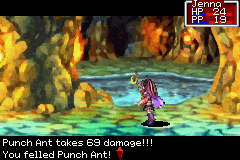 I changed up my strategy of "cast Fume once" precisely 0%. 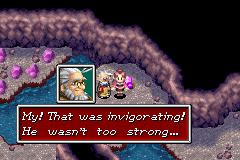 Kraden decides to say something about this. I'll get into Kraden's role more later, but in the Lost Age, he will always be a part of your party, but unable to fight. Instead, he's meant to serve as an advisory member, but because Camelot's writers, he'll instead just pad out the text length of the game. It's kind of a neat idea in theory, but not really executed very well. 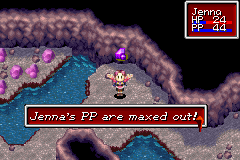 Oh no we were unable to self heal. We are doomed. 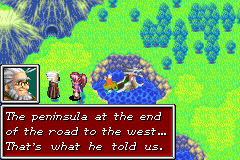 And we're at Idejima now. Remember how this was Menardi's ship and how I ignored the scene with Iodem investigating it in the first game? Well, now I gotta try to deal with it. 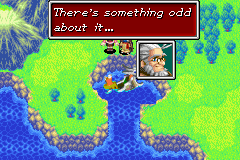 Like, okay. The idea here is that Saturos and Menardi sailed the ship from their homeland of Prox, far to the north, to here. Bear in mind, they've been traipsing all over Angara on foot, which is probably slightly less useful than going by boat. 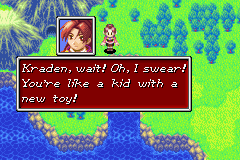 This gets slightly more reasonable once you remember that they had to backtrack the long way through Xian just like us, solely because the bridge to Kalay was taken out almost right after they stole the Stars. 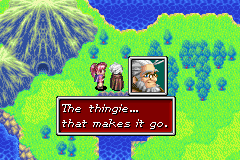 Quick break just to point out: this is a learned and venerable sage of Alchemy, the best Tolbi has to offer. 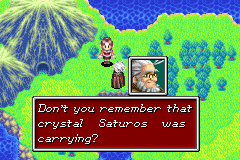 Anyway. Menardi's ship here is the same general model as the one Babi stole, and uses the same power source of the Black Orb. And it follows the same rules of where it can and cannot dock. This all matters because in order to necessitate them docking at Idejima at all, the ship has to follow these rules almost to the letter (otherwise they could probably just sail into a tributary or dock right outside Imil or something). And the ship is about thirty meters away from doing exactly that. Come on, Golden Sun. Please work with me here, just a little bit. |
|
#4
08-13-2016, 02:07 PM
|
||||||
|
||||||
 Quote:
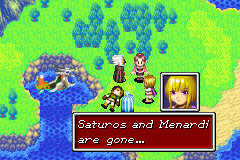
 Okeydoke, we all know how this part goes.  Venus Lighthouse's light causes major earthquakes... 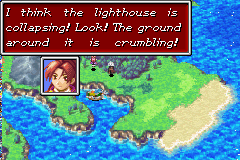 Up there, Felix and Sheba are currently falling off...  And on our side of things, we get stranded. 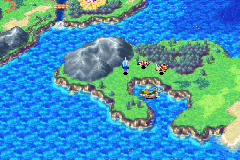 Goodbye, Skippy! 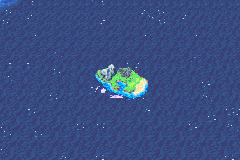 This scene is identical to the post-credits scene in the first game, of course. You can go see the last update of the previous LP, or you can not. Either way, I'm assuming you did. Good? Good. 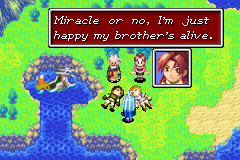 Nothing really meaningful that we don't already know gets said here, so let's skip ahead just a bit further. 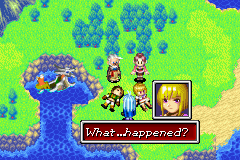 Quote:
 Quote:
 So, just as in the first game, Felix serves the role of player avatar, and loses the ability to speak, in what is perhaps the worst usage of the silent protagonist mechanic I have ever seen. Remember, he spoke in the last game (and was a prat outside of my edits). And likewise, Isaac will speak in this game (and will be a prat outside of my edits). I'm just going to ignore all of that, same as before. The conversation here in the original implies that Felix literally swam out to Idejima with Sheba. I'm just going to leave it as an exercise for the reader to figure out all the ways in which that is stupid, and work on characters instead. Quote:
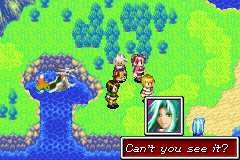 Is it an island? 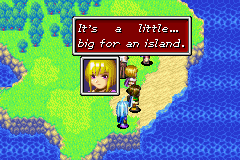 Everyone goes over to have a look... 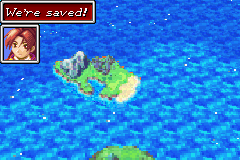 Hooray, a new continent! Prior to this, it's (probably) assumed that all the maps on Angara mostly cover itself and the nearby continent of Gondowan, with everything else as "there be dragons". Sheba even says in this conversation that nobody knows what lies beyond the Eastern Sea, which later gets contradicted by Kraden (correctly) saying there's no more lighthouses in the Eastern Sea. I'll just save you all the trouble and just say that down there is the continent of Indra, correlating loosely to India as separated from Eurasia during the Pangaea nonsense. Probably. I don't know, I'm not a geologist. 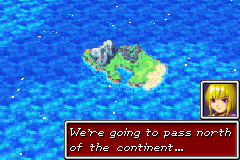 Anyway, time for shenanigans. We're going to pass north of Indra, which makes its discovery fairly pointless overall.  Not to worry, though. 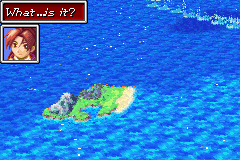 Quote:
 Quote:
 Now, from a narrative standpoint, this is a little unneccesary. If we were going to end up on Indra anyway, why not just crash Idejima right into Indra directly, rather than wasting time with the tidal wave? This, however, does serve both an immediate purpose and a bit of scene-setting for the start of the game. So hey, tidal wave's all right by me.  If nothing else, it gives us this scene, which I will present in screenshots only. 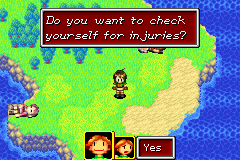  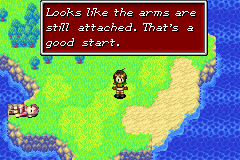  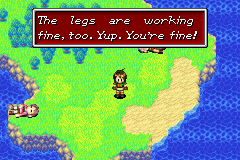 Golden. Next Time: Neville Longbottom and the First of Many Detours |
|
#5
08-13-2016, 03:34 PM
|
|||
|
|||
|
Quote:
Quote:
(trick question; nothing is worse than dark dawn) |

|
#6
08-13-2016, 04:56 PM
|
|||
|
|||
|
|
|
#7
08-14-2016, 03:15 AM
|
|||
|
|||
|
Glad to see this continue! I like your rewrites of Golden Sun.
Side note: I skipped Lost Age, but I have this sealed copy of Dark Dawn. Should I open it, or is it actually valuable to insane collector types? |
|
#8
08-14-2016, 11:06 PM
|
|||
|
|||
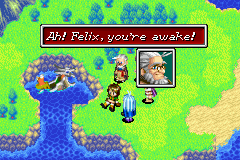
 So in order to upload my screenshots from this game, I need an Internet connection. As these write-ups right now happen, I don't really have one I can rely on. In the time between uploads, I'm spending a lot of time playing Dark Dawn, the Golden Sun game for the DS. I'm also keeping a journal of it, more concise and less editor-y than these LP updates. I don't think it'll burn me out too badly on this though, since half the appeal here is giving the story from these two games enough attention that they'll become actually good rather than merely bland and self-contradictory. 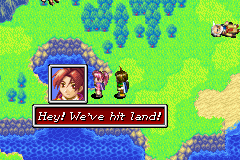 Anyway, let's fast forward through all of this here. 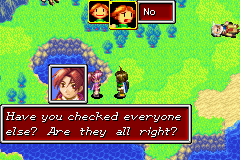 For every person we don't go up and personally talk to, they'll show up if we try to leave Idejima and complain at us. I'm not gonna allow for that, though.  In this game, as mentioned somewhere, Kraden joins our party, but does not fight and serves as an advisory role. Note that this isn't "advisory" as in the Persona series, where his insight will allow us field data and advantages, but instead will allow for more text boxes. Cut them some slack, operator-style characters weren't in vogue yet.  Hey Sheba. That looks kinda fatal. You okay?  She's okay.  Sheba and Felix both share class sets with characters from the prior game: namely, Sheba's Wind Seer and assorted sets match Ivan's completely, and Felix starts as a Squire just like Isaac. Felix's equipment selections are also identical to Isaac's, making stats the only real difference between the two. I think Felix is a bit on the heavier side overall, but it's not a major difference either way. Sheba, on the other hand, wields maces instead of light blades, giving her a different set of equipment to play with than Ivan. I rather like the equipment selections of the party at this point in the game, where just about any weapon you find will have a good owner, but later on Sheba's weapon selection becomes a strict downgrade thanks to the complete lack of maces in the Golden Sun series. Image unrelated, where Sheba can equip the Shaman's Rod for a marginal attack boost. Remember the Shaman's Rod? We have it now. Expect it to be useless for 98% of the game. 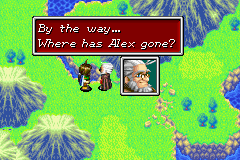 Looking up and down the island, Alex is nowhere to be seen.  Kraden posits this theory, which gets the party out as a group to discuss it.  Quote:
 Quote:
So my edits, as you can see, changed to focus on the characters. Felix still wants to light the lighthouses despite all, but has a few reservations post-Isaac. Jenna just wants to go right home, but will settle for ruining Alex's plans first. Kraden and Sheba are both more or less neutral on the lighthouses, but their differing views on Babi put them at odds. In short, they're a tangled mess of motives working together only because the alternative is being stranded in a foreign wilderness alone.  Off we go, into the wild unknown!  We now have access to a much wider, full map of all of Weyard than we did last game. As you can see, we're on the northern tip of Indra, a bit east of Gondowan. Southeast of it is Osenia (Australia).  Here's Angara, where most of the first game took place. We will not be traveling back to any Angaran locations from the first game for the duration of this game.  Over here we have Hesperia (North) and Atteka (South). You might recall the Shaman's Rod as the rod of Hesperia. I think I might've gotten these two mixed up in my older LP, but whatever.  Finally, this is the Eastern Sea, where we will be spending most of this game doing pointless side tasks. I think calling them "quests" overstates their importance a bit. 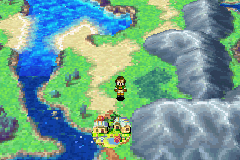 We don't get more than a kilometer before running into the first town.  Indra will be mostly themed after India, except when it isn't.  There's a few things of note in Daila here, but not many. Nobody bats an eye at us having surfed in via peninsula, they're all too busy dealing with the aftermath of the tidal wave. A few kids have gone missing, there's seawater all over, etc. 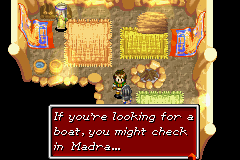 There's no boats here that survived, and I kind of doubt they had anything suitable for things beyond fishing excursions, so Madra is our next suggested place. It's at the south of Indra. 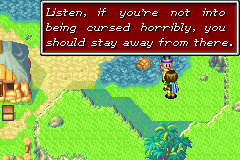 For immediate destinations, we are suggested to go to the Kandorean Temple nearby, and warned away from the Shrine of the Sea God. There's no real curse that would be a danger there, but it also isn't possible to do anything useful there right now. 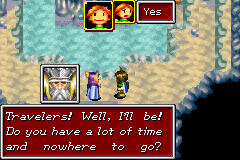 Yes. Hi. Welcome to the Lost Age. 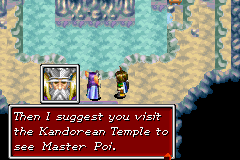 This isn't where we need to go to progress, strictly speaking. To reach Madra, we need to cross the Dehkan Plateau, but for that, we need the Psynergy granted by Master Poi. Just like the other temples headed by Masters, it's Psynergy but not actually Psynergy except it's totally Psynergy. 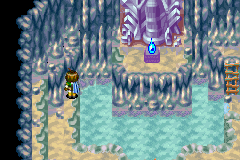 Want that thing, can't get it, it's not even important right now, whatever. 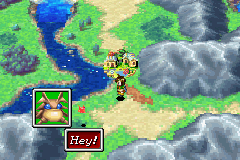 Time to start loading up on Djinn! |
|
#9
08-14-2016, 11:07 PM
|
|||
|
|||
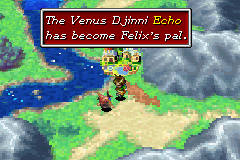 Unlike in Dark Dawn... 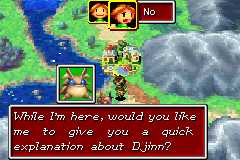 You can totally skip the tutorial on Djinn here. Echo is better than Flint any day of the week. 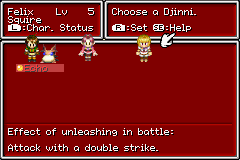 That said, Djinn-balancing here is going to be a bit trickier than in the first game. To put things simply but vaguely, we're not going to get a Mercury Adept for a while, but we ARE going to get Mercury Djinn.  Also: the Lost Age makes up for its much larger world map in comparison to the first game by making every route to anything of merit that much more circuitous and empty. 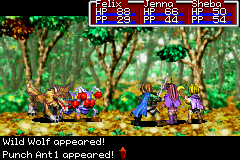 Despite the monsters all being relatively new types (although a few old ones will show up later) they're no harder here than they were at the start of the first game, Hard Mode notwithstanding.  Near as I can tell, even with the numerical boosts, most of the guys here don't even have much of an edge even with signature moves.  What? 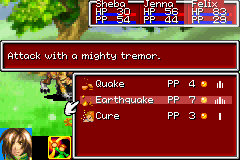 One difference is that we all start at level 5 rather than level 1, so we have access to a bit more here than we did at the start of the first game. It's not a huge difference, but it is a nice boost to getting the cooler Psynergy faster, and the XP curve for this game is more generous than for the first. 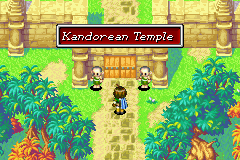 Oh man we can't get in I wonder if we'll have to sneak in using Psynergy. 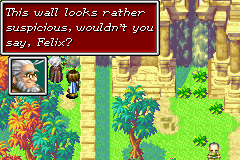 This instance I will grant Kraden being helpful, since a player who didn't play the first game might not think to use field Psynergy here yet.  In any case, we use Whirlwind and clean it up right quick. 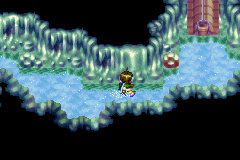 CHECK OUT THEIR TOP-END CUTTING-EDGE KNEE-HIGH WATER PHYSICS 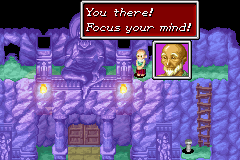 And now Master Poi yells at students. 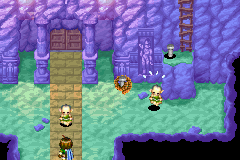 Most of them are utterly failing to levitate through meditation, at least with any degree of effectiveness.  Center monk shows the most promise. 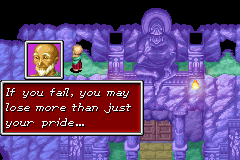 Even so, Master Poi isn't fully sure. 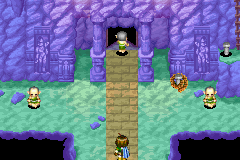 Oh, why not. Sure, go play in the death trap temple.  Of course, we follow him right in.  Good to see the tradition is alive and well here.  Status spells are, if anything, even more garbage here than in the first game. 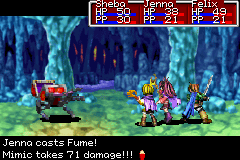 Also: while Jenna's base class lacks access to physical Psynergy, it bears repeating that the Fume line is more than sufficient as a replacement. 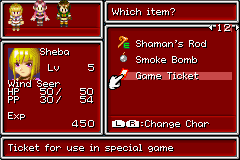 Game Tickets and Lucky Medals are still in this game, of course.  Also, they're not gonna wait for us to get a Mercury Adept before giving us those Djinn. We can't get this guy YET, but we will by the end of this update. 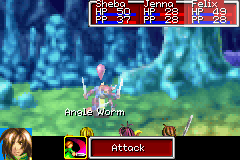 Your guess is as good as mine with this one, folks. 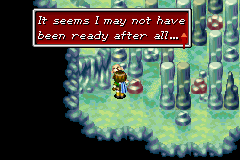 Monk didn't make it, but it wasn't so fatal after all, you see? |
|
#10
08-14-2016, 11:08 PM
|
|||
|
|||
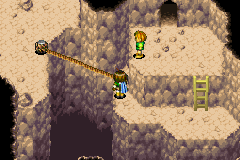
 Either he died to the encounters or he was unable to make simple jumps like these.  Waterfalls work exactly how you think they do, given Felix's incredible bravery in the face of ankle-high water. 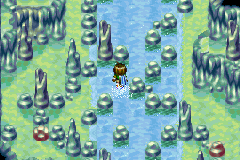 The waterfall doesn't supply enough force to keep us from moving against it, though. 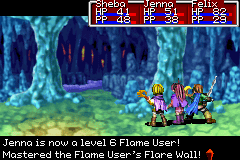 If Jenna leveled up enough in the first game, she'd get every Psynergy in the Flare line but literally no others. 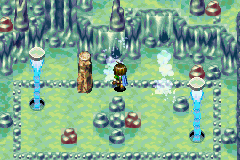 Anyway, this room. Using water pressure, we can push that pillar onto one of two platforms. Doing so will cause the other to be launched high enough to reach the upper level. 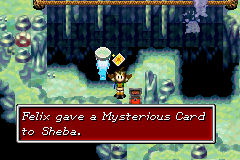 The bottom one takes us here, where we get the Mysterious Card. 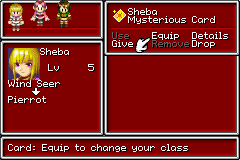 This is one of three items that let the wielder change their class. These new classes tend to have unique sets of Psynergy that rely on all four elements equally. They're not really bad per se, some of the Psynergy is quite strong, but it's hard to make a case for them when they require you to spread your elements so thinly. The Pierrot line, for example, has high Agility and its own physical Psynergy, but little else to recommend it, with most of its other Psynergy having a limited range, high cost, or useless status garbage. 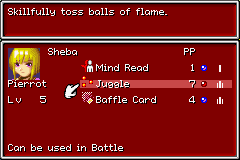 That said, it grants the Juggle line of Psynergy to anyone, letting you load up several people with Mars Psynergy if you expect to fight a boss weak to it (like the boss for this area).  Moving on. In addition to wading through puddles, Felix is a skilled tightrope walker.  Okay maybe not THAT skilled.  Lemme just fix that real quick.  What other monks do by dulling their ability to actually experience and enjoy life, we do by simply thinking a bit until a hand moves the scalding cauldron out of the way.  And then we fight apes. 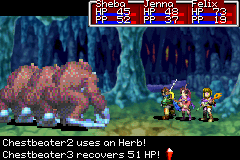 The Chestbeaters here are only dangerous due to numbers. Their Herb supply can't outpace our Psynergy. 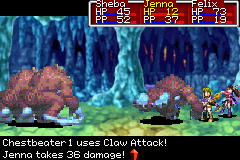 Okay, never mind, Hard Mode. Still, we're doing fine. 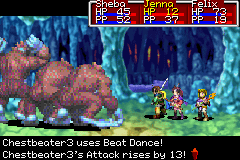 Attack boosts aren't a huge problem for us either. 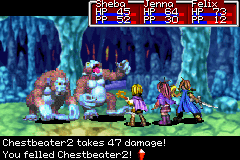 Constant Psynergy spam weakens all three at once, leaving only the one that spent its time gorging on Herbs alive. 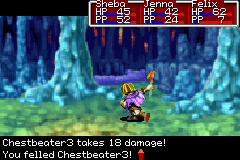 Even in Hard Mode, this is a simple fight. 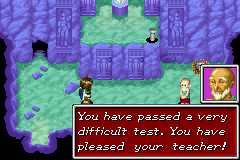 You are SO going to lose your teaching license.  Since we technically cleared his course, he is obligated to give us the secret power of Lash. 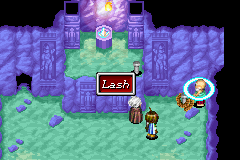 So why, instead of gaining the power to levitate, as would only make sense given the powers the other monks have displayed... 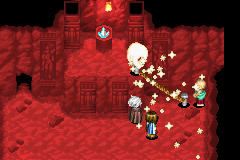 Do we learn the power to tie ropes to posts? I mean, okay, there's clearly a naval theme going on with this game given we're looking for a boat, so Lash is honestly a super-useful power in that sense (except where it doesn't really get used that way) but this is just arbitrary as HELL.  The reason Kraden is out here is to give the party a mouthpiece, but all he does is repeat the conversation we had last game in Xian, but expedited severely. I already gave y'all my thoughts on Xian.  Depicted: a lie 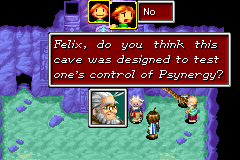 Who even designs a cave? This guy has a temple, yes, but it's meant to teach monks about meditation and enlightenment and stuff. Whatever. I don't know. |
|
#11
08-14-2016, 11:09 PM
|
|||
|
|||
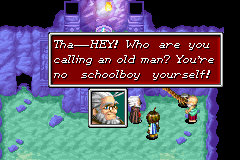 Also: Kraden is going to take offense to every single person calling him old. 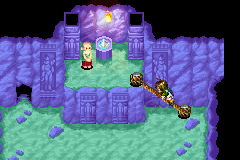 Anyway, up we go to get... 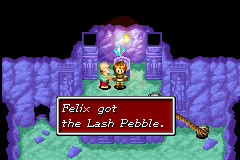 The Lash Pebble. Wow, you sure know how to make our ordeals seem worth it all, Camelot. 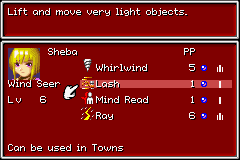 Lash is arbitrarily Jupiter-aligned, so I just-as-arbitrarily assign it to Sheba. 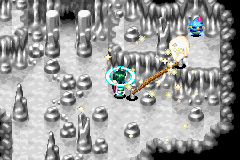 Using this, I can reach the Mercury Djinni here. 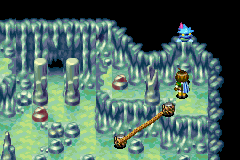 This again! 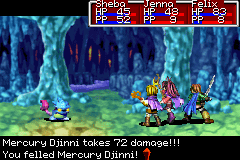 And this again! 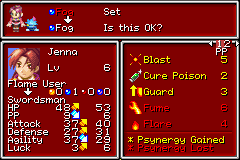 Now, while I could set the Djinni to anyone here, changing up their class in the process, I have no real inclination to do so. It'll be much harder to keep classes nice and orderly during this game because of the Mercury Djinn, so to start, I'm just gonna leave 'em all on standby. Worst case scenario, we summon 'em for a last ditch attack.  Okay bye. Next Time: Neville Longbottom and the Hunt for Djinn |
|
#12
08-14-2016, 11:55 PM
|
|||
|
|||
|
This is the golden sun game I actually played, and the one where I played a hard mode mod where every enemy got to act twice, had fixed move orders, and were given stat boosts to put even the most basic enemy on par with the boss of that area in the original game.
It was... actually pretty fun to me, and I remember thinking that while it didn't fix the biggest problems with the mechanics, it let what was good shine more because you had to actually think about it. Also I think they explicitly didn't buff the super boss because "There wasn't really much for us to do without either completely changing it, or making it needlessly more difficult."(What I remember reading.) Anyway, I was a stupid child when I played this game so I ate it up with my complete lack of literary knowledge. And since djinn were(and still are to me) just the coolest toy, I really still play and love this game even though it's an unreasonably wordy pile of bad writing and poorly executed mechanics. Last edited by Awkward Grunt; 08-15-2016 at 12:09 AM. |
|
#13
08-15-2016, 01:26 AM
|
|||
|
|||
|
Quote:
|
|
#14
08-16-2016, 02:49 PM
|
|||
|
|||
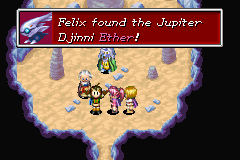
 Right, our next step is to go to an actual city and get actual info. Sort of. But first, a side thing for a Djinni. 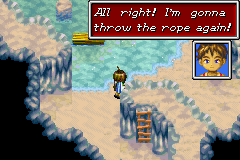 Riki and Tavi, the two boys who got lost following the tidal wave, are in here.  One of them got stuck on the upper cliff, and his buddy is trying to find a way to get him down.  When the two go off to find alternate routes, we use Lash to get a path up there.  This saves the kids, while Kraden acts as our mouthpiece. He does this a lot, because Camelot is committed as HELL to that silent protagonist thing.  The kids almost go chase a Djinni, but instead decide that not starving to death is a better plan. 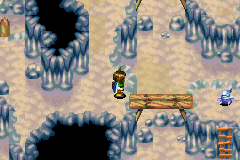 This leaves it to us to do the job. 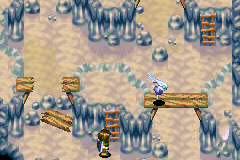 As the series progresses, Djinn that flee in the field outside of fights are more common, leading to a puzzle where you chase them around trying to disrupt them. 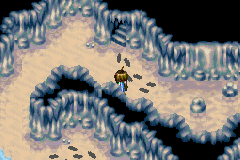 This one isn't very hard, though. 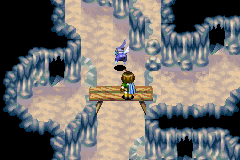 It's kind of cute and creative. 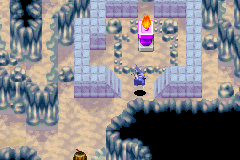 Here's the only actual puzzle element for this guy. 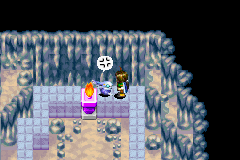 Cut off the escape route with the torch, then approach. 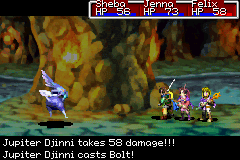 Not a very dangerous fight here either.  Have a Djinni, Sheba. 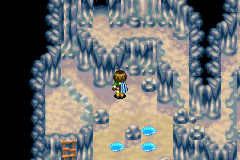 There's nothing useful for us if we try to continue, but we'll be back after we get someone who can cast Frost. 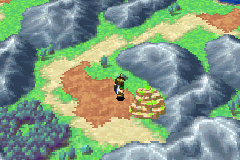 Next up is the route out of here, southeast of everything else.  The tidal wave's responsible for making the Dehkan Plateau here very unstable. The cracked ground has three levels: barely there, drops you down a floor, and hole you just jump over.  Stepping on tier 1 upgrades it to tier 2.  The fall doesn't hurt you, but it does show they actually made Felix look like he's falling rather than just Goomba-stomping like Isaac was. 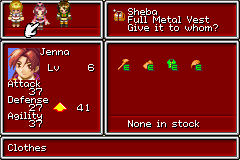 Hey look a completely normal set of armor. 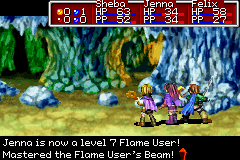 Jenna picks up another Psynergy type to separate herself from Garet, namely the Beam Psynergy.  Much like the floor, the pillars in the Dehkan Plateau are not-at-all stable. First jump is fine...  But the second jump results in dropping completely safely onto the ground and not being impaled by shards of rock. 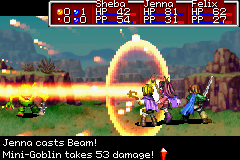 PSSHZZEWWW.  In a few cases, falling down is required to progress, while in others it's just a mild setback. It's kind of the same deal as the Tret dungeon in the first game, just expanded upon. |
|
#15
08-16-2016, 02:51 PM
|
|||
|
|||
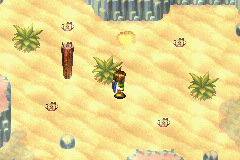
 The Lost Age is also really good at providing these kinds of backtracking shortcuts. 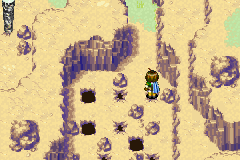 The trick here is just remembering that you can jump over holes here as well as anywhere else. 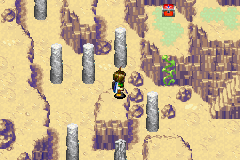 Treasure? 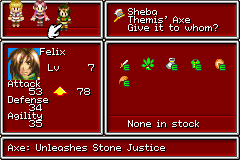 Treasure. The Lost Age is also a lot more generous with artifact weapons than the first game, and Themis' Axe here is the first such example. Needless to say, only Felix can equip it since it's an axe. There's also quite a few light blade artifacts early on, and even an example of a mace, so your party won't lack for options. 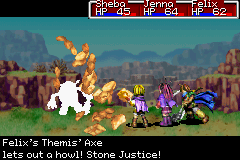 The Stone Justice unleash is a pretty memorable one, too. Shame it looks like junk in Dark Dawn. How do you ruin earthbending flying avalanches again? 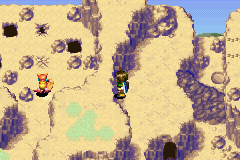 The Dehkan Plateau is our route from Daila to Madra, but it manages to spice things up by having the second half of the dungeon be Djinni pursuit. 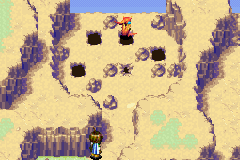 The Djinni follows the same rules that we do when dealing with the terrain. 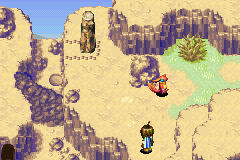 This means that it can weaken the floor too much for us to adequately pursue it, so we'll have to get creative. 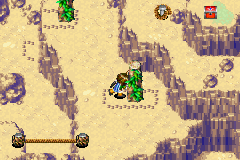 More inventive puzzle design here. Pillars like these were common in the first game, less so pillars you could climb. 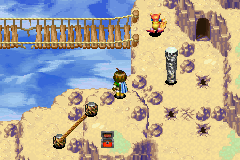 Also I went the wrong way, the implication is that you chase the Djinni and find yourself forced to find an alternate route. Whatevs. 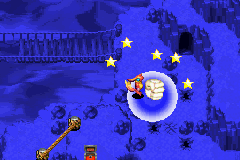 Either way, the Djinni uses its Pound Psynergy to smash the pillar out of the way and hurry along. 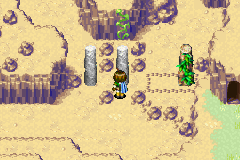 Here, the challenge is breaking the second pillar. The first is easy to break, but the second requires you to move the vine pillar. 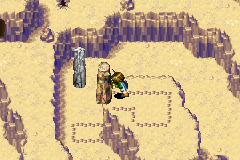 This, in turn, lets us push a pillar down to the ground as a platform. 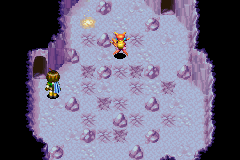 Here, if we just try to approach the Djinni by foot, it'll dunk us through the floor with a well-placed Pound. We need to get the drop on it somehow. 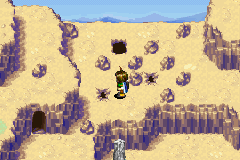 We can do that very literally here. 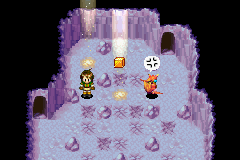 This dislodges the Pound Cube from the Djinni and causes it to flee again. 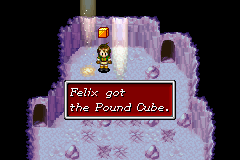 As the Djinni helpfully demonstrated, the Pound Psynergy lets us pound certain types of pillars into the ground. For reasons not properly defined, this counts as a Mars Psynergy, so we arbitrarily give it to Jenna (who otherwise has no innate field Psynergy). 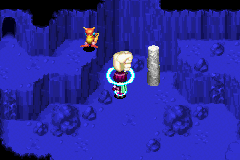 Shortly after, we get a chance to put it to use, by cutting off the Djinni's escape route.  At this point, it has no choice but to engage us. 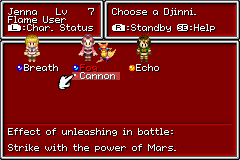 It does a thing but it also means we have one of each Djinn type now. So at this point, if you're relying on having all Djinni set, you're going to get some awkward class compositions now. 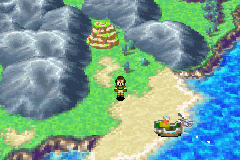 Our reward for getting through Dehkan Plateau is a boat! 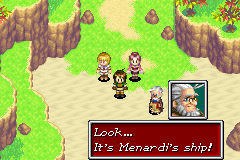 Quote:
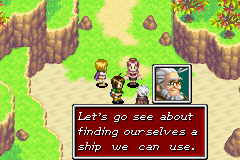 In the original text, everyone acts on the assumption that this is Menardi's ship and doesn't question it for a second. But again: it was docked in the cove of the Idejima Peninsula when it broke off from the mainland, and if that didn't do lots of damage, it was still on the south side of the peninsula when it hit Indra, hard enough to dislodge both peninsula and continent from their usual spots. Menardi's boat is totaled as hell (and I find it interesting that they call it hers rather than Saturos' when it's otherwise stated that he's the leader of the group, maybe she was the navigator). Similarly, the crew brushes off the possibility of actually sailing this ship exceptionally quickly given that their goal for this point in time, as well as for the foreseeable future, is not "lighthouses" or "go home", but instead "boat". They should try doing whatever they can to break into the boat, but since the plot doesn't want them to try, they don't.  Oh hey it's a tiny Tret. 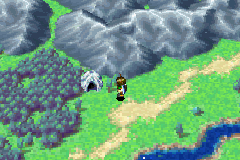 South Indra doesn't have much going for it, but it does have this cave here. |
|
#16
08-16-2016, 02:52 PM
|
|||
|
|||
 The puzzle within is perfunctory, but the tablet is definitely worth paying attention to. 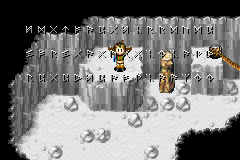 Tablets like these are strewn all throughout Weyard. 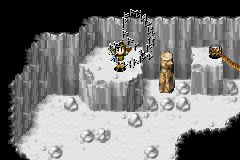 And written on each one... 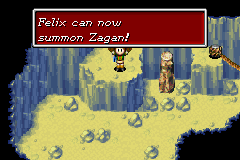 Is information for a new kind of summon. You begin the game with access to the same 16 summons you had in the last game, provided you can field the 1-4 Djinn of the element needed. These tablets provide dual-element summons, requiring two types of Djinni in varying numbers. Zagan is one of the simplest, requiring a mere single Djinni for Mars and Venus. These summons calculate their attacks from both elements, have some additional effects on enemies or your team, and provide boosts to both elements when summoned, making them considerably more valuable for parties not composed of single-element classes. I still likely won't bother for the most part.  Here's the town of Madra, we'll get to it in a bit. Right now, we want to wander around in this forest for reasons.  They're still doing this. This is a good place to tell players this sort of thing will happen, but the mechanic is still bad, and Weyard is so huge that testing every possible location on the world map for Djinn is awful.  You're a Knight now, Felix.  Madra is the first real town with things to do, comparable perhaps to Vault or Bilibin. 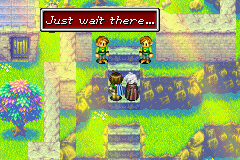 Unlike either town, they drag you into the plot from the word go. And unlike the first game, I won't be forcing myself into failed detours towards the actual objective this game, because there are none the game is plenty long as it is. 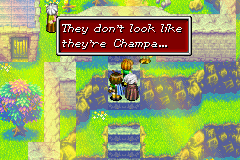 Anyway, the guards quickly let us through after confirming we're not Cham, and... hang on. Lemme just get the actual info from the town real quick like and summarize it. 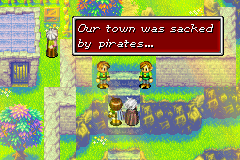 READY GO
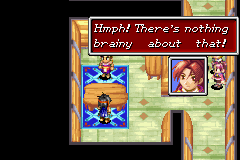
 While we CAN explore the ruins now, our ability to do things there is pretty limited, at least for the moment. 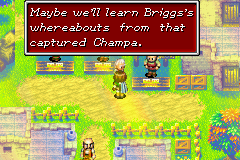 The leader of the pirates of Champa is named Briggs, but little else is known about them right now. 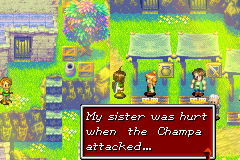 The item saleswoman is currently in bed suffering from flashbacks of the Cham attack. 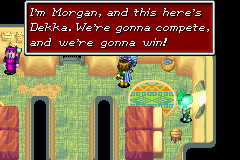 The inn holds some explorers, including a few former Colosso competitors gearing up for the next competition.  Artifact hat, only equippable by the girls, doubles as a healing ring. Got it? Good. 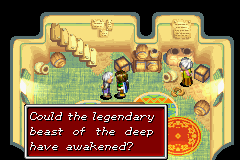 This house is way the hell more important than it looks (i.e. identical to every other house here). First off, this guy muses about the possible cause of the tidal wave.  Second off, he has a Djinni in his attic and gives us zero indication of how to get it. 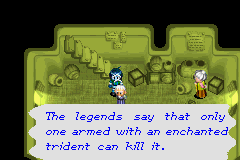 Third, he thinks that if you use a trident, you can kill the beast. This is not only extremely important and relevant, it is also about as much info on this as you'll get for most of the game. Camelot. 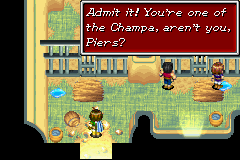 Anyway, let's go meet the prisoner, since this is how we advance the plot.  This is Piers, our Mercury Adept for the game. He will not be joining or acknowledging us now, because jail. 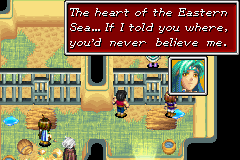 He's not from Champa, he's from a secret place of myth in the Eastern Sea. If you read the LP for the last game you probably can guess where he means. 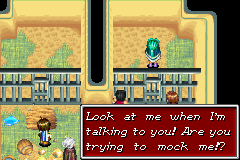 Anyway, his cage-rattler is angry as hell that his girlfriend the item saleswoman got injured in the attack and is taking it out on him. 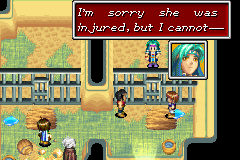 Piers is innocent and sympathetic, but even he only has so much patience. 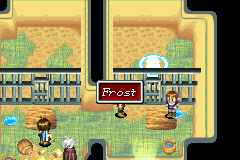 A few more taunts later, and he retaliates. |
|
#17
08-16-2016, 02:53 PM
|
|||
|
|||
 Just in case you missed all the townsfolk dialogue: Piers is a Mercury Adept.  Shin runs off like a punk while Piers just closes his eyes in regret. 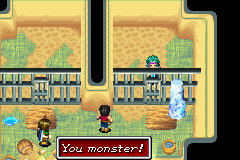 Needless to say, this freaks out his non-Adept buddy. 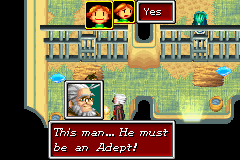 Anyway, you'd think at this point we'd go talk to Piers, get his side of the story, find out that boat is his, maybe even make a deal with him, right? We've had precedent for party members joining for less (Ivan). But no, here Piers barely acknowledges you. So as with Sheba before, let's give him a conversation.  First though: note that he has something he urgently has to do. We will not learn what that is until a good hour or so after he already has done it off-camera.  Quote:
 Ordinarily, if you mind read him, he notices the Psynergy but shrugs it off as you're not of his people. This is a TERRIBLE excuse and you really need a proper conversation here between Piers and the party, but it just doesn't happen. 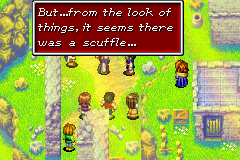 The townsfolk outside are getting antsy about their prisoner, who can apparently start fights without leaving his cell. 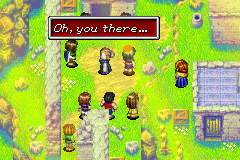 Anyway, time for the dumbest drawbridge yet. So the last time, there were all pseudo-reasons to block progress forward: Babi keeping us in Tolbi until we do what he wants, the lay of the land requiring new Psynergy, or a curse preventing people from leaving.  Here, passage from Indra to Osenia is blocked for reasons unknown. 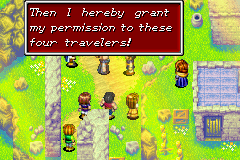 And for reasons just as unknown, we're prevented from actually going there until we see this scene by visiting Piers. The only justification for granting travel to the four of us is that the mayor's wife thinks we have kind eyes. They don't even need to have this as a roadblock if they just let you skip entering Madra, which is totally feasible if you just stop in for an inn stay and a weapons upgrade. All they'd lose is the meeting with Piers, which as written normally? You lose out on basically nothing but an introduction for a character who doesn't have any bearing on anything whatsoever for a few hours. There's no political reason to block passage to Osenia either; if it was Gondowan it'd make sense, but the closest towns to Madra in Osenia are all on good, or at least neutral, terms with them. And that drawbridge doesn't even need to exist if Indra isn't in physical contact with Osenia, which happened maybe two days ago, tops. Get better at blocking progression, Camelot. Next Time: Neville Longbottom and the Mayor's Journey |
|
#18
08-16-2016, 03:05 PM
|
|||
|
|||
|
I was proofreading the last update for Kalir when I noticed something very interesting: Camelot actually based Champa off a real life country, much like many of the other places in the game.
As in, they literally used their exact name. Champa was a Hindu state in South Vietnam that was known to have a large navy that was often used for piracy in the South China Sea. I wasn't expecting this game to base a location off what is nowadays a relatively obscure culture. (Granted, the leader of Champa would probably not have been named "Briggs." And people of Champa are referred to as "Cham") |
|
#19
08-16-2016, 03:13 PM
|
|||
|
|||
|
|
|
#20
08-19-2016, 08:06 PM
|
|||
|
|||
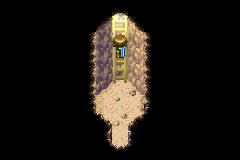
 While we can explore the catacombs under Madra this early, 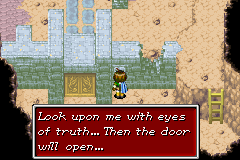 We get walled off pretty quickly by a door requiring Reveal. We learn it much faster in the Lost Age than in the original, but still not fast enough. 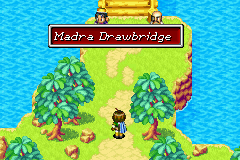 Screw this place. 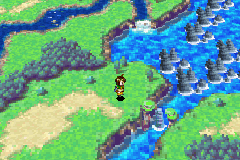 Next up, Osenia! Like Bilibin in the first game, this is another instance where we can go the "wrong" way first, with the only real wall for progression being a difficult encounter. I will be doing this, but I won't be able to defeat the encounter this time, not least because I'm on Hard Mode. 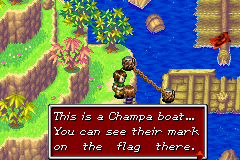 Here's where the Champan ship landed, but got totaled during the tidal wave. Needless to say, it's nothing like the Lemurian ship used by Adepts. 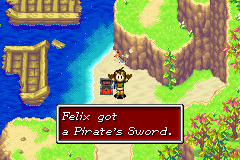 Sword! Jenna gets it. 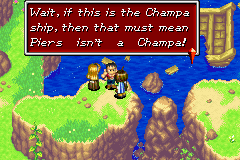 Yep, true. This is about all the evidence one would need for that, but angry townsfolk. This is one instance where I accept the easy solution of jumping right past the plothole as being impossible.  The Pirate's Sword unleash is inordinately fancy and inflicts sleep, making it by far the best early-game weapon.  For reasons, the bridge to Alhafra is broken and will be repaired long after we stop caring. To reach Alhafra, we need to go through the Yampi Desert.  In theory, the encounters here might discourage players from trying it and have them explore the rest of Osenia, down towards Mikasalla. But Mikasalla is, to put it plainly, useless and boring. So instead, desert.  This place has neither sandstorms nor mirages to ruin our day, just these weird wooden/stone (?) stakes. 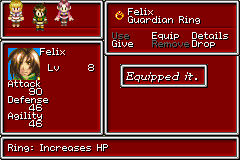 Guardian Ring! It gives passive stat boosts. Okay. 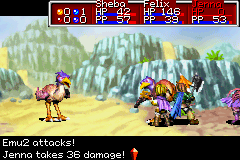 On an ordinary file, the encounters of the Yampi Desert are basically harmless. Here, though, emus are exactly as dangerous as they are in real life. 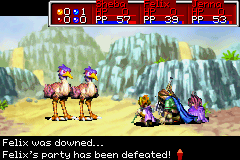 DED. 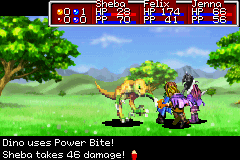 With this in mind, I start actually using strategy in my explorations of Osenia. I use Psynergy for tough fights but try not to overextend, use Sheba's higher agility for spot healing with Herbs, still never bother with the useless Defend command, etc. 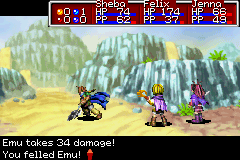 Once more unto the breach. 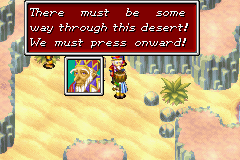 Here's the Madran mayors. They don't get names and matter precisely dick-all to the overall story, putting them on par with most characters in Golden Sun that get more screentime than they need. 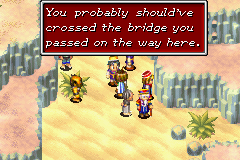 The basic thing is that the older mayor knows enough about the Yampi Desert that he could find a way ahead, but he wants to let his son, the mayor-in-training, navigate the desert himself. Look at how little I care. 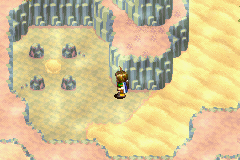 The path ahead is over here. We can't access it because shovels don't exist. 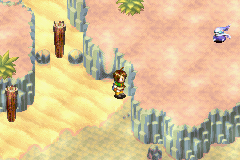 So for this area, the way to get the Djinni is to be psychic. You need to Pound the stakes in, but ONLY the ones that let you past. Pounding the wrong ones cuts off your jumping path to the Djinni, and it's impossible to tell at first glance which is which. 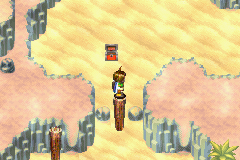 Let's just skip ahead to the part where I do that. 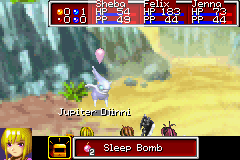 Since the Shaman's Rod hurts about as much as an unsoaked pool noodle and the Djinni resists all of Sheba's Psynergy, I'm gonna have her just go with item spam. 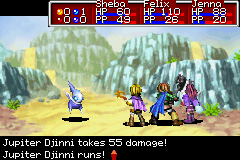 I saved beforehand. Screw you. 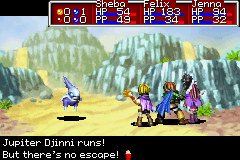 The second time, their flee attempt fails just as arbitrarily as ours do. Blitz here does a stun attack thing and upgrades Sheba to Magician but whatever maaaaaan 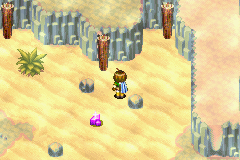 Nearly to the area boss, which is appropriately encountered halfway through the area. |
|
#21
08-19-2016, 08:07 PM
|
|||
|
|||
 To actually fight it, we have to divert its path as it tunnels around underground. It can only make 90 degree right turns, so.  Oh no an scorpion. 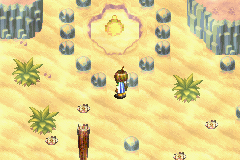 A couple puzzles later, and here it is. 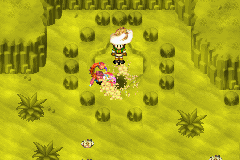 Chasing it onto the sand causes it to pop out and use the Scoop Psynergy, activating a pitfall trap. 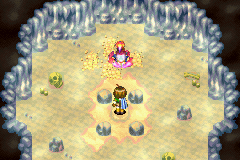 It then drops down into the pit after us, where we can't escape. 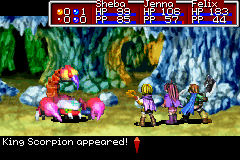 This is not the roadblock encounter, by the way. Still beefy, but by no means a roadblock. 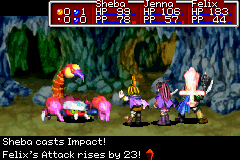 Since Sheba has access to Impact now, that's her weapon of choice for this fight. 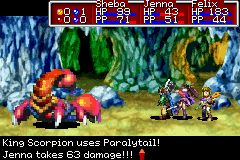 The King Scorpion has a few mean physical attacks and a Desert Gasp that can lower Defense. 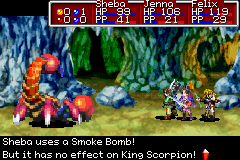 It's also virtually immune to status effects, as are all future bosses in the game. 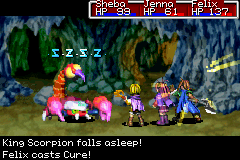 Not totally immune, apparently, but enough that it's not worth using anything that would cause them if that's the only result. 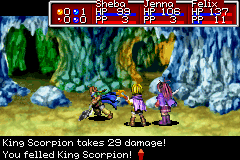 The fight takes a long time but isn't too threatening if I keep my healing up. 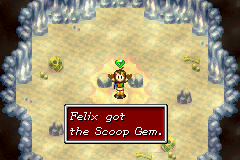 And now we can keep going. We open up a geyser thing by using Scoop on the sand we landed on... 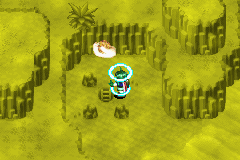 And in turn go back to this area. 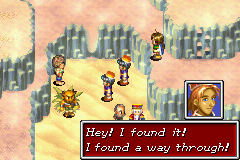 Inspired by other travelers, the mayors venture out about twenty paces from where they were camping and find the path ahead. Cool.  There are a few spots where Scoop can get treasure, spots visible with Reveal, but as you can see, they're mostly not worth it. 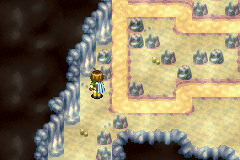 Hey it's that one room from Venus Lighthouse.  This chest contains the main reason to go this way rather than south to Mikasalla first. 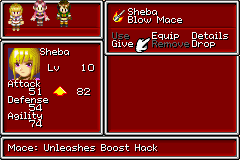 The Blow Mace finally gives Sheba a real physical attack, and you'll want that for the next main dungeon. By the time you clear it and come back here, the Blow Mace is soundly outclassed. 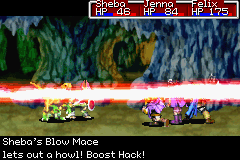 It has the same effect as the Elven Rapier from the last game, but slightly more visible. 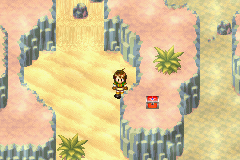 One last thing and we're more or less done here. 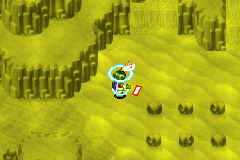 This isn't it. 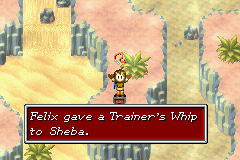 Here we go. This is the second of the three class-changing items, and it turns the wielder into a summoner of myriad monsters. It's not bad on the whole, really, and each tier of the class summons a different set of monsters so you'll never lack for animations, but it's mostly just kind of lame, not least because it's a healing class that can't heal outside of fights for reasons.  Yay we made it to Alhafra. 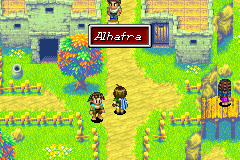 So, the city of Alhafra. I don't know what town it correlates to exactly, but the continent of Osenia is clearly meant to emulate Australia as a whole. 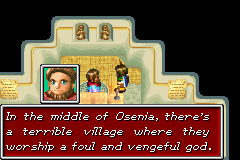 There's a cutscene shortly after you enter focused around the Madran group, but I want to interrupt it with this guy. Most of the town talks about the aftermath of the tidal wave hitting Alhafra as hard as anywhere, despite their newly-designed sailing boats being almost totally destroyed. But a handful of villagers, including the priest here, speak of the town of Garoh in the heart of Osenia, and usually in pretty unkind tones. They don't get any real details of it down, but suffice it to say that shaky stuff goes on there. If you head south first, you enter Garoh first, and most likely without any kind of information on the area thanks to Mikasalla being the only town in the way (and Mikasalla is, as established, boring). |
|
#22
08-19-2016, 08:09 PM
|
|||||||
|
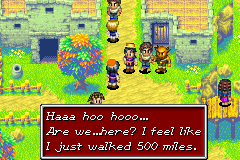
|||||||
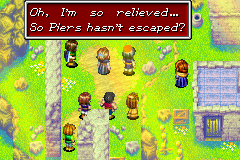
 This group arrives, with the old guy saying he feels like he could walk 500 more. Okay. 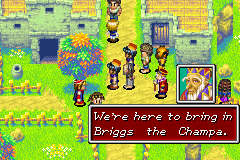 Just to remind y'all, if they bring in Briggs, they can get the truth about Piers out of him, and also all that stuff they stole from Madra. 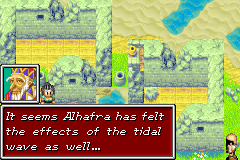 And since their boat was destroyed, and there's only one boat left in Alhafra that's not sunk (not really viable to sail, it's just still floating), guess what they're doing here. 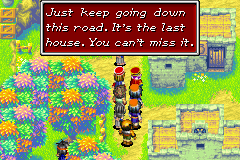 They go off to meet the mayor of Alhafra and we can safely forget about them for a while. 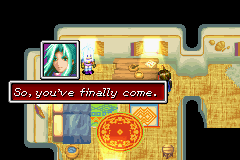 OH HI. Yes, Alex is straight up just chilling at the inn here, and just like Sheba in the first game, he is a completely missable encounter with zero bearing on what actually happens. He only speaks to Felix, and the rest of the party doesn't get out to address him. Guess what I'm doing here. Quote:
 Quote:
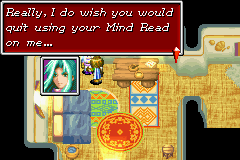 I just want to point out that you can ATTEMPT Mind Read on him, but it doesn't work, he just cuts you off. But that's not as exciting as... Quote:
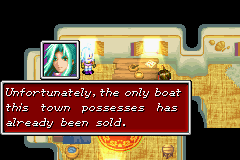
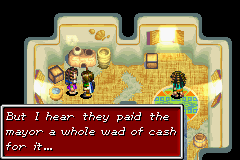 Anyway, Alhafra. Long story short, the pirates bought the boat with stolen Madran money and are trying to repair it. The Alhafran mayor doesn't care about their allegiance because their money is just fine with him. 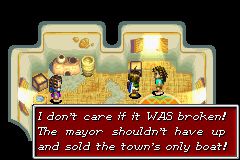 Alhafra's townsfolk have mixed feelings about this, since there's little done with reparations for the town itself while the mayor is off dealing with pirates. Have we established that the Alhafran mayor is corrupt and greedy yet? Good, moving on. 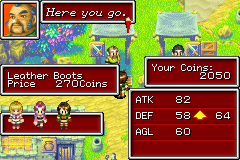 Alhafra sells ordinary boots. Cool. There are no upgrades to this outside of the Game Ticket slot machine that WILL appear later.  At the ship itself, there's a lot of things that need repairing. The main thing is the mast, which was split by the wave itself. 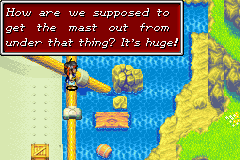 Most of the problems here can be fixed with mundane Psynergy, but the big-ass rock is a bit much for us. Not even Pound will dent that thing.  Going into the ship itself leads to Briggs, astonished that he's been followed so quickly by the Madran mayors. Quote:
 Quote:
 Quote:
 Since we lack a Garet to be a loudmouth acting against us, we need a replacement, so I suppose Jenna will have to do for now. Needless to say, this gets the pirates' attention, and they run out to see what's up. 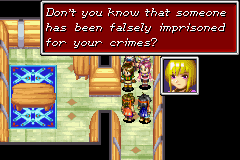 Quote:
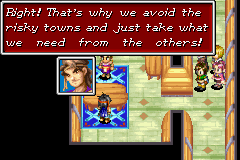
 In the original, Briggs' conversation with his first mate is basically the same (and pretty good), but the meet-up here devolves into a fight at Kraden's instigation, with this textbox, rather than Briggs being backed into a corner and lashing out. And honestly, Briggs' character arc isn't that bad for Golden Sun. He's displayed as sort of sympathetic, but who's turned to immoral ends to solve a moral problem (the starvation of his homeland). This scene didn't even need much editing. I mean, we don't have a reason to be going after Briggs here normally since we have piss-all reason to care about Piers if he doesn't talk to us, but once that's fixed, this is an easy one. 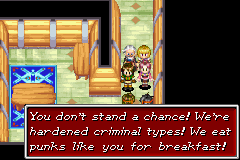 There's just one minor problem remaining. 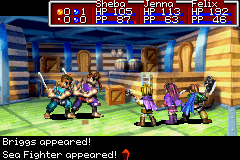 Briggs and his friend here? Between Hard Mode and going to Alhafra first? 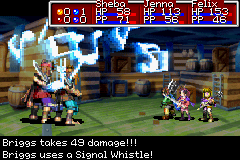 And with Briggs being able to summon more help with Sea Whistles? 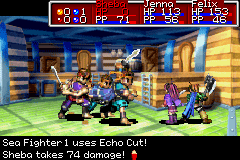 Hardest mandatory fight in either game, hands down. As in we can't actually win this fight as it currently stands, the pirates just sling too much damage, have too much health, and have practically endless numbers. 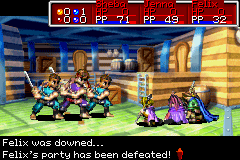 Once we do take down Briggs, we're done in Osenia, but we'll need to brush up on our technique (grind levels) first. Thankfully, Osenia's southern half DOES have a means to allow actual progression rather than just grinding, but we're not gonna like it.  If we go back into the Yampi Desert, we can see a route to the south leading somewhere else. This will be our eventual destination, but first I have a town to swing by.  Air's Rock (probably related to Ayers Rock, in Australia) is the next area, and it is a doozy. We'll save that for next update. |
|
#23
08-19-2016, 08:10 PM
|
|||
|
|||
 Right now, let's just make do with the town of Garoh, where they worship a terrible and vengeful god or something.  As with most prejudice and superstition, they miss most of the actual facts here, which we are going to discover through the ostentatious method of talking to them for a few minutes.  The town's front gate is a bit of an obstacle course, showing some reliefs spoiling the gimmick of Garoh.  Or you can call it foreshadowing, that's fine too. 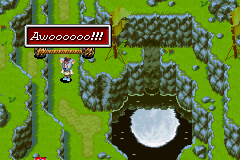 Anyway it's werewolves. Garoh has werewolves, it's pretty cool. 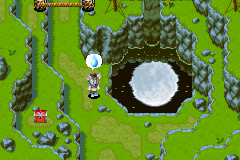 When this one notices our group, it panics and retreats. 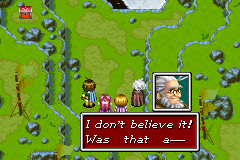 Quote:
In this scene, a minor text plothole comes up, in which the question is raised about whether werewolves exist on other continents, and if not, how Kraden could have even learned of their existence, being native to Angara. He neglects to answer this in favor of repeating that he's glad we found werewolves so he could learn about them, but this time more exasperated. He also doesn't really reinforce what Alhafra theoretically teaches the player about werewolves, i.e. they're terrifying and everyone hates them. It's just wasted potential, really. Not even that much, but still there. 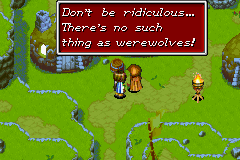 Unfortunately, Garoh is used to this sort of thing, and most of the townsfolk wear cloaks when outside to prevent changing shape. 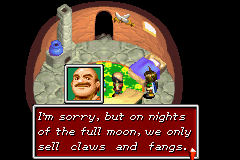 They're also really friggin' bad at disguising the fact that they are werewolves. Incidentally the equipment shops are closed. 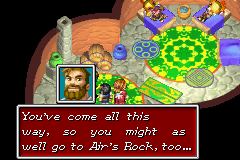 A few people here point us to Air's Rock, but past that this town is just as inconsequential as most of the rest. 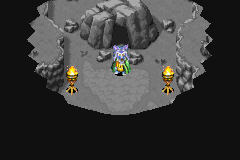 Later, another werewolf pops out of a solid stone using Reveal, then retreats when he sees the party. We cannot follow him into this stone because we do not have Reveal. Never mind that we clearly know the wall isn't there, or that it's a secret passage, or anything like that. It's as impenetrable to us as any of the cliff faces we've seen so far. This makes sense because reasons. Next Time: Neville Longbottom and the Cliffs of Insanity |
|
#24
08-20-2016, 11:31 PM
|
|||
|
|||
|
Mikasalla may be boring, but there are two Djinn you can get there right now!
But I understand if you want to do air rock first and get them on the swing back. also I'm pretty sure there's a tablet too in that area. |
|
#25
08-23-2016, 01:13 AM
|
|||
|
|||
 Today we're tackling Air's Rock, but there's a few more Djinn I want first. The more stat advantage I have going in, the better. Not because it's hard, but because it'll prevent my resources from draining as much.  Anyway, that map location has a random encounter Djinni. Good friggin' luck finding this guy without GameFAQs.  That makes two Mercury Djinn with Piers still further off than you'd expect.  There's one more Djinni in Mikasalla, making that about the only reason to hit this place.  Even the townsfolk know their town is more placeholder than a gas station along a Midwest highway. 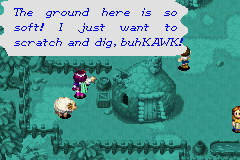 So the secret to get to the Djinni here is to use Scoop here, unearthing a secret tunnel to the Djinni's roost.  The chicken gives info on this with Mind Read, while the sheep just talks about eating grass. It's vague as hell, but still arguably more clued in than Sour. 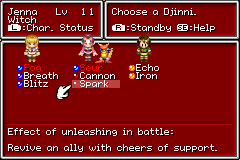 Like Quartz in the first game, Spark is by no means a sure thing. It's okay, Camelot, you don't have to ape Dragon Quest THAT hard. 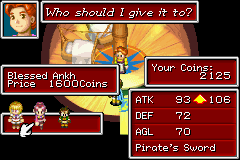 Weirdly, the only artifact weapon available for sale now is the Blessed Ankh. I guess inventory for each shop is only added when you check it? Oh well, it's an upgrade. 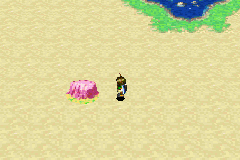 Anyway, here we go. This schnauzer bump here in the middle of the desert is where I spent a solid hour of my life. And remember, I know this place, I've been here before, and I sped up several sections with emulator sorcery. And I literally never do that. There are also no Djinn or plot revelations here, just a single Psynergy that we already learned in the first game, and which in no way helps us defeat Briggs. Hell, Scoop does more for our progression than the Psynergy here. Place your bets on what it is, of course, but it's not hard to deduce. 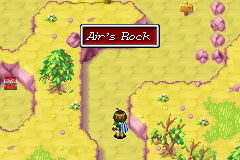 Here we go. 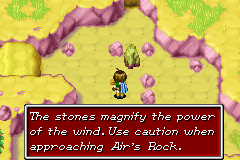 The premise here isn't that bad, of course. You cast Whirlwind on the stones, and they magnify the effects. 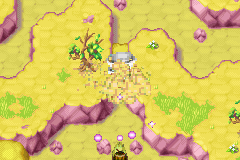 In short, this launches your Whirlwind forward with incredible force, blasting packed sand out of the way. 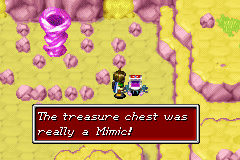 The problem is the route. In keeping with the overworld's style, our path to the actual exit for this first area (that larger Wind Stone) is incredibly circuitous, in no way helped by the need to approach the Wind Stones from slightly different angles to fire Whirlwinds at different sandbanks. 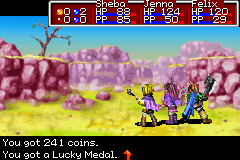 The encounters aren't too bad even with the constant hits to Sheba's PP, but they are a constant presence.  To make matters worse, there are a number of places where you can (slowly) climb up to the next area...  Only to discover, far too late, that you didn't open up that backtracking shortcut yet. 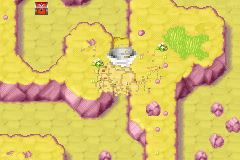 Air's Rock does have a number of treasures, true, but I know I'm skipping at least one of them here. The area is large enough that it's really not worth your time to take most detours. 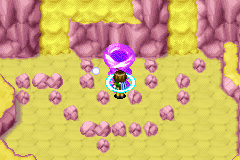 The reason I'm already at the end of this first screen is not because it's short. It is because nothing. Ever. Happens. There's nothing to screenshot because it all looks like the same boring desert mesas. There are no conversations, no treasures, no interesting terrain, not even so much as a new encounter (anything new in this area, we've probably found either in the first game or the Yampi Desert). 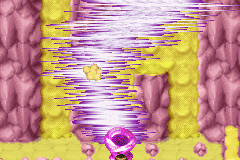 And now that we've reached this Wind Stone, we can start actually climbing Air's Rock instead of just wandering around the land at its base. 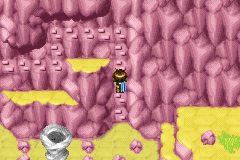 Again, you could totally just start the player off right here and miss basically nothing. Okay, there's two treasure chests, one of which contains an artifact weapon, but there are loads of areas you could throw those things. 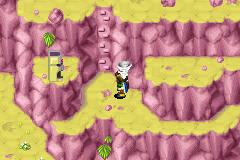 There are four Rocks like this in the game, one for each element, and they all prominently feature moai heads capable of using the element of the day (except for Gaia Rock where they just shove you off of climbing walls like total assholes. Gaia Rock is still probably the best one. I am not joking).  I have never known anyone who felt the need to backtrack here after getting Piers to obtain that treasure and you sure as hell won't catch me doing it.  Anyway if the moai whirlwinds hit you they carry you off.  Progression is half clearing paths by shoving pillars out of the way of climbing spots, and half flying on moai breath. |
|
#26
08-23-2016, 01:14 AM
|
|||
|
|||
 By climbing back down to the first area, we get the Storm Brand, which will serve Felix for maybe this area and the next. 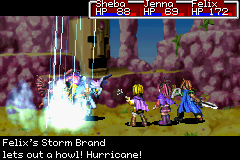 While the basic unleash effect is kind of neat, this rain-looking effect that he jumps and slashes into... 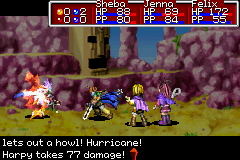 In the Lost Age, anything that debuffs Attack or Defense as an auxiliary effect staples on the graphics of Dull/Impair as a secondary thing. It's, um... a little weird, since that didn't happen last game (and if you import older weapons, they don't do it either). And that very same discrepancy was diligently maintained for Dark Dawn, because I don't know.  We had the moai help us earlier, and now they can drop us to the bottom of the rock wall. This isn't hard to avoid, just aggravating.  These ones in the floor launch us upwards, that's neat. 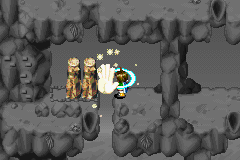 I can't pull this one off the cliff because it's in one of those puzzley ridge things that locks it off. This is not very clear. 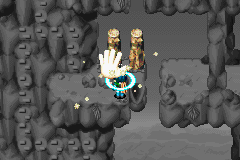 You need to first approach it from this side to move the pillar behind it. This constitutes a puzzle, right? 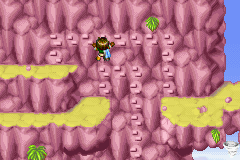 To make matters sillier, we need to go on this path first... 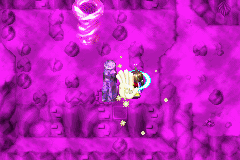 To move this out of the way... 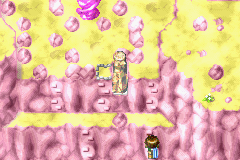 And then backtrack and take the lower of those two rock faces. If we kept climbing ahead, the mist would just have us repeat the screen. 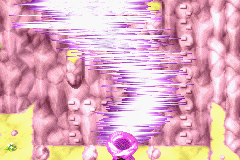 Again: none of this is an actual puzzle with any degree of difficulty in figuring it out. It is a long series of "did you go the right way first? Good, now take the other path. If not, go back and go the right way first." 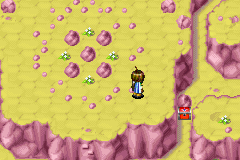 If you want, you can go back to the first climbing path to get that Fujin Shield there. No.  One last Wind Stone later, and we lightning-blast open the top of Air's Rock, revealing a passage inward.  Again: we first spent maybe 15 minutes outside Air's Rock approaching it, then about another 15 climbing up to the top. We are not done yet. We are about halfway in. There has been NOTHING here.  Our goal is to activate that giant moai with that Wind Stone. And wouldn't you know it, in order to jump there we need to hike all the way to the basement of Air's Rock.  To their credit, they try adding actual puzzles here. The two pairs of stakes here are set up so if we walk on one, it collapses and the other rises. To fix this, we just set them up where the pillars block one in the ground, while still letting us jump to others.  This doesn't make our route any more straightforward, unfortunately. We're still in loads of featureless winding corridors with most of the puzzles still consisting of "go the right way, and if you didn't, backtrack and go the right way". 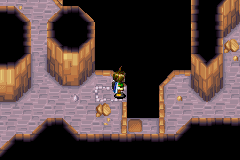 Here's one more puzzle that'll get our next multi-element summon. As you can see, we need to push a pillar, but it despawned due to sprite limits. Or something. 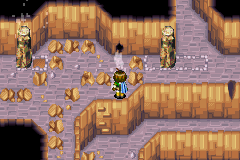 The actual answer is we need to launch that pillar via Whirlwind. Also depicted: air vent things that can only supply pressure to one of two paths. This is a "neat" reflavoring of the same "go a roundabout path and push a pillar then backtrack" things we have been experiencing all dungeon. Apologies if I'm cranky, our AC and Internet are in the shop. 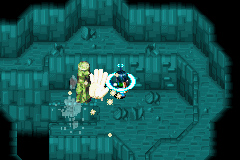 This one's actually a puzzle, since we need to Move the pillar into place for a stepping stone, but barehanded pushing would put us in the path of the air vent. This is as close to an actual puzzle as the entirety of Air's Rock has actually gotten. This is not hyperbole. 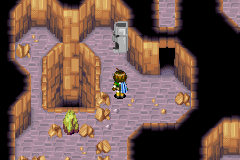 For extra backtracking fun, we can't actually do the puzzle for the summon until we activate this moai, done by activating the larger moai near the top. We will still be getting it anyway because the backtracking is mandatory.  YAAAAAY WE DID IT  The next evolution in circuitous path design: these spinner platforms that you can change the angle of with Wind Stones. 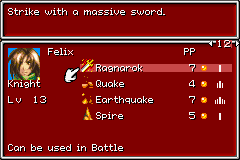 Somewhere in these doldrums, Felix grabs the Ragnarok Psynergy I never used in the first game. It's the physical Psynergy for the Knight class and it's pretty cool, let's use it. 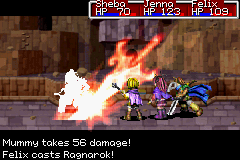 It fires a sword at dudes, and then explodes. Cool. |
|
#27
08-23-2016, 01:16 AM
|
|||
|
|||
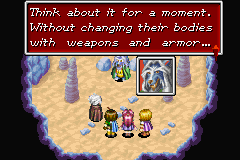
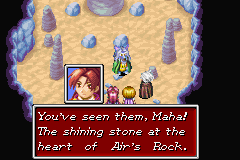
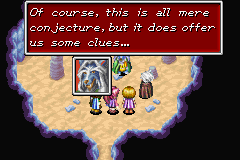
 The actual total final goal for the dungeon is in that beehive structure there. That contains our Psynergy of the week. 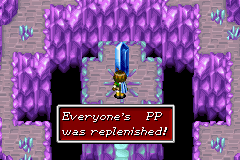 Are you getting the idea of how long this dungeon is yet?  Shortcut to the outside of Air's Rock! Y'know, in case you wanted to backtrack all over it again (or desperately need to make an inn run now that you've fully restored your PP and probably your HP if you weren't stupid). 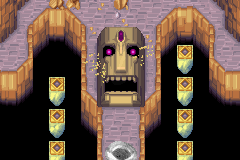 There we go. Get these moais up and running. 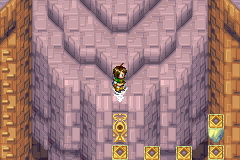 Come on Felix, just jump to the platform from the whirlwind. It's fine, you're immune to falling damage, Sheba's in the party.  No idea what the difference between Top Moai and Bottom Moai is.  And yeah, since it's basically on the way to the end of the dungeon, I GUESS we'll grab the summon.  Make sure you pushed the pillar to the right psychic spot, or everyone will laugh at you.  To go with Ocean Anime, and the Sword Anime we missed but might get later, we can now summon Flower Anime. She can inflict Sleep because something something essential oils.  Oh by the way, you can go to the left first once you get into this large antechamber. Don't bother before activating the moais, because it's not the right way. I've managed to instinctually learn this by diligent study of my Nintendo Power Strategy Guide, without which I'd probably never have finished this game.  Yay pointless headgear that Sheba wants. (It boosts Jupiter power, and if you made Jenna into an Illusionist, you're an imbecile.) 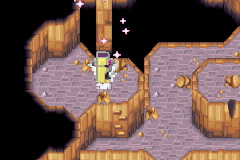 A few more floors of pointless garbage later...  Including this device which helpfully auto-backtracks for you if you don't go the right way first...  We finally make it to the beehive of knowledge!  The path behind us vanishes and Retreat doesn't work in here just so you have to use the power in question to leave. 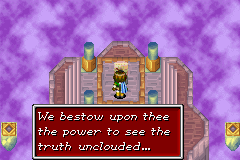 By the way it's Reveal again. The good news is that Felix, Jenna, and Piers get new and actually-unique Psynergy from their respective rocks. 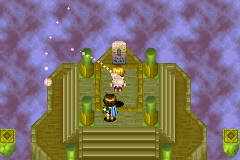 In every case it works the same, the respective Adept comes out, touches the stone, and floats into the air while absorbing magic rock powers. 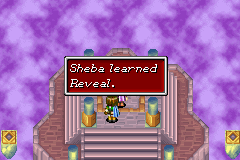 Yaaaeyy  I skip past the fine details of leaving the room and just Retreat out of here. 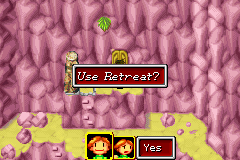 Twice. Air's Rock took an hour of my time. 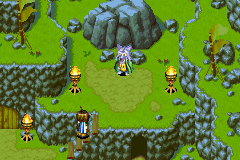 HEY LOSER WE'RE GONNA TURN YOU INTO A NICE CLOAK FOR PILLAGING COASTAL CITIES  As we follow him in, we also encounter the younger werewolf, which leads us on a merry chase (merry chase not depicted). 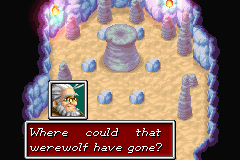 I'll give you a hint Kraden: they have Reveal, we have Reveal, there is a hexagonal pattern. 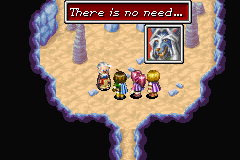 So, this conversation. This is one of the many conversations in this part of the game we don't need to have involving the full party, but which we have anyway. We gain no new knowledge about how the characters feel about different events, only the barest thread of worldbuilding that was already established through NPCs, and no headway in terms of our characters' presented goals (which, again, mostly involve going home or lighting the lighthouses). Yes, we learn more about Alchemy, except where we already know literally everything that is mentioned in this conversation by virtue of not being idiots (Air's Rock bestows Jupiter Psynergy, likely related to the Psynergy Stones housed within). Similarly, it gives zero answers about the actual question on everyone's minds, of "why are werewolves". Well, not exactly: it kind of sort of hints that Air's Rock's Psynergy turns people into werewolves, giving Jupiter even more powers that should really be a bit more evenly spread out among the four elements. And the worst part is that they split the conversation into two halves, neither of which has any value to it. (If you go listen to the second half you get a Djinni though.) Anyway, I'm still going to try to work with it to add actually interesting things here, so let's see... 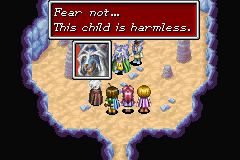 Quote:
|
|
#28
08-23-2016, 01:20 AM
|
|||||||||||
|
|||||||||||
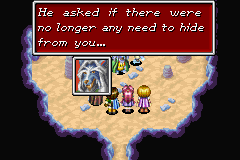
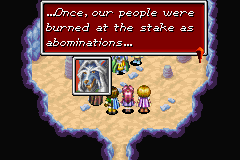
 Quote:
 Quote:
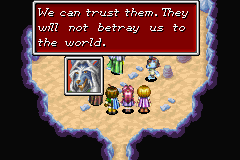
 Quote:
 Quote:
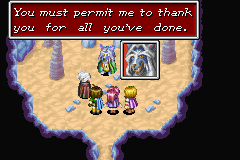
 Skipping past assorted nonsense that I can add to the second conversation. Remember, there's two of these. Why are there two conversations about werewolves here? I don't know. I have zero idea. Remember, werewolves don't come up in ANY OTHER POINT in the first two games. Hell, the lore here doesn't even work for Dark Dawn, since they have a nation of beastmen, but they're in the Kolima area with zero explanation or prejudice. (The good news is I have zero plans to LP Dark Dawn, since I already replayed it once and took a journal, from which I can safely conclude there is no way in hell I'm salvaging THAT story.) Meanwhile, Felix doesn't get lines in this game for reasons, despite having to answer for taking fully half of the party here hostage. Kraden and Sheba show zero sign of acknowledging that the former's employer is the latter's captor. We are not going to see a lighthouse for 75% of the game, and Alex has basically vanished for a solid 40% now. We are thrown into a sea of nothingness and Camelot is burning two full-party conversations on a completely isolated topic from the rest of the world... werewolves.  Screw it, fine, whatever.  The second conversation is, mind you, totally optional. But it gives you a Djinni, therefore I'm doing it. 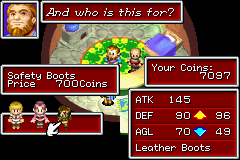 Now that it's daytime and Maha's spread the word that we can be trusted, we can buy these garbage Safety Boots at the shop. I will not be doing this. 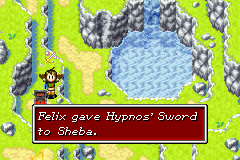 New Pirate's Sword, same as the old Pirate's Sword. 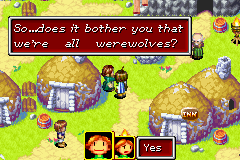 You can answer this in the affirmative, and the lady gives a disheartened howl when you do. Okay. 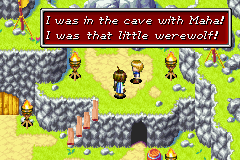 But hey, Maha says we can be trusted, and what the boss says, goes. 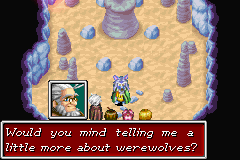 Great way to start the conversation, Kraden. Truly brilliant. Quote:
 Quote:
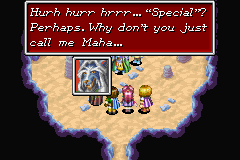
 This conversation is hilarious for the wrong reasons. Let's just pretend this screenshot didn't exist and we continue as follows. Quote:
 Quote:
 Quote:
 Quote:
 HEY GUYS GUESS WHAT TIME IT IS 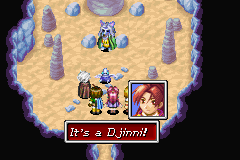 Quote:
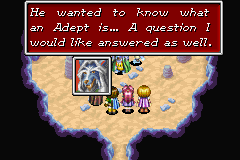
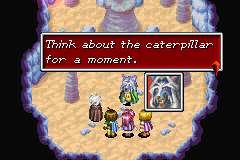
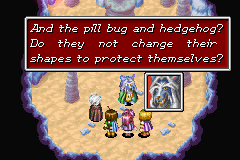
 Oops, I got bored and used the Djinni as a mouthpiece. 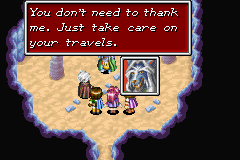 SO MUCH CRUFT in these cutscenes. Talking to the small werewolf (who needs Maha as an interpreter), the conversation about pillbugs, the entire thing I excised about how Garoh can't actually have Psynergy until Sheba realizes that wind wears down rocks and therefore Psynergy Stone particles could be carried all the way from Air's Rock to Garoh (yes, this is the explanation)... just why? Why is this the conversation we need to have here? There's no talk of lighthouses, of the seal on Alchemy, of boats... argh whatever I've beaten this drum too much already and it took me like five days to figure out what to even write here. Next Time: Neville Longbottom and the Pirate's Revenge |
|
#29
08-23-2016, 05:48 AM
|
|||
|
|||
|
Quote:
I have forgotten what it was. |
|
#30
08-23-2016, 09:43 AM
|
|||
|
|||
|
every time i got far enough to get piers, i had forgotten that chest existed
|