
-
Welcome to Talking Time's third iteration! If you would like to register for an account, or have already registered but have not yet been confirmed, please read the following:
- The CAPTCHA key's answer is "Percy"
- Once you've completed the registration process please email us from the email you used for registration at percyreghelper@gmail.com and include the username you used for registration
Once you have completed these steps, Moderation Staff will be able to get your account approved.
My writing can beat up Camelot's writing. Let's Play Golden Sun
Back to Let's Play
< 1 2 3 4 5 >
< 1 2 3 4 5 >
|
#91
 06-16-2016, 11:24 PM
|
||||
|
||||
 Quote:
 Quote:
 Quote:
 Quote:
Next Time: Harry Potter and the Warrior's Tournament |

|
#92
06-16-2016, 11:38 PM
|
|||
|
|||
|
11:30 PM - Turtle: to emphasize the point in your latest update, i never knew you could talk to sheba in tolbi
11:30 PM - Kalir: it's true, you can! |
|
#93
06-17-2016, 08:55 PM
|
|||
|
|||
|
Quote:
Quote:
|

|
#95
06-17-2016, 09:24 PM
|
|||
|
|||
|
OK. I thought that's what you meant but it was hard to parse.
|
|
#96
06-18-2016, 02:07 AM
|
|||
|
|||
 Hi. Mostly just wanted to give a view of the continent-and-a-half map now that we've seen basically everywhere there is to see in Angara. The bridge my cursor is on is the broken bridge that forced us to make a brief detour into China on our journey from Liechtenstein to Turkey. The bridge south of Tolbi leads to Gondowan and the endgame. The horrid pixelly mess to the west/south is probably just leftover dev garbage and is in no way indicative of the state of the land/sea in those areas.  I figure now is as good a time as any to do the Lucky Wheels sidething. It's basically the same as the slots in Pokémon. For every extra ticket you spend per spin, you unlock two more rows of symbol-matching, up to a maximum of 4 tickets to also add the diagonals.The symbols are easy enough to decode: boots, shirts, and rings all award exactly what they say they do and are your top priority since nothing else can be equipped to those slots except the prizes here for some reason. Hearts and stars give consumables and therefore are not worth my time or yours. Moons are wild.  It's also Yahtzee: each time you spend tickets you get 5 spins, and you can lock as many or as few wheels as you're so inclined.  There's only about three of each class of prize to be had, but again, you don't have literally anything else in that department except maybe the Healing Ring from earlier. The War Ring I got here but then savescummed over because I screwed up my ticket count earlier is one of the possible rings, which basically casts Impact when used.  By this point, I personally have about 28 Game Tickets. To maximize the odds of getting useful junk, I'm spending them 2 at a time. I'm not really sure what the best strat overall for it is, but that just strikes me as the most economical given that it's pretty likely to actually give returns.  Moving on to the prizes. (Note: this was a false positive and got me a Star prize when I was CLEARLY going for Boots.)  In the event you are so horribly scammed, you get a Psy Crystal.  One of the three boot types are the Quick Boots, which do exactly what you think they do. Mia gets our only pair.  Ivan and Isaac get Hyper Boots, which come with a critical hit booster. This isn't even the only way to stack crit chance in the game.  Going to Shirts, the Silk Shirt is Mia-exclusive and grants a Luck boost, because that seems like a stat Mia needs more of or something. (Why would they make one out of three random Shirt prizes you get exclusive to one character? I dunno.)  Garet gets stuck with Fur Boots because they boost Mercury resistance and he kinda needs that.  Isaac gets an Adept Ring, which can restore PP. Don't ask why this is given out as a carnival prize in a place where nobody has Psynergy except their ruler. (Not pictured: Running Shirts for a few others. Guess what they do.)  Anyway, to the colosseum. Like any good sporting event, there's gambling and scalpers outside.  The soldiers recognize us right at the entrance, which is good because the line to get in is monstrous.  Half the guards give us guff for being a tiny pipsqueak who can't even bench a log.  The other half tell them that we've earned our place through well-placed trust in their leader lying.  Speeding along. In fact, even past the sepia-tone, because one thing that gets brought up here is that Isaac is the only one competing. Before this point, Babi says "hey, why don't you all enter Colosso?" and Garet gets really hype about it, but then he shoots down everyone by notifying them here that Isaac is the only one to compete. The sad thing is, if you think about it even medium hard, there's a perfectly fine justification for Babi restricting it to Isaac alone that simply isn't ever brought up (which I'll explain in the update after this). Come on, Camelot, work with me here.  Quote:
 Quote:
 Off we go.  So how Colosso works is that it's basically an obstacle course culminating in a fight.  In other words, American Gladiators. For each of the three fights, we'll get a new course.  They say "explanations", but honestly a lot of them are so mind-numbingly simple they needn't have bothered. The Lost Age, if I remember right, does this obstacle course race segment just generally better in that regard (at the cost of it being significantly harder in both the race and the fight at the end, and also only making you do it once).  What Colosso has that that segment doesn't is the ability to cheat like crazy.  For example, here's the first area of the first stage. If we were to do it legit, we'd just shove the pillar down and make a bridge, as we've done countless times before without needing explanation. |
|
#97
06-18-2016, 02:08 AM
|
|||
|
|||
 Here's another stage, with a timed bridge segment or something. As you might've noticed, quite a few of these segments have something that can be interacted with from the audience.  So what we can do is swap around everyone's equipment and Djinn to give them the Psynergy they need...  Changing up our classes in the process...  And then park them at the spot we want. Ivan's Shaman class, by the way, is terrible. The Bolt like of Psynergy is basically strictly worse than the Slash line. The fact that it currently matches up just fine to the Ascetic class he used to be AND has healing (and later down the road, revives) says more about the class balance curve than it does about the Ascetic class in particular. I'm still changing him back after this because I SWEAR he's going to get the upgrade to Volcano soon.  Anyway we've parked everyone somewhere they can cheat.  Before the first match, we can talk to most of the warriors here. Azart is wrong: he's not rated as second-best, he's just seeded second. (And will be our first opponent.)  This guy here, Satrage, is going to be our second...  And Navampa here, from Gondowan, is our third. Spoilers, I guess.  There's a few others here, each with their own names (Morgan, Galahad, Dekka, and Buford, if memory serves) but this is the only scene they show up in. Well, no, I think one of them shows up later down the road in the Lost Age somewhere.  Anyway, let's do this.  Blatantly Cheat!  Like, okay, I'll grant this one, where if done subtly it's possible the audience won't notice it.  Rapidly accelerating plant life is not subtle.  MIA YOU ARE NOT GOOD AT SUBTLETY.  Okay whatever let's clown this entire thing.  If you're on point with everyone else CHEATING, you have more than enough time to go for these garbage treasures in the side routes.  Well... not garbage. Not when Isaac is your only party member. Even so, half the classes he could be at this point can self-heal, and all of them have physical Psynergy. If you're really dumb enough to saddle him with Jupiter Djinn for this, that's on you.  As for the obstacle courses... they're not really BAD, but they're trying to pack entire puzzles into these screen-width rooms. You can do that, Link's Awakening proved it, but they also couldn't afford to make them too detailed since you're on a pretty strict time limit for them.  Anyway, the first gladiator to the center gets and immediately equips the stronger of the two pieces of armor.  Azart gets stuck with the leather glove to compete with our iron shield. I mean, we can still use all of our Djinn no problem and call upon way strong summons to destroy our foes, but it's the little things that matter.  So, how hard can a match be against an opponent with no skills outside of their basic attack and a limited supply of items?  Meh. As long as you don't outright forget to heal, you're fine.  The Oil Drop is dangerous, but that's about it.  He also eats both nuts back to back and full heals, but whatever, at this point his action is literally the same every turn and it at no point threatens our life.  Good work getting those Nuts. I mean, I can heal myself for the same amount simply by thinking hard enough about it, but nah you did good with those side puzzles. |
|
#98
06-18-2016, 02:09 AM
|
|||
|
|||
 I don't think he appreciated my taunts.  I'm a little disappointed. If this was developed later in the JRPG life cycle, they'd give these guys non-Psynergy moves perhaps, making them still tactically interesting as opposed to just thematically.  At some point I have to remind myself that they likely developed Golden Sun for a younger audience. This does not excuse Dark Dawn in the slightest.  Next round is a new arena with entirely new seats, so that's cool.  While I'm here and have Djinn changed up, Garet's base class. Warrior probably differs from Soldier in ways I dunno. By this point, Garet's picked up Heat Wave, which has the same element and cost as Volcano but is a physical Psynergy and therefore infinitely better.  He also has both Guard and Protect, which do exactly what you think they do. We're still keeping him as a Barbarian.  The obstacle course does not get appreciably harder.  This isn't even a thing we could appreciably fail at. OH NO IF WE FAIL TO HOLD DOWN A DIRECTION ON THE D-PAD WE WASTE TIME SLIGHTLY.  Good. Better.  Aaaaaand you ruined it.  Just go down the middle one. The challenge here comes from you not being able to see the single-tile landing spot. Also spoilers: don't go for the treasure chest here, not worth it.  This is probably the single most efficiently designed puzzle here and it's one we can skip.  Oh, and the Wall has a spot where Isaac, specifically, needs the Growth Psynergy. Don't do it. If you miss the jump you'll waste just as much time casting Growth as you will just climbing back up.  Okay cool.  So wait, does that mean any Xianese spectators could cheat on behalf of their favorites similarly? After all WE ARE CLEARLY USING CHI HERE  I have no idea how this gets unnoticed.  Let's get this over with!  OH NO I MIGHT NOT HAVE TIMED MY JUMPS EFFICIENTLY ENOUGH  Hey Mia how's it going.  Continued adventures of the Wall wasting your time: you can only get this treasure by pulling the pillar away, SLOWLY climbing up, and then SLOWLY climbing down to grab absolutely nothing of use.  One interesting thing is that even outside of the personal stat bonus of the equipment in the center...  You fight a gladiator with higher/lower stats too. At least Satrage gets a commemorative T-shirt.  And a commemorative beatdown.  You keep all the items you didn't use up between matches, for what it's worth. If you're hellbent on running Enchanter Isaac, you'll want to save the Nuts for the last match.  But whatever MAAAAAAN |
|
#99
06-18-2016, 02:11 AM
|
|||
|
|||
 Unlike Azart, Satrage will occasionally waste a turn being self-congratulatory about his in-depth knowledge of battlefield tactics.  He will also waste a turn trying to tag you with Delusion, which doesn't actually mean anything because you're already using Ragnarok/Planet Diver/Cutting Edge/Astral Blast.  Think over what you've done here.  I don't feel accomplished here.  You are severely overselling your ability to duplicate a puzzle that was in the first area.  This obstacle is actively controlled by an operator, down in the right. We'll be going to a bonus area soon that'll grant us the Halt Psynergy, which lets us briefly immobilize creatures, except not in fights because haha you didn't seriously think you'd be able to debuff enemies did you? We could use it on the operator to completely lock the pistons, rendering this area trivial.  OH BOY, FREE CLIMB UP THE COMPLETELY LINEAR PATH  In the interest of obtaining a thing in a slightly easier fashion that is blocked in the same way it wasn't on the Wall, I reclass Isaac to Barbarian for the last fight, granting him Growth.  HOWEVER WILL WE FACE SUCH A DASTARDLY OBSTACLE IT IS COMPLETELY UNKNOWN TO ME  I like how each area includes something where Garet can just move a pillar an inch to the right.  Ivan continues to violate OSHA standards.  Last time, I promise.  Hello, spectators I have never met! What an ordinary match this is turning out to be!  The pistons aren't even that hard, just run diagonally towards them and the exit and it's literally impossible to fall off.  Have fun with your rapier, nerd.  Like Satrage, Navampa will occasionally defend instead of doing actually useful things. Unlike Satrage, Navampa actually stands a chance of winning.  Oh hey, maybe status debuffs aren't useless after all.  14 Defense? That's... not terrible.  OH WAIT IT RESTORES AFTER A SINGLE TURN BECAUSE GOLDEN SUN IS A WELL DESIGNED GAME  New strat, same as the old strat.  Here's the only reason Navampa actually poses a threat. Unlike him, you don't magically recover from status effects just by blinking hard enough. If he tags you with this, he can and will combo you into paste.  In any event, he is exactly as hard as the enemies before him, has the exact item-based limitations on his only dangerous techniques, and is exactly as boring as the prior fighters.  Despite this, apparently three simple obstacle courses and fights to the moderate exhaustion is enough to drop Isaac. Who knew.  Everyone is very concerned for his health, of course...  No harm done. This happens at the conclusion of the fight with Navampa whether you win or lose, by the way. Last edited by Kalir; 06-27-2016 at 03:40 PM. |
|
#100
06-18-2016, 02:13 AM
|
|||
|
|||
 Either way, you wind up back in here and the plot moves on.  Quote:
 Quote:
 Anyway, that's Colosso for you. It's not as bad as I complained it out to be, really. It just needed a little more polish to ensure the fights themselves were a LITTLE more interesting. And given the time limit, most of the obstacle courses were fine. The Wall and the conveyor belt could be just straight up thrown in the bin, though. Next Time: Harry Potter and the Terrible Trivium |
|
#101
06-19-2016, 12:39 AM
|
||||||||
|
||||||||
 Hi. Because I got bored or am a hypocrite, I've reclassed everyone but Isaac. Ivan's using the Shaman class I most definitely called garbage last update, Garet's an Enchanter because AS IT HAPPENS he gets every class of buff that exists, and Mia takes over Ivan's old role as Ascetic. I might change them up even further for the next update, for reasons I'll explain once we get our sixth of each Djinni.  Anyway, first things first, we have to talk with Babi.  Whether you win or not, Babi is still impressed, but defeating Navampa still earns you a reward.  That is, assuming a helmet that boosts the encounter rate is your idea of a reward.  Quote:
 Quote:
 Quote:
 Quote:
 Protip: if someone is saying this line, they are probably not a person to be trusted. Quote:
 Quote:
 Quote:
 Again, Babi's villainy is a 100% optional missable thing prior to this encounter. You have no real reason to distrust this guy other than that he's rich and powerful. Your party doesn't even have an internal discussion about the pros and cons, because there are no real cons except not wanting to back the establishment. Likewise... there's no real pros either? Babi offers you whatever you can think of, but nobody can really think of what they want. Ivan responds with "I haven't even considered my own wishes lately", which is more like what I'd respond with on my birthday rather than what you'd say when presented with a fiscal genie. Also: the thing about Venus Lighthouse only being accessible to Venus Adepts, and so on and so forth, IS a plot element that comes up, but it shows up later than here. And it gives Babi the PERFECT excuse to only send Isaac into Colosso: to prove that yes, he can get into Venus Lighthouse and get him the information he wants. You also might note that Kraden is barely mentioned here: his token mention here was an afterthought of mine, and he literally doesn't come up in the plot, despite Kraden's backstory with Babi being one of the rare few instances of character development and contrast for Kraden in The Lost Age. You could argue that hey, we don't need even MORE text in Golden Sun, but the problem is that of all the text we do have, so little of it is actually plot relevant. We got like thirty text boxes on the differences between ki and chi, and maybe four about why Saturos and Menardi are actually doing what they're trying to do. I'd gladly take some exposition about Babi's connection to other characters we know over him explaining that THE DRAUGHT OF LEMURIA IS FOUND IN LEMURIA AND IS TAKEN BY THE CITIZENS OF LEMURIA. Finally: I cut out a HUGE number of screenshots here. The sad truth of the matter is that, as with most Golden Sun cutscenes, they simply forget to write actually critical information until way beyond when the player could infer it. I'm hoping my writing cut to the chase a bit, but even so there's a lot of stuff about Babi's backstory that doesn't honestly fit into the whole "negotiate for Sheba's release and try not to give the tyrant immortality" thing I was going for.  Quote:
 Also, as soon as that cutscene ends, Babi retires to his room, trying to get as much sleep as he can to prolong his life.  We can "borrow" his Cloak Ball here, and will be doing so. Remember, he needed that to survive Altmiller Cave at all, so that really is the last bit of draught he has.  We're not gonna use it now, but we do want it on hand while we backtrack to the first part of the game.  To my arbitrary class changes. Mia's Ascetic class is functionally similar to Ivan's, save that she uses Mercury instead of Jupiter for the offense Psynergy, and has Wish instead of Ward.  Ivan inherits Garet's old Growth line of Psynergy as well as gaining the garbage-level Bolt line of Psynergy. It's weak enough that he'll be likely to get its third and final tier very soon.  Garet's Enchanter class is a bit stranger, though. As mentioned, he has Impact, Ward, and both Guard and Protect, letting him increase all kinds of stats for the party. He also has status effect Psynergy to use on enemies, namely Delude and Sleep, and we don't care. One conspicuous absence is his ability to use multitarget offensive Psynergy, a weakness I am 100% happy with.  He makes up for it with Astral Blast, the Jupiter physical Psynergy. It shoots stars!  Anyway, to make it back to Kalay, and in turn the rest of Angara, we need to take the Gondowan Cave south of the Karagol.  I like that literally no two sources can agree on what exactly kobolds are supposed to look like.  Eventually Ivan will be useful, right?  I got bored, sir.  HAHA WHAT EVEN ARE WE GONNA DO WITH THIS TRASH? GET OUTTA HERE LOSER. |
|
#102
06-19-2016, 12:40 AM
|
|||
|
|||
 And that's it. Gondowan Cave is basically just a rehash of Goma Cave, because that was an exciting and innovative dungeon that needed to be revisited. I still like you, Mercury Lighthouse.  The cave deposits us just southwest of Kalay. And since we've created a shortcut through it, we can get back to Tolbi with ease now.  We have three places to visit here. First is the cleanest one to tackle, Vault.  You all remember this guy, right?  Well, now we can get to them.  By giving the dog this bone we've been hoarding literally all game...  They will get the hell out of our way cheerfully indicate the spot of a hidden entrance to the Vault Cave, which we could have never inferred from the hexagonal pattern denoting Reveal entrances.  Zounds and so on. If we used Mind Read, the dog would be less ambiguous, so that's cute I guess.  Mimic. Again.  It's exactly as hard as any other mimic in the game and drops the same kind of mostly unremarkable treasure.  Hooray, now Ivan has the useless status effect instead of Mia.  Vault Cave isn't very long, and this right here is the preview for the one actual puzzle in it.  We can also get a prize by using Whirlwind here.  Since setting Ivan with any non-Jupiter Djinn causes him to lose access to the Whirlwind Psynergy, we have to do this. (There is a set all/standby all shortcut of R+Select, though.)  Our reward is a pretty solid glove that also boosts Attack. I forget who gets it.  Every day I'm freezin'.  Here's the actual puzzle. The water droplets, one of which is currently covering Isaac, fall at four points, and you need to get the torch past them without a droplet hitting them. (No, Garet can't reignite the torch.) Given how they're spaced, you basically have to travel along the circuitous side paths.  Anyway, the main goal is to open this door and let out the water pooled up in here so we can take that ladder.  Doing so fills the lower area, requiring you to take the path blocked by that puzzle to return.  And that's it. If you didn't ring the bell (or if you did the first time and then assumed it was meaningless), the Djinni remains over there and you have to redo the area, because punishing the player for not being psychic is always a good idea.  Sap drains HP, but its effect on Ivan's class is even more interesting. As discussed, your character's classes are a factor of their elemental levels, which Djinn are the only way to influence. Setting Sap brings Ivan's Venus levels above his Jupiter levels, granting him access to a class that normally only Isaac would have, albeit at a lower level than Isaac could potentially get. I just want you to take a look at all the stat differences. Consider that Shaman is probably Ivan's weakest class option (even if it's one that grants Revive), and Enchanter is Isaac's weakest. Just really soak it in. I might finish the game with Mia and Ivan in the OP physical classes just to let them get a bit of time in the spotlight.  Going back to the regular order of things for now, though. To unlock the final tier of the dual-element classes, you need to offset the element of the Djinn you've already put on the character with a single Djinni of their innate element. This balances their elemental levels at the end of the game at 6/6, putting them exactly on par with Isaac at the start of the game and his starting Flint Djinni.  Next.  Something sort of important to do but not really if you're continuing to the Lost Age is to talk to the mayor here. I mean, the thieves break out of jail either way, but this sets up an event flag for the sequel for some reason. Okay.  Back in Vale, the second of the three minor random caves we're going to complete for Djinn is waiting. Last edited by Kalir; 06-27-2016 at 03:47 PM. |
|
#103
06-19-2016, 12:41 AM
|
|||
|
|||
 It's not behind these Whirlwind-susceptible leaf piles, despite what you might think. If you really wanted, you could backtrack here after getting Ivan for good and open these up then and there. But nah.  Your actual goal is over here. Of all the boulders never to be removed by the villagers, only the one by Kraden's house, and the only one that actually damaged anything without smashing into hundreds of pieces, was left alone.  Behind it is another small cave.  You'll also need Reveal, if you're dumb enough to backtrack all the way from Altin through the Goma Cave to here. So uh... don't do that. You can clear this area, and the Vault Cave before it, as soon as you get to Kalay and the bridge is fixed. I delayed for reasons.  There's only two things here, and one of them is over this way. It's not the Djinni. We want to take the upper path...  And then drop these logs in the pond.  This creates the kind of bridge you'd find in a marble-rolling plastic game found in the 90's.  And Djinni. That was fast.  And a bonus Psynergy-granting thing! Halt is what I might've mentioned back during Colosso, that lets you temporarily stop time for certain things. It is in no way usable in combat, and even if it was, it'd probably suck.  We're going to use it to capture this Djinni, who wants nothing to do with us and flees down the slope.  If we don't use the newly acquired Halt Psynergy, it employs squirrel tactics around this rock formation.  Time's up!  Hooray, we have Kite! Kite grants the recipient two actions on their next turn, which would probably be really broken in a game like EO but here just kind of... eh.  As with Ivan, we can use these to convert Garet into the same class Ivan had all game. Does that seem like a worthwhile trade to you? DOES IT?!  ...Huh. So, geology is weird [citation needed]. But as it happens, the timescale for seismic activity is stretched way beyond what our mere mortal lifespans can comprehend. It's not out of the question that Mt. Aleph would still be erupting at this time (and the frequent explosion sounds attempt to indicate that yes, this is the case). It also means Sol Sanctum is a one-time dungeon, which I do not care about in the slightest. What I DO care about is the fact that the eruption of Mt. Aleph is supposed to be a one-time event that happened a while ago. Vault is supposed to be ordinary flyover country at this point, considering the eruption was causing enough calamity for a group of thieves to raid all kinds of treasures from it. In the grand scheme of things it doesn't really matter that much, it's just very inconsistent.  Anyway, while in Vale, we can check in on Garet's family and Isaac's mom.  They try to play this off as a MYSTERIOUS ILLNESS but no she basically has a cold whatever.  Anyway, remember how Dora was sad to see her son go but respected his wishes, while Garet's entire family basically called him an idiot four times in a row?  When you return, instead Garet's family is completely welcoming and happy to see you back, even if only for a while. (Also: his entire family has portraits, except for his grandma and grandpa. His grandpa, you'll recall, is the mayor of Vale. NONE OF THEM GET NAMES.) You can also run into Heather and Tammy outside, and they also say hi to Garet and wish him well in their own ways.  In contrast, Isaac's mom...  Guilt trips him with a promise we never made and scolds him for abandoning his quest to check in on her.  OH NO WHAT A MYSTERIOUS ILLNESS WHAT COULD THIS MEAN FOR ISAAC'S BELOVED MOTHER And if you're curious: Jenna was staying with her grandparents. I don't know where in the village they are nor do I care to find out, but I'm pretty sure they wouldn't have scenes like these.  Right, last cave, but next update for what it means. West Lunpa Cave is very short.  Ordinarily, this side entrance is how one could sneak into Lunpa, but the gate is jammed MOSTLY shut. Rather than doing a cool action slide under or just crawling like a boring person, we violently break the gate using Frost.  You guys ready to save Hammet? Next Time: Harry Potter and the Den of Thieves |
|
#104
06-19-2016, 12:59 AM
|
|||
|
|||
|
Quote:
|
|
#106
06-19-2016, 11:31 PM
|
|||
|
|||
 As of this writing, I've pretty much exhausted my backlog. I have all of one unposted update and it's going up tonight. Maybe I'll take a break and fix that.  So, Lunpa. The town is in total lockdown. It's like that even before Hammet comes in, which doesn't make a whole lot of sense honestly, but whatever. Nobody goes in or out except Dodonpa and his gang.  Needless to say, this isn't helping business much.  The inn is closed down as a result, but you can use Reveal to snag a Psynergy Stone here to do basically the same thing for free.  They're not even letting the chef who brings them meals see anything.  The only other thing we can do outside the fortress is this...  Except we have to use Reveal in the exact right spot or the water-turned-ice resets into its rock form. This isn't even the most egregious abuse of Reveal altering the state of reality: in the Lost Age, someone else uses it to leave through a secret passage, only to retreat through it, leaving you 100% stumped as to how to actually get into the secret passage. Never mind that it's just "this rock is actually a door". I don't know. It's magic. Psynergy. Shut up.  This leads to a storehouse with a bunch of useless garbage.  Lunpa Fortress does honestly live up to the townsfolk's claims that it's impenetrable.  As soon as the guards see you, they retreat to the chokepoint, and you have no way in.  That's why you can't actually do anything here until you "borrow" Babi's Cloak Ball. The Cloak Psynergy works much as it did for Babi, rendering the user invisible while in shadow.  This lets us sneak into the fortress with ease.  The fortress interior IS a stealth section, but it's not nearly as bad as it seems at first glance. I mean, it's no Klei stealth game, but it's passable.  There's a few minor rooms you can duck into where you can see Dodonpa's goons reveling and having a good time, and people he's captured basically complaining and fearful.  To the stealth. If the green guards see you, they kick you out of the fortress instantly. They CAN see you in the dark, but only if Cloak isn't active. There's no reason not to recast Cloak every time you step into shadow.  You can step out of the shadow for a while provided you're not in the guards' very generous line of sight.  The patrols here aren't hard to avoid since their torches have clearly defined radii. And unlike Klei stealth, there's basically no penalty for screwing up or outside pressure to GET ON WITH IT, so just observe and walk and you'll be fine.  Just in case you guys hadn't been told Dodonpa was a villain. He's a villain, see? Villain villain villain.  Only problem with this segment. While the green guards chuck you out of the fortress no problem...  Being detected by a red guard forces a fight.  Garet's Protect Psynergy is pretty handy for this area since nobody can use Psynergy attacks.  Also Isaac picks up the Revive Psynergy, which does exactly what you think it does.  Thanks, buddy! 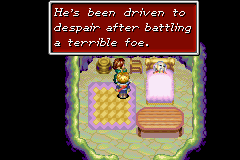 Down here is Donpa, the elderly father of Dodonpa. He's getting as much bedrest as he can since he fought a terrible foe or something. There are two possibilities here, one of which is canon but doesn't make sense, and one of which isn't but does.  Anyway the whole reason Dodonpa is a scumbag instead of a noble thief is because, apparently, Donpa spoiled him as a child. Which makes sense to me. |
|
#107
06-19-2016, 11:32 PM
|
|||
|
|||
 YEAH OKAY FINE SURE  Anyway, we need that key to get further in. We can't get it from the south at all...  But we can Catch it from the north. Never mind that the south entrance also faces the key and is barely any further away than the north entrance. Would it have killed your map designers to have shifted the south entrance slightly to the right?  A sole Brigand poses about zero threat to us.  Down here is where Hammet is being kept. That pile of leaves is covering...  A switch that is, in turn, hidden via Reveal. I guess you could make the argument that the thieves are using secret high-tech stealthy switch technology, but eh.  Only at this depth do actual monsters show up. I don't really know WHY, but eh, they're there.  It kind of gives off the impression that Lunpa and co. found the fortress long before and have only had cause to use the upper levels, leaving the ancient catacombs mostly undisturbed.  Needless to say, this makes reaching Hammet more than a little difficult.  But eventually we make it to him.  Hey pal how's it hanging?  So like I mentioned earlier, actually completing this sidequest and going back to Kalay to say you saved Hammet gets you a reward of "STOP FRIGGIN' SLACKING OFF AND GO SAVE THE WORLD ALREADY." Similarly, most of this sidequest line doesn't really make sense for me to write the characters for, since they want to get to Venus Lighthouse ASAP to save Sheba, Jenna, and Kraden. So we're all going to say this isn't quite canon, but instead "dark canon", as envisioned by the true pioneers of vidcons, Tales of Game's. Quote:
 Funny how these things work out, isn't it?  This is Mondego. The Kingpin. Baron Blade. Strong Bad. Whatever. Quote:
 I don't really mind Dodonpa's over the top villainy here. It's a bit refreshing, really.  Also: we don't fight Dodonpa, per se.  Instead we fight his giant frog monster he has sealed right next to Hammet...  With perhaps the best name in the series.  According to the seven-tongued liar that is GameFAQs, Toadonpa displays a notable weakness to status effect by virtue of being a "dumb" boss, i.e. animalistic. The Killer Ape also falls in this pack, while Saturos, Tret, and the Manticore for some reason are "smart" bosses, rendering them more resistant. I rejected that extremely arbitrary explanation and went to look up enemy stat tables for an explanation. As it happens, Toadonpa's Luck score is more in the same vein as random encounters, while the bosses mentioned above are higher ranked. So I guess Luck determines resistance to status effects to a degree.  In any event, Toadonpa has pretty strong innate regeneration, so you can't just go throw a status effect on him and use the time to heal and buff indefinitely.  Also apparently taking enough damage breaks the sleep effect, but it still robs the target of their turn if they had one.  For this update, given everyone's got such buff-focused abilities, I'll just be doing that. Except upon reflection, stacking buffs indefinitely is BORING. I'm going back to my old setup next update.  I kept trying to get the death effect to stick on Toadonpa but it never did. Oh well, Cutting Edge isn't very good here given Toadonpa's Mercury resistance.  Thrash has a chance of bringing the target down to 1 HP, but it never did here.  I guess this is a fight where Enchanter is really strong, but it still feels lame and dumb. Gimme explosions any day of the week. Last edited by Kalir; 07-27-2017 at 07:54 PM. |
|
#108
06-19-2016, 11:33 PM
|
|||||||
|
|||||||
 I don't think our being able to cast Sleep is that critical here, guys.  This is Dark Blessing, which can be distinguished from Dark Blessing by its bright pink color and the fact that it lowers Defense. See, that would be a great way to differentiate between the 20 or so different families of multitarget Psynergy, by their auxiliary effects. Which none of the Psynergy we can cast gets.  IVAN IS A HEALER MAYBE SHAMAN ISN'T A GARBAGE CLASS AFTER ALL.  And then Toadonpa died.  Ivan learned Revive just in time for me to lose patience with his class. Good job, kid.  When we get back, Dodonpa is...  In a really bad spot to be, honestly. Quote:
 In the original, you get a yes/no choice for whether to move the monster off. Ordinarily, if you go no, Hammet says "we have to try, at least" and you do it anyway. Which... why? This guy is a clear villain who has done us nothing but harm since the minute we've met him, why is mercy suddenly mandatory? To make matters worse, everyone in the following scene is all "oh good, you're not harmed", prompting Garet of all people to go "uh guys, HE LITERALLY JUST TRIED TO KILL US."  Quote:
 OH HAY.  Donpa's feeling well enough to trek down to the dungeons.  Quote:
 Quote:
 Quote:
 Donpa's rumor bit is in the original text too, and it's... honestly pretty clever? Really convenient way to just let us walk out of the fortress, but it'd also be way easier to just say "Donpa's back in charge and everyone is happy". I legit, no fooling, really like the tack Donpa takes here.  Quote:
 And we're out. Just gotta get the big man back to Kalay and we're set.  Now that we've cleared Tolbi and Lunpa, we can buy some seriously nice loot, but it also is very expensive. I have a lot of stuff I could sell, but I'm not quite feeling up to it yet.  One thing is the Demonic Staff here. We are not buying this, because it's cursed. Cursed items will rob the user of some of their turns when equipped, and can only be unequipped at a sanctum. You'd think the Demonic Staff would be clearly more powerful than the comparable options to accommodate for this, right? Well... no. Nope, it's about the same statwise as the Dragon Axe, its status effect from its unleash is Haunt... I just think they figured Ivan and Mia needed to be ruined even harder.  The real problem is even if I did sell off a bunch of stuff, most of the things I want to sell won't even fetch a very high price. I doubt I could buy more than one or two of the weapons being offered here. I might try it anyway, we'll see. 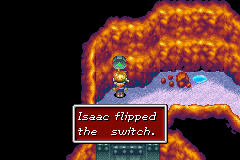 Anyway, we're going to mostly but not quite leave Lunpa for reasons.  On our way out, we catch a glimpse of someone.  The question is raised that it might be one of Dodonpa's henchmen, but Hammet recognizes them.  This is Bunza. There sure are a lot of -u--a names in Golden Sun, aren't there.  Quote:
|
|
#109
06-19-2016, 11:34 PM
|
|||
|
|||
 Quote:
 Quote:
 Bunza here doesn't really do a whole lot, but I still rewrote his dialogue to be a little more effective and lend a bit of development for both himself and Hammet in terms of philosophy. Also: we can take the wagon for a free ride back to Kalay. Don't friggin' do this: Hammet and Layana will not give you a reward but will instead chew you out, and there's still one last thing to obtain in Lunpa.  I mean, they make you navigate a really contradictory maze of yes/no prompts to decide not to do it, but hey.  Quote:
 And then they go. I might go get the cutscene reunion there for the sake of magical event flags I don't know exist, but I won't screenshot it if I do. Ordinarily that's where Hammet would tell us about the Shaman's Rod, and the location we actually have to use it in (and by "we", I mean "not Ivan"). But again, that's kind of flying in the face of the story idea I have.  Anyway, back here.  Apparently some Brigands carry a dose of Crystal Powder, letting them duplicate Hail Prism, the next in the Prism line of Psynergy.  Hey cool, now Mia FINALLY HAS PSYNERGY ON PAR WITH BARBARIAN GARET.  In any event, the sidequest's actual reward is received by talking to Donpa.  "Long ago" having an upper bound of "like a month, tops".  Yup, that there's a Djinni.  Tonic is one of the very few ways of curing Haunt midfight, and it works on just about everything shy of cursed weapons. If I gave it to Isaac, then he'd be the one stuck in the Shaman class. But I'm not gonna bother with that, and probably will just change to my old setup next update. I forgot how much I dislike actually using buff spells.  And that's a wrap. Now we can go get on with the actual plot. Y'know, Venus Lighthouse? It exists, guys, I promise. Next Time: Harry Potter and the Desert of Lizards |
|
#110
06-21-2016, 02:31 AM
|
|||
|
|||
 The guy standing guard out front doesn't even bother to look in to see whether it's Dodonpa or not. Dodonpa himself is pleading that he's changed his ways and won't do any more bad deeds ever again.  Literally a surprise to nobody.  Selling off a bunch of our old junk that we're never going to use here.  Buying almost everyone new equipment, save Mia, who inherits Ivan's old Angelic Ankh.  Turns out there's a few artifacts in the armor shop, too. Most artifact armor boosts stuff aside from just defense, such as these War Gloves...  Or the Blessed Robe, which grants the wearer extremely minor regen.  Garet's Dragon Axe does the exact same thing as the other three fire-type axes he had before.  Isaac has a Shamshir, which proves that acid is Mars-aligned and can also lower the target's attack power.  These jerks scold us for wasting time.  At least Bunza is sympathetic.  I mean, he doesn't actually tell us we can go get the stuff there. But we're allowed to, no question.  Most of it is basically junk.  The only one we actually have to expend effort to get...  Are these Spirit Gloves, which boost the wearer's elemental attack power. Good work, Camelot, you properly devised gear that would actually benefit a caster playstyle. I mean we could still give them to Garet or Isaac if we wanted to but eh.  Ivan's Ninja Blade does this thing, possibly lowering the target's resistance.  Anyway, at this point our "dark canon" comes to a close, and we shall resume the game as normal.  The Gondowan Passage here is where we transition from not-Eurasia to not-Africa, as well as the endgame proper.  Let's pretend he said Venus Lighthouse instead.  Iodem joins you for everything south of here. Quovak tries to give Iodem a purpose by providing him as a voice of reason to contrast Babi's power-grabbing, and to give us a reason to stick with Lord Babi. Needless to say, in the original text he's basically just Babi's mouthpiece while the man himself is trying not to die. Quovak also suggests characterizing Babi as a necessary evil which Iodem recognizes, to make it so we'd have to work with him but wouldn't just feel like we're working for a villain for no good reason. If I'd had a bit more foresight, or if Iodem had had any point of interacting with the party to actively request their help, I could potentially pull that off. But as is, the dude has basically no depth. His character can be defined as "Babi's advisor" and literally nothing else. Given that Babi has already basically been called evil by the party, I feel like any attempt to rationalize him via Iodem at this point would be worthless. I literally can't even write about Iodem as a character without linking him back to Babi. I guess I could try painting him as a Cecil-style loyalist who distrusts the ruling power but still serves out of a sense of duty to their homeland or people, but I basically always hate that character archetype and don't have it in me to convincingly write it.  Moving on. Suhalla is the next town, and it's basically a pit stop before the Suhalla Desert.  Presented without comment.  Suhalla's got a lot of people back here who tried to cross the desert but failed due to a sudden increase in sandstorms. Let's hear what the soldiers have to say!  Ah, a good start. Quote:
 Quote:
 Quote:
|
|
#111
06-21-2016, 02:33 AM
|
|||
|
|||
 Suhalla Desert! It's not anywhere as hot as Lamakan Desert but it's just as good, if not better, at that whole attrition thing.  Quote:
 In order to stop the sandstorm, you have to get caught in it, for reasons. While there, you have enough time to use a single field Psynergy.  Doing anything except casting Douse throws you back outside Suhalla.  While casting Douse...  Leads to a miniboss fight. There's one of these in every tile-wide chokepoint in Suhalla. Yes, it gets old fast.  Tornado Lizards have a few Jupiter Psynergy spells, including Impact, and they get two actions a turn. They're tough, but not impossibly so.  Behind this one is a Virtuous Armlet. Both of our characters who could equip it have better options, but it's still a usable item that heals more efficiently than the Healing Ring.  We're far enough in that recolors of bosses are fair game, apparently.  Do note: for some reason, Ascetic Mia can use Hail Prism but Savant Mia cannot. MEANWHILE BARBARIAN GARET IS JUST SWIMMING IN NEW PSYNERGY THIS IS NOT HOW YOU GAME BALANCE.  Even in the most inhospitable wastelands, mimics find a way.  They can now cast Condemn to fail to instakill you, and the final Psynergy in Mia's Ice line.  Oh hey, Tornado Lizards can Ward too.  Oh good, we can buff everyone's Attack. STILL NO HAIL PRISM.  It's not as strong as a per-target Impact, but we can also cast it twice to duplicate Impact for everyone. That's more efficient in turn count, so it's what to do unless Ivan or Mia is actually going to use offensive or support Psynergy at this point (spoilers: no).  I feel like Wing Flutter is physical-typed and multitarget and I'm incredibly jealous of this.  I WANT DE BOX  For reasons I can't explain, Cookies increase the max PP of whoever gets them.  You can't see it because flicker, but that niche over there holds a large red hurricane. You can Douse it for an extra-beefy optional encounter, but this is the wrong choice. We'll leave it until we hit Lalivero.  This pit over here has a hidden pillar we can reach with Reveal.  This leads to another Mars Djinni.  Oh man, that actually paid off! Djinni love to fight using Psynergy, maybe I've actually done something clever and made Ivan viable!  hahaha NO  Second time around, I mistakenly assume that Bind is not a waste of time, an assumption that follows me into the next boss battle, where it wouldn't even be a good status effect even if it did work. Oh well, Ivan's been dead weight since around the time Planet Diver was picked up.  The final Psynergy in the Blast line of Psynergy! Wacky. |
|
#112
06-21-2016, 02:34 AM
|
|||
|
|||
 Eventually we defeat Flash, giving us the other half of the garbage combo people use where they alternate between this Djinni and Granite. I will not be doing this.  Basically, the second you drop down the ladder there, you get chased by an extra-large tornado.  If you run this far and cast Reveal, you have time to hit this Psynergy Stone and heal up your undoubtedly-low PP reserves, full healing in the process.  I do exactly that.  AAAARGH I ALMOST MADE IT OUT OF THE AREA BEFORE IT GOT ME  Storm Lizard is exactly the same as the prior fights except larger and meaner.  Flash is the worst Djinni. It has caused me to attempt this stupid, stupid strategy.  The Storm Lizard immediately proves itself a better adept than Ivan by casting Sonic Slash, the final tier of the Slash line of Psynergy, twice.  It can also use its Wing Flutter attack to basically do the same thing but more so.  The fights are now dangerous enough that our party might actually die, but both Garet and Isaac can revive because they can do literally anything we need them to do.  Eventually I get bored of Ivan trying to Bind the Storm Lizard and just attack normally, which the Storm Lizard resists.  Garet demonstrates the folly of doing anything except physically attacking your foes.  Anyway, that was the whole desert, and there's no sign of Sheba.  Quote:
 So, just pointing this out. See that boat over there? If you actually go over there, Iodem mistakenly assumes it to be Babi's Lemurian ship, but then realizes it isn't when he asks you to activate it for a test run. It fails because that's actually Menardi's ship. I'm not going to bother actually going over there, because that's a TERRIBLE place for them to dock their boat when they could very likely find a more efficient parking spot at Imil. I guess they didn't take into account the bridge from Kalay being destroyed when they parked there, though? They did kind of have to take the same roundabout detour your crew did, too. Anyway I'm not gonna actually go over there because it's 100% pointless.  The Suhalla Gate covers the Idejima Peninsula where the boat is docked and the Suhalla mountain range.  Looks like that detachment isn't in any shape to comb the desert.  Quote:
 Also: this is not an inn. This is a sanctum. If you want to rest and recover full PP and HP, too bad. (You can find a Psynergy Stone by heading down into Idejima, but I didn't want to go that way.)  Suhalla Range is full of these slidey-spots. That treasure has a stat boosting item of some kind.  I use a bunch of them at once and continue to marvel at the inordinately huge stat differences between the Sol adepts and the Luna adepts.  The encounters continue to ramp up in power here, and second-tier Psynergy is now the baseline for any casting monster.  Jump down this one, ignore the others.  Doing so leads to the final Mercury Djinni in the game.  We handle it in the usual method. |
|
#113
06-21-2016, 02:35 AM
|
|||
|
|||
 FINALLY.  This also lets Isaac reach his final class rank of Guardian, topping out his stats.  Idejima is just through there, but I've no intention of going down there now.  HOW'S IT TASTE, PUNKS 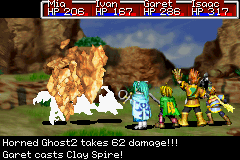 Garet immediately shows us up with his own fancy new Psynergy. Ivan STILL DOESN'T HAVE ERUPTION.  As we near the exit, and around further areas, we'll find guards who say this line...  Before fading out entirely.  Here's Venus Lighthouse, which we will NOT be instantly climbing for reasons.  There are a ton of beaten-up soldiers and scholars around the area.  Saturos and Menardi, with Felix's power, managed to unseal Venus Lighthouse in seconds, but this apparently isn't the actual way in. Venus Lighthouse is a bit weird in this way.  We'll discuss that next update maybe. For now, let's stop into Lalivero.  A good sign, that.  This is where they bring up Sheba, but I shifted that to the Gate because it's actually halfway logical there.  Apparently the crew's headed for the ruins Babi Lighthouse was meant to use as a foundation? Okay. THATS ALL I GOT. BYE. Next Time: Harry Potter and the Lost Island |
|
#114
06-22-2016, 01:51 AM
|
|||
|
|||
 We'll check out Lalivero and a bit of the two lighthouses today, but my main goal is to get through the final optional area. This is where Babi's Lemurian ship is docked, by the way.  Something I might've glossed over when we first introduced her, but still important: Sheba literally fell from the sky into Lalivero. Their leader, Faran, took her in as his own daughter. If you think Sheba barely got any characterization, guess how much her surrogate famiy gets. Hell, mom and the rest here just have stock villager sprites.  Anyway there's a lot of things to climb on in Lalivero, leading to a few nice goodies. Here's one for Isaac.  I guess we could give it to Garet too, though, since they both wield Venus Psynergy.  We go to the weapon store and snag everybody a few upgrades, too. I just want to point out: there are a ton of artifact weapon upgrades for most weapon classes: about 10 combined longswords/axes, 9 staffs/ankhs, and roughly 7 light blades. There are four artifact maces: one can be "won" at Tolbi Springs by getting a Lucky Medal into the 4th ring or out of the circle, one is a random drop that doesn't have an unleash but can be used to heal, one is cursed, and one is this weapon. I mean, it IS Jupiter aligned, so if Mia wanted to use it she very much could, and it has a hard-to-see HP regen feature... but there's also a much better staff option available for sale at this same vendor. And needless to say, since neither Garet nor Isaac is running Enchanter, they have no need for this mace either.  Anyway, by playing Spiderman, we can get to the very last Mars Djinni, Torch. They can penetrate defense with their attack, which I don't know exactly how monster defense factors into calculations so it might be great, or it might be garbage.  With it, Ivan gets his final class upgrade to Fire Monk. Let's just gloss over the fact that he's learned all of one Mars Psynergy the whole game.  Also: the talk of the town is primarily them being concerned over Sheba, not least because she got captured by a second group of people. Many of them, like this priest, are angry at Babi for stealing their beloved skygirl and trying to renovate the hell out of their sacred ruins.  We'll come back to that, though. First, a quick detour into Venus Lighthouse.  While we can explore a bit of it here, there's not much we can actually do. We want this Carry Stone, at least. This is the latest in Psynergetic hand based telekinesis, letting us not only lift small blocks into the air, but then carry them one space in any direction.  Weapon unleashes. Mia has a way better option than the Righteous Mace in this Crystal Rod, whose Drown unleash can instakill.  Isaac's Silver Blade doesn't have a fancy effect with its unleash, it just hits hard.  Meanwhile, Ivan gets the Sonic Sword, the endgame equivalent of the Bandit's Sword. You can't see it here, but the unleash has a chance of dealing 3x damage, finally giving him something to compete with Isaac and Garet in terms of damage for.  Anyway, we can't actually clear Venus Lighthouse here.  The whole gimmick is that it and the ruins under Babi Lighthouse are linked, and only by fiddling with that statue somehow can we open a subterranean path between the two.  The routine enemies can outclass us in Psynergy no problem. I might be a bit underleveled.  If you haven't found Carry yet, this is as far as you go. But hey, that relief tells you SEE THAT WHICH IS UNSEEN and there's no excuse for not having Reveal constantly on a shortcut at this point.  Hello, exit shortcut we won't need. Using Reveal on the unreadable sign there leads us...  Up to here.  There's two potential routes here we can take, which we can change by talking to the statue again. You can get some alternate treasures with each path and I forget what they are or whether they're worth it. I'll check 'em both out, why not.  Here's one of the two routes.  Back over here. This is where Babi is building his lighthouse.  I like this part here, even if it's just a minor line of dialogue, since it shows that Felix (and Alex) aren't really willing to attack people just because they're there, but Saturos and Menardi totally are.  We're not staying here for very long, though. Just gonna go grab a Djinni and get out.  First step is to climb down these ladders and move those pillars you saw last screenshot. |
|
#115
06-22-2016, 01:52 AM
|
|||
|
|||
 This lets us get over here.  Welcome to the inside of Babi's Extremely Safe Lighthouse.  HEY BUDDY WHATS GOING ON  Luff does nothing noteworthy during the fight, and as an unleash it duplicates the Bind Psynergy we've never gotten to actually work. With it, Mia upgrades her class to the final rank of Sage.  Sages drown gnome wizards. You heard it here first, folks.  OH HEY IVAN LEARNED HOW TO BLOW THINGS UP. NOW HE HAS AN ACTUAL MARS PSYNERGY.  I also chance upon the Lucky Cap in here. This I give to Ivan, because between that and his Hyper Boots, his crit chance is good enough that an attack from him will almost always unleash Rapid Smash.  THATS WHAT I'M TALKING ABOUT  Guys. It took most of the game and a lot of very specific equipment, but it happened. Ivan is finally Good at Combat.  Mia I'm willing to give a pass on given her access to the Impact and Wish lines and her high Agility and PP, but uh... Isaac still outheals her, easily.  Anyway, this red tornado you can't see. If we douse it, we'll fight a Tempest Lizard, stronger than any of the other lizards, but we will not do this here.  Instead, the tornado launches us to...  Somewhere.  Crossbone Isle is where we failed to visit during the Karagol Sea sideline thing. We'll be cleaning it out of all of its treasure, regardless of what is actually worth using.  You can get about halfway through at the first point you could access it, but no further.  The puzzles in Crossbone Isle are at actually good levels. You'll have to look at them, think your way through a bit, take your time... it's refreshing, honestly. Although I suspect coming almost straight off of the Talos Principle into Golden Sun kind of blunted this game's overall puzzle strength.  Most of the rewards for Crossbone Isle aren't worth the trouble it takes to open the chest.  We're going into the caves, of course.  The interior is basically a massive spiraling stone staircase leading down to a grotto.  At each interval, we'll find a door, behind which is a puzzle room.  The door always holds an encounter, but only the first time you open it. They all get standard boss music, too.  Since the first half of them are meant for players just after clearing the Kraken fight, they're basically nothing for us right now.  First area is another jumping puzzle, with these pillars. The trick is you can shift them one way, but not the other, so you might have to leave and re-enter to get all the stuff (assuming you want it).  You probably don't, though.  This stone starts shifted left. So you need to jump to its platform, pull it right, loop around, and then Move it right again. |
|
#116
06-22-2016, 01:53 AM
|
|||
|
|||
 Mimics gonna mimic.  After each puzzle room, you can create a shortcut back with these pillars.  Oh no, Grislies. And a Succubus I guess.  This is after they boost their attack, by the way.  I sense a pattern.  I'm okay with giving Garet all the Lucky Pepper ever because I don't want him becoming invalidated the second an opponent casts Sleep or whatever.  This one's pretty straightforward. Just work from the top down so you can clear a path.  Your reward for clearing it...  Is the Mystery Blade, which isn't actually that bad when you first get to here through the sailing thing, but which is useless garbage to us now.  Oh no it is a lich we are doomed.  To be fair, the Lich has access to Glacier, the final tier of the Frost line. It's still not that scary.  Oh yeah and we can instakill these guys too.  OOOOH NOOOOOOOOO  OOOOOOOOH NOOOOOOOOOOOOOOOOOOOOOOOOOOOOO  This next puzzle room is built around Catch. There's a bunch of keys littered around.  You have to Catch them from very specific ranges, and each key opens up a different treasure room. That conspicuous empty circle there holds a Red Key which we can get via Reveal.  It's also a bit of a jumping puzzle, too. I honestly rather like this room.  I'll stop doing this now. It's a good way to gauge the depth of Crossbone Isle, though.  The Faery Ring found here is a good ring to give to a fast non-healer character, but it's not super essential.  Okay we're done. Next.  I just want to point out: we can encounter upgraded Gryphons at Babi Lighthouse already. I wonder how the workers there feel about that.  Let me just put into context HOW MUCH DAMAGE IVAN'S UNLEASHES ARE DOING  And Mia completely invalidates it. WHY COULDN'T THEY HAVE HAD THIS GOOD OF GEAR EARLIER, GAME  If you came here through the sailing thing, this'd be the end of the line. You need Cloak and Halt to get anything done here, and Cloak isn't available until after resolving Colosso.  The statues here will move around to block your path or push you out of the way. These ones can be frozen via Halt. |
|
#117
06-22-2016, 01:54 AM
|
|||
|
|||
 Others can be snuck past using Cloak, obviously. Here is where the gear starts actually being Good. 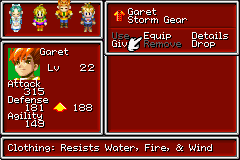 That is some tasty Storm Gear, isn't it?  This is also where the encounters start being actively dangerous. Okay, not the Harridan or Stone Soldiers, we've seen those before.  The Lizard King, however, is a real contender.  Okay, not THAT much of one. But for real, things are actually dangerous a bit now.  Yay a useless Psynergy.  The next puzzle is a repeat of the floodgate puzzle from Kolima Forest. Which... okay, thats fine, I accept that. Could we get a repeat of the Mercury Lighthouse water-walking tiles? No?  WHY ARE YOU EVEN GIVING US THIS GARBAGE NOW. YOU ARE A POX AND A WASTE OF SPACE.  This one isn't even that complex though, it's mostly just positioning the logs thats the hard part.  Now we are true Hoshidans.  Everyone else already has body armor they're happy with, so why not speed up our healer a bit?  Here's how you leave.  Chimera timera.  The chimeras have deadly breath weapons and a Rabid Bite that does what it shows here.  I'm concerned. This is my concerned face.  Deadly poison does actually live up to its name, but again, Isaac can heal it just by blinking hard enough.  See you have no problems reusing lighthouse tilesets WHERE THE HELL IS MY WATER-JUMPING PUZZLE  There's the last Djinni at least. It runs away from us, as usual.  This area is mostly about testing your ability to go between different levels effectively.  This'll let us get back to pursuing the Djinni.  Guess what we gotta do here. Guess guess guess.  It is an axe, it is cursed, we will probably not use it.  There she goes, there she goes again.  Make your own JJBA reference. I'm hungry.  With Bane in tow, Garet upgrades to Berserker, giving us our final team of Sage, Fire Monk, Berserker, and Guardian. I mean, unless I change it again. I do want to show off the triple-element classes for a bit next update. |
|
#118
06-22-2016, 01:56 AM
|
|||
|
|||
 To get to that last treasure, we have to lock ourselves in by moving the pillar from the north, then climb the ladder behind us.  Earth Lizards! Yay!  I decided to make a funny joke about how Debilitate is useless... but it actually worked? On both of them? (It's still useless.)  Acid Blessing can be distinguished from Dark Blessing by having the actually correct name. No, I don't know either.  Earth Lizards also have access to mid-tier Venus Psynergy, including the not-yet-demonstrated Gaia line.  Pretty cool, pretty cool.  Also: Quake Sphere. Given these guys using all the Psynergy in the world, and the fact that Debilitate actually worked...  SUCCESS!  FAILURE.  MAXIMUM SUCCESS! PRIZES FOR EVERYONE!  And without Carry, this area's a dead end to you too.  Yep, they make you do this puzzle. Jump over the minor gap that would be easily visible from the characters' perspective!  The trick with a lot of this is that once you Carry a block too high, you can't retrieve it, so you may have to leave and re-enter this one a few times. Kind of one of the weaker rooms.  Another artifact mace. It's not a bad weapon for Mia at all, and it inflicts deadly poison with its unleash, which is even stronger against monsters than against us. But cursed.  This fight is an actually dangerous one. Thunder Lizards, I'm pretty sure, aren't exclusive to this area, but they're the real threat instead of the Poison Toad.  And Storm Blessing is why. Not only does it pack a kick in terms of Jupiter damage...  It can also stun people it hits. An unlucky run against this team can and will wipe you. Our run was not unlucky, though.  Oh man, this is actually starting to look like a real puzzle game!  So, the dragon statue up there. When triggered, by freezing the water under the lever, it'll breathe fire for a bit, melting the ice here or drying up the water if there isn't ice. So we want to jump north and freeze the puddle first.  This lets us get down to here and shove this rock out of the way. Now we need to get back over there.  We need that ice pillar to cross over to the left, but it also blocks us from getting back to the right without sliding down the ledge, so this is where we trigger the statue.  Once we do that, we can push the last log and take the Cleric's Ring.  The Cleric's Ring deserves special mention as one of the few items worth actually importing from this game to the Lost Age. Saying "the curse can be removed" is inaccurate, you still have to go to a sanctum to unequip cursed items. What it actually does is render any curses on the wielder harmless, so you can safely set up one of your characters to wield as many cursed items as they damn well please. I think this is a REALLY clever idea honestly, letting the player use a bunch of neat items they might otherwise just ignore outright for the curse. And there being only one in the game means you have to carefully decide: who among your team REALLY needs this the most? Does Mia want that Wicked Mace? Maybe Garet could roll with the Demon Axe? There's cursed armor in the game too, and the Lost Age has a crafting sidething where one of the materials only yields cursed gear. Basically I'm 100% in favor of the Cleric's Ring and wish it or similar was in other games.  Last puzzle area.  Hooray, now Mia can area heal more efficiently than Isaac! |
|
#119
06-22-2016, 01:57 AM
|
|||
|
|||
 Garet also picks up the Curse Psynergy. True story: I once used it to kill the Storm Lizard, just to prove I could.  This last one is a Fuchin Falls Cave log-roller.  There's basically two pools here, where you have to strategically roll the logs around to reach all the treasures, blocking the logs off with each other.  The first area doesn't have any prizes worth mentioning.  For the second one, we're going to head into that niche up there.  Much like the pipe-rolling area early on, you kind of have to work backwards, using the logs to set up a bridge system to get in.  Muramasa is statwise weaker than the Demon Axe and has a Mars Haunt-causing instead of Venus poison-causing unleash, so it's your call as to which one you want to use.  And that's almost all of Crossbone Isle. I'll save the optional boss for next time. In the meantime: I've complained a lot more about the gameplay of Golden Sun than I was really expecting to this update. I've come up with a few ideas for how to fix it, but I'm no romhacker, so it's basically out of my league. Still, I may as well list what I'd do with the system.
I've no idea how effective most of this would be, and I know that Dark Dawn didn't do hardly any of this, but I think on the whole this would help the Golden Sun combat be a little more lively. Next Time: Harry Potter and the Dread Pirate Roberts Last edited by Kalir; 06-23-2016 at 12:11 PM. |
|
#120
06-24-2016, 01:41 AM
|
|||
|
|||
 At the very bottom of Crossbone Isle is this wrecked ship. It's possible, but never confirmed, that this ship is the replacement ship to Tolbi that vanished. We never get a timeframe on when that happens, but wreckage aside this ship looks identical to the one we sailed on.  He's trying his best, guys.  There are no Psynergy Stones here to recharge with, but there's nothing saying you couldn't leave, go back to Suhalla Desert, full heal up, and then re-enter Crossbone Isle at peak performance. So I'm just gonna save myself a lot of time with these Psy Crystals I've been hoarding all game.  Anyway, as soon as you head up these stairs...  A contender for best name is here to steal the heavyweight title from Toadonpa!  Deadbeard functions like how an endgame SMT character might. Break is Dekaja, which he will cast very frequently to cancel all your buffs.  He also has each single-target buff Psynergy in the game and more than enough base stats to make them dangerous to amplify.  Most of the time, his physical attack is the most dangerous move he has, especially if your elemental resists are decently organized.  HAHA WARD IS FIXED BECAUSE PSYNERGY LEVELS ARE ALSO FIXED BASED ON DJINN UNLESS YOU'RE A MONSTER  Deadbeard has three offensive Psynergies, which are functionally identical save for element and minor numerical tweaks. Inferno is the final tier in the Fire line used by Saturos and Garet.  Spark Plasma is the final in the Plasma line, now incorporating dramatic slow-panning cameras.  Deadbeard's high physical defense, combined with constant usage of Break, Guard, and Ward makes our fairly underleveled party unable to do any real damage to him. At least, not on the same scale we can damage everything else in the game.  Freeze Prism is his last one. Deadbeard doesn't have any Venus Psynergy, which is a subtle hint that Venus Psynergy is also his weakness. I don't have any good ways of capitalizing on this with my current stats. If I really wanted I could hit Venus Lighthouse and go get a sword with a very strong Venus unleash and rely on that, but eh.  If Deadbeard goes a few turns without buffing his stats, they'll reset to their usual values.  There's a few places where actual strategies could be used here, given the vast stat gulf between you and Deadbeard. I'm relying on the tried and true JRPG staple of "hit him a lot and keep healing", but there's a few things you could actually do in this fight.  One thing is summons. At this point, you have access to 4-Djinn summons, the strongest in the game, and you have enough Djinn in reserve that you can (probably) go a few rounds against the big guy without needing to be at full strength. Deadbeard's only defense against a bevy of summons is Ward, and he doesn't have the HP to take very many 4-Djinn summons, so if you can survive at weakened stats against Deadbeard, it's by far the fastest route. In fact, if you're at least level 29 and do a hard reset before fighting Deadbeard (since the RNG is freshly seeded with each game startup), Deadbeard will use his first two turns just buffing with Impact, meaning an alpha strike of all your 4-Djinn summons followed by your 3-Djinn ones will kill him without taking a hit, guaranteed. Another option is the cheesing method of combining unleashes of Flash and Granite, ensuring constant invincibility. Deadbeard doesn't use any status effects at all, just raw damage, so halving or reverse-decimating his damage output is an excellent way to just say he doesn't get to do things. Finally, if you're really stupid: Deadbeard is, in fact, susceptible to having his Psynergy sealed, so if you can get that to stick, the only move he has is his physical attack, which is way easier to keep in check, and which cuts off his buffing.  My method worked out just fine, though.  As is usually the case, defeating the optional endgame sideboss gives loads of XP, giving Ivan an area-of-effect version of Ward and everyone else a much more standard level.  The hell you say.  You can drop items. I have discovered an instance where it's a decent idea to do so. I'm pretty sure you can't drop plot-essential items flagged as "cannot be sold", but you can sell the empty bottle used to hold the Hermes' Water, so maybe you can get yourself stuck forever by dropping it. You'll forgive me if I don't go test this.  Anyway, the Demon Mail. It has the highest base Defense out of any body armor in the game, but it (slightly) lowers your Jupiter resistance and is cursed. So Garet or Isaac could still use it, especially with the Cleric's Ring, right? Not really. In this very same dungeon, you get the Storm Gear and the Ninja Garb, which are both universally wearable, both respectably strong in base Defense, and both sporting actually useful auxiliary benefits (Storm Gear giving you strong resists against everything but Venus, Ninja Garb giving Jupiter resistance and an Agility boost). The only reason to go defeat Deadbeard is bragging rights.  The hurricane deposits you back at Suhalla of all places, meaning you have to backtrack through Suhalla Desert and Gate to get back to the actual game.  In the interest of making Crossbone Isle a more worthwhile endeavor, I'm giving Garet the Cleric's Ring and Demon Axe.  OOH NOOOOOO  The Demon Mail, as mentioned above, isn't worth using in any respect. |