• Welcome to Talking Time's third iteration! If you would like to register for an account, or have already registered but have not yet been confirmed, please read the following:

    1. The CAPTCHA key's answer is "Percy"
    2. Once you've completed the registration process please email us from the email you used for registration at percyreghelper@gmail.com and include the username you used for registration

    Once you have completed these steps, Moderation Staff will be able to get your account approved.

If I had to take one person to be stranded in a cave with... Let's Play Cave Story!

Kalir

Do you require aid.
(whatevs)
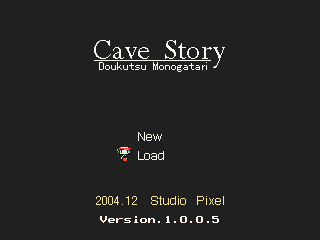
snapTitle.png


Hey everyone!

Let's play Cave Story!

It's hard to think of a more iconic indie game than Cave Story, developed by one Daisuke "Pixel" Amaya over five years and eventually released in 2004. This curious little platformer may have been one of THE titles that really helped people get into indie games as their own thing, rather than just one of a handful of Computer Programming 101 homework pieces thrown into a 500,000 in 1 collection. The popularity of the game was such that it eventually got the attention of a localization/publishing company by the name of Nicalis, who proceeded to rerelease it to a number of other platforms, giving it even more fame.

Unfortunately, it quickly became apparent that Nicalis was, to put it simply, complete evil jackasses. I'll leave the full breakdown to Wildcat, as shown here, but as far as Cave Story goes, Nicalis more or less wrangled the Cave Story IP from Pixel and have since claimed it as their sole property. Pixel hasn't touched the IP since his first time dealing with Nicalis on the Wiiware release, and has moved on to other things (mostly Kero Blaster). It's a really sad story, and Pixel and Cave Story both deserve better. And as such, I'll be using the original freeware version, which has remained free for anyone to play even with Nicalis' IP seizure.

Now, this being as classic and influential a game as it has been, Cave Story has also seen a lot of LPs, including one by one of the earliest big LPers, Deceased Crab. And while I absolutely want to LP it, I don't just want to retread the same ground as everyone else with it. So for this LP, I'll be bringing on a guest commentator as I play through! jenkitchen will be joining me for every episode, as someone who has never seen this game before, and really, if you're playing Cave Story, you should be flying blind for your first playthrough.

PART 01
FROM SOMEWHERE, A TRANSMISSION
THE FIRST CAVE, MIMIGA VILLAGE

NOTES
  • KAZUMA IS LOOKING FOR SUE. You're dropped into the game with a seemingly-unrelated guy on a laptop trying to reach someone, while the actual player character starts out in the First Cave and just goes exploring. It's got a kind of "harmless whiplash" to it that makes for a strong first impression.
  • THE FIRST CAVE IS REALLY SHORT. The only actual gameplay to it is stealing the Hermit Gunsmith's Polar Star gun, and not getting punked by The Door. For those who don't know the game: the orange triangles are weapon energy, which you use to level up your weapon. Taking damage lowers your weapon level. Each weapon goes from 1 to 3, with a little buffer of energy you can get to put a weapon at MAX.
  • SUE ANSWER YOUR DMS ALREADY WILL YA. Don't leave Kazuma to eat cockroaches in a shed or whatever.
  • WE VERY GRACEFULLY AND POLITELY ENTER THE MIMIGA VILLAGE. The main thing we're trying to do is find Sue, but the villagers have differing opinions on Sue. King, the head honcho, wants to turn Sue over to the Doctor, whoever that is, but Toroko is adamant that Sue be protected. Since Toroko has the key to Arthur's house, where Sue's hiding out, we need to track her down.
  • FIRST WE CHECK THE RESERVOIR. Only thing we learn is that Sue is a Mimiga like all the other bunnypeople, but we do get a cool Silver Locket out of it. Toroko is too busy bodychecking King to appreciate it.
  • THE PRIMARY DIET OF THE MIMIGAS IS FLOWERS. Don't eat the red ones.
  • TOROKO GOES HARD. She's no snitch, and she's not afraid to crack some skulls. She only calms down if you shoot her with a gun.
  • THEN THINGS GO WRONG. The Doctor's minions, Balrog and Misery, show up on the scene and abduct Toroko, mistaking her for Sue. Balrog stays behind to "clean up", but they're a bit of a slacker, and it's not like we have any beef with them, so we just leave them be. You can absolutely fight Balrog if you're so inclined, and it's worth a decent amount of weapon energy to do it, but by no means required.
  • WELP, GUESS WE GO GRAVEROBBING. Toroko still had the key to Arthur's house on her, so we're forced to go through the Graveyard to get the key Arthur was buried with for some reason. The mushrooms Jack was so worried about aren't too bad, but they don't give weapon energy. The knife-armed Gravekeeper is a lot tougher, but they're vulnerable when swinging the knife or from behind.
  • AND THEN ARTHUR'S HOUSE. Still more mysteries here. A bed with red flowers is in the basement, the messages from Kazuma are on the computer, and the teleporter is linked to the Egg Corridor, whatever that might be. It's our only lead on Sue, so off we go!
 

Mightyblue

aggro table, shmaggro table
(He/Him/His)
There is a definite trend of companies that buy up retro/classic/indie IP rights (Nicalis/Gearbox/etc) being rather shitty to everyone else involved with them, sadly. And sure, there's companies that offset that like Devolver Digital but that doesn't fix things like someone's magnum opus basically being stolen by profit hungry shitheads.

Cave Story itself is pretty great! I played the freeware release back in the day as I used to check the Aeon Genesis and Romhacking.net sites pretty regularly, and then foolishly bought several of the ports before we all learned how terrible Nicalis is. There's more meat to Cave Story than Kero Blaster, but there's also a better depth of design to KB in contrast I think. I also spent a fair amount of time messing around with the Cave Story music editing tool.
 

Kalir

Do you require aid.
(whatevs)
I'm only gonna post this once here and once at the end of the LP, but again, if you like what's going on here, please chip in to my Patreon!

PART 02
FIRST REAL LEVEL
EGG CORRIDOR

NOTES
  • ONE TOUCH AND POW, IT'S OVER. The Basil at the bottom deals 127 damage if it hits you. We won't even get half that in max health by the end of the game. Fortunately, the Egg Corridor is built so that you'll rarely cross Basil's path.
  • SUE VS. IGOR. We encounter Sue, challenging some kind of giant monster to a fistfight. It doesn't go well for her, and we're left to follow the trail and rescue her.
  • CTHULHU'S ABODE. Instead of being an unspeakable squid-god invented by a racist, Cthulhu turns out to just be kind of a jerk. They know who we are and don't tell us, save for that we're a "soldier from the surface".
  • CAVE STORY'S JUMP PHYSICS ARE WEIRD. The best way to describe it is that it's MUCH harder to change direction in the air than on the ground. Not impossible, but broadly speaking, if you're making a jump, you need to know exactly where it's going before you even push the button, because you have barely more control than a Belmont in deciding it. The upside is that this makes aiming during your jumps easier, since you don't immediately reverse course if you jump over your target.
  • EGG OBSERVATION ROOM. Lots of cool stuff here. A bed with more mysterious red flowers, a boatload of terminals monitoring the Sky Dragon eggs (with anomalies at eggs 01 and 06), and most importantly: the Missile Launcher! This heavy weapon has limited ammo, but the shots travel far and pack a kick.
  • EGGS 06 AND 01 ARE HOLLOW. For whatever reason, they contain the dual security measures needed to lower the shield to number 00's room.
  • I'M NOT DOING ANOTHER IJI LP. I've subjected you to enough playthroughs of that wholly excellent game. I'll just show jenkitchen that in our spare time.
  • WHOEVER WE ARE VS. IGOR. We've already seen Igor's primary tactic of "walk up, punch really hard", so we can just run and jump and use our weapons to keep distant. He's got a weird kinda bubble breath move as well, but that can also be avoided by staying low and far away. When defeated, Igor turns into a regular Mimiga. Mysterious!
  • WE FINALLY MEET SUE. She's in a foul mood about having lost to Igor, but she appears to have the goal of getting off the "island" we're apparently on. She offers to help us as well, since we're (apparently) not from around here, and heads back to the village without us. Neither of us can hatch Egg No. 00 without a password, so we follow her back.
  • JEN'S GAMING TASTES. Y'all know me already, I'm here for the crunchy mechanics and flavorful setting, but jenkitchen's far more about the characters and story involved. She's also of a temperament where she's just fine watching a game instead of playing it herself, so that usually means I go to games like this and play it with her watching. Everyone wins!
  • SUE TOUCHES BASE WITH KAZUMA. And then King and Jack roll up (we didn't lock the door behind us, of course), blame her for Toroko's capture, and jail her in the middle of the village. Given her predicament, Sue delegates the task of rescuing Kazuma to us, and hey, sure, we can do that.
 

Kalir

Do you require aid.
(whatevs)
PART 03
THE CHRISTMAS SPECIAL
GRASSTOWN

NOTES
  • I DON'T KNOW WHY THE NAMES IN THIS GAME ARE LIKE THIS BUT I LOVE IT. Santa, rather than being a portly, arctic-dwelling fae, is in reality just some villager who dropped his house key. Still gives gifts to good kids, and he rewards our kind deed with the Fireball, a bouncing weapon that sees a lot of use in Grasstown.
  • INSTANT DEATH. Grasstown's got a lot of new things in it, including instant death spikes. These ones are pretty standard fare for a platformer, only ever found underneath pits.
  • CHACO'S FIREPLACE. In order to go through, we need to use some Jellyfish Juice. Conveniently, right after we learn this fact, jellyfish start appearing all over the place! Only the queen jelly, Kulala, gives us any Jellyfish Juice, though. Each helping of Jellyfish Juice is good for one fire extinguishing.
  • KAZUMA'S SHED. Sure enough, he's trapped in there. The door isn't even locked, it's just rusted shut. He still gives us a key he's found in there, but it's to the nearby Power Room instead.
  • EXECUTION CHAMBER. I don't know why the monster-ridden part of Grasstown has an Execution Chamber in it, but yeah, if the Press inside lands on you, it's lethal. They are, however, safe to stand on.
  • INTRUDER ALERT! COMMENCE DESTRUCTION!! The Power Room is guarded by a MALCO-class robot, but we are spared its undoubtedly-fearsome arsenal by the fortuitous arrival of Balrog. We have to fight Balrog instead, so it's a bit of a wash. They have a few techniques to work with, including a limited degree of flight and some orb projectiles, but just spam harder than they do and you're good, really.
  • YOU'RE A NICE PERSON. After the fight, we can haul MALCO out of the ground. It takes it upon itself to aid us in turn, and promises to put together a bomb capable of blasting open Kazuma's shed. Just gotta go grab a few ingredients first, all of which can be found in Grasstown.
 

Cadenza

Mellotron enthusiast
(She/they)
I haven't played this game in ages - not since like 2012, maybe? Honestly not sure. But it seems to still hold up, going by the thread so far!
 

Kalir

Do you require aid.
(whatevs)
PART 04
SERIAL NO. 24601
GRASSTOWN PART 2

NOTES
  • BUBBLY BUBBLER. The Bubbler is an optional weapon with bizarre functions. At level 1, it's about the same as a level 1 Polar Star, but with slowly recharging ammo and shot deceleration (which is to say, it sucks). Level 2, it gains a lot of range and faster ammo recharge, while adding some spread to it's shots. And at level 3, the shots form an orbiting barrier around you, which pop either over time or when you release the fire button to shoot a projectile in the direction you're aiming. In theory, maybe you're supposed to use the weapon at the level you prefer to handle gaps in the rest of your loadout, but in practice, the level 3 Bubbler just does stuff no other weapon can do, and the level 1 Bubbler is just trash.
  • MY RIGHT BUMPER IS OVERLY SENSITIVE AFTER YEARS OF 20XX DASH-SPAMMING. This makes cycling through the weapons to optimally obtain weapon energy a huge hassle and I am not a fan.
  • SANTA'S FIREPLACE HAS CHARCOAL. It's probably meant to be a big joke about how Santa gives good kids presents and bad kids coal, but ehhhhh we still need it for the bomb and it's not like Santa minds us getting the charcoal.
  • YOU HAVE TO GET THE JELLYFISH JUICE NO FEWER THAN THREE TIMES. Four if you want the Bubbler. It makes for a big chunk of kinda-needless backtracking, although this isn't the worst instance of the game pulling that on us.
  • KAZUMA'S LOCKED IN A ROOM WITH A BUNCH OF DIFFERENT KEYS, AND THE DOOR HAS NO KEYHOLE. This feels kinda like he pissed off some old-timey mythological being that decided to trap him in a karmically-appropriate prison of some kind. But hey, we get the Gum Key, which is probably useful.
  • THE GRASSTOWN HUT IS NOT ABANDONED. Just after taking the missile upgrade, you'll get ambushed by what the game calls a Rabil. It'll almost certainly get one or two free hits on you if you're not ready for it, but it's not too dangerous beyond that.
  • GUM. The Gum Base is sitting right in the middle of things, but Misery and Balrog show up again. Misery turns Balrog into a Balfrog to fight us, giving us our first serious boss fight! Balfrog will slowly and invincibly advance across the stage while small (usually) frogs rain from above. Once they get close to a wall, use the fan to float overhead, and then trade shots when Balfrog opens it's mouth to attack. Make sure to cover your head when Balfrog does a big vertical leap!
  • FINALLY, KAZUMA IS RESCUED! And right after explaining things to him, Professor Booster, whoever that is, teleports in shortly after. The professor's got knowledge of the Doctor's plans to some degree, but it involves stuff that we don't really know much about. Well, we can get caught up back at the village, right after Kazuma drives you there on that motorb-
  • KAZUMA THAT IS NOT HOW YOU DRIVE A MOTORBIKE. Seriously, you should've just stayed with us, we have a gun and a hat.
  • SO WE'RE... WEAPONS? Upon returning, we're given a back-to-back double cutscene of exposition about the facts of the game. First, the nature of the red flowers: they don't actually kill, they just drive the Mimigas berserk and drastically increase their strength. (This happened with Igor, for one.) The Doctor's plan is to gather the Mimigas together to use them as living weapons, but he needs the red flowers for that. The flowers are stored somewhere in the Sand Zone, and we are the only person capable of surviving the hazards of the Sand Zone, so it falls to us to get to the red flowers first and destroy them.
 

Kalir

Do you require aid.
(whatevs)
PART 05


ANCIENT ROBOTS OF MYTH

SAND ZONE

NOTES
  • SUDDENLY ROBOT. Immediately after entering the Sand Zone, we catch a glimpse of a robot that looks very similar to us. We track down Curly Brace to her place, where she accuses us of wanting to attack the Mimigas and opens fire. She's got plenty of health, and the Mimigas she watches (collectively called the Colons) will fight alongside her and take hits. She can also shield herself when we use the Missile Launcher, so stick to the Fireball.
  • THAT'S RIGHT, THERE'S NOTHING BAD ABOUT THEM! Curly Brace has a bit more info about our past: the robots that came to the island apparently did so to attack the Mimigas, presumably because of the threat they posed if they ate the red flowers. But that's a conditional: without the red flowers, they're fine!
  • DO YOU WANT TO TRADE IT FOR MY MACHINE GUN? There are three ways you can upgrade the basic Polar Star, each of which is completely viable for endgame. The Machine Gun is the simplest and earliest upgrade, having vastly extended range and automatic fire. At level 3, the recoil when aiming vertically can adjust how quickly you rise or fall, allowing you to use it to hover around! It's not my favorite upgrade, but it's easily the best choice for a new player given how early you get it.
  • PUPPY HAT. Hajime is a necessity for progressing through the Sand Zone, although it's not immediately clear how. Not that that matters, we would take any excuse for a puppy hat.
  • THE SAND ZONE IS BASICALLY SPLIT INTO TWO PARTS. The upper part is very tightly-packed, full of splitting Polishes, destructible blocks, and dangerous sandy areas that hide lurking Sandcrocs. Always be on the lookout for the bones that indicate where the Sandcrocs lurk. We've got to traverse the entirety of it to find the way to break the Sunstone seal.
  • NO, THERE'S NO NEED FOR ME TO GET INVOLVED. We bump into Misery at the end of the path, but she ducks out and leaves us to fight Omega instead. Omega isn't too scary, they're more about the spectacle than anything. Keep an eye above you to destroy the mines, and keep that Fireball or Missile Launcher firing (or Machine Gun, if you have it) and Omega should be down before too long. Once they go down, the Sunstone seal is broken, and we can progress.
  • THE SAND ZONE IS ABOUT BACKTRACKING. The Sunstones are much closer to Curly's place than to Omega's lair, but that's the only time we have to spend up there. The lower area will have a lot more backtracking to it, but it still makes the Sand Zone a fair bit more tedious than it has to be.
  • JENKA'S HOUSE. Jenka is the one who has the key to the red flower storehouse, and she's also Misery's mom, apparently. Unfortunately for us, she isn't willing to play ball, or at least not until we rescue all of her puppies. So that's our next job: puppy hunt! There's a lot worse reasons to backtrack.
  • MICK IS HIDING ABOVE JENKA'S PLACE. As we learned earlier, the pawprint blocks are telltale signs of secret passages. Mick's not the only puppy behind one, either!
  • ARMADILLOS ARE IMMUNE TO MISSILES. I expect a certain level of strangeness to Cave Story's names and descriptions, but on this I am certain: the Armadillo's "Tough missile" description is a mistranslation, and it's supposed to say that it's a missileproof creature. None of the translations, not Aeon Genesis, not Nicalis, have gotten this right. This is an incredibly minor issue and I will adamantly insist that I am right about it despite knowing virtually no Japanese.
  • DESERTED HOUSE. Don't get lax and walk right forward upon entering, unless you like getting munched by a Sandcroc. The easiest way to go about it is to use the Map System to figure out the safe spots to jump, but you can also just feel around. Do it right, and you can rescue Shinobu.
  • MIMIGA FALLOUT. Jenka gives us more backstory: in the time where robots roamed the island, the Mimigas fought them and won, but they persisted in their berserk Rabil states, descending to the surface (whatever that means) to attack humans indiscriminately. Which colors her perception of the red flowers: we both want them gone, but she's unlikely to trust anyone whatsoever with the storehouse, while we want to destroy them.
 
Last edited:

Cadenza

Mellotron enthusiast
(She/they)
I'm sad that you can't do the puppy stack in this version of the game, but that's a small complaint, really - it gives you more time to listen to the excellent Sand Zone music. The whole soundtrack is really great, and I'm glad these videos are giving me an excuse to revisit it after not listening for many years.
 

Kalir

Do you require aid.
(whatevs)
PART 06
THIS IS NOT A HAPPY CAVE STORY
SAND ZONE PART 2

NOTES
  • KAKERU. The first four puppies are easy pickings, but the last one asks us to traverse the entirety of the Sand Zone and then return to Jenka's place. It's kind of a lot!
  • POINTING AT MY SCREEN LIKE A FOOL. Jen and I can see what I mean, so it's fine. If you want indicators of where we're going: you see how the right part of the map is two-pronged? The upper prong is where Omega is, the storehouse (and the last puppy) is at the very end of the lower prong, and Jenka's house is right where the two intersect. Kakeru (and Shinobu) were at about the halfway point of the lower prong.
  • SERIOUSLY, IS THAT JUMP DOABLE? Either that one or the following one I try on the return trip. Help me out.
  • SLEEPY PUPPY. Nene is the final puppy to rescue, and she's waaaaay at the end. As mentioned, some of the Nicalis versions of Cave Story allow for puppystacking, greatly decreasing the time spent exploring the Sand Zone. This is not a worthwhile reason to get a Nicalis version, because there is no worthwhile reason.
  • PAWPRINT BLOCK TUTORIAL. I guess it's nice to have if you don't have a finely-honed Metroid sense, but this late in exploring the Sand Zone? This area is punishing enough as it is, especially if you didn't get the Machine Gun.
  • NO! THE PUPPIES! The last time we head into Jenka's place, we're too late: Balrog's already seized the storehouse key. The puppies have all hidden, and we're tasked with what we were already set on doing: going to the storehouse and destroying the flowers. We're too late to get the key, but Jenka does give us the Life Pot, which is good for one full-heal at any time. Make it count!
  • HE CREEP. We finally encounter the Doctor face-to-face. And while you'd expect this to be a first fight with him, there's a LOT going on here. Toroko gets brought in and fed a red flower, King makes a grand entrance, arriving just before us but a hair too late, and Misery knocks him into next week. This leaves us with a fatally-wounded King, a smugly-retreating Doctor, and a...
  • FRENZIED TOROKO. Every single other fight prior to this point has been relatively fine, but Frenzied Toroko is a really tough one. Her main mode of attack is throwing an indestructible block, which does a chunk of damage when it hits and releases a Flowercub upon colliding with the ground. The Flowercubs are weak, but they litter the area just enough to make dodging the heavily-damaging blocks trickier than it needs to be. You're likely going to take hits this fight, so the rule of thumb is this: if you're taking a hit, prioritize it coming from a Flowercub than from a block.
  • WHAT ABOUT OUR FRIENDS? WHAT ABOUT THIS SWORD? The Blade is a nice weapon, but it's got a few limitations to it, particularly in that you can only have one shot from it on screen at once. There's some other quirks to it, but we'll have to discuss them later, because...
  • SORRY! HEE-HEE-HEE. Balrog and Misery ambush us as we exit, hoping to stop us from being quite the thorn in the Doctor's side we have been. Misery warps us to the Labyrinth, whatever that is, and then warps Balrog there as well because why not, honestly.
  • ONCE YOU GET IN, YOU NEVER GET OUT. The Labyrinth is the last place anything on the island ends up, and now we're stuck here, while the Doctor sets up his army of frenzied Mimigas. We're going to have to find a way out... but then what?
 

Kalir

Do you require aid.
(whatevs)
PART 07


TRASHBOT REVOLUTION

LABYRINTH

NOTES
  • THE DOCTOR GETTING THE WEIRD HAT. That's what's happening on the title screen! Now we know!
  • HEALING IS FOR SUCKERS. Coming right off of the severe beating you've gotten from the Frenzied Toroko fight, the Labyrinth can be really harsh early on. Fortunately, the only foes you have to deal with are some fairly-predictable Critters, and the shiny new Blade is more than capable of handling them. You also get a pretty quick life capsule that really helps out.
  • YOU SMELL A BIT LIKE MIMIGA. The Labyrinth is absolutely PACKED with the native Gaudis, most of which serve as enemies. The ones in the Labyrinth Shop don't attack us, but they do provide some handy lore about the Labyrinth.
  • SNAKE. Chaba provides an even better thing: the opportunity to fuse the Polar Star and the Fireball together, creating an entirely new weapon called the Snake! This handy weapon is closest to the Wave Beam from Metroid, with its oscillating high-level shots and wall-piercing capabilities. It's my preferred Polar Star upgrade, although not the outright best. Chaba also offers minor upgrades for the other Polar Star variants, although I wouldn't backtrack to them.
  • KING'S SOUL DWELLS WITHIN. At max level, the Blade calls forth the ghost of King, wielding the Blade for you in a wide-ranging slashing frenzy. It's a powerful weapon, if perhaps lacking the raw damage of point-blank level 2 Blade, but it's also immediately maxed out, so a single hit will disrupt the Blade back down to level 2.
  • OH HEY! HAVEN'T SEEN YOU IN A WHILE. We meet Curly Brace at a physician's camp just beyond the Labyrinth Shop. Dr. Gero doesn't charge us any money, just asks us to get some medical supplies from the nearby clinic. Curly herself isn't doing so great, since she apparently got captured at around the same time as us, and the Colons are nowhere to be seen.
  • ARMS BARRIER. In theory, you're supposed to come back here after you get an advanced form of vertical movement. In practice, you can damage boost off of the Critter to make the jump handily, and get rewarded with the Arms Barrier, a very nice tool that halves weapon energy losses.
  • LOOKS LIKE A GHOST BALROG. The old clinic is haunted by a ghost named Pooh Black, which bears a curious resemblance to Balrog. The attack pattern isn't very threatening, though. Just the up-and-down stomps, with a froth of ghost bubbles whenever they land. Any attack that can deal with the cloud at once will work really well, like the Missile Launcher.
  • THE TUNNELER'S THE BOSS! Shortly after that, we come across Monster X, a cat piloting a weird tank machine. This fight is up there with Frenzied Toroko as far as difficult fights go, with the Gaudis making for a hostile area even before it activates and the raw amount of projectiles it puts out, to say nothing of its massive health total. This is where the Blade shines, though, both for the wide area of the level 3 shot and the major damage when spammed up close, especially at level 2. Focus on maneuvering around the area first and foremost, dodging instead of taking shots immediately.
  • MAYBE THERE'S A SILVER LINING AFTER ALL... We find Prof. Booster just in time to hear his final words, and get a plan: destroy whatever's keeping the island functioning. I don't think that's a GREAT plan, given the Mimigas are still living on it, but with them in the Doctor's clutches already, we may have missed the boat on that one. We also get the Booster v0.8, allowing us to hover!
  • BOULDER CHAMBER. Curly's back on her feet and back to her usual chipper self, but even the two bots working together aren't strong enough to deal with the boulder. Balrog chooses that time to drop in and fight us once again, but Curly throws everyone for a loop in trying to convince them to move the boulder. Doesn't actually work at first, though.
  • FINAL BALROG DUEL. I play that fight REALLY badly, what with letting Balrog grab me like four times in a row, but at this point you really shouldn't have much trouble. Defeating them not only gets them to help you open the Boulder Chamber up, but also rewards you with Super Missiles! Faster, stronger, oranger!
 
Last edited:

BEAT

LOUDSKULL
(DUDE/BRO)
KALIR I JUST WANNA SAY YOU'RE KNOCKING IT OUT OF THE PARK. KEEP UP THE EXCELLENT WORK.
 

Cadenza

Mellotron enthusiast
(She/they)
Huh, I don't think I ever figured out how to get the Arms Barrier. Or I just forgot to go back for it.

KALIR I JUST WANNA SAY YOU'RE KNOCKING IT OUT OF THE PARK. KEEP UP THE EXCELLENT WORK.

I also agree with BEAT!
 

Mightyblue

aggro table, shmaggro table
(He/Him/His)
I don't think I ever got that like you're supposed to (with the later upgrade), I always just damage boosted into it.
 

Kalir

Do you require aid.
(whatevs)
PART 08


WATERY GRAVE

CORE, WATERWAY

NOTES
  • CURLY JOINS THE PARTY! For the last stretch of the Labyrinth, Curly fights alongside you, wielding whichever weapon you didn't take in her trade offer. She's invincible and uses the weapon at level 3, so she's a big help in fighting all the above-average enemy types in the area, including the Armor Gaudis.
  • TELEPORTER TO THE LABYRINTH SHOP. It's not really super-vital to have, but it's a nice way to return back if you wanted to use the Booster to reach the Arms Barrier, and didn't damage-boost or backtrack for it already.
  • PLENTY OF WATERY TERRAIN AROUND HERE. Curly's got her Air Tank, so she's fine, but we need to watch our step and air supply, lest we take some cheap hits here or there.
  • WEIRD PLACE, EH? We eventually reach an area full of heavy, HEAVY security. Tons of locked doors, most in disrepair, that bar our path forward. Only thing that makes sense to keep under this much lockdown is whatever keeps the island floating.
  • THE SCRAPYARD AT THE CORE. The last room contains not only the island core, but a whole slew of wrecked soldier robots. The only one that's anywhere near functioning simply repeats its final message, indicating they were on the losing side of a massively overwhelming force.
  • RETREAT! RETREAT!! And then it explodes, stunning Curly and awakening the Core as the boss of the Labyrinth area! The most difficult thing about the Core is the terrain; not only are there few places to stand where you can actually engage the core, but the room periodically floods, putting traversal out of the question and making dodging much harder, especially when it uses a pressure wave to knock you against the far wall. Despite all of that, it doesn't have much killpower; the large projectiles pack a wallop, but they happen infrequently, it's mostly just spam of smaller stuff that you can easily overpower.
  • THIS IS WHAT I HATE ABOUT ROBOTS. Misery warps in just as we put the Core in critical state, confirming our suspicions and Prof. Booster's last-ditch plan; if we destroy the core, the entire island's going to come crashing out of the sky. Stops the Doctor's plan, sure, but that'll have a LOT of collateral damage, to say nothing of our own survival odds. The Doctor shows up at the last second to warp the Core out to his lab, leaving us locked in.
  • YOUR SENSES DIM, AND THE WORLD GROWS DARK... After the Core is warped out, the room floods, as it did during the fight. Only difference is that this time, it doesn't lower back down. That's a major problem, and it looks like that's the end of the cave story for a bit there...
  • ...YOU CAN BREATHE. Easily the saddest part in this game, which is already not a very happy story. Still one of the most striking and tragic scenes in any piece of gaming media I've encountered, and I think that a major part of it is twofold. First, it's playing by the established rules of the game: we already know there's a way to be immune to drowning, and it's always been a thing that can kill you, but no area has come close to actually making that lethal except this one. And second: we don't get a choice in the manner. This is all Curly, doing the first thing she could think of to save us, and we just have to sit there and take it. A lot of heroic sacrifices in games tend to feel kind of like the player character is doing the Willy Wonka "no, stop, come back" routine, because they're sitting still in the cutscene despite being fully able to faceroll over the controller to handle the threat if given the chance to do so. Here? No chance. By the time we're saved, the damage has been done and there's nothing we can do about it.
  • WATERWAY. A short breather of an area, pun retroactively intended. There's nothing more dangerous than a jellyfish here, you're mostly just at the mercy of the water currents as they chuck you here and there and everywhere. After the dangers of the Labyrinth, it's almost relaxing. Just keep your head about you as you approach the spikes, it's almost always just one well-held jump to handle them.
  • 04-08-08 WIFE BORE CHILD. Partway through, we encounter a small cabin. The message and its existence is a complete mystery, but there doesn't seem to be anything else we can do with it.
  • MAIN ARTERY. One last miniboss before we escape. Ironhead makes a cameo appearance from Pixel's previous game, Ikachan, as a slightly different boss from usual. We're locked into a side-scrolling shmup sort of thing as we ride the current, taking shots at Ironhead as they swim in front and behind of us. They don't have much health or do much damage, but as the clue hidden in the map screen indicates, if you can complete this fight without taking damage, you get a Secret (which does nothing, but it's THERE).
  • YOU HAVEN'T SEEN THE GUN I MADE, HAVE YOU? Tetsuzou the gunsmith is awake now, and upset about the missing Polar Star we obviously don't have with us. In the event you do still have the Polar Star (passing up the Machine Gun and the Snake in the process), he might be able to finish it, but would he really be willing to help the person who stole his weapon?
 
Last edited:

Kalir

Do you require aid.
(whatevs)
PART 09
THE SONG EVERYONE LIKES
EGG CORRIDOR PART 2, OUTER WALL, PLANTATION

NOTES
  • AUDIO DECIDED TO BE WEIRDLY BALANCED THIS TIME. We're a little quieter than before and I'm not sure why, but it's here for this and next episode. Won't happen after that, I should hope.
  • THE EGG CORRIDOR IS COMPLETELY DEMOLISHED. The only thing indicating what might've happened here is a lone Counter Bomb about halfway through, which explodes in a fatal blast if left alone. Everything throughout the Egg Corridor is a wreck, Cthulhu's flown the coop, and what dragons are intact are hostile zombies. My guess is that the Doctor blew it up to destroy any possibility of escape.
  • THE SISTERS. There's a midboss partway through! Nothing fancy, just two dragons with the same healthbar. They're vulnerable when they open their mouths to attack, and hitting them enough stuns them, which also leaves them open. You can also skip them if you don't want the missile upgrade, but they're not too hard.
  • HATCH SUCCESSFUL. Fortunately, Egg No. 00 survived, as did Kazuma. That's the only bright spot for our current situation, though; as it stands, there isn't much we can realistically do to handle the Doctor and his army of Mimigas. Kazuma offers us the chance to escape the island with him, and honestly? We take it.
  • THIS DOESN'T SOUND LIKE A GOOD END. Naturally, we can't leave the Mimigas, Sue included, to that fate, to say nothing of the world's nations. So when we reset, we decline Kazuma's offer, and he repeats the same plan Prof. Booster came up with. Sure, it'll destroy the island and cause lots of collateral damage, but that beats the Doctor's plans for an omnicidal bid for world dominion. So, we've just got to get to his throne room at the top of the island, which means scaling the Outer Wall.
  • MOONSONG IS MY RINGTONE. It's also one of the best pieces of music in Cave Story, which has no shortage of solid tunes to it (and which is surprising given that Pixel had no formal musical training when he made the game). The Outer Wall itself is a similarly subdued affair, with only a few simple enemies to handle. The main threat is from the climb itself, but even falling isn't likely to cause any damage, just set you back.
  • CLOCK ROOM. On this playthrough, the Clock Room does nothing and is just a strange secret. It's something you can mess with if you aim to tackle the postgame.
  • DON'T KILL ME! I'M A HUMAN! At the top of the Outer Wall, we find Itoh, who freaks out immediately as we appear. He's a human-turned-Mimiga with a knack for engineering and a fear of heights. Good to see he's survived, I guess, but better news is that Sue appears to have spread news of us. Good thing we didn't duck out with Kazuma, huh?
  • NOTHING GOOD EVER HAPPENS ON A PLANTATION. The Plantation is a pretty spacious area with a few secrets to it, but not much that actually lets us progress further. Of note: there's a statue carver named Numahachi working on a statue of the Doctor, a jail or two full of rebellious Mimigas, and fields full of Mimigas working on the red flowers that won't speak to us. The exception is Kanpachi, the fisherman, who recognizes us and fishes us up a key to the teleporter room.
  • KILLER ROBOT! And then we get JUMPED ON. So rude.
 

Kalir

Do you require aid.
(whatevs)
PART 10
AIMING FOR THE TOP
PLANTATION PART 2, FINAL CAVE

NOTES
  • THIS IS THE JAIL. When we finally awaken, our only companion is the hungry Mimiga Mahin. It's not too much effort to escape the jail, but there's something more important: Sue left us a message about the Doctor!
  • THE DEMON CROWN. The Doctor's weird hat finally has a name! Apparently, the Demon Crown is a relic that's native to the island, from a former master of it. You can see the same headpiece on all the statues Numahachi carved. It grants magical powers to the wearer, including control over berserk Mimigas, as well as Misery and Balrog. I dunno how the Doctor heard of it, but he got onto the island research trip from the very beginning to snag the Demon Crown.
  • MOMORIN'S HIDEOUT. The password for getting in is Litagano Motscoud, which is a reversal and/or romanization of the game's Japanese title, "Doukutsu Monogatari". Once inside, Momorin Sakamoto greets us, making a strong impression with her deadpan attitude and snagging our Booster. At least we get a way to talk to the Mimigas working the Plantation thanks to the slightly-large Mimiga Mask.
  • BLOOM AWAY, MY CRIMSON DAINTIES! Most of the Mimigas working the field have only gotten their information from the Doctor, and believe they're preparing themselves for defensive measures against an attack from the surface. There's a lot of dissidents, but most of them either get jailed or keep their heads down. So we've got no problems hijacking one of their sprinklers to power Momorin's rocket.
  • ITOH AGAIN. His engineering expertise is enough to get the Controller for the rocket working, but he needs to be there and present to get it operating. We take a nap while we wait, but by the time the rocket is operational, the Mimigas and flowers have already been pulled.
  • FINAL CAVE. One last gameplay gauntlet before the showdown with the Doctor, and it's a tricky one. It's as hazardous as Cave Story has gotten, complete with Presses, lava-ish stuff, spikes, you name it. I play it a little lamer than I ought due to having the Snake, but as long as you keep moving and shooting, the Presses in the last tunnel shouldn't pose a problem.
  • BALCONY. Very tranquil up here on the top, assuming you discount the berserk Mimigas. There's a few relics of the initial expedition here, including a helicopter (which we naturally have no idea how to pilot) and a prefab building.
  • PROF. BOOSTER'S NOTES. Mostly about the Booster system we're using for hovering. He promises an advanced v2.0 version if he lives long enough, but as we saw, he dies mere seconds after getting warped into the Labyrinth. Is there anything that can be done about that?
 

Kalir

Do you require aid.
(whatevs)
PART 11
COLONY DROP
THRONE ROOM

NOTES
  • MISERY. She gives a brief perfunctory speech, indicating that she's stuck following the Doctor's orders, and then it's right to the battle. Misery's not a very difficult foe due to how infrequently she attacks, but she is a small target with frequent shields around her. Get under her with your heaviest weapon for big chunks of damage, and just keep moving to avoid her retaliation, not too bad.
  • THE KING'S TABLE. We find the Doctor with a handful of yet-untransformed Mimigas, standing over the magnum opus of his research: the Red Crystal. Overwhelming berserker power wasn't enough for just the Mimigas, he wanted that action for himself as well. So the Red Crystal works equally well on humans and Mimigas. Fortunately, it does nothing to robots, so we're still free to trounce him.
  • FIGHT THE DOCTOR! As you'd expect, this is a two-phase fight. The Red Crystal acts as a shield for the Doctor in both phases. In the first, he uses the magic of the Demon Crown to fire wave beams at us, with a shockwave move here or there. Both attacks block shots, and he teleports around often, so you don't have many windows to hit him. Play cautiously and don't let him grind you down.
  • I CAN'T CONTROL IT!!! During the Muscle Doctor second phase, he switches to charge and stomp moves, closing the distance a lot more. Still have to keep moving, but for different reasons. He can also conjure a massive stream of bats, which can cloud up the entire stage and make avoiding hits even harder. I'd say this is the easier of the two phases anyway, since he stays close enough to hit with weapons more or less constantly.
  • YOU'RE SO STRONG! Talk to Chaco twice after defeating the Doctor, and the Mimigas in the cages will get fully collectible hearts over their heads! It's a nice bit of midfight healing, which can help if you've already used the Life Pot by now. It's not really required, just a charming little easter egg sort of thing.
  • IF YOU VALUE HER LIFE, STEP AWAY FROM THE CORE. Misery makes one last-ditch attempt at a deal: to keep us from crashing the island, all we have to do is take Sue and get out of here. Which is fine by us, honestly; long as the Doctor's out of the picture, no need to wreck the Mimigas' home, y'know?
  • THE POWER OF THE RED CRYSTAL IS WONDROUS INDEED... Unfortunately, the Doctor somehow survived the destruction of his body, to the disappointment of literally everybody. Misery even tries attacking the incorporeal form, but to no effect. Between that, the Red Crystal transforming Sue, and the Doctor being able to possess the core, we've got a hell of a final boss on our hands:
  • THE UNDEAD CORE. The final boss of Cave Story is a real doozy. First off, you have frenzied versions of both Misery and Sue running support, with Sue charging you down and Misery summoning monsters. They can be taken down, but they have a lot of health. The Undead Core is a souped-up version of the earlier boss fight, with a longer hallway supporting its ranged attacks, and little to stand on save the auxiliary cores. The attack its using is determined by the face: the skull throws ground-and-ceiling fireballs, the grin has its options fire orbiting shots, and the void, only appearing near the end, uses a heavy cannon that does ridiculous damage. There's a lot going on and a lot of ways to handle this fight, so giving a preset strategy is hard. Think on your feet and move as the situation demands.
  • THE ISLAND'S STARTING TO COLLAPSE! Last part of the game: escape from the crumbling island! Nothing much to it, you can afford 5 hits easy if you've been taking your Life Capsules like a good robot. One last leap at the end, and you're in the clear! Make sure you ACTUALLY jump, mind you.
  • ONE MORE SAD FOR THE ROAD. Well, we stopped the Doctor, but I can't exactly call this a happy ending. Surely there has to be something we can do to change things... right?
 

Kalir

Do you require aid.
(whatevs)
PART 12
SCHRÖDINGER'S PROFESSOR
SKIPPING BOOSTER V0.8

NOTES
  • BACK TO THE LABYRINTH. Cave Story, by default, has only one save file, although there are mods and utilities to circumvent that. I just played back up to the Labyrinth because this game is fun. Notably, I did not fuse the Polar Star and Fireball into the Snake. Anyway, the point of all of this is to clear the jump to the door without grabbing the Booster v0.8. You are given a very slight visual cue that a canny player might catch on their first playthrough, but that one jump is the gateway to the postgame. It is very obtuse, but I'll have more to say on that later.
  • SOMEHOW THIS IS THE FIGHT WHERE I REMEMBER BALROG'S PATTERN. It's the same pattern as the first fights: one running move, one running jump, it's just that the latter has missiles added on. If you can remember that severely complex routine, you can handle Balrog easily.
  • DIFFICULTIES OF NO BOOSTER. The Labyrinth isn't that different the second time around, but we can't go heal up after the damage we did take in the Balrog fight, and lacking a Booster means we can't go fly up and grab health or missile drops, nor do we have an easy out when it comes to water. As such, the team-up section with Curly needs to be taken a lot more slowly this go around.
  • TOW ROPE. The Tow Rope only appears if you skipped past Prof. Booster. Which, I suppose, proves an extra layer of complexity for if you did the skip jump naturally, but didn't know to look for it. My take on the obtuse requirements involved here is twofold: first, as good as Pixel's design senses are, this is an easy mistake to make for a one-person devteam, having no real signposting for this sort of thing (although the sparkling is a giveaway, you're unlikely to actually go to that area, even during the fight.) And second: Pixel wanted to make damn sure nobody accidentally got the postgame on their first playthrough. The way I learned of it was after clearing the game normally and spoiling myself, and I think that's probably the route that was expected.
  • THE CORE IS MUCH HARDER WITHOUT THE BOOSTER. Flooding aside, you have very few places to stand where you can get hits in, and the Core has the mini-cores to bodyblock shots for it. That's not even factoring in the deadly combo of water, pressure waves, and the giant laser blasts, which ends my first run before it even gets anywhere.
  • BUT NOW THINGS ARE GONNA CHANGE A LITTLE BIT. After defeating the Core and passing out from water overdose, we get a cryptic message about Jenka; specifically, her equally-sorcerous brother Ballos. We won't meet Ballos for a LONG time, but that is the first we've even heard of him, and we've already cleared the game once. More immediately relevant: the Tow Rope we got lets us haul Curly along with us out of the Core room... but with everything still flooded, and the Waterway ahead, our prospects don't look so good...
 

AwkGrant

Snap, Crackle and Pop all in one physical form.
(He/Him)
The various steps to get to the end game are more than a little obtuse and required me to look up a guide to figure it out, but frankly I incredibly do not mind looking thing up about the games I play, and I was happy to have more Cave Story to play.
 

Kalir

Do you require aid.
(whatevs)
PART 13
THE GOOD STUFF
RESCUING CURLY

NOTES
  • AT LEAST WE GET FLOOR DORITOS. Again, without the Booster, we're missing out on the health and missiles above us, which would be REALLY NICE after leaving the fight with 7 health. Fortunately, there's hidden health pickups in the alcoves around the Waterway, letting us keep up despite the heavy damage we took in the Core fight.
  • JELLIES! Normally I like to play it safe and clear the jellies out in their entirety before I drop down into the current, but this time I mess up and we just get right in there whether we like it or not. I was entertained, at least.
  • THE WATERWAY CABIN JUMP IS MUCH HARDER THAN I MADE IT LOOK. Remember, we don't have a Booster, and the water curbs our jump height. If you mess that up, you cannot save Curly. You NEED to get to the Waterway Cabin.
  • THERE'S A NOTEBOOK, COVERED IN DUST... Once you rest up and set Curly in the bed, you can read the notebook on the shelf to learn a situationally-specific procedure for draining flooded robots. This gets Curly active for just long enough that she regains consciousness, which is a hell of a lot better than before. As she said, she couldn't think of anything else to do when the Core room flooded, so she gave us the air tank at her own expense. DO NOT leave Curly behind, though; she can't get through the Waterway on her own, and she'd be trapped in the cabin even after she rests up.
  • I GET HIT IMMEDIATELY IN THE IRONHEAD FIGHT. Haha chump. Anyway the reward for that's not anything with ingame value, just an Alien Medal as a proto-achievement.
  • OH NO, CURLY! CURLY COME BACK! Right after defeating Ironhead, the Tow Cable comes loose, and sets Curly adrift in the Main Artery. We wash up at the Mimiga Village without her; we can only hope she washed up on a safe shore herself.
  • ONLY YOU, I SEE... If you leave Prof. Booster behind, due to Schrödinger's Law (that's my story and I'm sticking to it), he survives long enough to escape the Labyrinth by fixing up the teleporter under him. He tasks us with finding Sue and escaping the island, but not before giving us...
  • THE BOOSTER V2.0. This powerful piece of mobility gear allows you to not just hover, but airdash in any orthogonal direction as long as the fuel holds out! It's got a lot more kick than the v0.8 and takes some getting used to, but once you master it, the old Booster isn't even close to the same. It is also a necessity for clearing the postgame.
  • HEY!! ISN'T THAT MY GUN?! We also go visit Tetsuzou, who rightfully chews us out for stealing his Polar Star. That said, returning it to him and still putting it through its paces, even in its unfinished state, impresses him enough that he lets us keep it after he finishes it. He gives a long-winded speech about what it means to be a creator, which I can't help but feel comes a bit directly from Pixel there, and at the end of it...
  • POLAR STAR UPGRADED TO SPUR! The Spur is the most objectively powerful weapon in the game. The basic shot is the same as the max-level Polar Star, but it completely bypasses the usual gimmick of collecting weapon energy in favor of letting you use charged shots. The charge time scales up with each level, with a level 1 charge being effectively instant, a level 2 charge taking only a short time longer, and a level 3 charge being significantly longer, about 50% longer than Mega Man X's charge, for example. The firepower of the charged shots simply does not have an equal in the game, and it pierces through enemies as well. I still like the utility of the Snake more, but the Spur is in a class of its own.
  • I SPEND MOST OF THE REST OF THE VIDEO FLEXING ON THE EGG CORRIDOR AND OUTER WALL. You can honestly skip it if you don't want to see the Spur being put through its paces, but there are two points of interest right as we reach the Outer Wall. There's a Little House full of tiny people that serves as an indication for one of the more annoying sidequests in the game, and the Clock Room's chest, which we can now open to obtain the Nikumaru Counter.
 

Kalir

Do you require aid.
(whatevs)
PART 14


YOUR NAME

RESTORING CURLY

NOTES
  • CURLY'S GOT THE AMNESIA NOW. Cthulhu, who's recovered her, hints that there may be a mushroom that works as an amnesia cure, which gives us a clear path to take to the Graveyard, considering the high amounts of mushrooms there. We need to stop by there anyway to pick up Mr. Little.
  • QUICKLY SPEEDING THROUGH THE FIRST HALF OF THE PLANTATION PLOT STUFF. There's very little actual run-and-gun gameplay in this part, but right now we only need the teleporter back to Arthur's house up and running, which means getting sent to jail and reading Sue's letter to open up the secret hideout of Momorin. Everything about building the rocket can and should be left for after we complete the side stuff.
  • "HE'S WEARING A GREEN SHIRT." "...OH JEEZ." The first order of business is tracking down Mr. Little, who is in the Graveyard, walking through the grass. You will basically never find him without a guide. If you find him, AND you've already talked to his family, he'll hop in your inventory and wait to be brought back home.
  • THE MUSHROOM BADGE. In order to get the Mushroom Badge, you have to navigate a very silly yes/no menu maze to show off just how much you really, really want it. That said, we don't actually need it, what we need is...
  • MA PIGNON. Even without the Spur, for the point you encounter Ma Pignon, they're kind of a pushover of a fight. Most of their time is spent hopping around, with only infrequent and fairly non-threatening attacks. Take them down and they resign themselves to being used as an amnesia cure.
  • BACK THROUGH THE EGG CORRIDOR AGAIN. Probably should've cut that but ehhhh it goes by fairly quickly. Feel free to skip to 10:38 or so if you don't want to watch it.
  • THE NEMESIS. If you return Mr. Little to his home, he'll offer a trade: your Blade for his Nemesis. The Nemesis is a powerful weapon that shoots strong piercing shots, but it also handles weapon energy poorly: every level it gains is WEAKER than the previous one, and it only takes a single dorito for it to gain a level. This makes the Nemesis a tricky weapon to handle given what the rest of the game has taught you, but it's still very handy to keep around.
  • JAMMED IT INTO CURLY'S MOUTH. Upon administering the Ma Pignon like a professional, Curly's amnesia doesn't just clear up from the recent water damage, but from even before that! She reveals our protagonist's name and our shared mission: while all the other robots were sent to the island to capture the Demon Crown, the two of us were sent to destroy it. Their mission was ultimately a failure, ending with Miakid, the third bearer of the Crown, defeating them and capturing the Demon Crown.
  • IRON BOND. By recovering Curly's memory in full, she gives us the Iron Bond, which is our ticket to the postgame (probably, I think). Do not enter the Last Cave without the Iron Bond.
 

AwkGrant

Snap, Crackle and Pop all in one physical form.
(He/Him)
Nemesis is pretty rad.
Also I have vague memories of the Machine Gun being about as strong as the Spur if you can keep consistant fire on the enemy.
 

Kalir

Do you require aid.
(whatevs)
PART 15


HITTING DIFFERENT

LAST CAVE (HIDDEN)

NOTES
  • KNOCKING OUT MOMORIN'S ERRANDS. Doesn't take very long provided you go for them as fast as you can.
  • I AM NOT A QUALIFIED ROCKET PILOT. Their rocket also has no actual seating or anything, so maybe it's not all on me, but I feel like we shouldn't be flying this thing.
  • YOU FEEL A BLACK WIND BLOW THROUGH YOU. This is the text where the game tells you it has officially stopped pulling punches. Upon entering the Last Cave, all of your weapons drop to level 1. This is the hidden advantage to the Spur and Nemesis that no other weapons get: they can handle that kind of handicap no problem, because the Spur ignores that entire gimmick, and the Nemesis functions best at level 1 anyway.
  • THE LAST CAVE IS DESIGNED FOR THE BOOSTER V2.0. It's possible to not get your Booster v2.0 back from Momorin, keeping the Mimiga Mask through the end of the game. This changes the Last Cave to its non-hidden variation and prevents you from accessing postgame, so we don't do it, but you CAN. With the kind of jumps you need to be able to pull in this area, navigating it without the v2.0 would be literally impossible.
  • TRUE HEROES MEET THE RED DEMON. The Last Cave also has a midboss in this iteration, a Red Demon. Functionally it's a super-powerful Droll that fires a lot more shots, so it's not that hard. It is, however, an important enemy in the lore! You can visit Jack in the Assembly Hall after clearing Grasstown to hear the details, not that they're THAT important. Suffice it to say that defeating the Red Demon, despite the useless Clay Figure Medal it offers, is a requirement for postgame.
  • BALCONY AGAIN. Once you're clear of the Last Cave, things go back to normal for endgame. Balcony still has the helicopter and prefab building, there's still the much-more-valuable cache of goods near the Throne Room, and you still have a boss rush to deal with. DO NOT USE THE LIFE POT DURING THIS BOSS RUSH.
 
Last edited:

Kalir

Do you require aid.
(whatevs)
PART 16
A GLIMPSE INTO THE ABYSS
SACRED GROUND

NOTES
  • A SECRET PASSAGE IN THE PREFAB BUILDING. If you do get hit by falling rocks, you can examine the bookcase to reset to the start of the escape sequence. And you absolutely want full health going in, because down there is HARD.
  • I OFFER A BRIEF SAMPLE OF THE NEXT AREA. I don't complete it, but by "brief sample" I basically mean all of it except the boss at the end. As such, this'll be a smaller update.
  • WELCOME TO HELL! The Sacred Ground starts you off with draining all your weapons to 1, a sign with that message, and a really harsh booster segment just to really put down exactly what you're getting yourself into. I made that segment look easy, but only through practice. The Nikumaru Counter tracks your time in this area, and the best time I have ever gotten after loads of attempts was 4'45"01.
  • THE TALE OF BALLOS. Throughout this area, we'll learn about Ballos from an unknown source. We haven't seen him all game, but he's pretty much THE reason for all of the game's events, even if he didn't intend any of them to happen or even know they WERE happening.
  • FIRST AREA: BOOSTER FUEL CONSERVATION. As Jen observes, there's basically nowhere safe to land here, and plenty of spikes, instakill or rarely otherwise. If you want to clear a gap, make sure to only use EXACTLY as much juice as necessary for each boost, because if you're flying blind, you don't know where, or if, you'll find another patch of land to safely refuel on.
  • CURLY AGAIN. No clue why she's down here, but that's better than leaving her on a bed. The Tow Rope should keep her safe while we're rocketing all around.
  • SECOND AREA: COLLAPSE IMMINENT. The island is still collapsing, and this area is feeling it worse than any other. While there's little terrain to deal with, the constant falling blocks and continual waves of Butes prevents there from being anything close to a safe spot to stop. The gameplan here is to go as fast and as low as possible, maximizing the amount of time you're boosting through. Standing your ground to fight is possible, but the delay on Butes dropping items is very much not in your favor here.
  • THIRD AREA: THE SLAUGHTERHOUSE. Curly recovers fully once you reach here, but there's no time to undo the Tow Rope, so she just grabs a Nemesis of her own and shoots in the opposite direction that Quote is facing (or, if you're both on the ground and looking up, she aims up with you). That firepower is a welcome addition, because this area is full of near-constant streams of small, fast Butes, with a few heavier enemies thrown in. There's also a lot of Deleets that lock down passages every so often, forcing you to stand and fight the waves of enemies that approach you (although the Snake can cut time here considerably by destroying Deleets through walls).
  • HEAVY PRESS. The boss at the end of the Sacred Ground isn't the final boss for postgame, nor are they very hard if you know what you're doing. Basically: avoid their periodic lightning bolts and the Butes, and spam as many shots straight upward as you can. The Nemesis is ideal here for speedrunning, and the Spur suffers somewhat from the boss being covered by blocks, at least early on. You'll see more next time.
 

Kalir

Do you require aid.
(whatevs)
PART 17
HOW TO DESTROY HELL
SACRED GROUND PART 2, BALLOS

NOTES
  • THIS MIGHT TAKE A COUPLE RUNS. I trimmed out the bulk of the runs that didn't make it, but this is still a pretty big video, so be forewarned.
  • YOU CAN'T SHOOT THROUGH THE GROUND. This spot here is probably the biggest timesaver in a speedrun if you have the Snake. Shoot through the walls to activate the Deleets ahead of time, minimizing the amount of waiting you have to do. It shaves off a good 10 seconds or so!
  • PLEASE DON'T DIE THIS TIME. Or, as BEAT might put it, LOLDEAD. You do at least get a preview of how you leave the area: Heavy Press crashes down into the floor below (which is lethal if you're under them), opening up a passage of some kind.
  • PASSAGE? This is an area we've been to before, under much shorter circumstances. To the left, a doorway to the Plantation (which we can't open right now). To the right is Numahachi's statue-carving workshop, now with the completed statue of the Doctor. We vandalize their creations and move on.
  • MYSTERY PUPPY. Ballos' weird ghost dog appears before us and requests that we kill their master. It feels a little arbitrary given that we've had all this exposition about Ballos indicating that we need to kill him already, but there's no indication that Quote or Curly actually has that info, relative to the player.
  • WELCOME. I AM BALLOS. We finally find Ballos, and proceed to fight him in a lethal fashion. His pattern is fairly simple to start out: charge forward, lunge upward if we're above him, and then crash down if we're below him, sending a wave of bones through the area. After a while, he'll ascend into the air and call down lightning, but we don't make it that far on the first run.
  • AND BY THAT I MEAN WE DID IT ON THE FIRST TRY. I'm only including me screwing up early on for comedic sake.
  • AND THEN WE'RE GONNA GET HIT SIXTEEN TIMES IN A ROW AND DIE IMMEDIATELY. You can't make this stuff up, I tell ya.
  • FALLING BLOCKS REMAIN ACTIVE THREATS EVEN AFTER THEY HIT THE GROUND. I still don't like that I got hit at that point, but eh, game disagreed.
  • JEN OFFERS SOME INSIGHT AS TO HOW SHE WOULD PLAY THE GAME. I politely offer her the opportunity to demonstrate for us all, but she respectfully declines. Another time, perhaps.
  • USING THE LIFE POT AT THAT STAGE WAS A BIT OF A MISPLAY, BUT NOT BY MUCH. There were still health pickups I could've put to use, provided I timed my approach a little more safely. That said, my health was low enough that the Life Pot was due to happen sooner or later, and this area has less pressure, so I could actually remember it reliably, rather than risk forgetting my options due to heat.
  • BALLOS SECOND PHASE. In this form, Ballos becomes a giant spherical enemy, and attacks primarily by jumping. His only weakpoint is the eyes, which can be hard to hit at first, but since he stops every three jumps and it's safe to stand on him, it's not too hard to get in there and line up a charged Spur shot. Not complex, but probably the longest of the phases due to the massive health total and few opportunities to land hits.
  • BALLOS THIRD PHASE. Here, Ballos calls up a barrier made of eyestones and rolls around the stage, dropping skull projectiles when above you. Each eye has to be damaged enough to close in order to progress. It's not hard to line yourself up between eyestones, but they deal monstrously high damage, so even a single misstep here can end the run. The Green Devils flitting around above in this phase make for great refills for health and weapons, but it can be a little risky to fly up into range to grab hearts. If you can manage it, the Nemesis can pierce multiple eyestones at once, which makes it an ideal choice for getting through this phase faster.
  • BALLOS FINAL PHASE. In the final phase, Ballos' shell cracks open, allowing him to be hit anywhere, but the eyestones remain around him as a defensive measure, to say nothing of the arena transforming: cursed Butes approach from the sides, the floor is covered in spikes, and the only safe spots to stand are the rotating platforms and Ballos himself. The expected way to do this fight is to shoot down the open eyestones, which makes them bounce around and leaves Ballos open, but the speedrun method is just so much better.
  • COLONY DROP AVERTED. We stop the island from crashing, narrowly escape Ballos' dying revenge, and go live out our days in peace! This is a relatively happy ending! I'll do a big epilogue post later, but for now, that's a wrap, everyone.
 

Kalir

Do you require aid.
(whatevs)
EPILOGUE BONUS POST!
IT AIN'T OVER UNTIL THE BALROG HUZZAHS

This was a really fun project to do! My entire reason for doing LPs is to introduce games I like to people who have never played them, and jenkitchen is an ideal person for coming along for the ride since she likes watching games more than playing them. I'll DEFINITELY include her on future projects. Not entirely sure which one I'm gonna do next, I have a few ideas but nothing solid yet, but I'm going to keep at it. But that's for later. Right now, I want to talk about Cave Story a bit more, especially in the elements that didn't come up during play.

WHAT CAN ONE PERSON ACCOMPLISH?
The most consistently impressive thing about Cave Story is that the original game was entirely the work of a single person over five years. It's not Pixel's first work by a long shot; he'd made a few other small games beforehand, most notably Ika-chan. But Cave Story was his most ambitious project yet, and it's definitely shown here. A massive island to explore, full of neat weapons and secrets and a delightful cast of characters, all with a unique flavor that I'm sure a lot of people at the time of its ascendance would've written off as "oh those wacky Japanese games" but which doesn't really do Pixel's creativity justice. This is a landmark game for indie games for a reason, and it's kind of amazing that it's entirely free to play: just head to this place, download the game and a language patch, and you're off!

Not to say the game is entirely free of blemishes, mind you. The problem with single-person projects is that if you're off-base, you have nobody who can help you correct. There's a few ways Cave Story hits this particular hurdle, most of them tied up in the secret ending requirements virtually requiring you to look up a guide (which I consider a slight feature). You also have the heavy amount of backtracking, especially earlygame in Grasstown and the Sand Zone. And while I never showed it to jenkitchen, I question the choice of taste in the secret items you can obtain at Curly and Chaco's places (look it up if you want, I'm not posting it here). Those aside? Cave Story is a classic and for good reason.

WHAT DID HE DO AFTER THIS?
Well, disregarding the remake stuff, Pixel's next title is a game called Kero Blaster. While the game is entirely different from Cave Story, it's not hard to see the similarities in the gameplay. It's a mostly-lighthearted romp with a stoic gun'sbraster adventuring through a colorful world wielding an array of powerful weapons, taking a turn for the darker as you get going. Kero Blaster is just as worth your time to play as Cave Story is, even if it's not free. Hell, I'd argue that if you liked Cave Story, you should go out of your way to buy Kero Blaster to show Pixel support. If he's working on any other games past this point, I'm not aware of them, but I'd happily look forward to whatever projects he chooses to work on.

WHY THIS AND NOT THE REMAKES?
To be honest, I don't know that I have the headspace to write in detail about this, nor do I want to end this LP on a downer, but I'd be remiss if I didn't discuss it in some detail. WildcatJF's article above is what I'd prefer to link people to, that's a much better in-depth breakdown of Nicalis' history with Cave Story than I could put out. So I'm going to keep my thoughts here short and to the point.

Cave Story is a game that deserves to be renowned for both its history and its gameplay. Nicalis was given the job of publishing it to a wider audience. They succeeded, but only by leeching the IP away from the original creator and taking it for themselves. I will not touch the remakes, nor any other project put out by Nicalis.

CREDITS:
POSTERS:

Mightyblue
: Yeah Pixel legit made a music-editing tool for his games! Cool stuff!
Albatoss: Backtracking for the Arms Barrier is time-consuming and not actually that ideal, but if you're going for the Whimsical Star for some reason it's an option.
BEAT: THANKX BRO WE SHOUD DO A PROJECT ALSO SOMETIME
Awkward Grant: I'll take your word on the Machine Gun thing, I just run Snake on most files so I don't have a good point of comparison.

US:
Kalir:
I wrote all these words and played the game! Wow! SUB TO MY PATREON DOT COM WOOOOOOOO
jenkitchen: My girlfriend who is great and I love her and I like that she wants to see the cool games I show her!

YOU:
YOU:
Whether you've played Cave Story or not, thanks for reading the LP!
 
Top