
-
Welcome to Talking Time's third iteration! If you would like to register for an account, or have already registered but have not yet been confirmed, please read the following:
- The CAPTCHA key's answer is "Percy"
- Once you've completed the registration process please email us from the email you used for registration at percyreghelper@gmail.com and include the username you used for registration
Once you have completed these steps, Moderation Staff will be able to get your account approved.
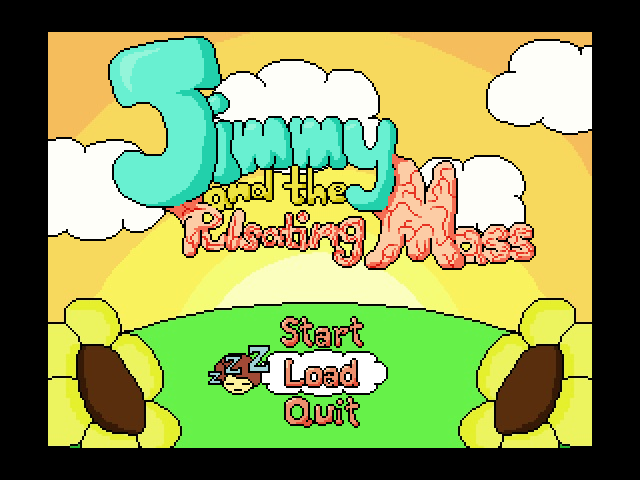
Fresh. Let's Play Jimmy and the Pulsating Mass!
Back to Let's Play
< 1 2 3 4 5 6 7 8 9 10 11 12 13 >
< 1 2 3 4 5 6 7 8 9 10 11 12 13 >
|
#1
 10-24-2019, 06:18 PM
|
|||||
|
|||||
|
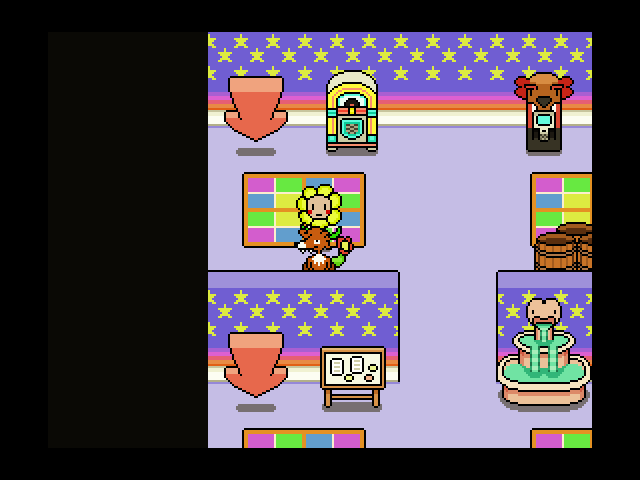
Hey kids!
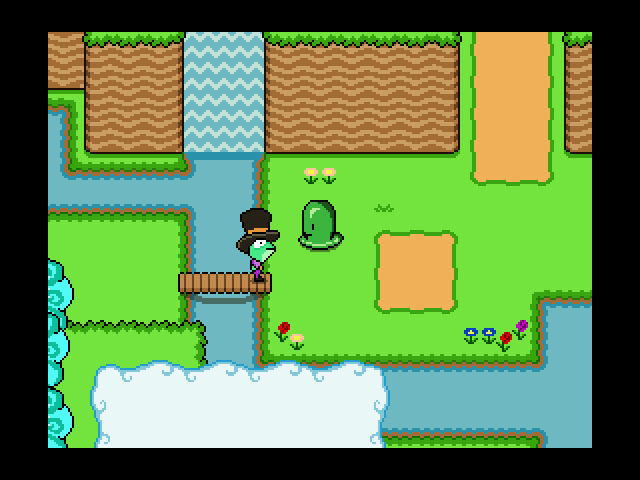
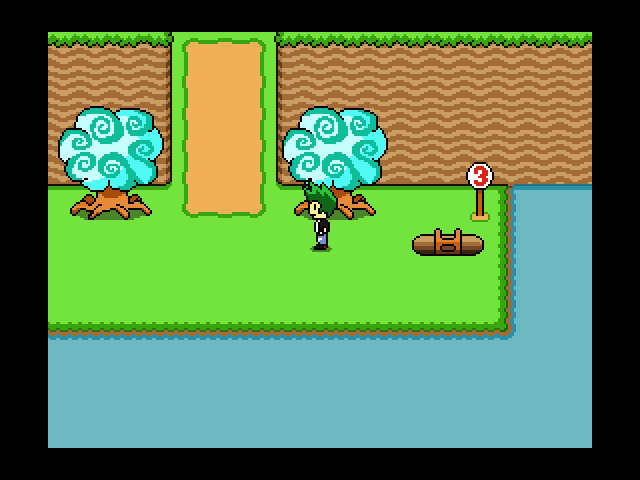
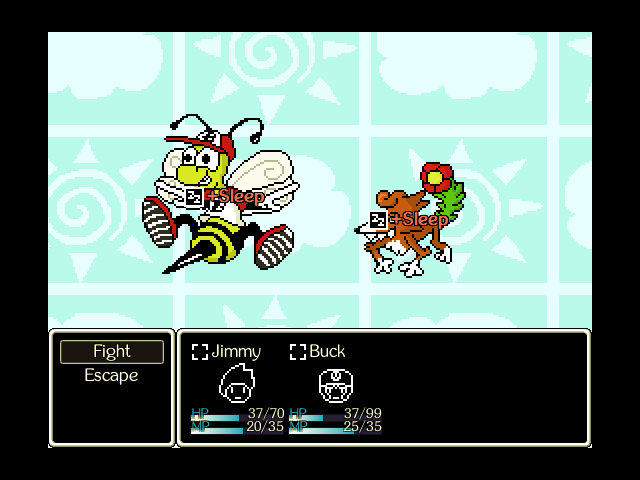
 Music: Serotonin Flowers Let's play Jimmy and the Pulsating Mass! Released as a one-man RPG project by Kasey Ozymy, Jimmy and the Pulsating Mass is one of those things that people will inevitably compare to Earthbound and the like, and not without reason. The story takes place in the dream of Jimmy, an eight years old boy, as he goes on his adventure. In addition to some very good writing and character design, the gameplay itself also does some very neat things with the RPG formula that I'd like to see more games adopt. But you'll see those in due time. Oh, one thing I will warn y'all of right at the very start, and consider this a Content Warning: This game loves its body horror and can get very bleak at times. Like, you remember that part from Mother 3, right? It can hit at LEAST that hard when it wants to. For this LP, I'll be doing a bit of a blend of screenshot and video, but mostly stick to screenshot where possible. This is an RPG, after all, and a lot of the game just isn't going to make for fun video. Here's how things start off, however: with a song. 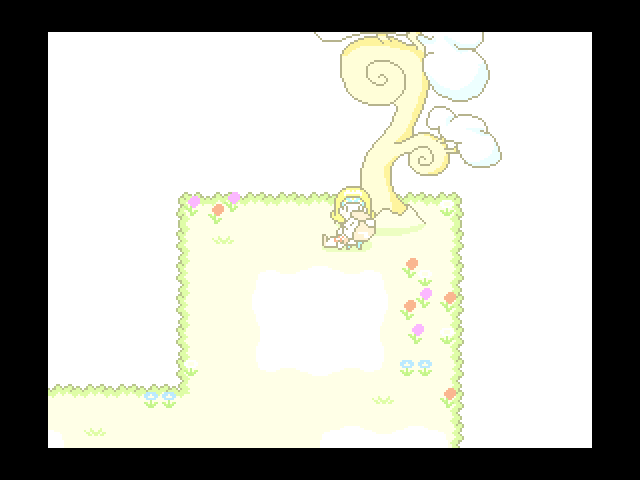 Music: An Open Window And then, a hillside with a tree.  Quote:
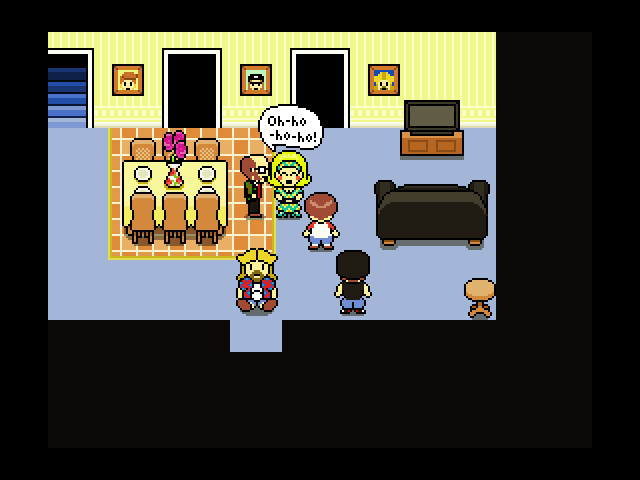
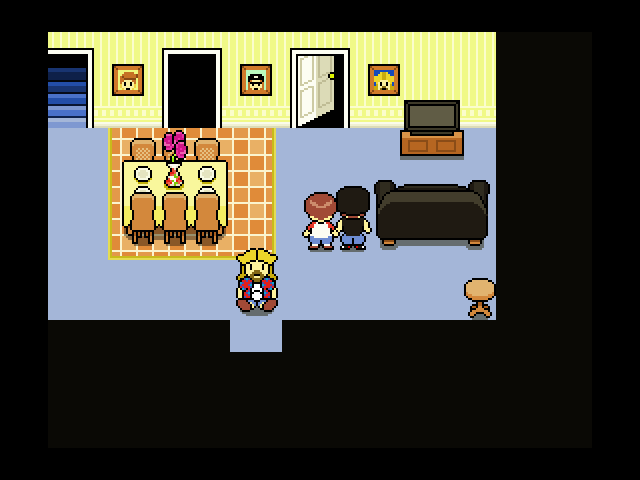
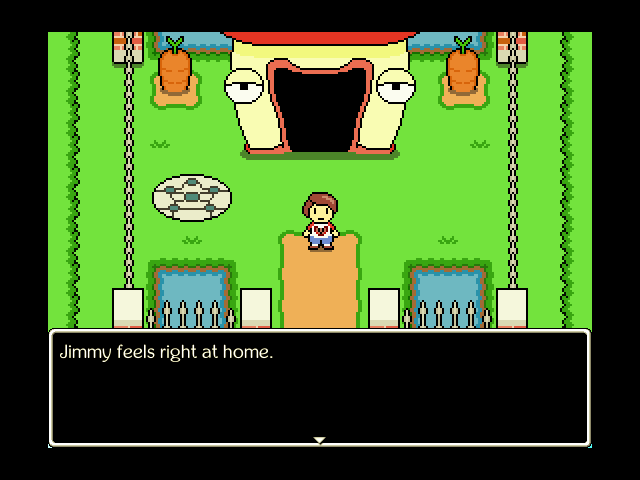
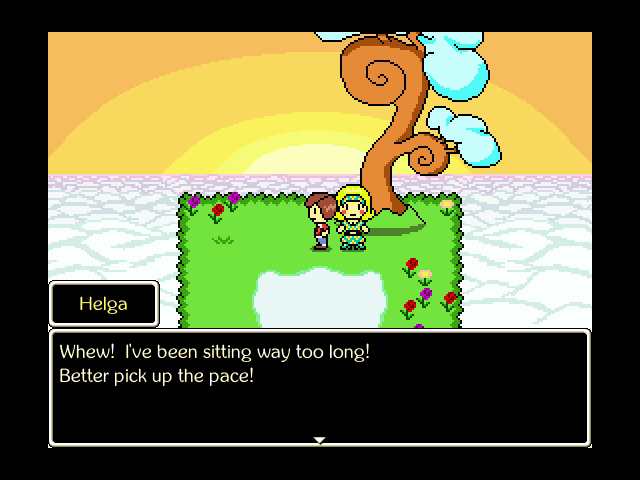 There's a lot of charm to all of these characters we're going to meet in our adventure. 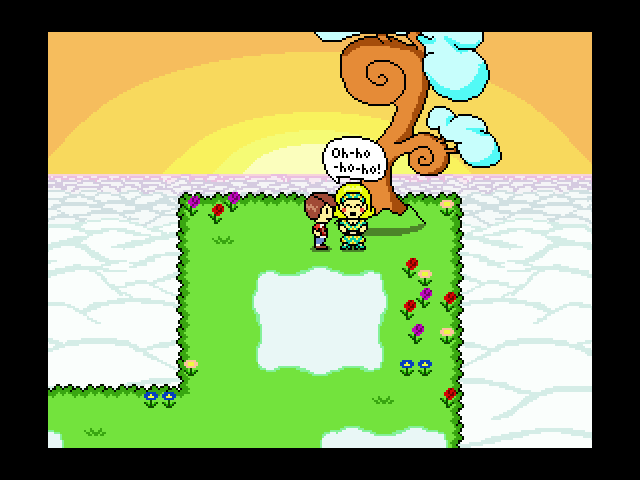 Helga, in particular, is a constant ray of sunshine and hope, and is always there to help Jimmy to have a good time. 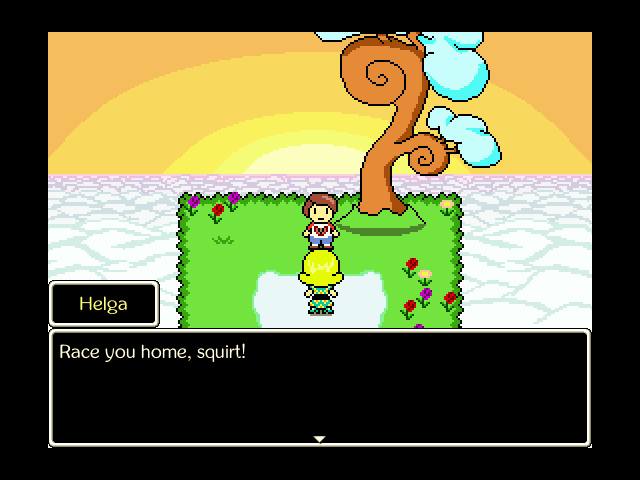 Wait, I don't know the controls yet! 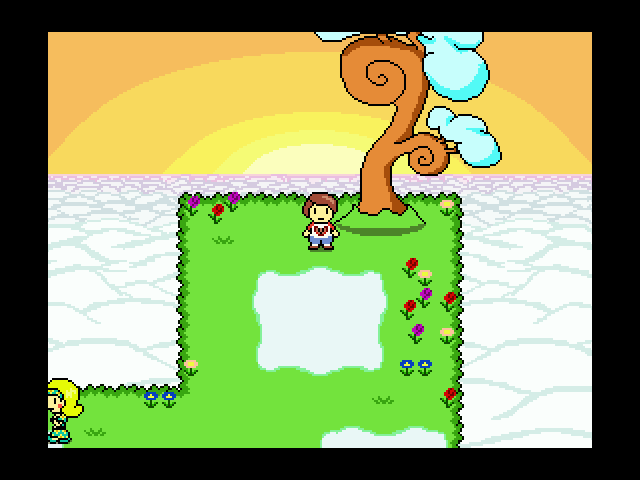 No fair getting a head start!  Oh, okay. This is an RPG Maker game, to a degree. But if you've played a bunch of those you could probably already tell.  One extra key not mentioned is the A key, which lets you do a field action. Right now, that lets us get Jimmy's perspective on events wherever he is, not unlike the Tattle move in the Paper Mario series. Jimmy is a silent protagonist, but only because he's shy and doesn't like to talk. He is absolutely his own character in this story. 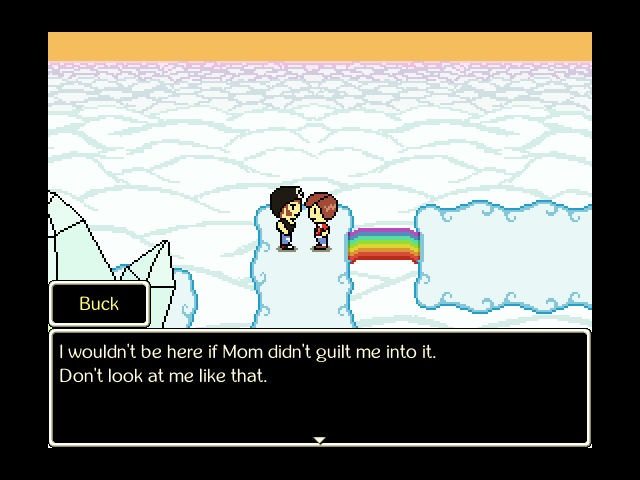 A little further in, we meet Buck, Jimmy's big brother. 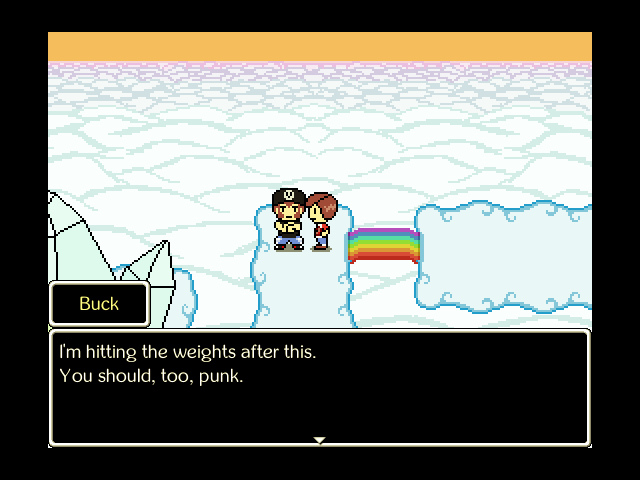 Buck is every stereotype you have ever heard about a meathead older brother, for better or worse. 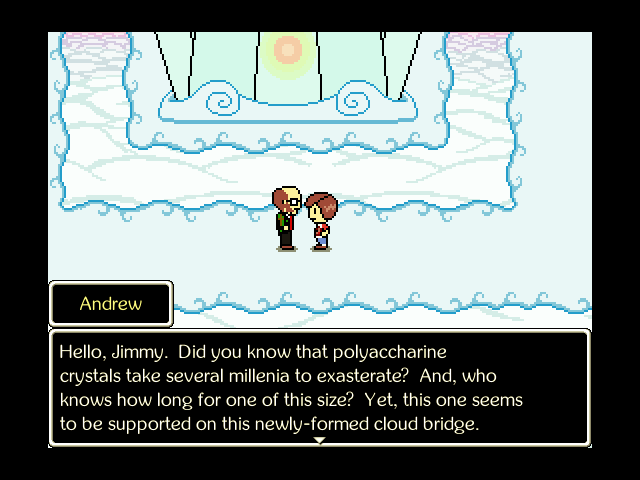 Next up is his dad, Andrew. Andrew is really smart, and uses lots of big words that Jimmy doesn't quite understand. 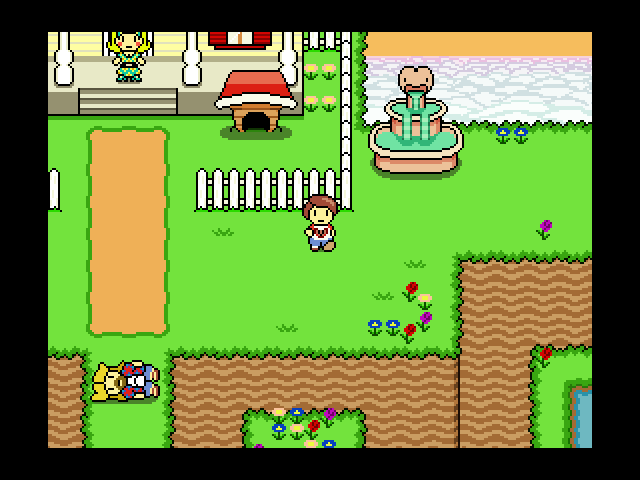 Just beyond that is Jimmy's home. The fountain there is a fullheal for Jimmy's party (which presently consists of just Jimmy). 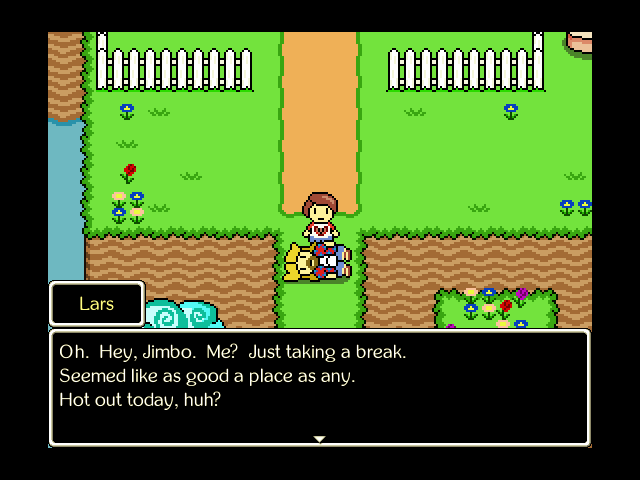 Down here is Jimmy's uncle Lars. Lars is, to put it plainly, a loser. He's a nice enough dude, but unquestionably a loser.  Oh, okay!  Jimmy's mom is cool. 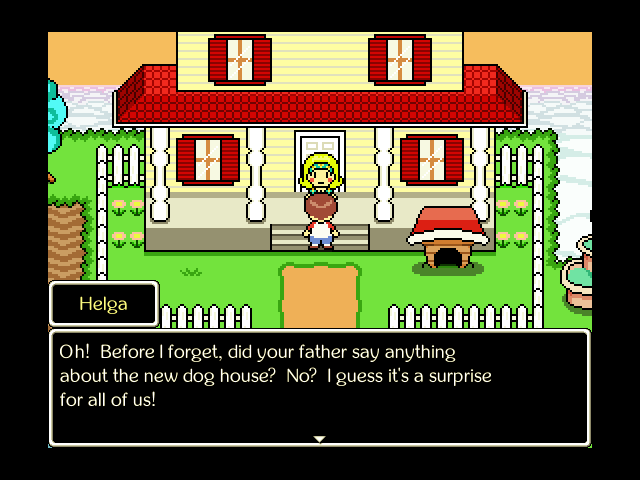 Quote:
 With that, Helga leads us inside. 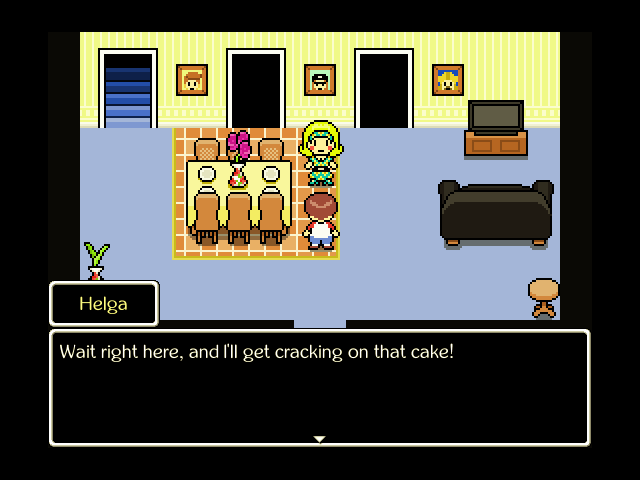 Sure! 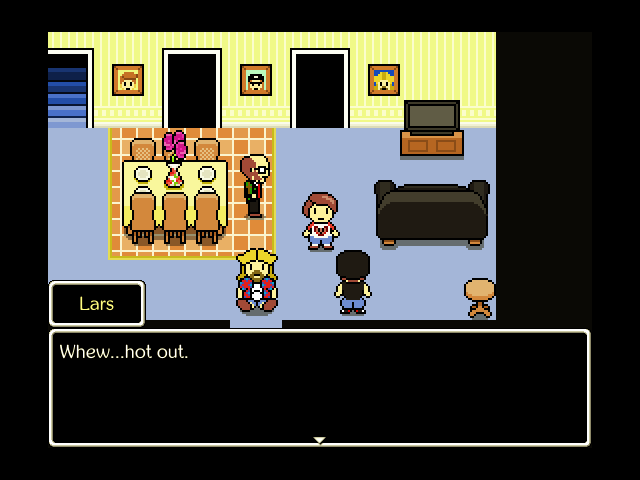 The rest of the family files in not long after.  Hi again Helga.  Helga and Andrew are extremely happy with each other. 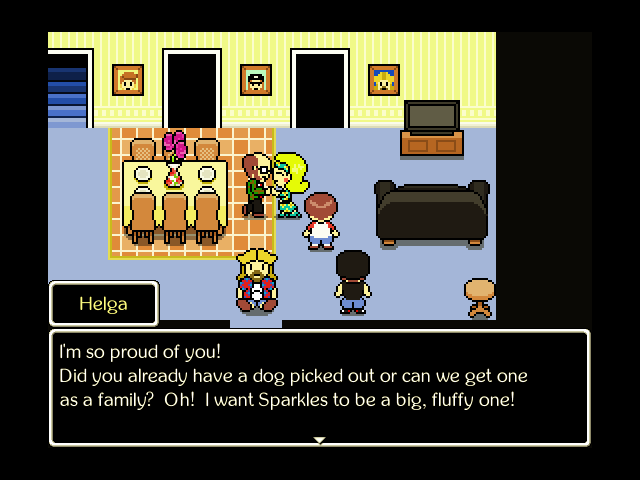 Quote:
 Quote:
 Quote:
|

|
#2
10-24-2019, 06:22 PM
|
||||||||||
|
||||||||||
 Quote:
 Quote:
 Quote:
 Quote:
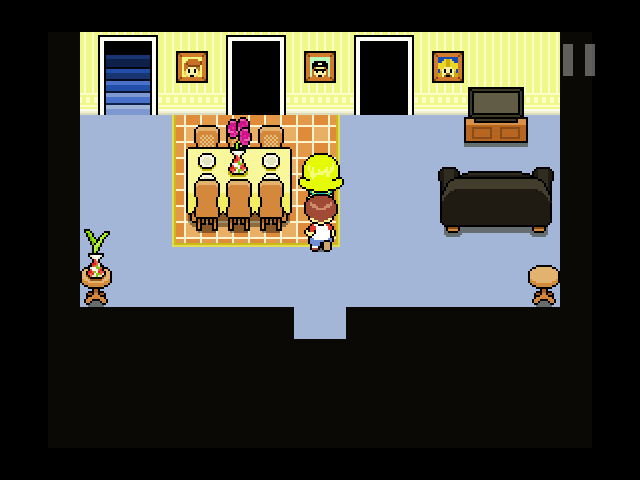
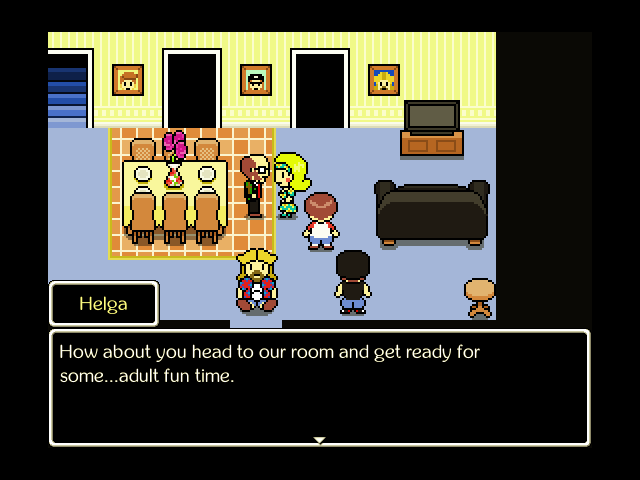
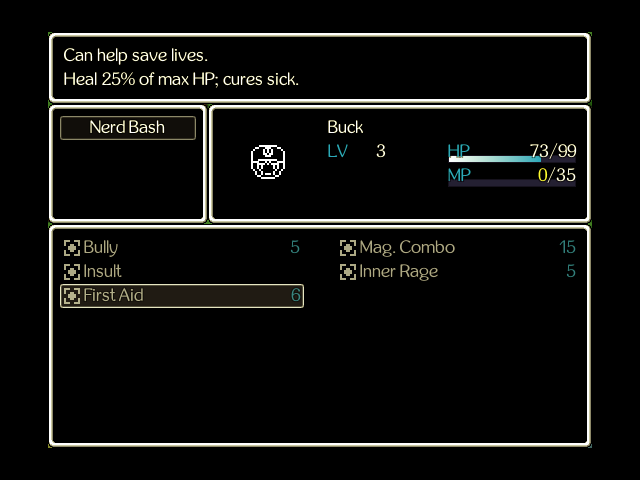
 With that, Helga leaves to help Andrew with the adult fun time, and we're stuck with Buck. 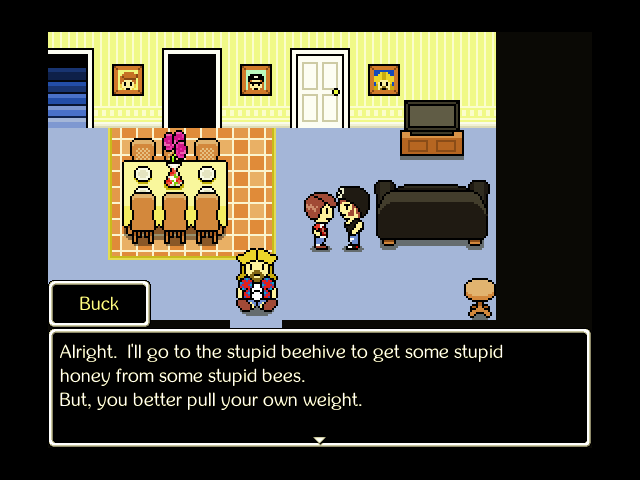 I'm sure it'll be... fun? Anyway yeah, Buck joins the party! We'll go over his stuff in a bit. 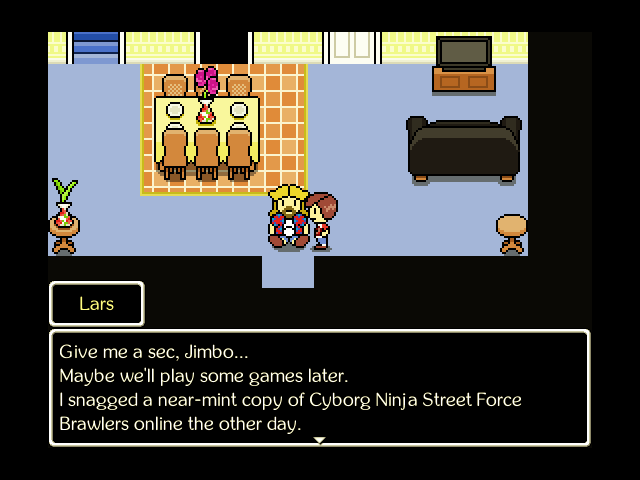 Lars will stay here until we help Buck clean his room. 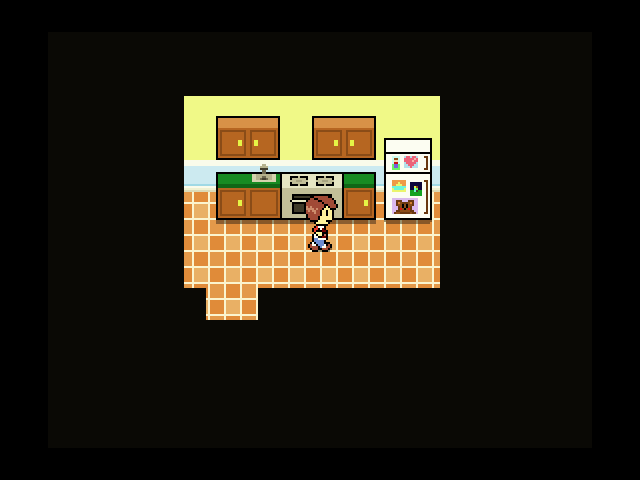 The kitchen is right next to Helga and Andrew's room. 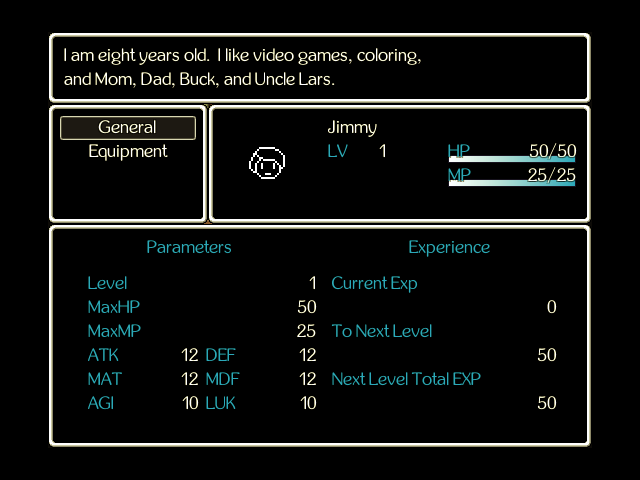 It's in here that I elect to check the stats of our two adventurers. Jimmy's stats are... kind of bad. It's hard to tell without anyone else to measure against, but there really isn't a single stat Jimmy does well in. At least, not right now. Don't worry, though: he'll eventually become really strong.  Right now, our only measuring stick is Buck, Jimmy's brother. As you'd expect, Buck has very good HP, ATK, and DEF, even factoring in the extra level over Jimmy. His other stats that aren't related to SICK GAINS aren't really any better than Jimmy's, although they're not really worse either... the difference comes from equipment. 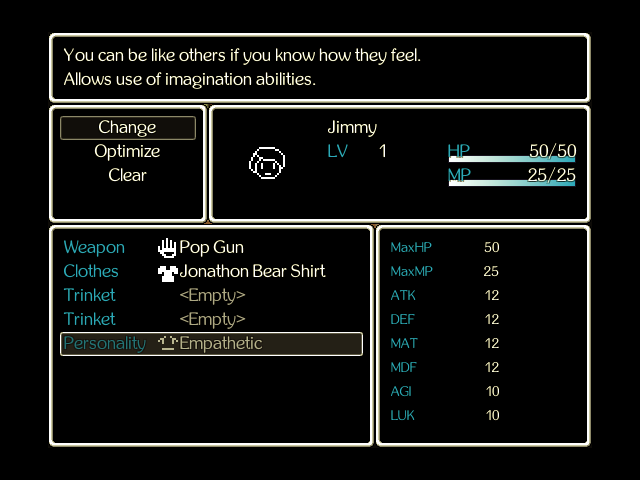 Speaking of equipment: every character has access to a weapon, armor, and two trinkets, although the Personality slot is fixed and specific to each character. In Jimmy's case, he has the strongest personality of all: because he's Empathetic, he is by far the most customizable character in the game... eventually. Right now, this does nothing, but that will change this very update! He also has a Pop Gun (+2 ATK/MAT): Quote:
Quote:
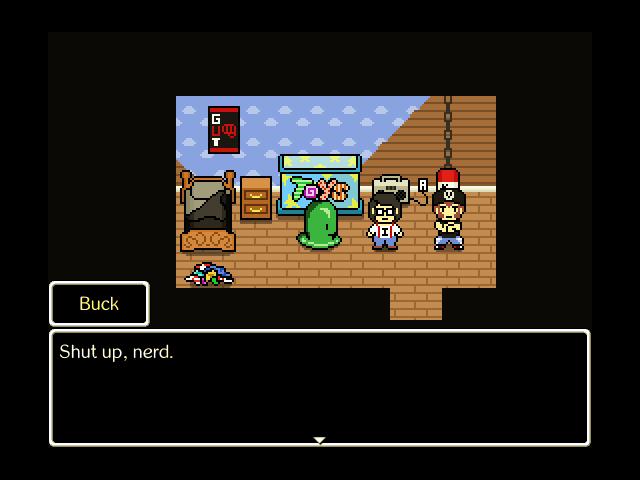
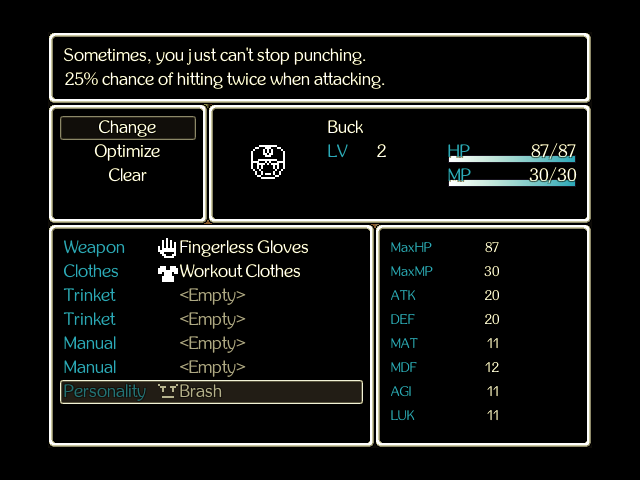 Buck, on the other hand, is a Brash guy. He'll get in a fight and won't think twice, because that gets in the way of punching twice. He also has two Manual slots, like every character except Jimmy. We can buy or find items later that can be equipped here to unlock new moves, although Buck already has moves of his own that will see usage shortly. Buck also starts with a set of Fingerless Gloves (+2 ATK): Quote:
Quote:
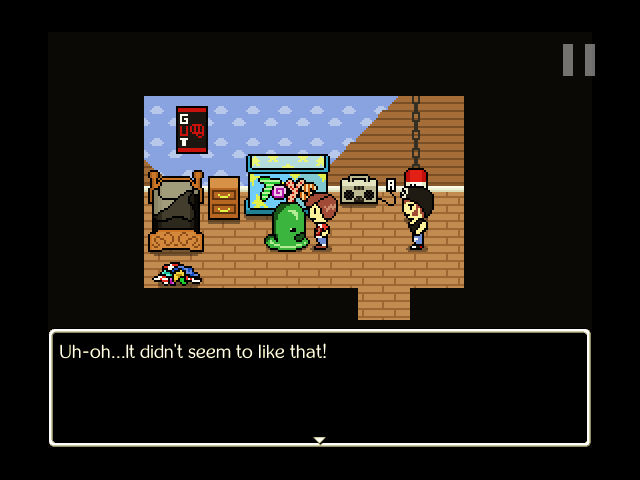
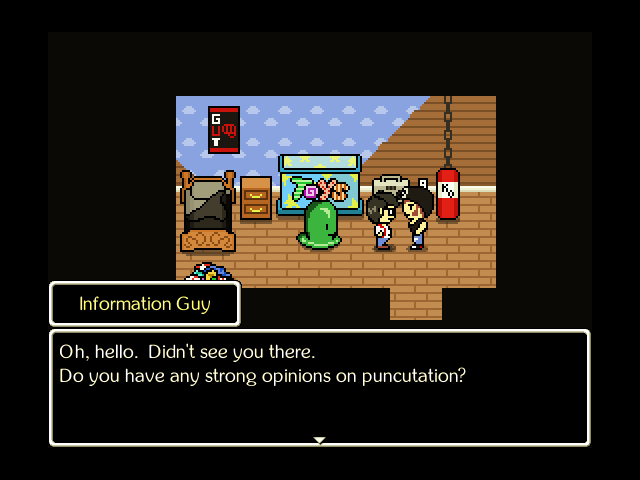
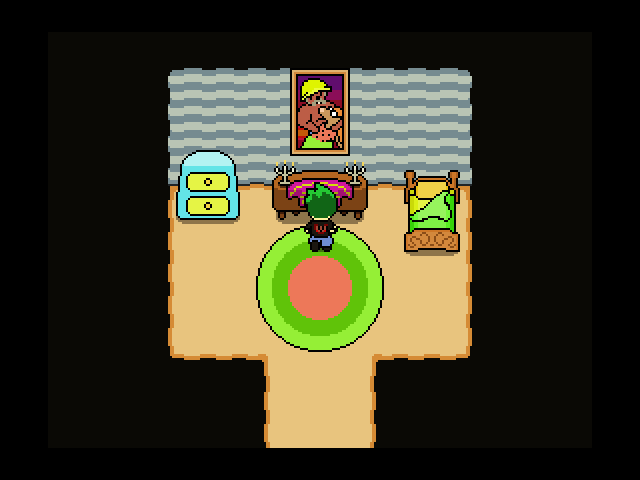
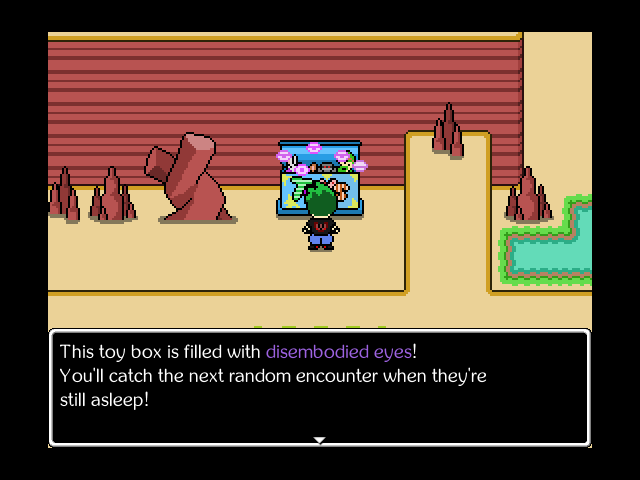
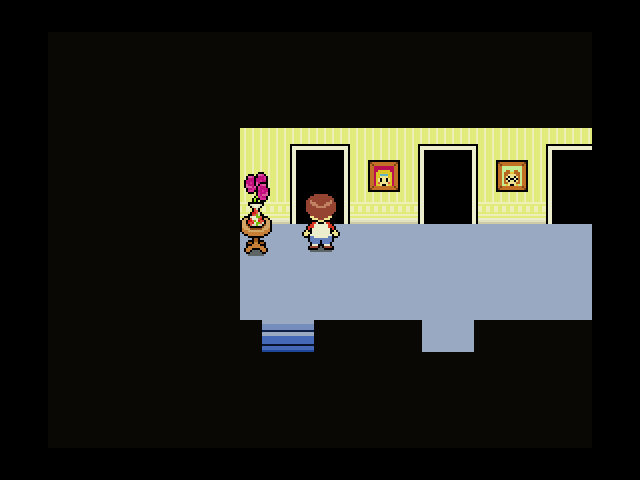 Jimmy, Buck, and Lars all have rooms on the second floor.  Jimmy's room is pretty nice and clean, but the closet is... alarming. Not only is it under heavy lockdown, but something on the inside is knocking. We do not open it. 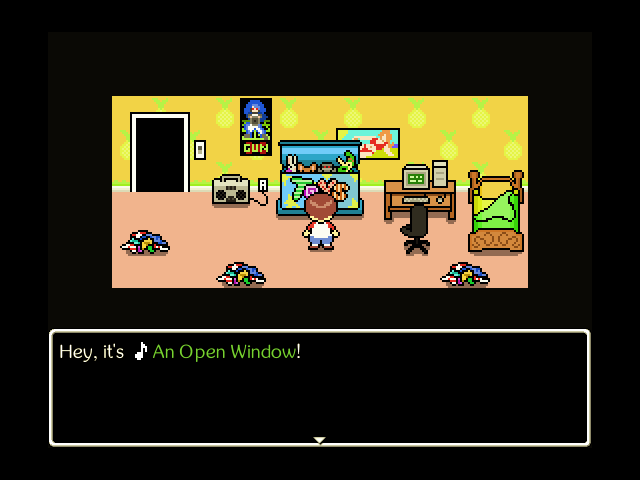 Lars' room is a mess, but he has a toybox Jimmy can open! Toyboxes are treasure chests, but they also have a unique mechanic available to them we'll see later. For now, though, we just get ourselves the music that's playing now. Almost all of the music in the game can be found in chests like these as Singles, which we can play elsewhere. 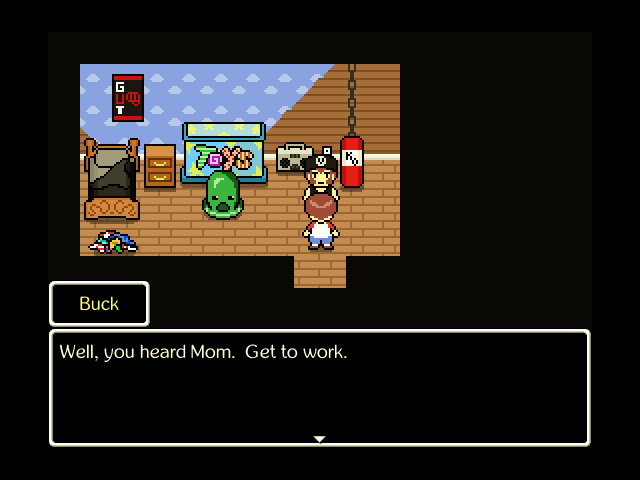 Buck's room is somehow in even worse state than Lars' room. Even disregarding the Revolting Blob, the wallpaper's only half on. No computer, either; Buck will not sully his hands with the tools of nerds. 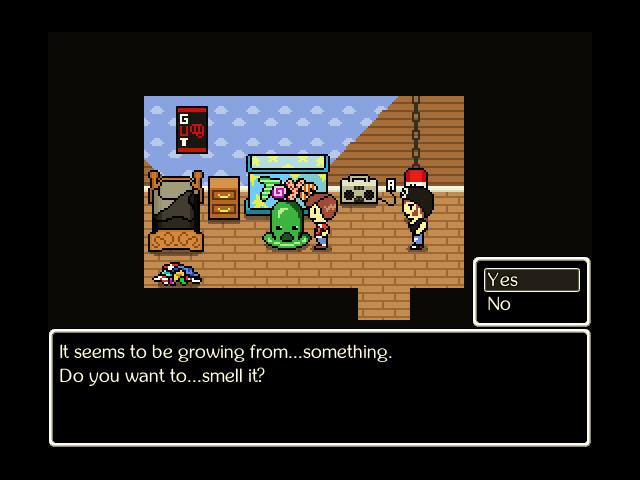 Grody. Well, in for a penny. 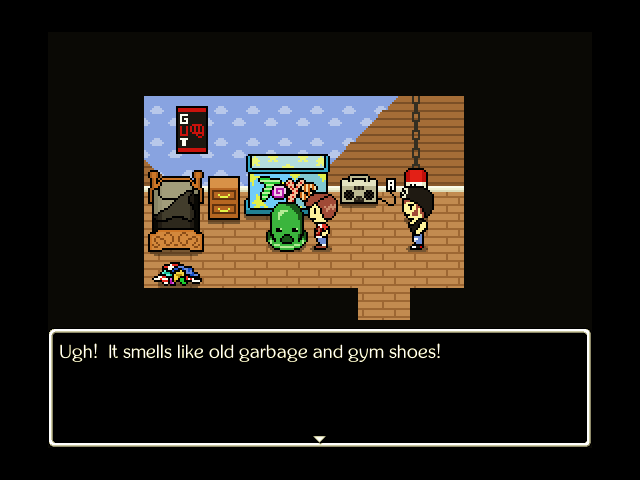 At this point, the game asks if you want to touch it. If you don't, then you'll get another prompt... 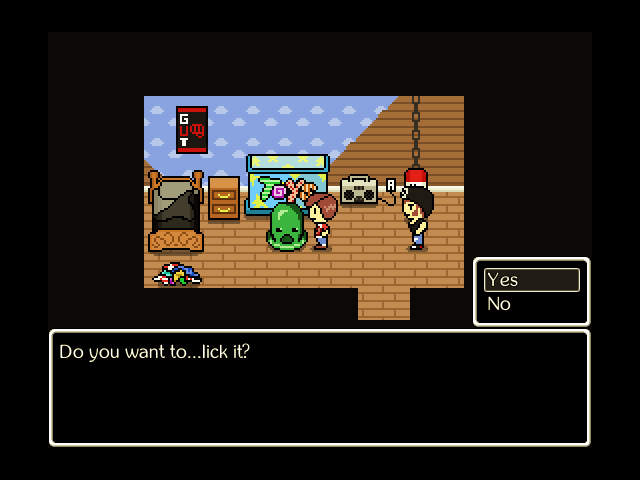 Quote:
 Jimmy makes good choices.  Music: Motion Sickness Every fight in the game starts with a record scratch and the transition shown there. Every fight is Fresh. Do not question it. Anyway, here's the Revolting Blob! This is a fight meant to introduce you to the combat mechanics of the game, such as they are. It's not a hard fight at all. You should have no trouble winning this fight, and could probably manage it with Buck alone, especially since Jimmy has no techniques and does so little damage. The Revolting Blob has only two moves it can do normally: it can either attack, or tell an off-color joke, which does nothing. However, the turn after telling an off-color joke, it will always tense up like a python, entering a Counter stance that lets them hit back hard after any physical attacks. This is a big part of how Jimmy and the Pulsating Mass handles combat: many enemies that LOOK like they're doing a traditional goof-off move are actually telegraphing something. Buck's Insult, which not only disables the Counter status but inflicts Startled, is a good way to disrupt any enemies going for such a move, but we'll cover that more in a little bit. 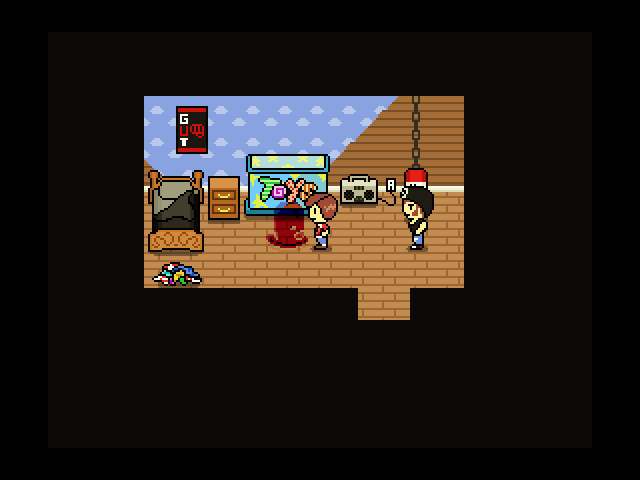 In any event, that's about as much of Buck's room as we can stomach cleaning. But first...  Music: The Noble Sea Let's show off what Jimmy's Empathetic personality can really do!  Quote:
 We unlock the true power of Imagination! |
|
#3
10-24-2019, 06:24 PM
|
||||||||||||||||
|
||||||||||||||||
 ...Great? 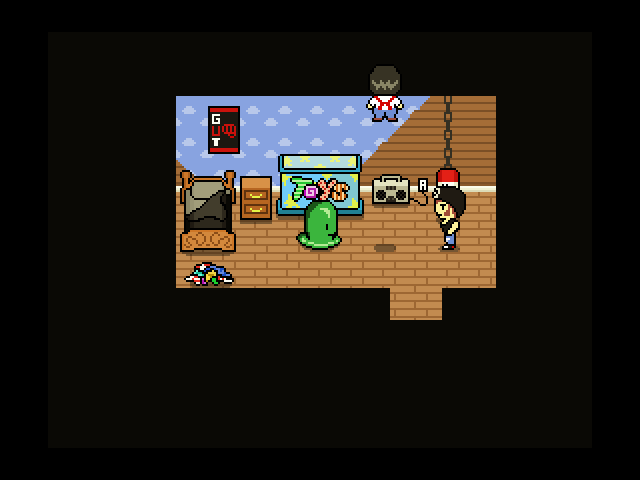 Without warning, some weirdo falls out of the ceiling and lands right in Buck's room! 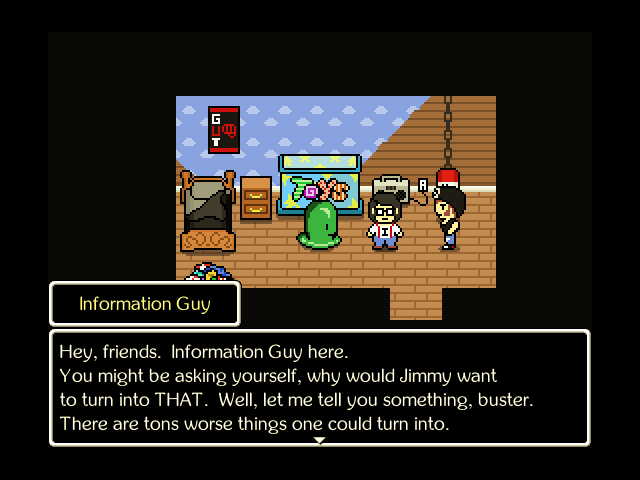 Music: Worm Party Quote:
 Quote:
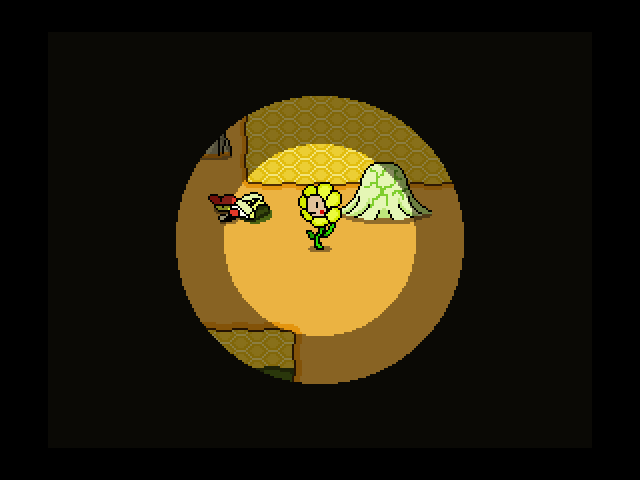
 And if that's how we feel, imagine how Buck feels right now. 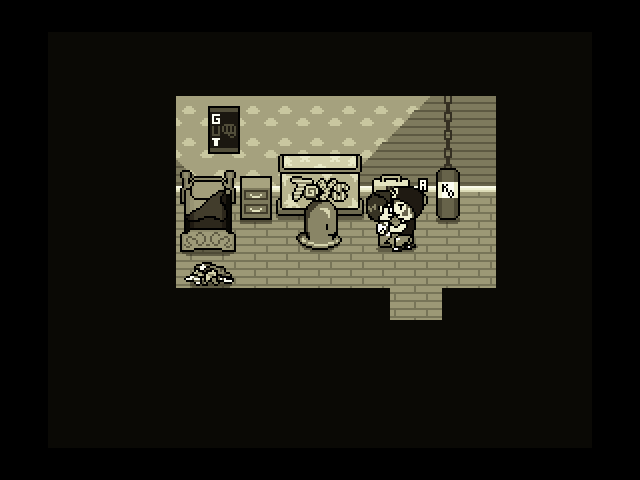 Music Probably like punching you in the gut, really hard!  Music: An Open Window Anyway yeah. Imagination lets us change forms and do cool stuff, and it's the core of how Jimmy plays. With that, we're done in Buck's room. 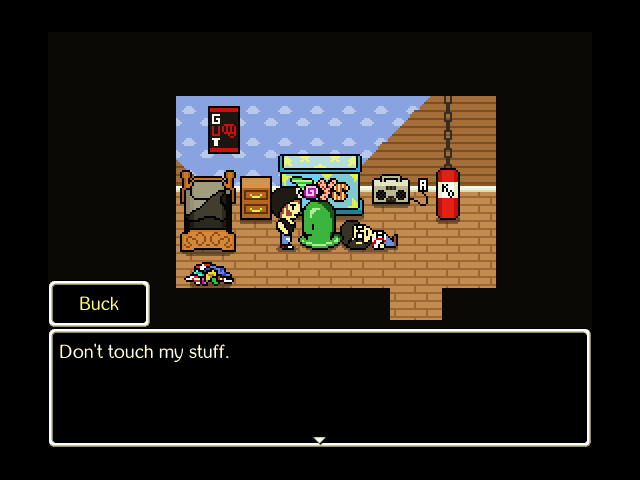 We can't get the toybox right now. 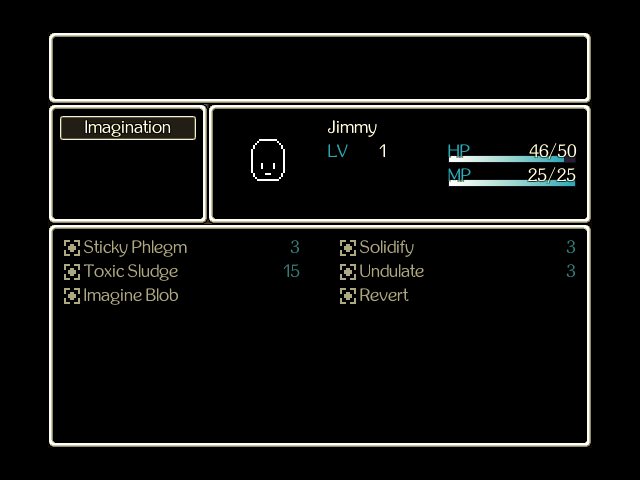 So, let's talk Imagination. Each of Jimmy's forms has access to four moves, all available in his normal skillset while transformed. He can also instantly transform into (or out of) any forms he has available during a fight, although transformation has a three turn cooldown. This lets you adapt to the situation in a fight as it changes, not just your team composition. Right now, Jimmy can Imagine Blob: Quote:
Quote:
 Buck's skillset, to nobody's surprise, is Nerd Bash. We'll cover this in full now, since Buck will be a fixture of the party for a while and he has some nuance to his skills not immediately evident. First up: Quote:
Quote:
Quote:
Quote:
 Anyway, enough about Buck. It's Jimmy time. Jimmy's stats (counting equipment) get the modifiers listed before you when he is transformed into a Revolting Blob, and every level of Revolting Blob he has also applies a permanent +1 DEF to all of his forms! Additionally, when he levels up the Revolting Blob high enough, moves that it has access to can be equipped in this menu. Anything in the starred slots is available regardless of form, while things in the other slots are exclusive to Jimmy's normal form. Each form, in addition to their usual four active skills, can unlock passive skills (which aren't normally available even in that form). Quote:
Quote:
Quote:
Quote:
Quote:
Quote:
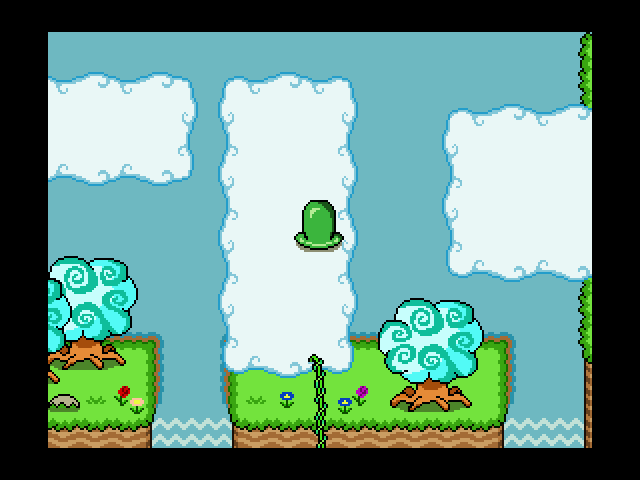
 Anyway, let's test out the ability of the Revolting Blob!  We can easily slip down the shower drain like this. This takes us to the downstairs bathroom, which links right into...  Music: Worm Party Adult fun time. 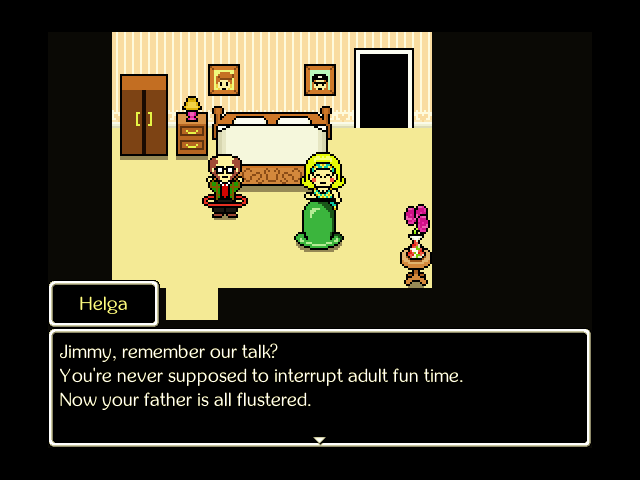 My bad. 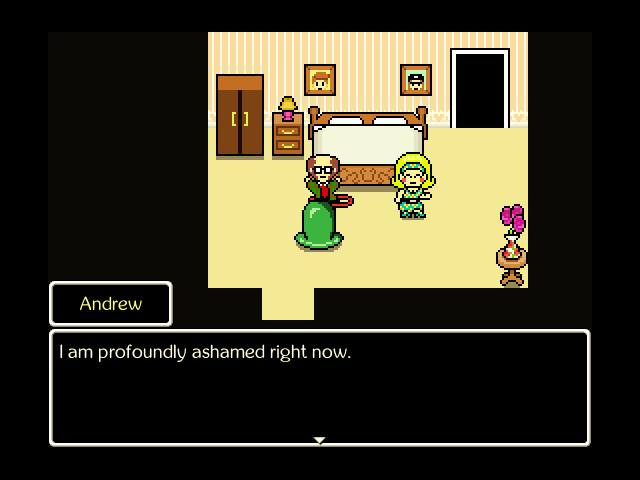 We'll just be on our way out then.  Music: An Open Window Lars has decided to relocate to the kitchen, where he will resupply us with snacks if we run out for a while. 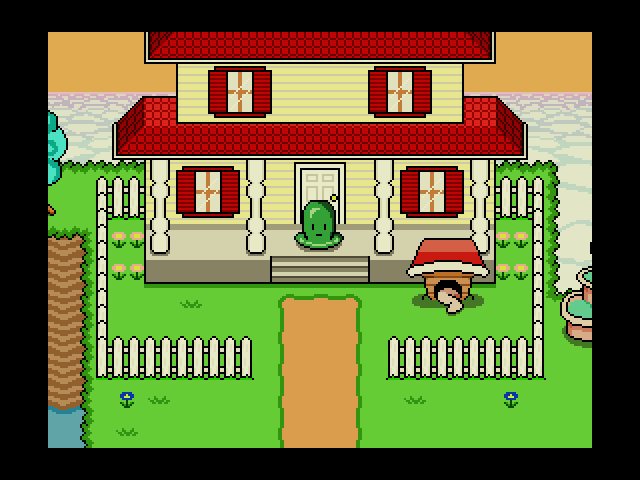 As we exit, something slithers into the doghouse. 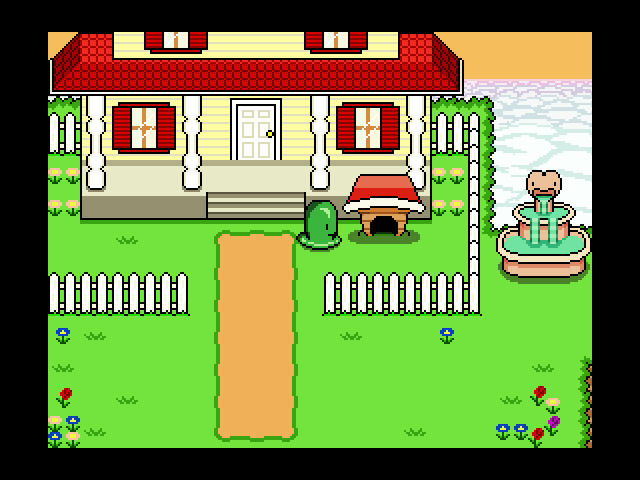 No idea what, but it doesn't come back. 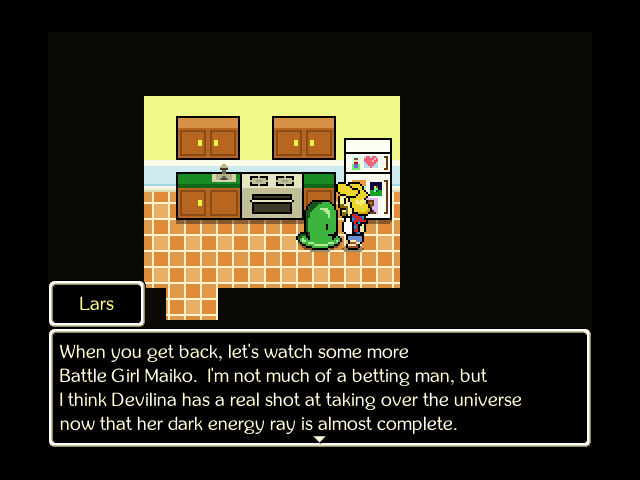 Quote:
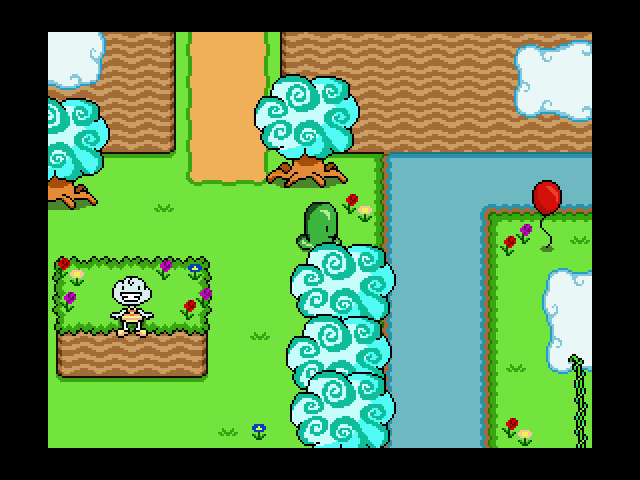
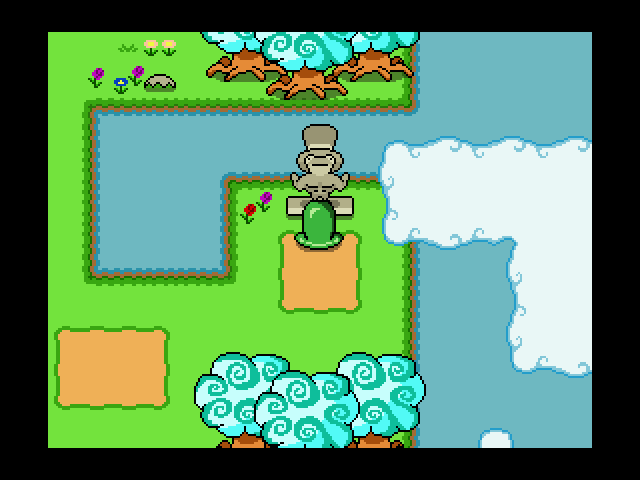
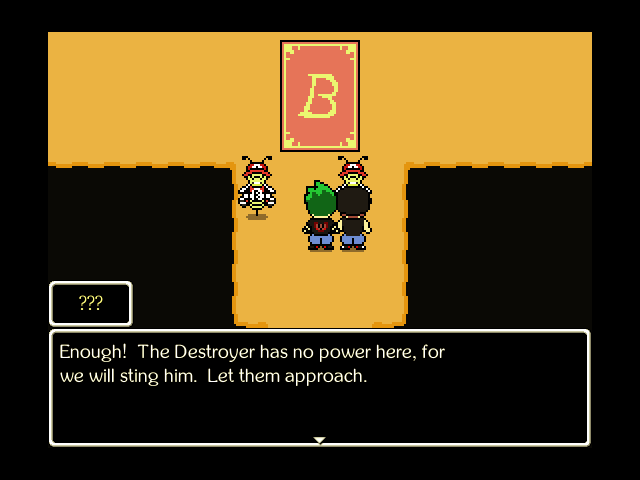
 Hey, here's what the Revolting Blob's field action is. If we're in an area that can field random encounters, this will automatically do so. 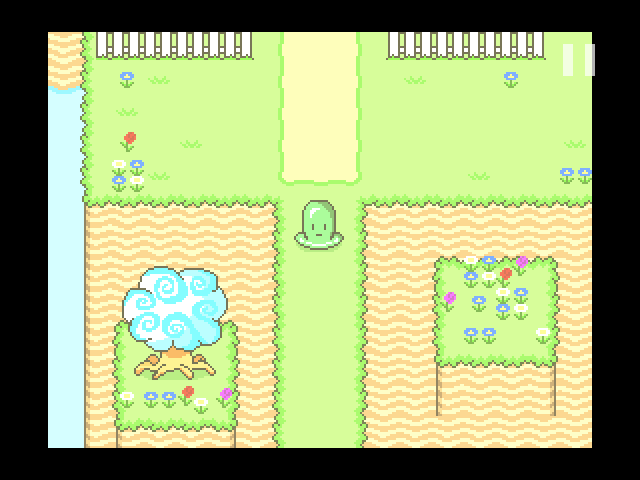 Music: Let's Color Today Enough of that, it's time for the adventure!  Welcome to the island of Homeflower! Look at all of those interesting places we could go! There's a mountain with a giant bird, a weird tower, an island, a bridge, and a town! But to get to any of that, we have to cross Cloudy Hill! 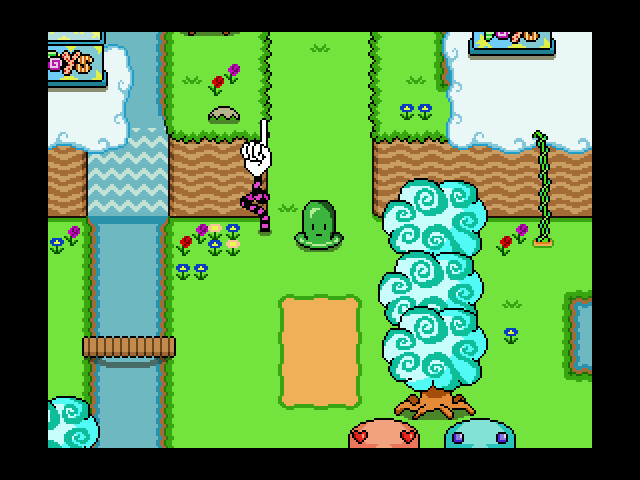 Music: Cloud Sundae Cloudy Hill isn't a very challenging area, and it's a good place to get used to the Revolting Blob and the mechanics exclusive to Jimmy and the Pulsating Mass. 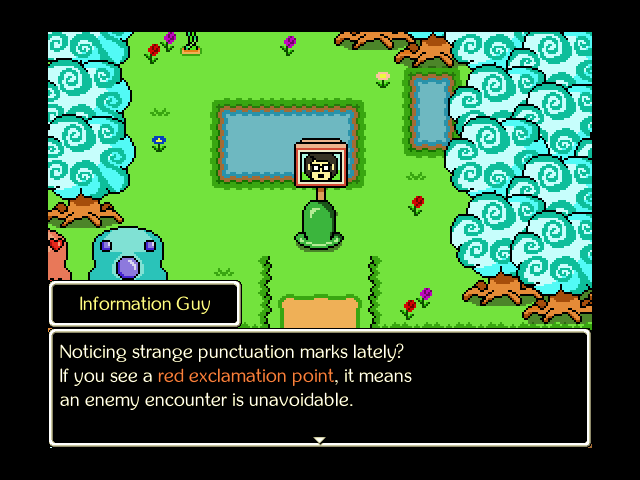 Quote:
Last edited by Kalir; 03-11-2020 at 09:14 AM. |
|
#4
10-24-2019, 06:26 PM
|
||||||||||
|
||||||||||
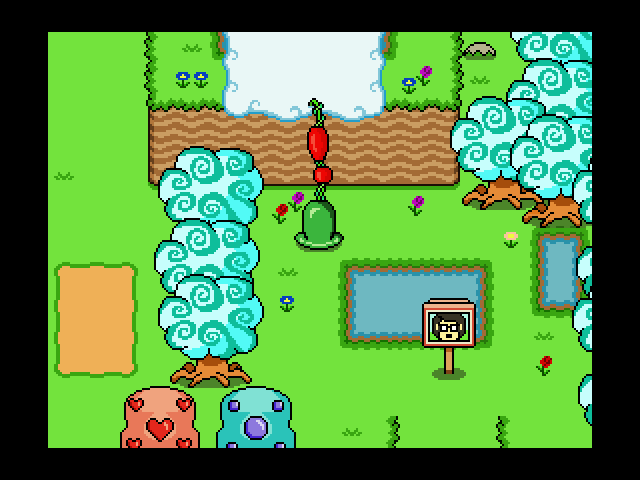 We're only level 1 right now, so we can't skip any encounter.  Music: Motion Sickness Remember: this happens every time. 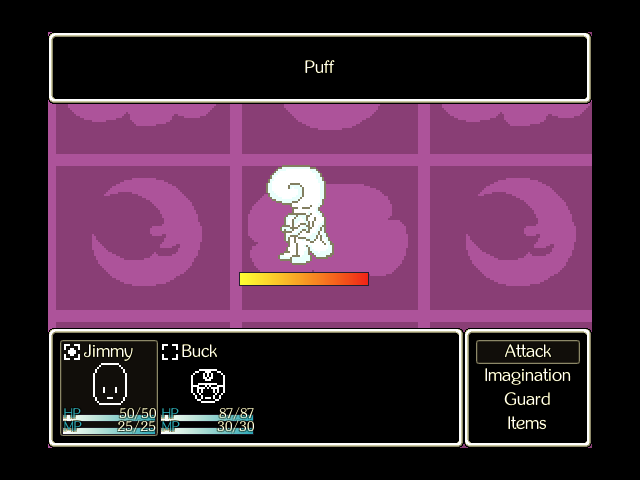 Quote:
 Buck promptly dunks Puff for over thrice their max HP and we move on. 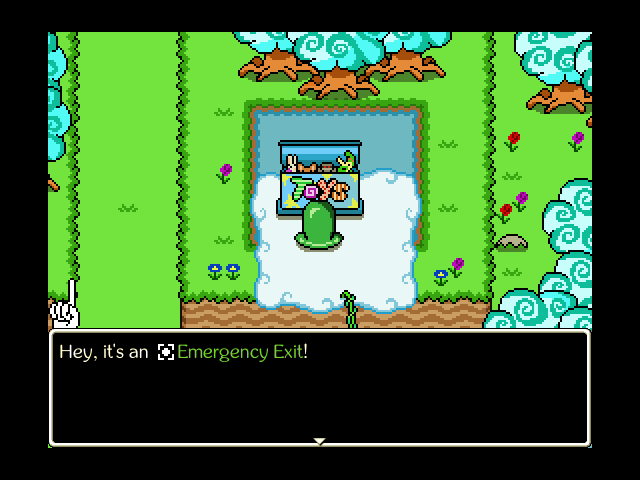 Music: Cloud Sundae Quote:
 A ways ahead, we find a balloon we can't reach and a cheery cloud girl. She does not pay any attention to Jimmy whatsoever.  Quote:
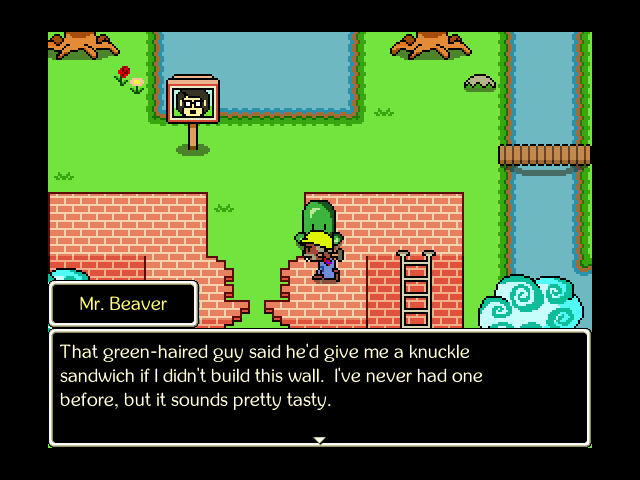
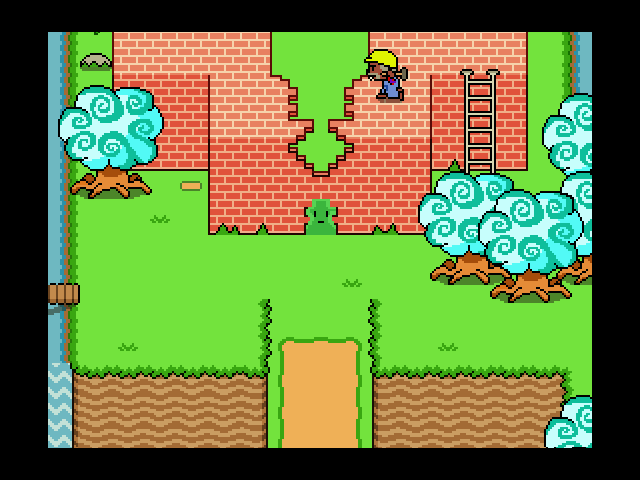
 Further ahead is a mysterious and shy fish, and a beaver working on a wall. 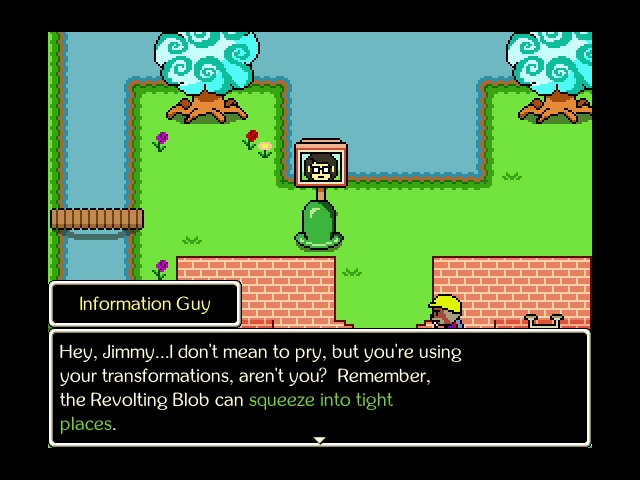 Quote:
 Nothing over here yet except an encounter. 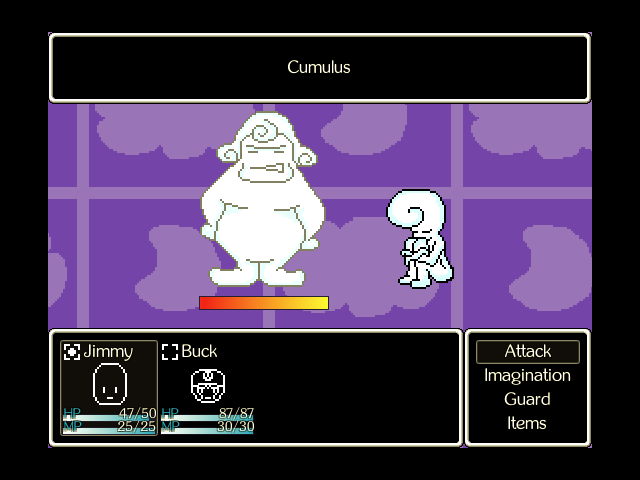 Music: Motion Sickness Quote:
 Music: Cloud Sundae Quote:
 Better squeeze through while we can. 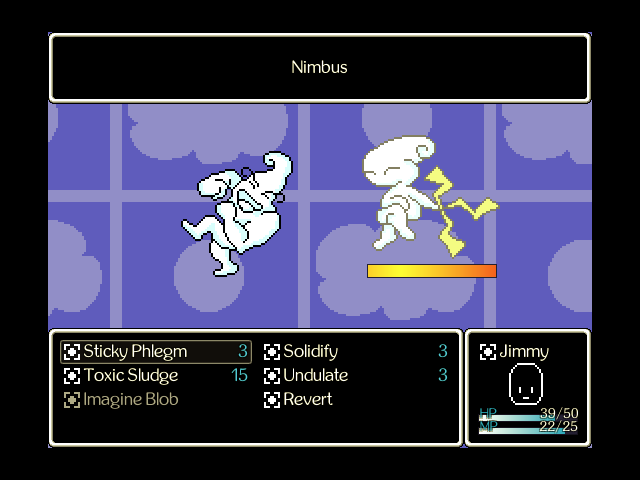 Music: Motion Sickness Quote:
 Quote:
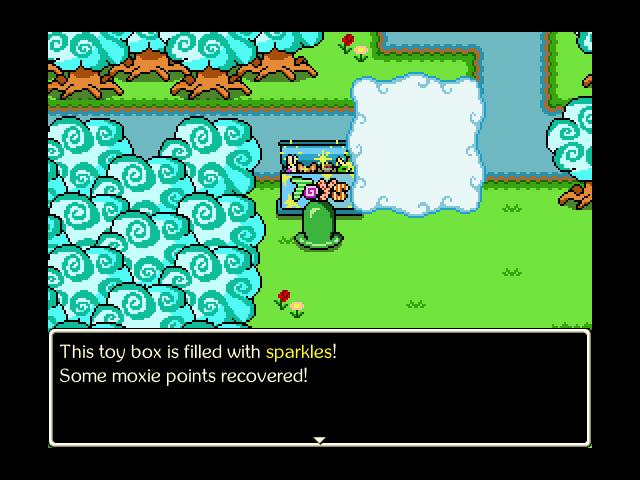 Music: Cloud Sundae Hey, remember when I said there's more to toyboxes than just items? This is what I meant. Sometimes, usually after fighting a few encounters, toyboxes can have an extra bonus to them. In this case, this toybox is full of moxie-refreshing sparkles, not that the fights here have been even close to taxing (Buck can drop almost every enemy in one normal attack, save for Cumulus). 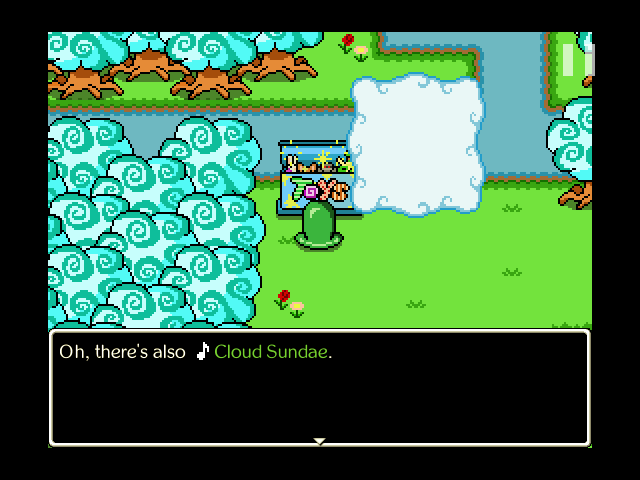 After the bonus effect resolves, you get the item you were actually here for. 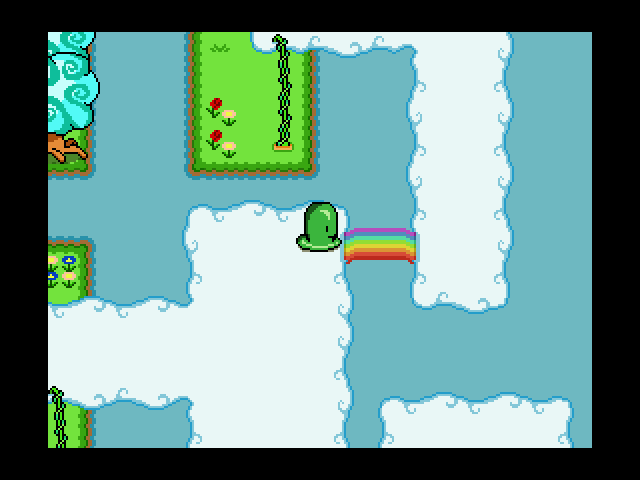 Really, that about does it for the combat threat of Cloudy Hill. Which is to say, there isn't one. 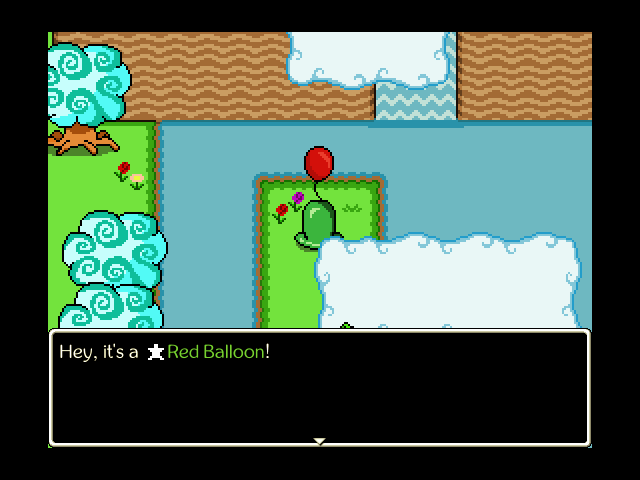 Quote:
 We find this weird statue along the way. It does nothing. 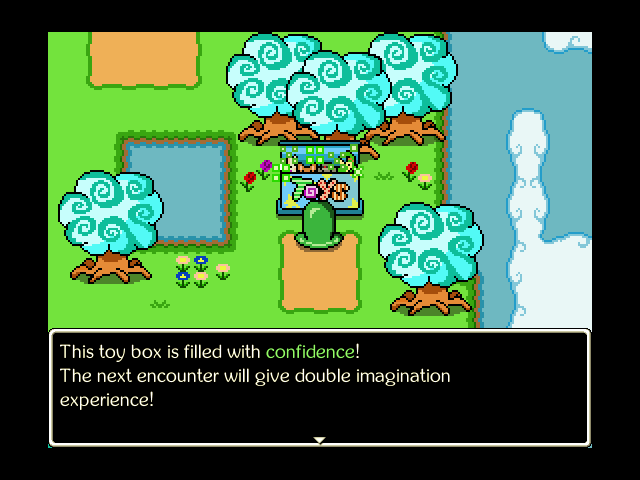 Heeey now that's what I'm talking about! Confidence is a great find, especially if you know there's a boss fight coming up that can give a big payout. 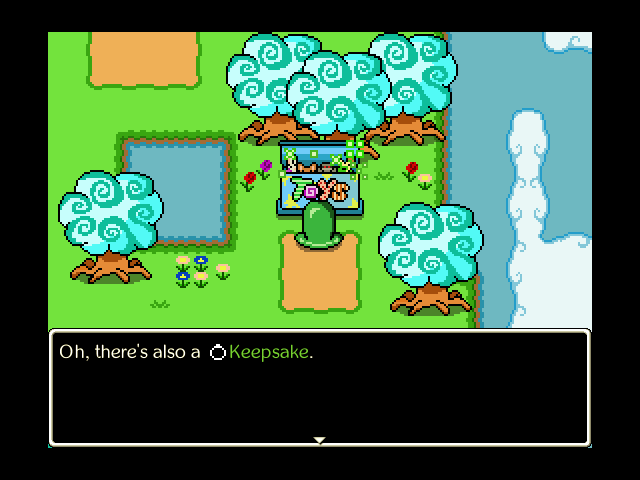 Quote:
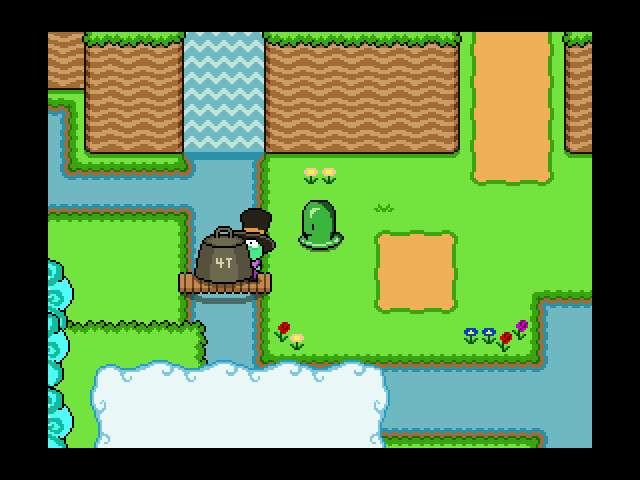
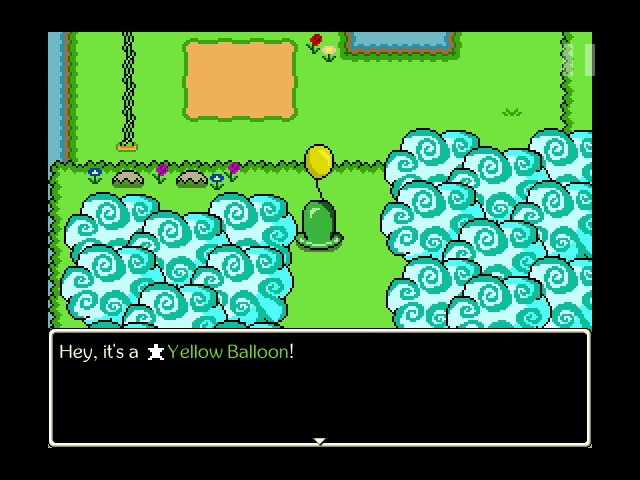 The next balloon is just past it. 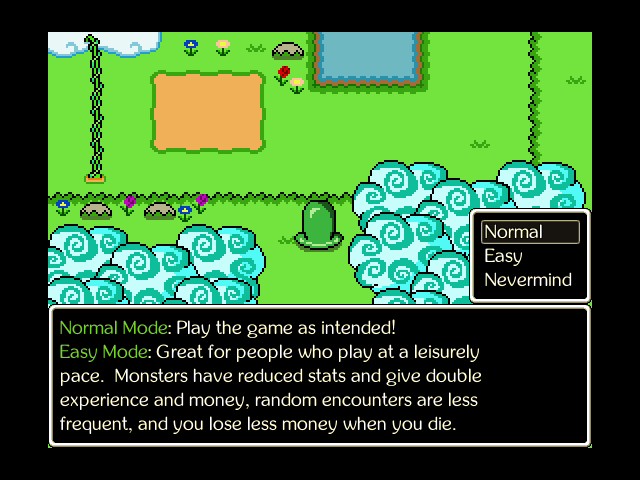 Oh, and while we're here: this game has a difficulty setting you can modify whenever you want! So if a boss fight is giving you trouble, or you want to grind past a tedious area, you can just flip things down to Easy for a bit, and it's all good. Normal is the intended difficulty setting to play the game on, and I'll be there for most of the game unless I really am having trouble with a boss fight.  Just ahead, we find ourselves blockaded from further progress by a weight. |
|
#5
10-24-2019, 06:26 PM
|
|||
|
|||
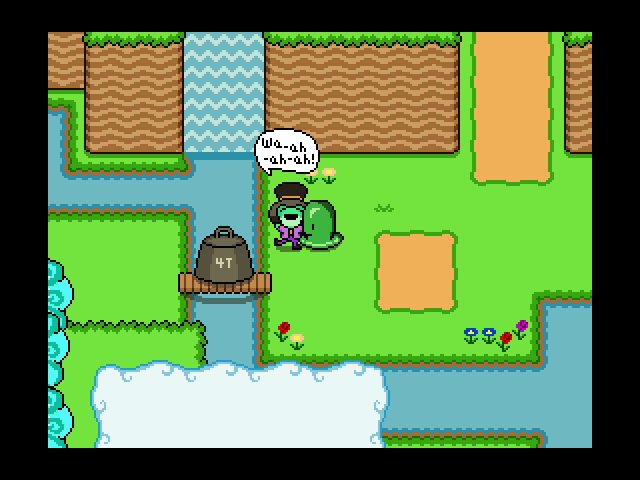 This marvelous fellow appears to be unperturbed by this. 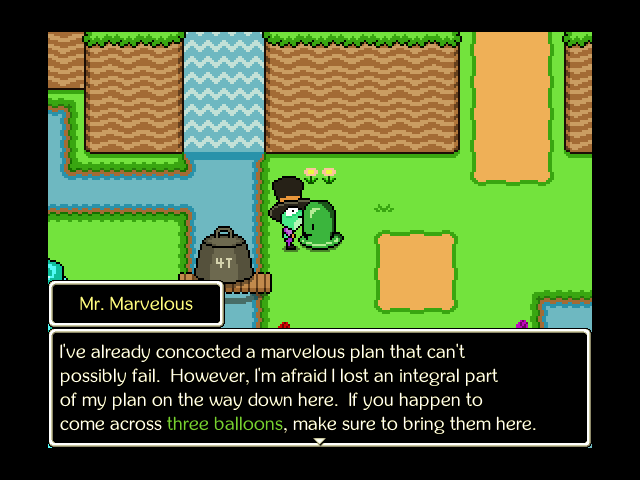 Yeah we can do that sure. Give us like five seconds. 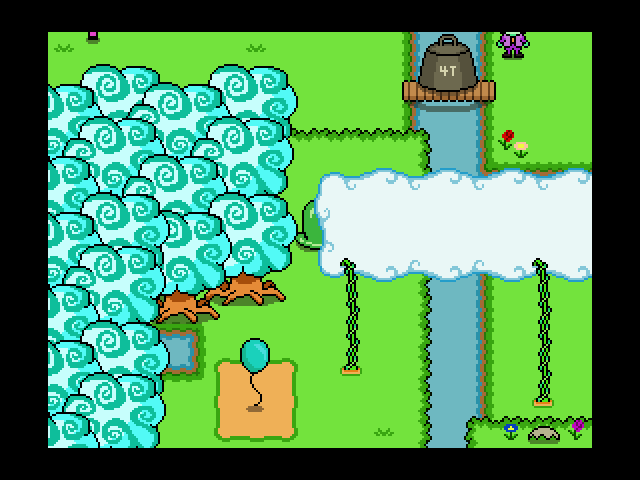 Like... exactly five seconds, my guy.  Music: Motion Sickness Quote:
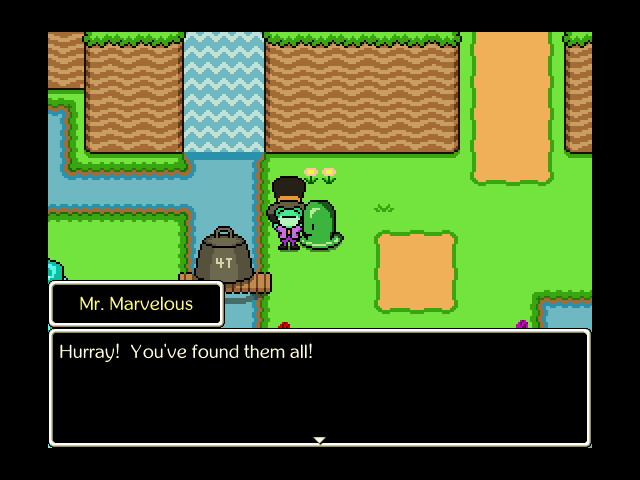 Music: Cloud Sundae Quote:
 With Mr. Marvelous' help, we can leave Cloudy Hill and keep progressing through Homeflower. 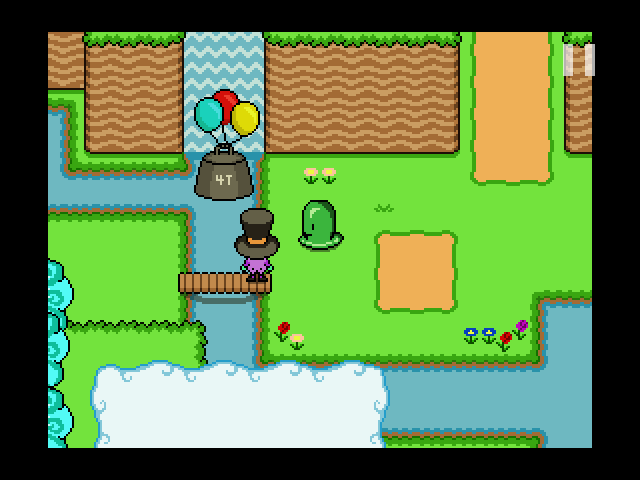 Hm... I have several questions, actually. 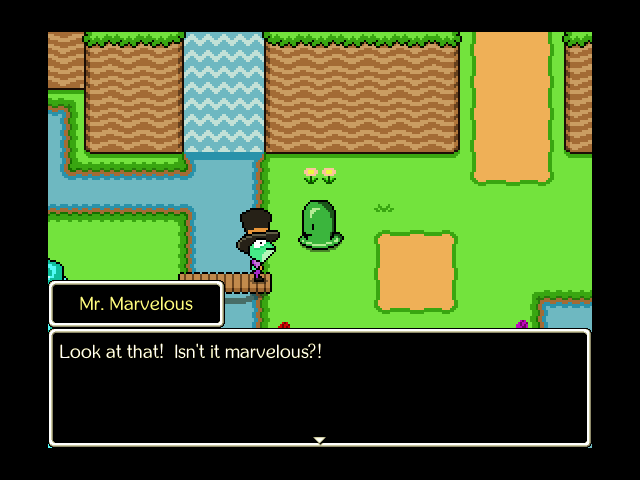 Quote:
 For presumably completely unrelated reasons, the sound of a heavy falling object can be heard shortly afterward. 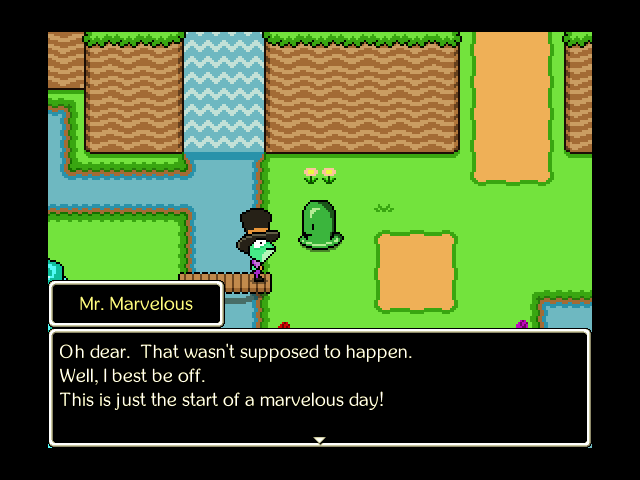 And that's Mr. Marvelous for you.  We'd better be going, too! Next Time: You can keep all of this rustic crap, but you need to send us all your booze and drugs and candy. |
|
#6
10-24-2019, 06:35 PM
|
|||
|
|||
|
Can't read it yet, at work, but I want to be the first to say YES JIMMYGAME!
|

|
#12
10-25-2019, 05:20 PM
|
|||
|
|||
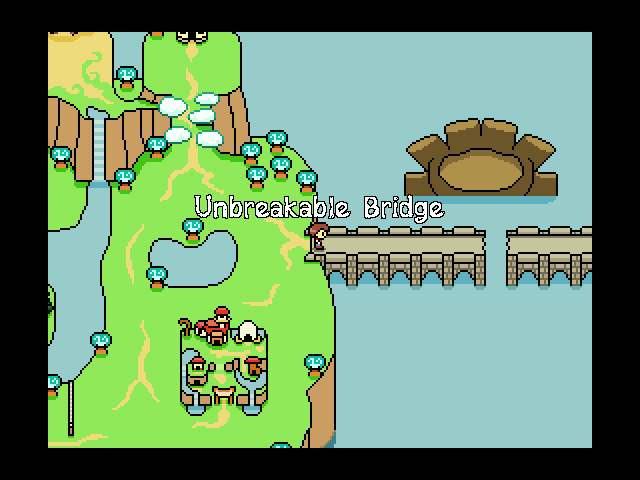 Music: Let's Color Today Right, let's see what all we can see around this area. First off, Unbreakable Bridge. 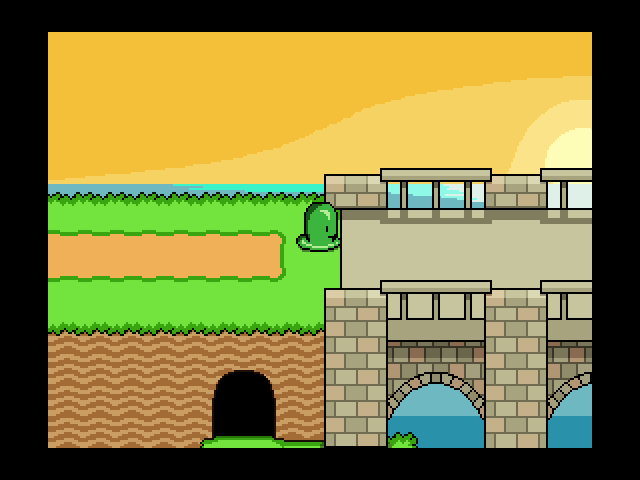 Nice view. 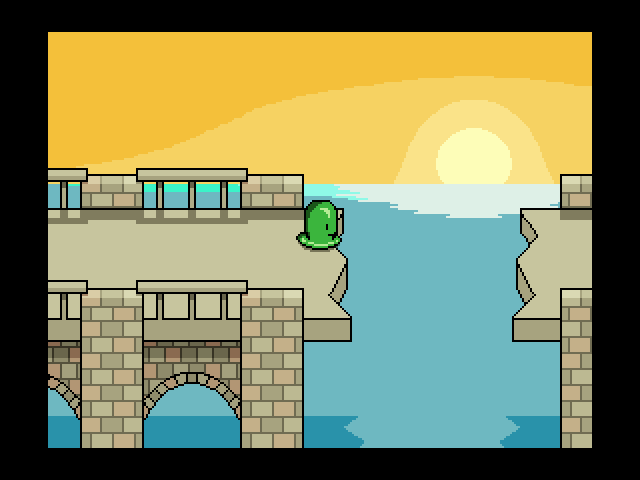 Let's just assume that the name is accurate and that it was built like this. Surely Unbreakable Bridge could never be broken by, say, a 4 ton weight falling from a great height. 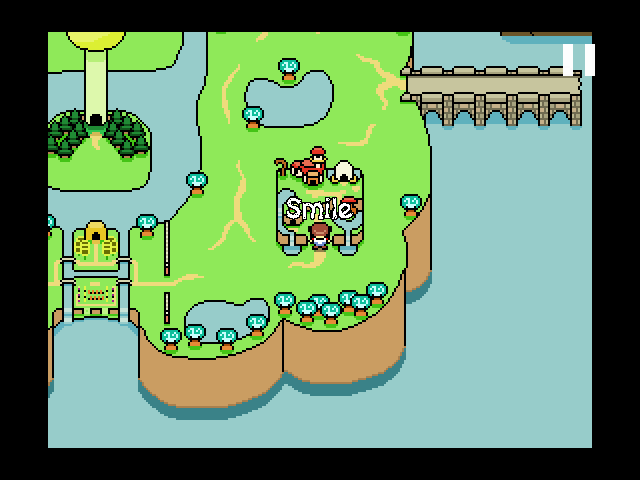 Not much to do there for now, so let's check in at the town of Smile. 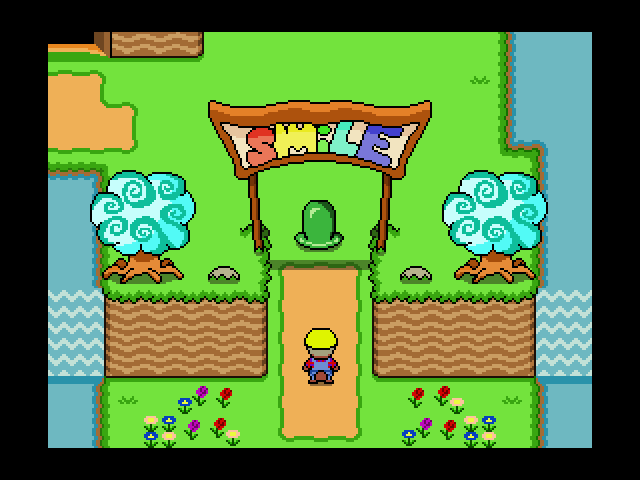 Music: My Animal Friends Mr. Beaver comes in behind us as we enter. 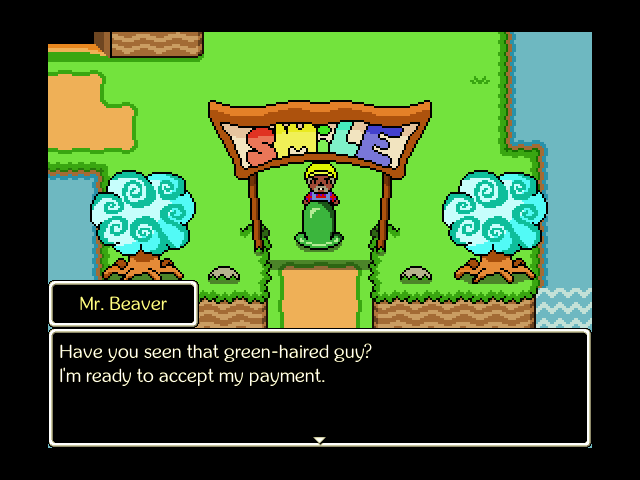 Dunno where they are. 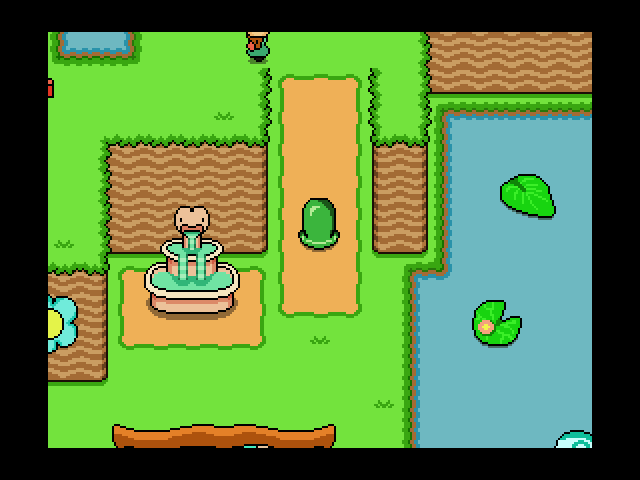 There's a healing fountain really early on, but I'm not gonna explore the town in full yet. 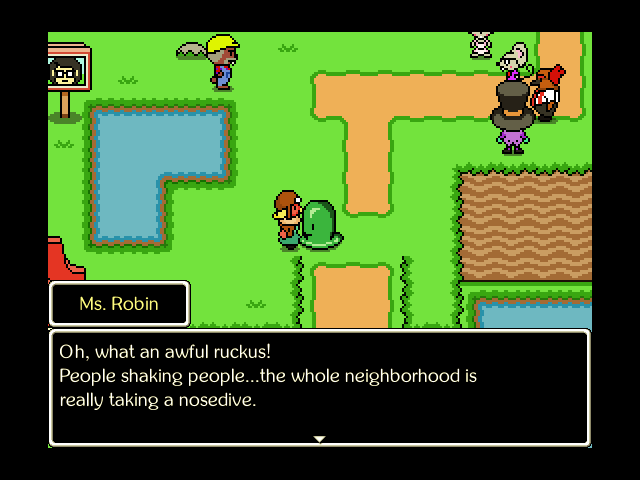 Partly because it's pretty clear where the game wants you to go. 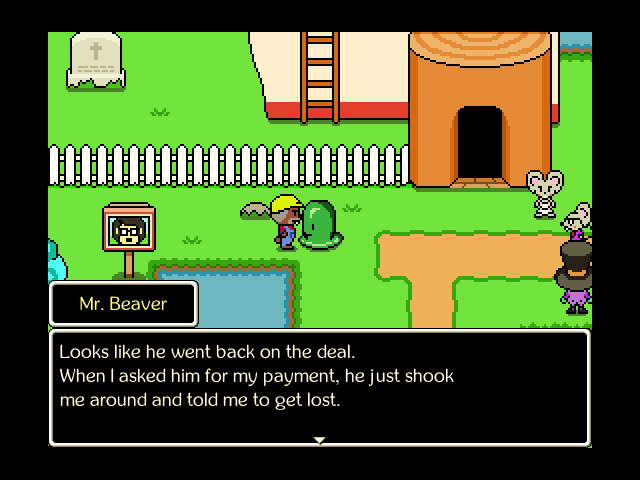 Quote:
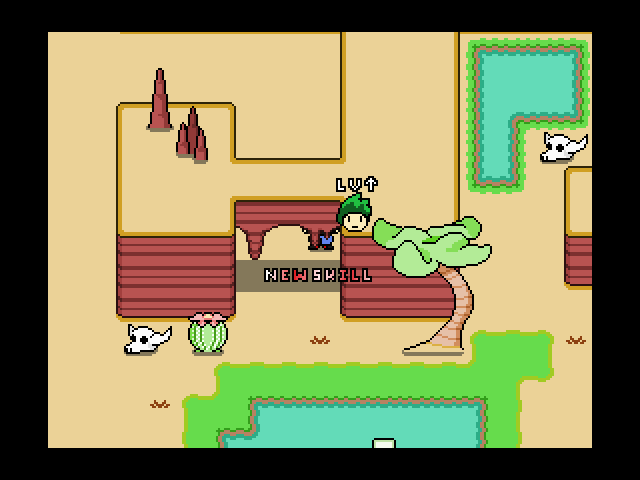
 Of course he gives this a hearty laugh after he says it. Guys, I'm starting to think Mr. Marvelous might be kind of a dick. 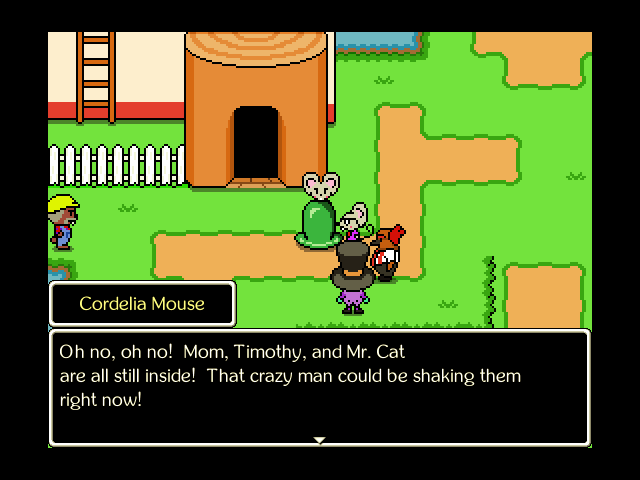 All right fine we'll go save the town. 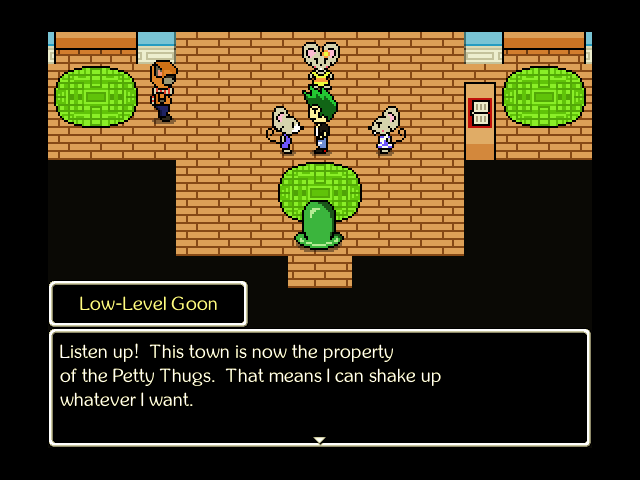 Music: Worm Party Oh no, it's a Low-Level Goon of the Petty Thugs! You can't imagine what kinds of aimless recklessness they get into! 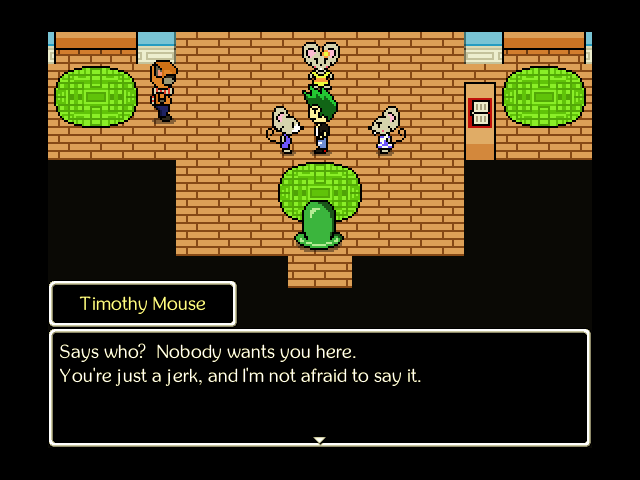 Timothy Mouse is unimpressed. 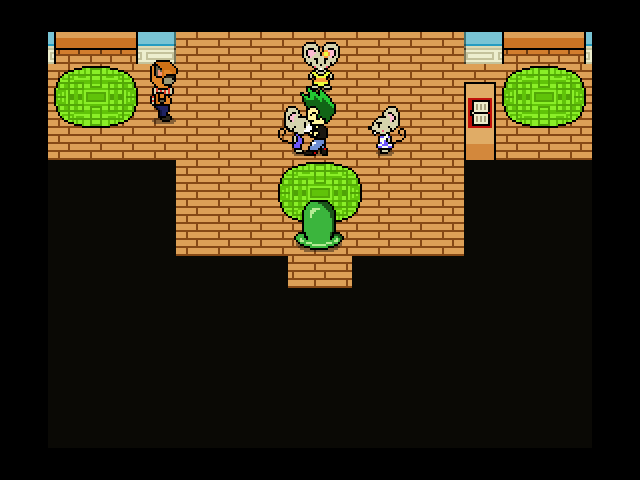 The goon gives them a vigorous shaking in response.  Do you wanna get shaken, too? 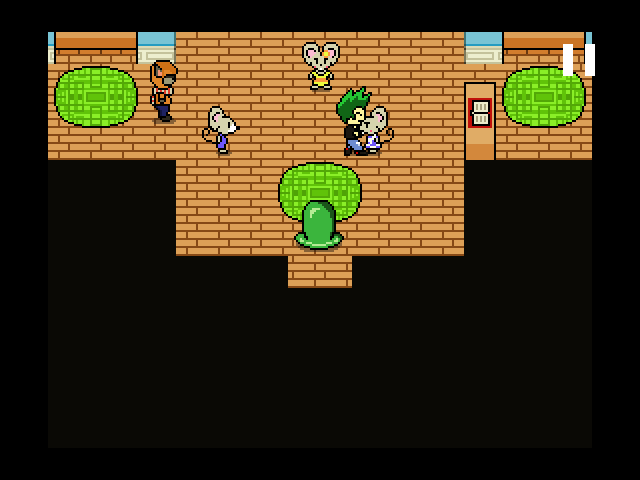 Because that's how you get shaken. 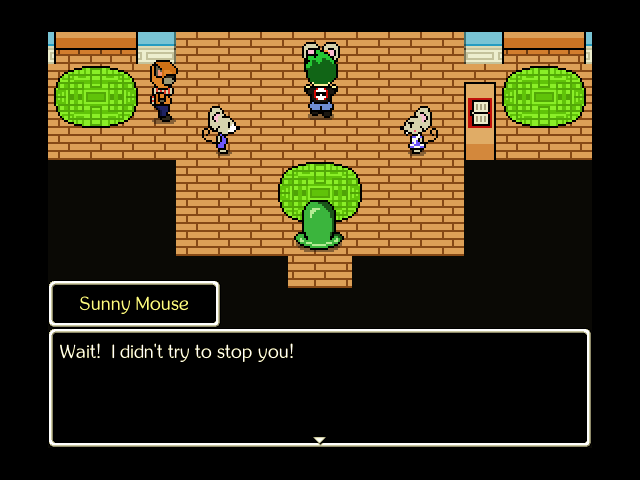 He'll shake anyone! He's out of control! 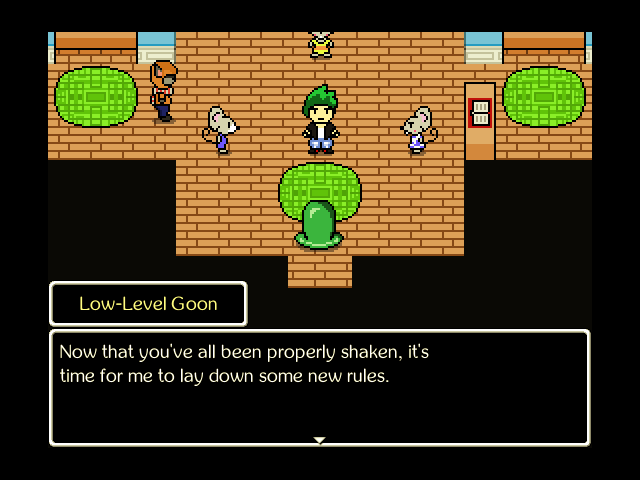 Quote:
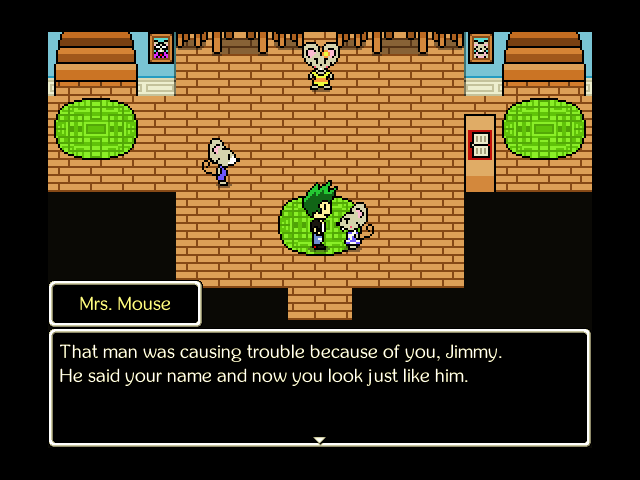
 Don't be mean to Jimmy, he's shy. 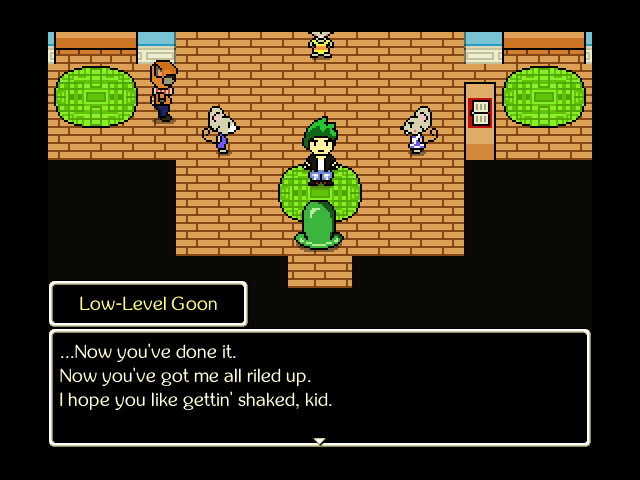 He's shy, but he'll destroy you. Music: Motion Sickness The Low-Level Goon isn't an especially dangerous fight, although he can hit hard if he breaks out his Bully move. He's able to heal himself with First Aid, but Buck's damage output can keep that from being a big deal. This is a good fight to showcase the moveset of the Revolting Blob, though: if I'd been smarter and used Solidify more, Jimmy would've taken even less damage, and it's not like he contributes a lot of damage anyway (although Toxic Sludge helps and there's no reason not to use it here).  Well, that's over with.  Music: The Noble Sea Quote:
 It's already time for Jimmy's new form!  The Low-Level Goon form has perhaps the most used field action in the game. You'll see why in a bit. 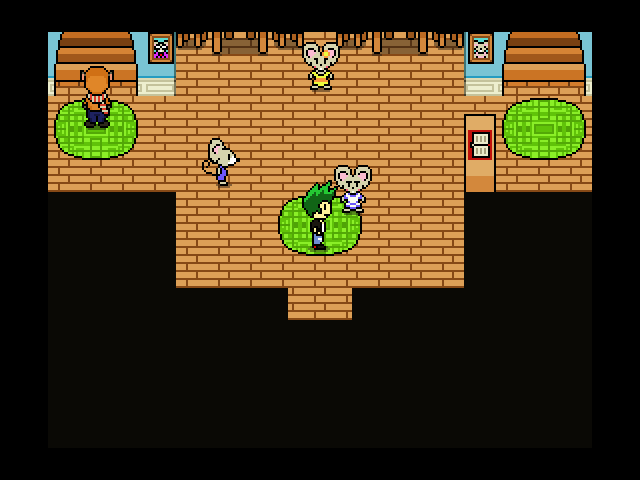 Music: My Animal Friends Now that the original Low-Level Goon got whacked, Mrs. Mouse heads over to us, while Mr. Cat (who didn't really get involved or say anything) just goes back upstairs. |
|
#13
10-25-2019, 05:23 PM
|
|||||||||||||||||
|
|||||||||||||||||
 Quote:
 Fair enough, take it easy out there. 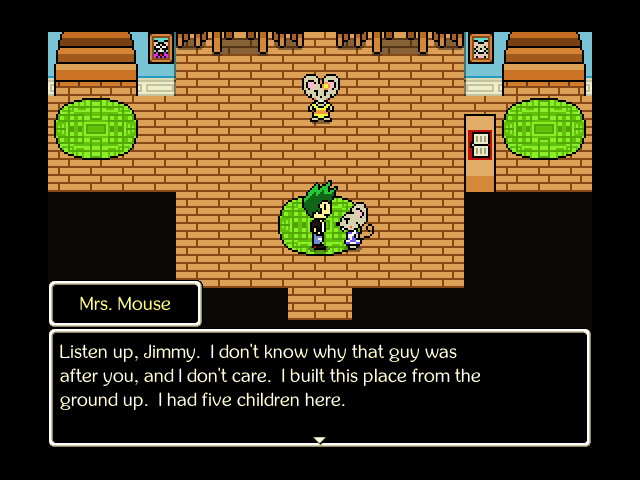 Quote:
 Anyway, the Low-Level Goon! This form is a really versatile one, with a focus on LUK. Like the Revolting Blob, every level of Low-Level Goon gives an extra +1 LUK to all forms. I think LUK affects critical hit chance, but it can do other things too, as you'll see here. The best part of it: Jimmy's leather jacket trades out the Petty Thugs' logo for a Jonathon Bear! That is adorable. Quote:
Quote:
Quote:
Quote:
Quote:
Quote:
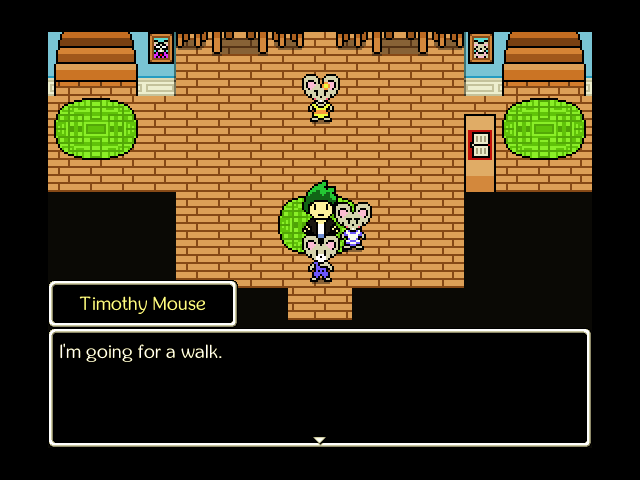
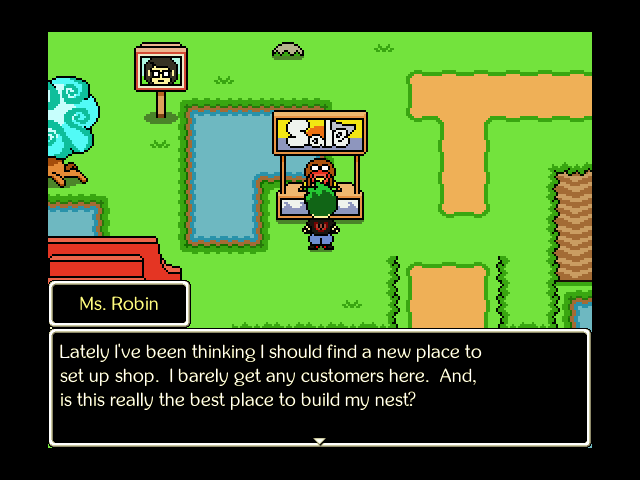
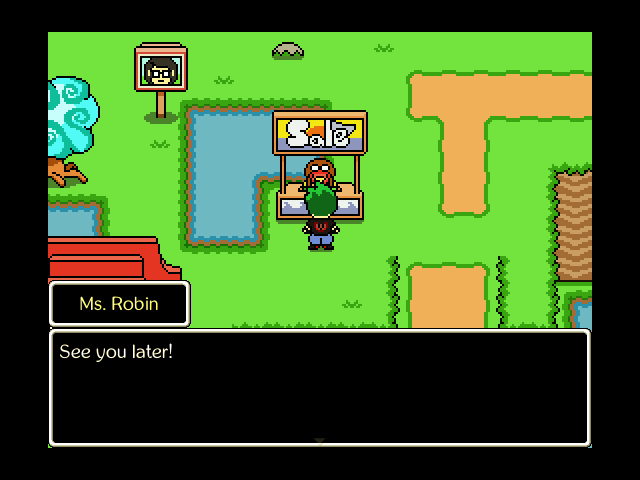
 As for Smile itself... it's a small, charming little village full of animals that Jimmy would normally consider good friends. Most of them are still pretty friendly to Jimmy, too.  Mrs. Mouse is still hostile to us, but won't do much more than refuse us a room for the night. Not that we need it with the healing fountains.  And we don't just get the option to talk to everyone, mind you. 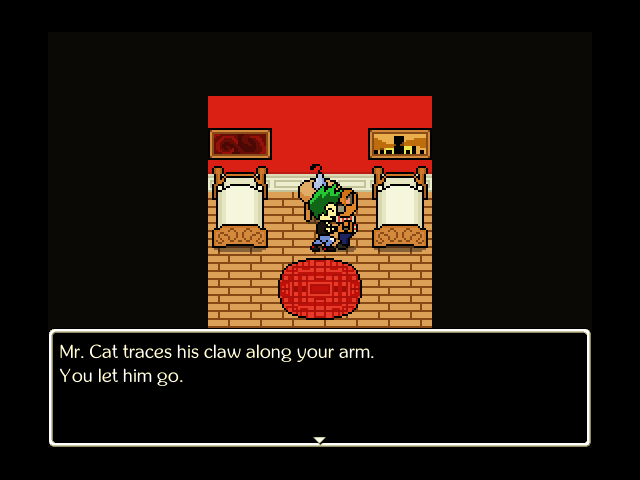 We can also shake almost any NPC in the game for extra dialogue. Except that Mr. Cat doesn't like talking. Fine, be that way. 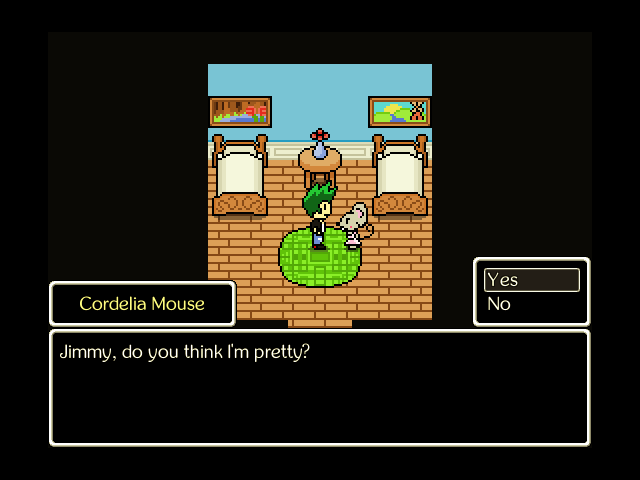 In the room next to Mr. Cat is Cordelia Mouse. Let's humor her and say yes, I don't really have a good gauge here. 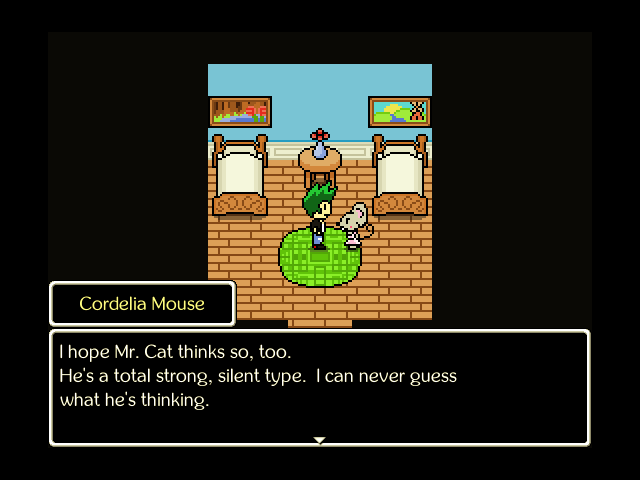 Guess she's got a crush on Mr. Cat. 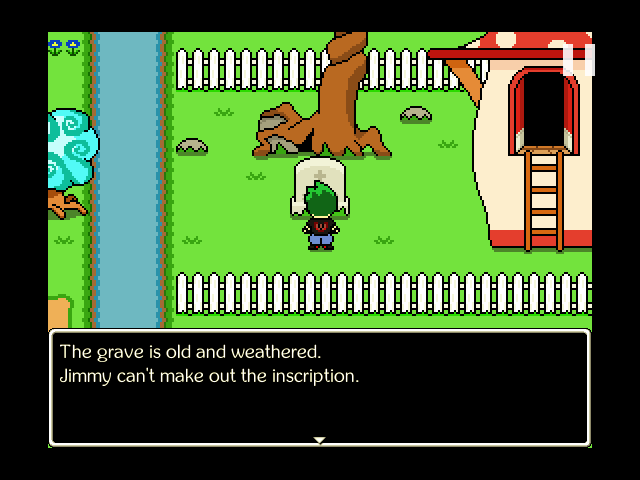 Exiting the inn from the back ladder takes us to a grave. Too old to figure out who it is, though.  I've been forgetting to do this for each area, I'll try to be more diligent about it. 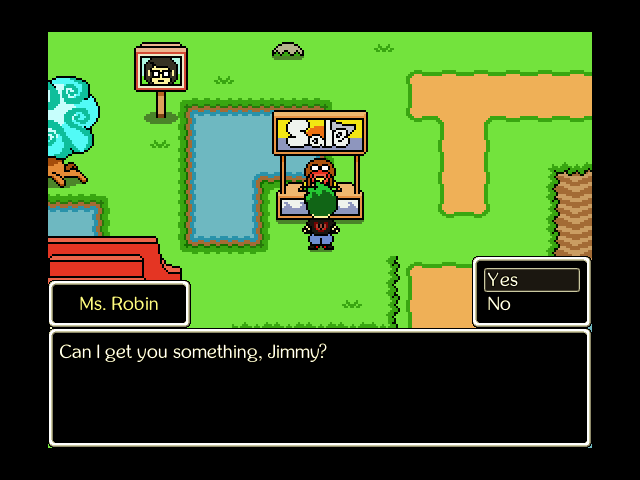 Outside, Ms. Robin's got her vendor stall set up. 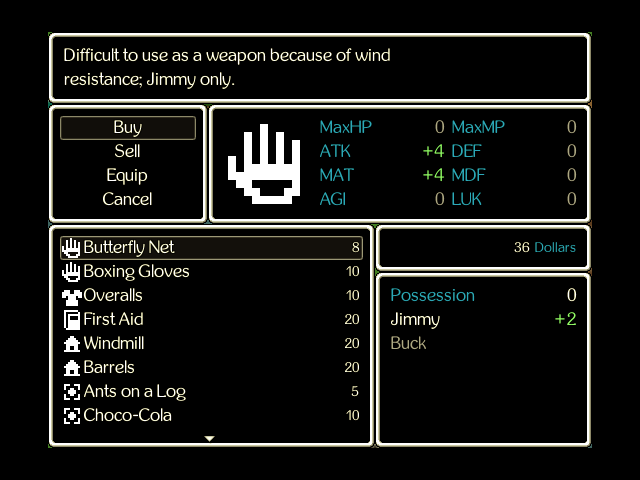 Her shop stocks a lot of things. I'll put the bulk of them in a spoilerpop for now, but suffice it to say that I buy a First Aid manual for Buck, and later when we get more money, we'll buy the Windmill and Barrels.
 Quote:
 Thanks to the manual, Buck now has access to a fifth move in his repertoire of Nerd Bash skills. How does this move help him bash nerds? ...You got me. Anyway, First Aid (6 MP) is a pretty weak heal, but it also lets Buck do healing in addition to his usual garbage, and healing moves don't care about stats. Plus, curing sick will be pretty handy for the area after Giant Garden. Most manuals, like First Aid, can be equipped to any character, although obviously some moves are better suited to different characters. Buck CAN be a healer, but his stats don't really lend themselves to anything but punching and tanking, and he's not even that good at the second thing due to lack of skills. 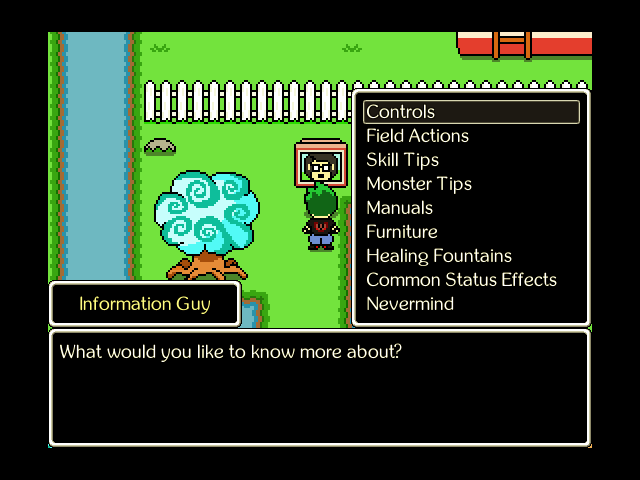 Look at all this useless garbage! Well, that's not fair: this covers a lot of topics useful to the game. But I'll skip them until they become relevant.  To the south is Mr. Beaver's house. It's pretty big despite its looks, but also largely inconsequential, so if you want to check it out, you can watch this video. 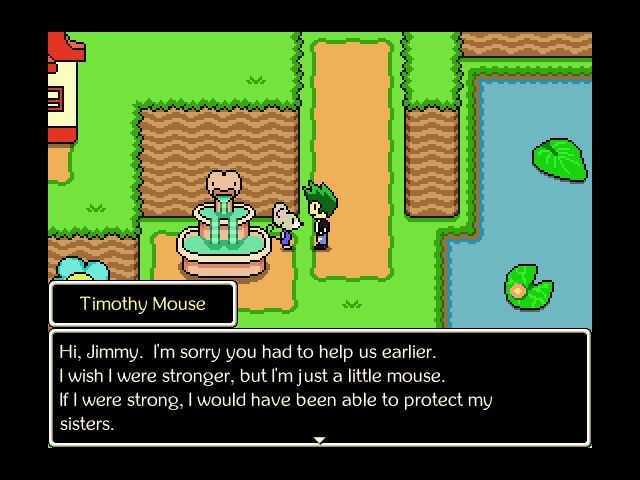 Quote:
 Just below Mr. Beaver's home is an unoccupied cave home. The resident, whoever they are, has some... interesting tastes. 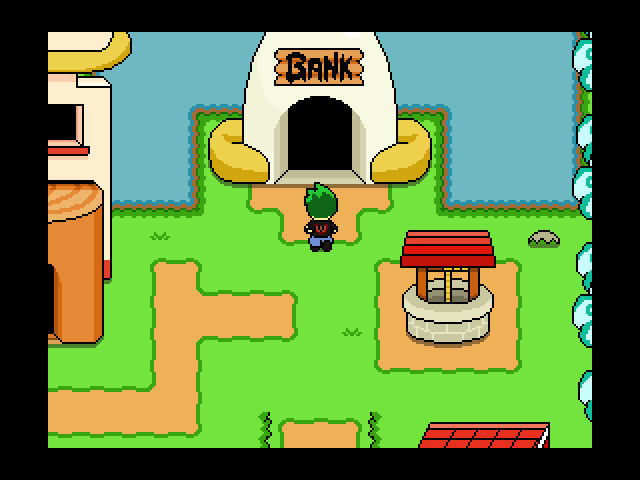 Next up is the bank. 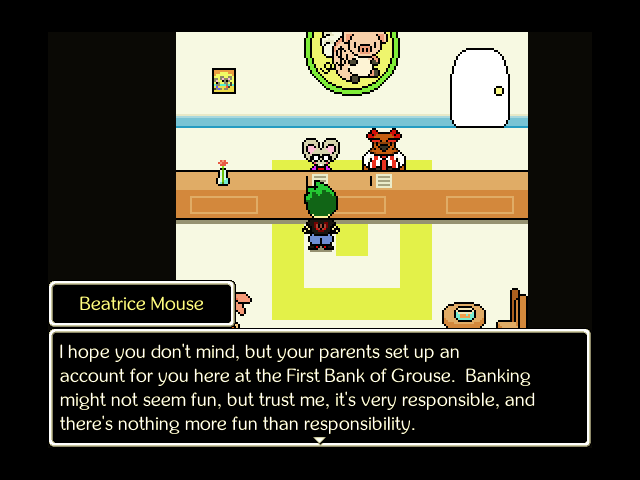 Quote:
 Mr. Grouse here will do the basic work for now. 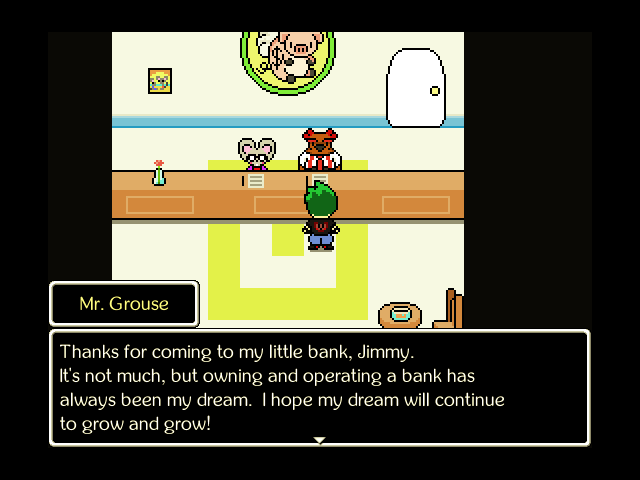 I'm not sure how exactly you make money in this deal, but hey, Jimmy's eight, he doesn't know how banks work either.  Here's the last home in Smile. |
|
#14
10-25-2019, 05:26 PM
|
|||||||
|
|||||||
 Quote:
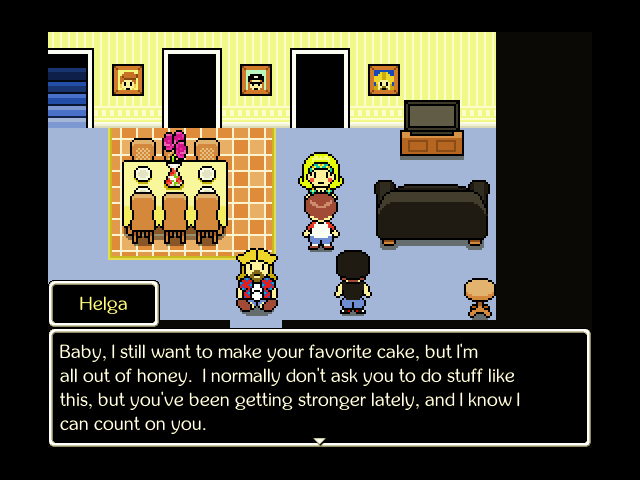
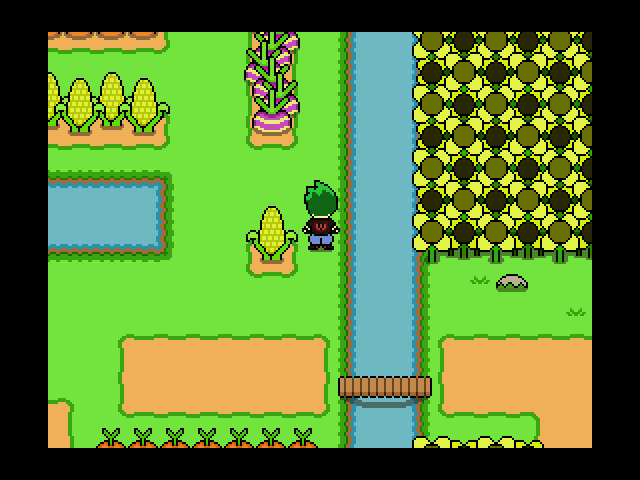
 As you can see, some characters respond positively to shaking. You can never really tell at first glance.  Music: Let's Color Today Right, that's enough time spent here in Smile.  Let's get ourselves that buddy bee honey already!  Music: Adventuring for Beginners Giant Garden is our first real area, and it's a bit of a pain to navigate. 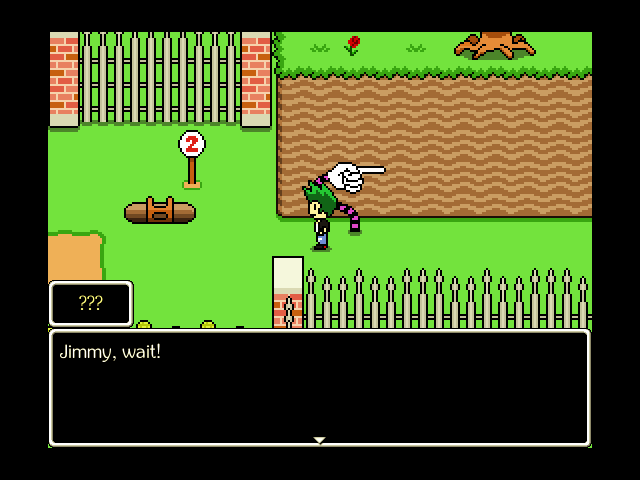 But first things first. 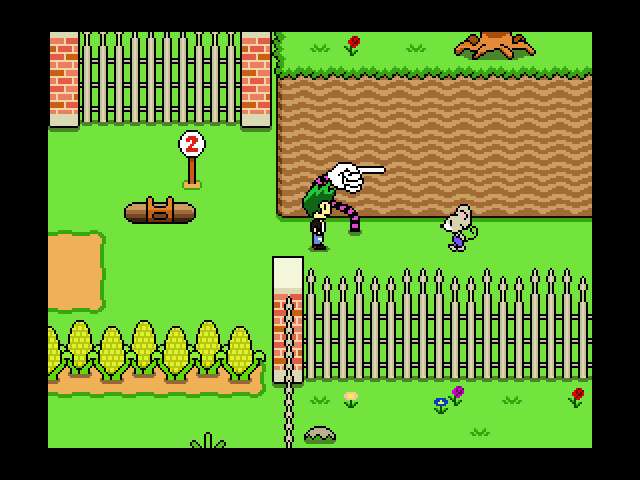 It's Timothy Mouse! 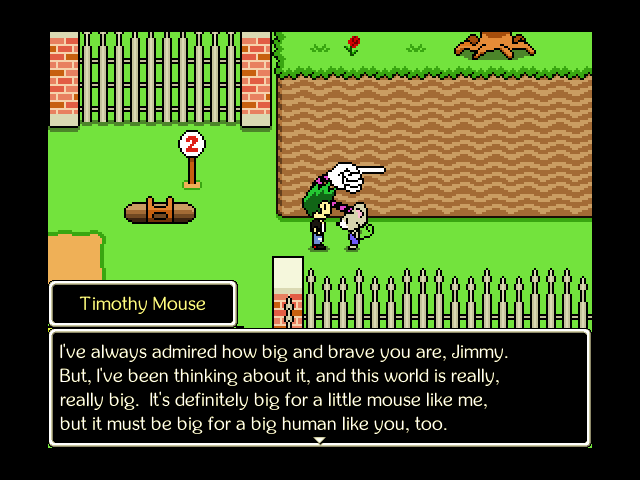 Quote:
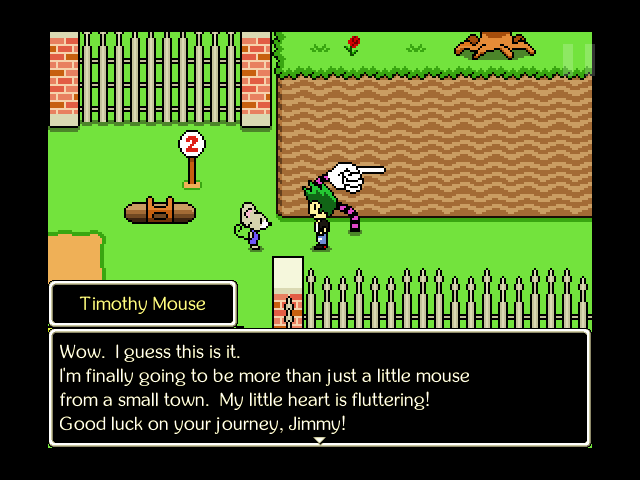 Good luck to you too, little buddy! 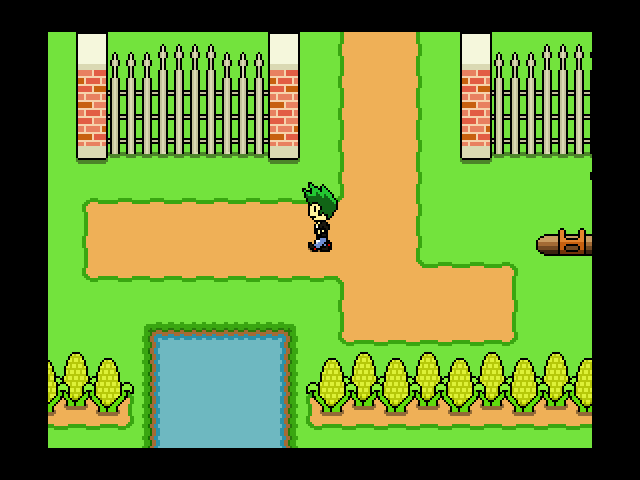 Anyway, Giant Garden is a kind of confusing area to navigate because it's so open and there's the tunnels everywhere. Thankfully, the tunnels are both numbered for convenience and totally optional, so you can ignore them or use them as you see fit. I'll try to catalogue the tunnels as we go. Right now, #6 (just north of here in a dead end) and #2 are both super close to the entrance. 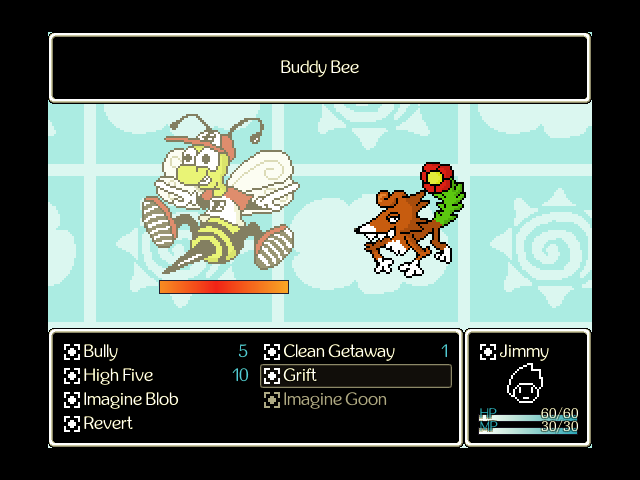 Music: Motion Sickness Quote:
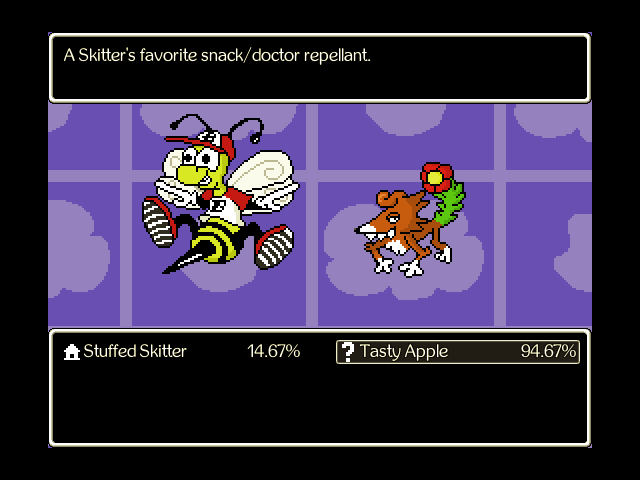 Quote:
If we don't steal the apple, the Skitter will either attack or preen itself, which telegraphs a triple attack next round. 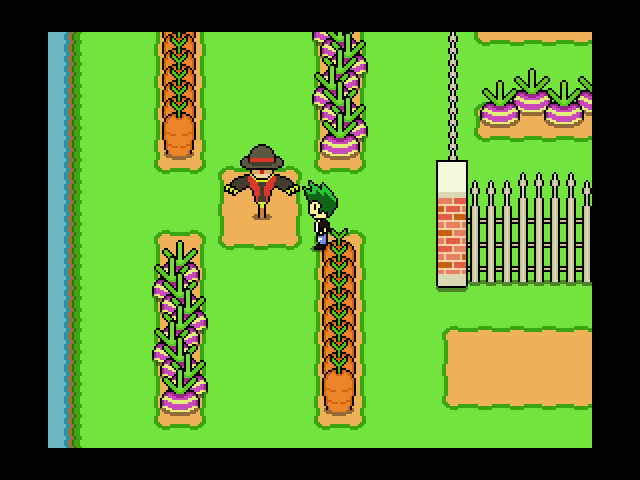 Music: Adventuring for Beginners Oooh, scarecrow! We're gonna shake it! 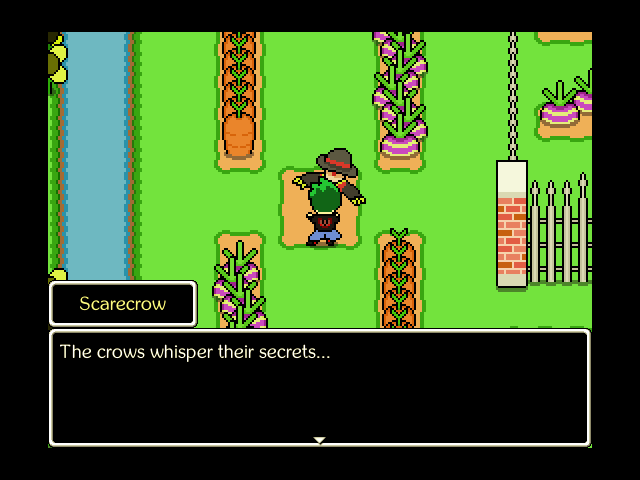 I... see? I guess that means the scarecrows can give hints.  Music: Motion Sickness Quote:
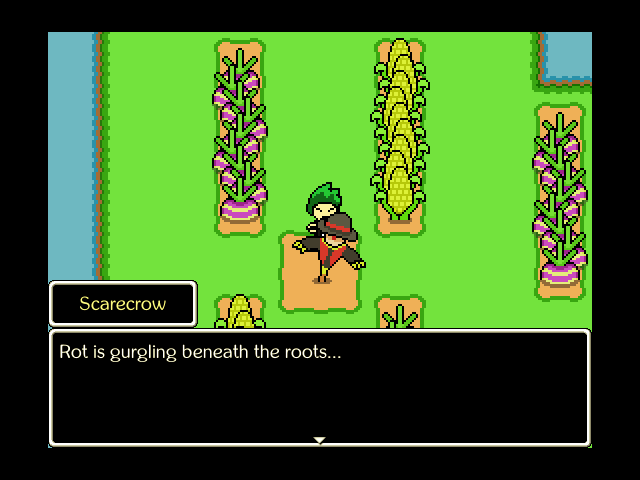 Music: Adventuring for Beginners Man, crow secrets are creepy. 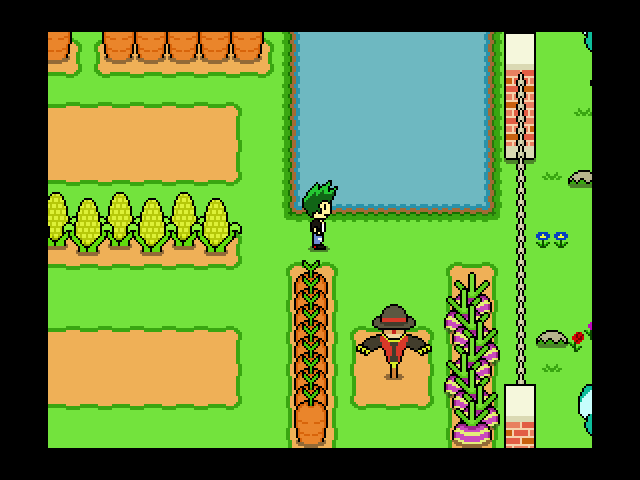 We keep heading south and keep meeting more scarecrows. 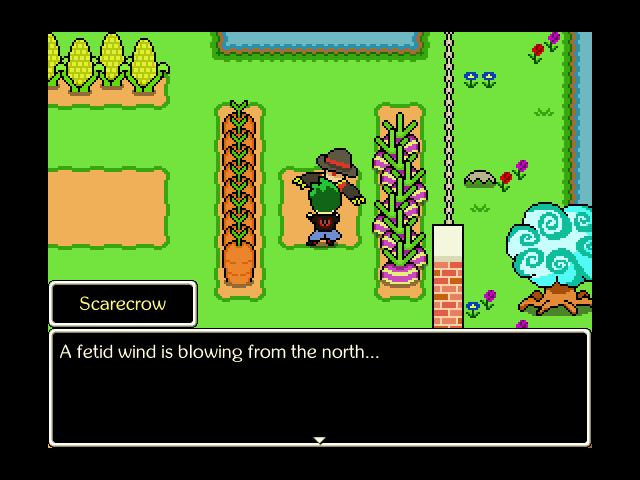 Does this mean the mountain with the giant bird? 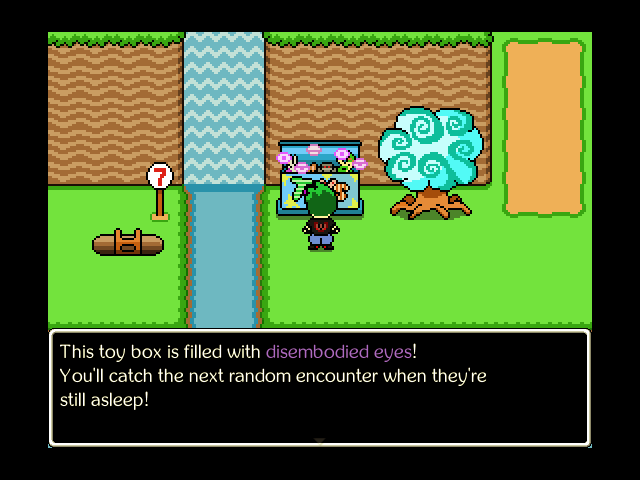 The next toybox has a spooooooky bonus for us. 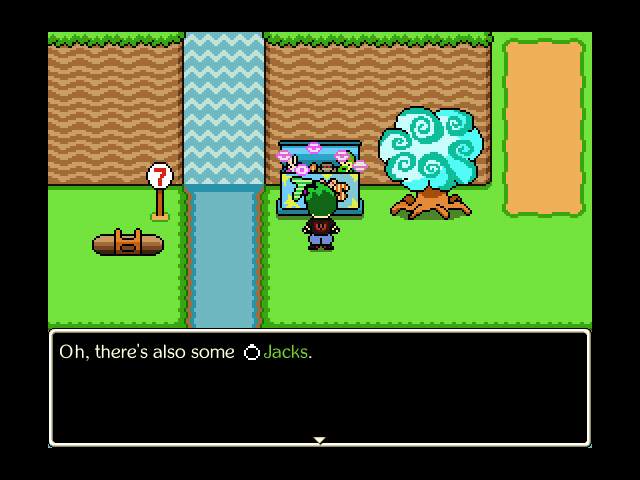 Quote:
 Next to that is tunnel #3. 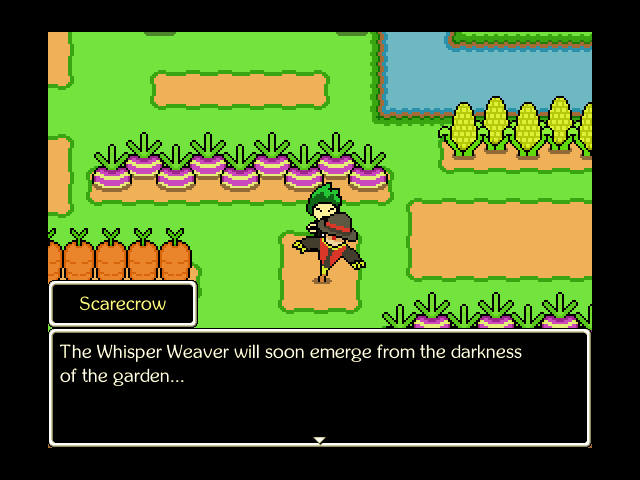 And a little bit west of that is another funnyman.  Below them is tunnel #7...  Quote:
 Music: Motion Sickness Sure enough, we catch the next encounter napping. This doesn't improve our steal rates any, mind you, but it does mean we get double damage on the hit. |
|
#15
10-25-2019, 05:28 PM
|
|||||
|
|||||
 But hey, that's convenient anyway!  Music: Adventuring for Beginners Tunnel #8 is directly opposite from tunnel #7, on the other side of Mr. Marvelous.  Will you guys give it a rest already?  Even further west are some creepy eyeball cabbages. I ignore them for no reason that I can recall. Also displayed: this represents a random encounter we can cancel due to level advantage. 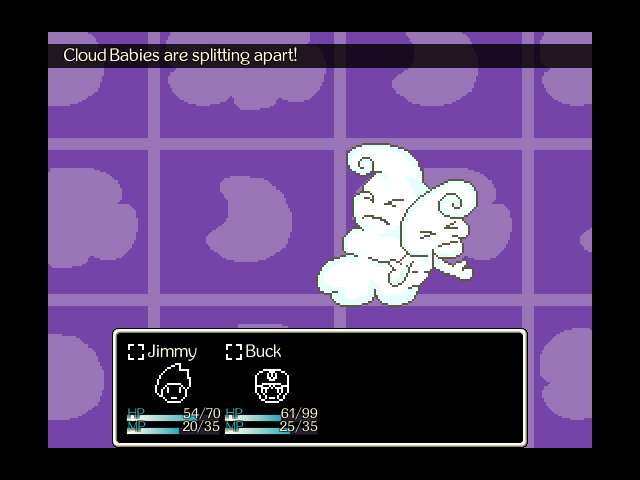 Music: Motion Sickness Quote:
 Music: Adventuring for Beginners Our goal for this area is the patch of sunflowers. You can reach them this way, by going around the south edge of the garden and coming up. If you ignore them and head north, you'll encounter tunnel #5. 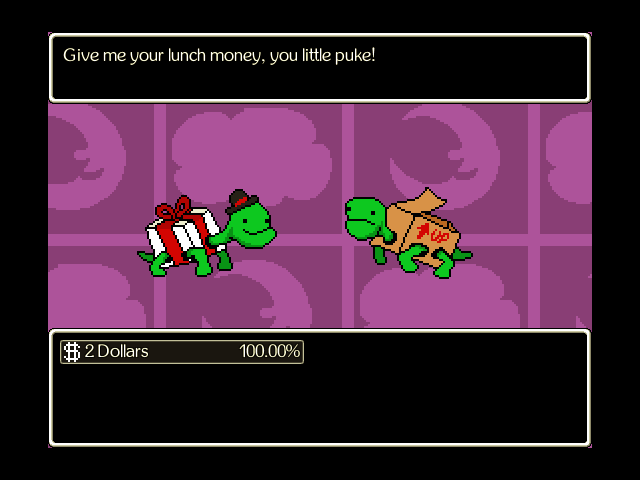 Music: Motion Sickness Quote:
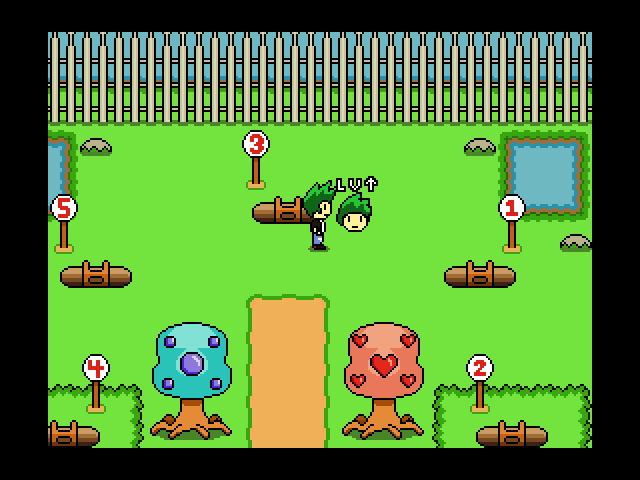 Music: Adventuring for Beginners We elect to actually take tunnel #5, leading us to this central base. We can access the other side of tunnels #1-5 here, although #2 and #4 are offlimits for now. 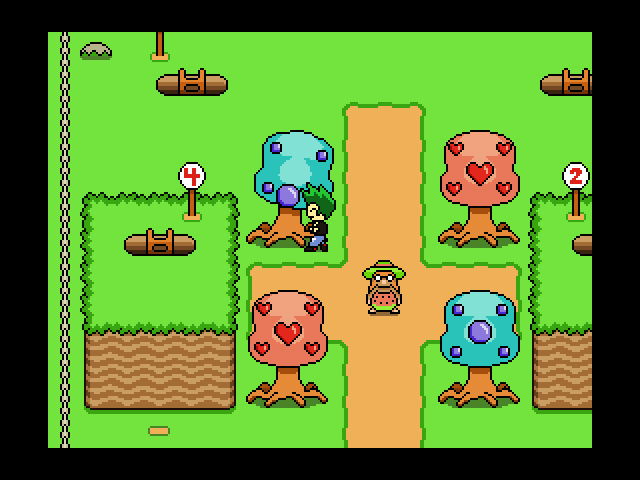 There's also trees we can shake here, whose fruits will restore our HP and MP. 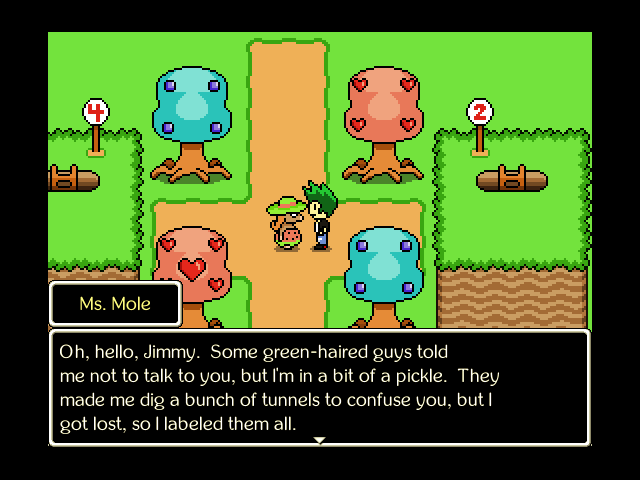 Quote:
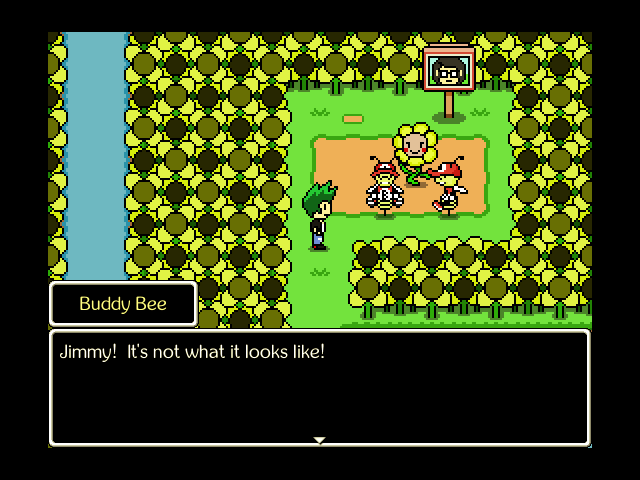
 Oh. Sorry. 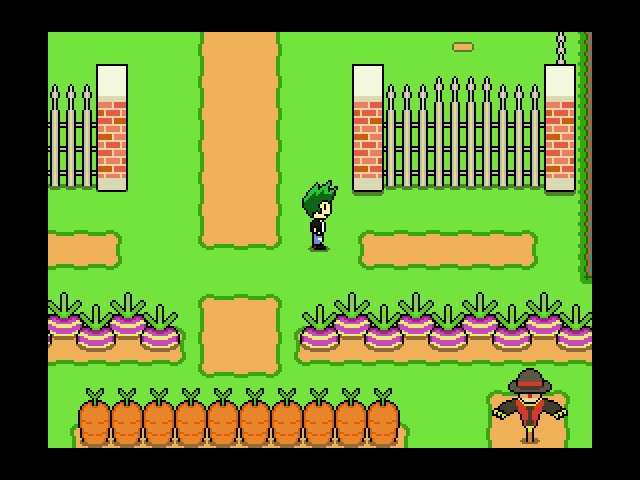 Heading south from here takes us to the hillside where Mr. Marvelous is working on the statue, so that means that the tunnels are all pretty close to one another. 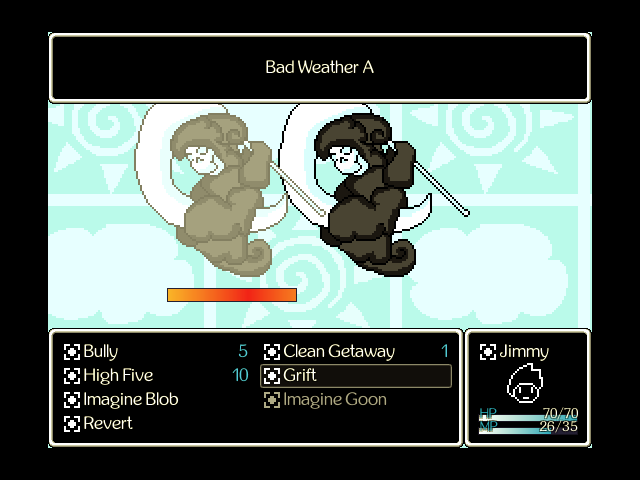 Music: Motion Sickness Quote:
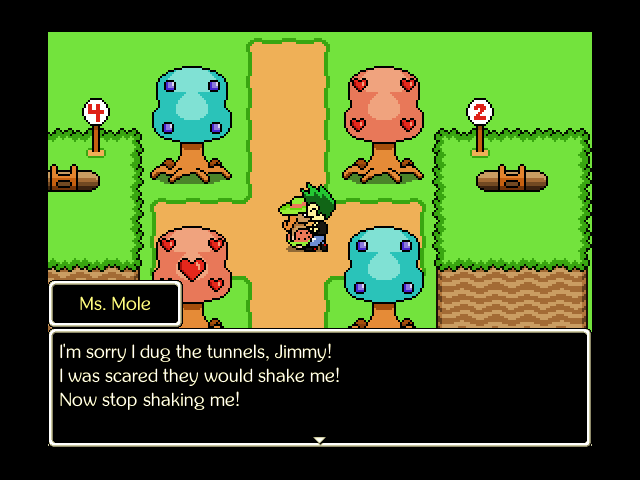
 Music: Adventuring for Beginners This time, we investigate the eyeball cabbages, and find a spooky cave and tunnel #6's other end. 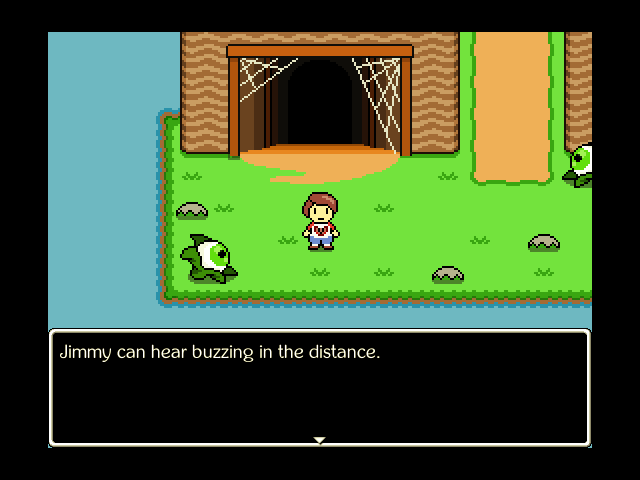 Before entering, we take the time to get Jimmy's thoughts on Giant Garden. 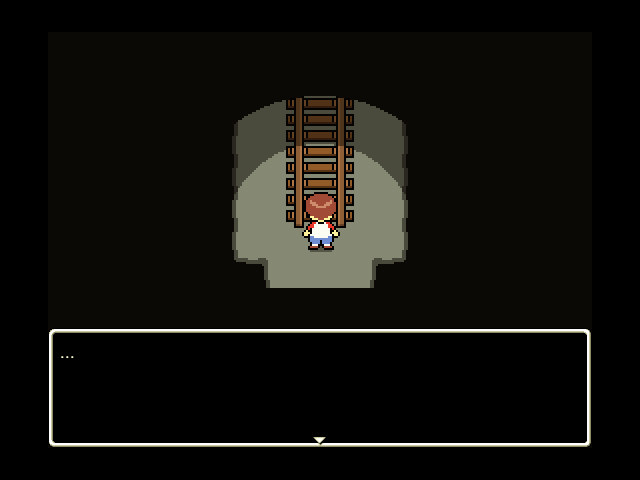 Music: Sarcastic Applause From The Darkness Once inside, we find that he's too afraid to say much of anything. This is a way to telegraph certain dangerous areas. Right now, this area isn't too deadly, but I didn't actually go right instead of left at the fork thought the actual path to take was elsewhere in Giant Garden, so we'll visit here later this update. 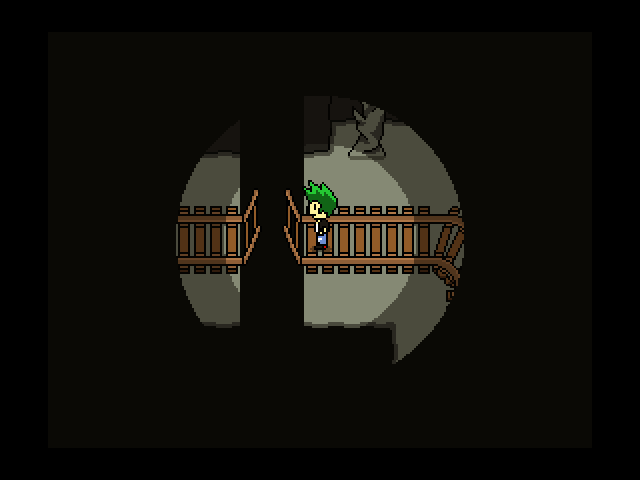 If we just follow the tracks, we get stuck in short order.  Music: Adventuring for Beginners Backtracking to west of the sunflowers, we find this little crack in the dirt. 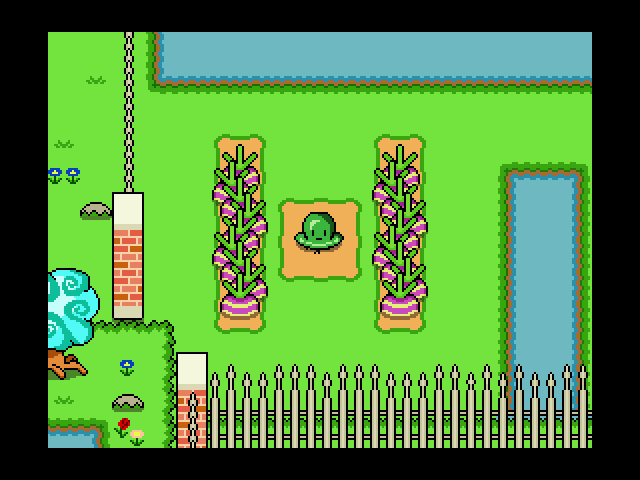 In we go. 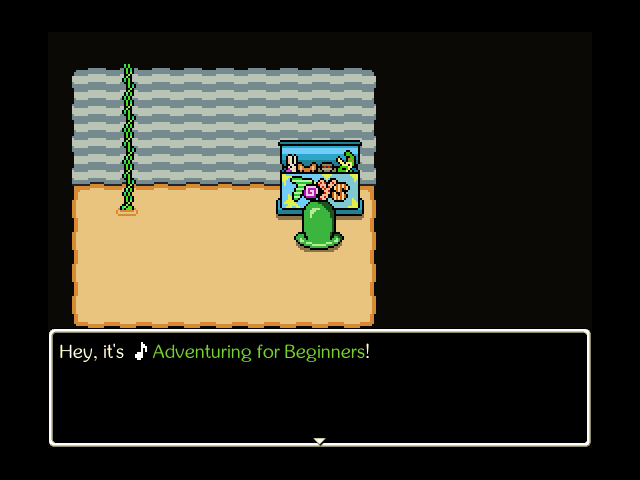 WHERE'S MY BONUS, TOY BOX??!? 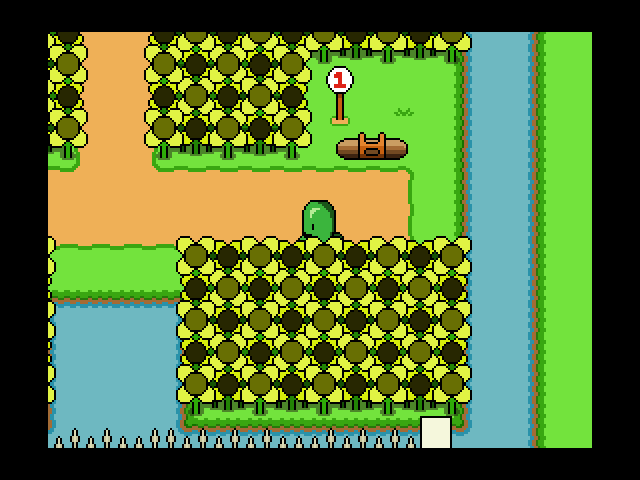 Tunnel #1 at the main camp takes us to the sunflower patch. 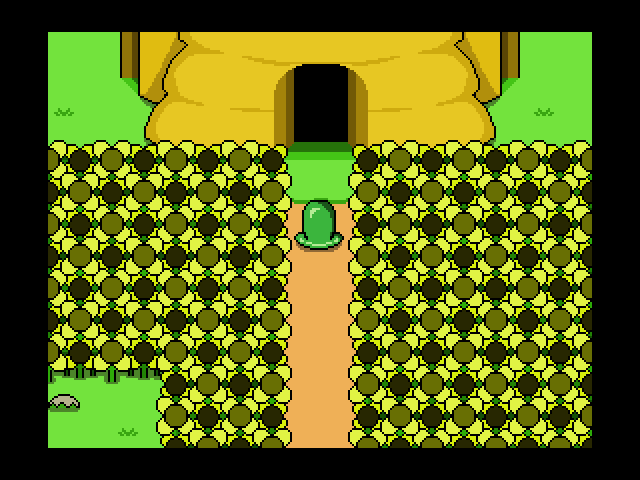 And that takes us to the Buddy Bee Hive. So, if you're playing along at home, the painless path to get here is: head into tunnel #6 to the north, head northeast, and if you run into the center camp, take tunnel #1. You miss the treasure boxes and a fair few encounters this way, but it's not a big loss, honestly, and you'll bump into plenty of them anyway.  Music: Let's Color Today I throw the Emergency Exit so I can go back to town, heal up, that sort of thing. 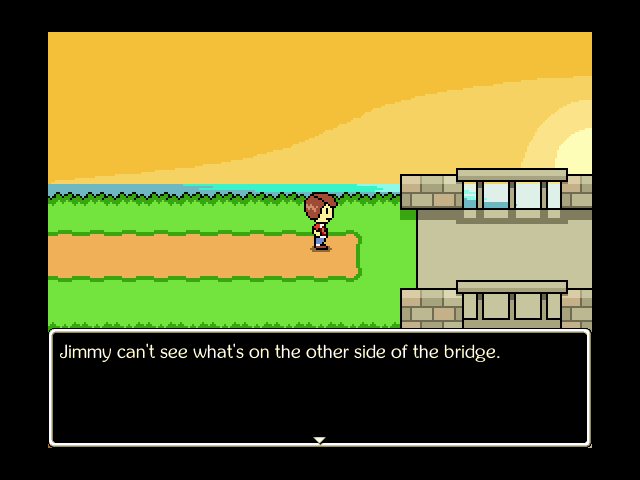 I'll also get Jimmy's perspective on Unbreakable Bridge and Cloudy Hill, since I neglected to do that. 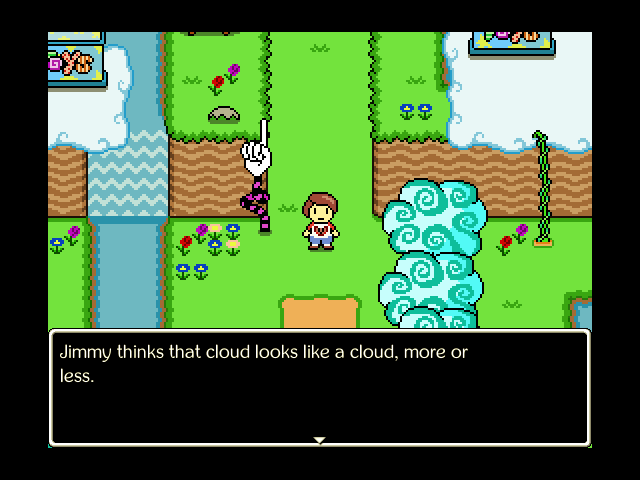 Music: Cloud Sundae For Cloudy Hill, the responses Jimmy gives actually randomize to a degree. Here's the spoilerpopped list of all the ones I got.
Last edited by Kalir; 10-28-2019 at 09:47 AM. |
|
#16
10-25-2019, 05:30 PM
|
||||||||||||
|
||||||||||||
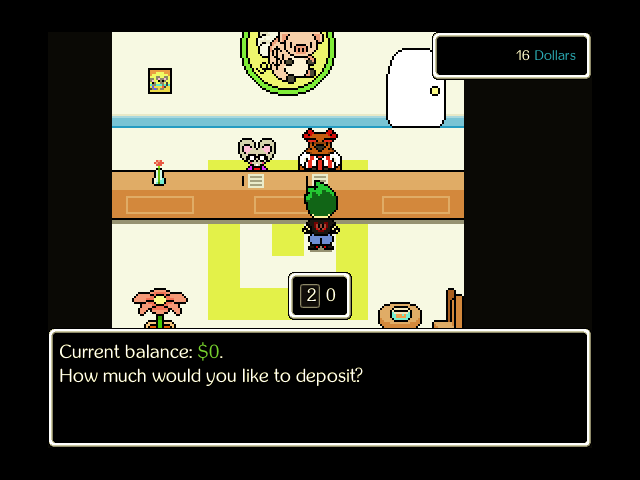
 Music: My Animal Friends I grab the furniture from Ms. Robin as well as a set of Overalls for both Jimmy and Buck, then deposit all my cash in the bank.  For people keeping score, I have 108 dollars in there now. 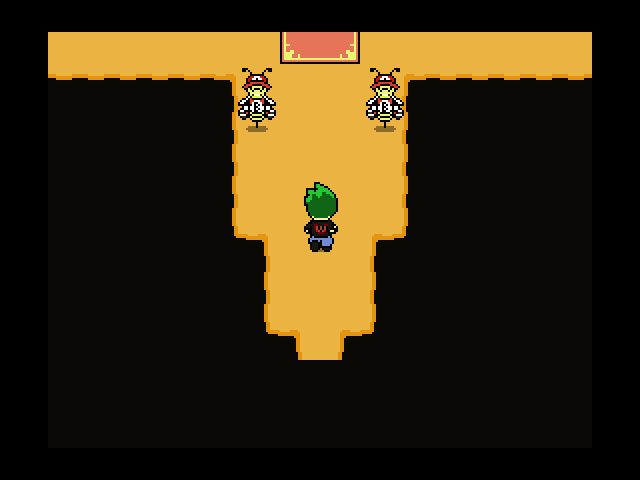 Music: Adventuring for Beginners WHAT'S GOOD, BUZZY BOIS 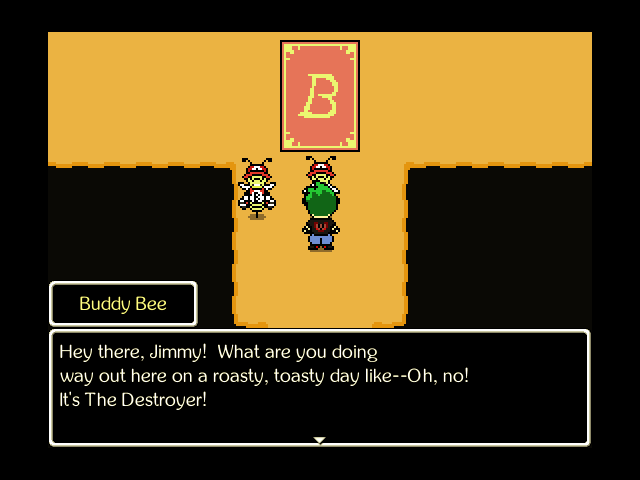 The what now? 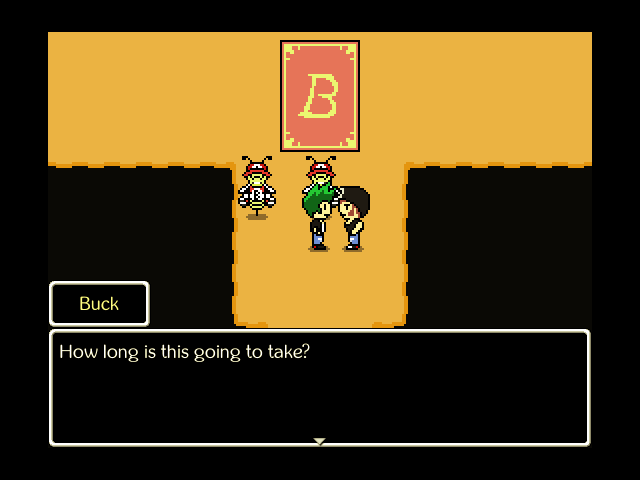 Quote:
 That's fine with me. 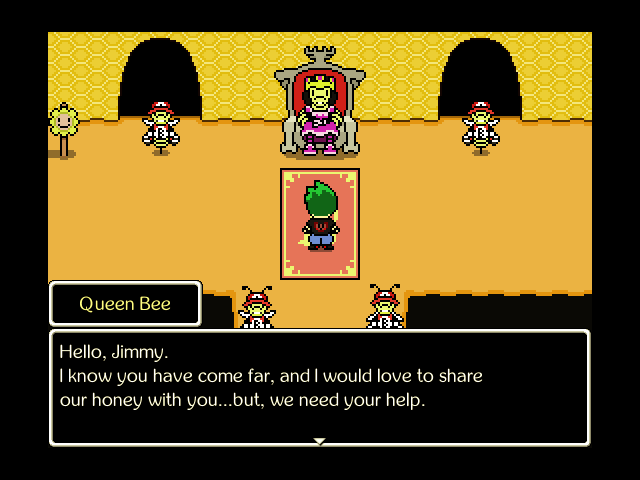 Music Quote:
 Music: Skin Thieves Quote:
 Music: Adventuring for Beginners So, our adventure has shifted in priority slightly. We're nearly done for today though, just want to get to the other side of Giant Garden.  The other Buddy Bees won't let us further in the hive, but they are jazzed to talk to us.  Nice. So if I had 108 in there before, that means probably 21 dollars should have been added.  More furniture. We'll cover that at the tail end of the update. 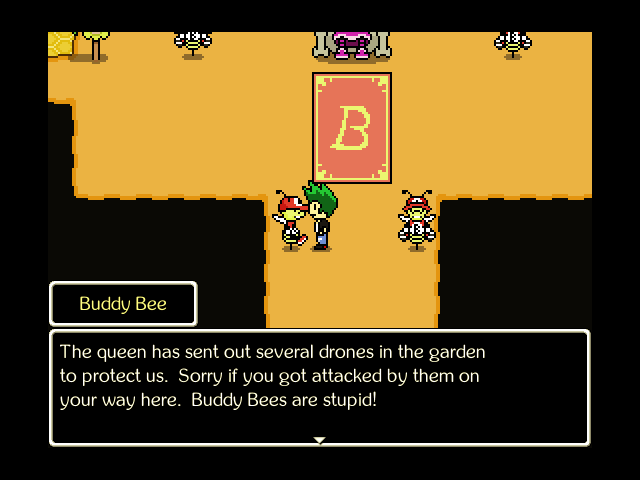 That's okay, I forgive you. 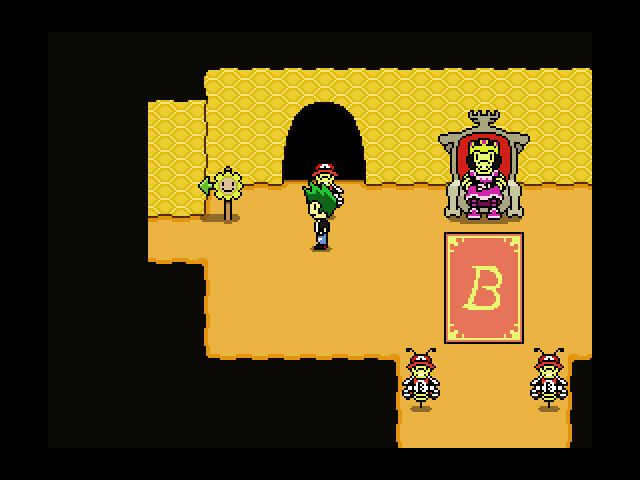 In order to complete Giant Garden, we gotta go over here.  Music: Worm Party Quote:
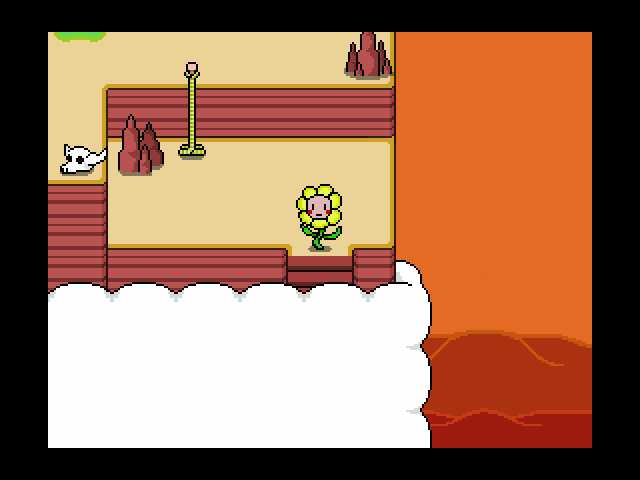
 Quote:
Music: Motion Sickness The Buddy Bees here are backed by the Happy Little Sunflower, which will spend each of its turns healing the Buddy Bees for half their max HP. So don't do what I did in this fight like a damn fool, and focus down each bee one at a time. Once that's done, the Happy Little Sunflower will switch to normal attacks, which hit pretty hard, but not hard enough to merit a tactics shift. Overall, shouldn't be a big deal. 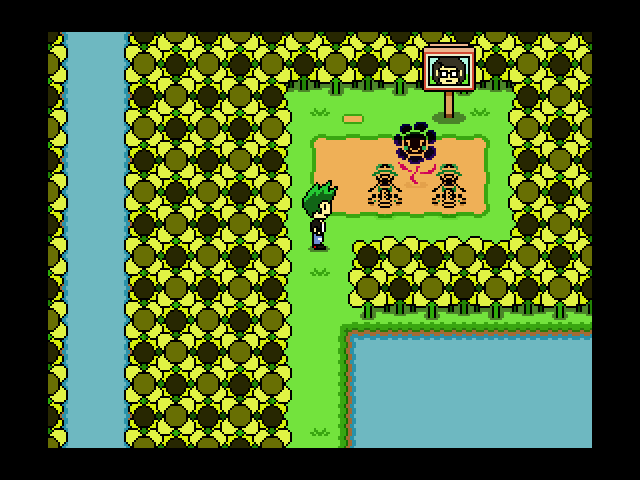 Well, that sure was something. 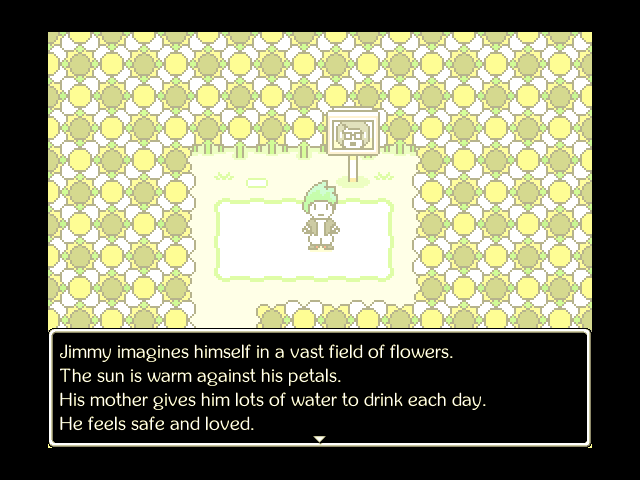 Music: The Noble Sea Quote:
 And once again... 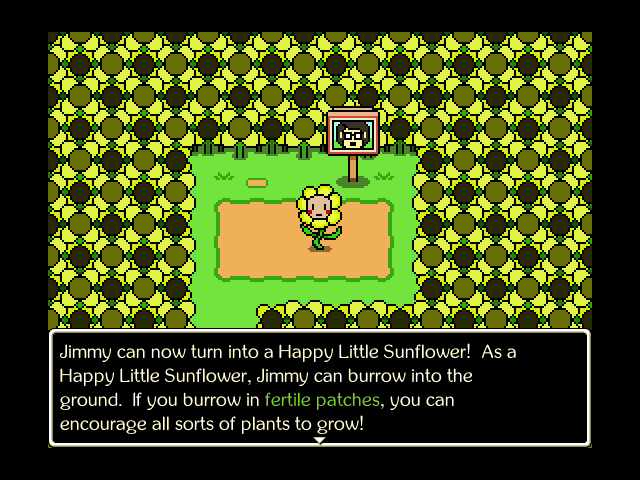 Jimmy unlocks a new form of Imagination! 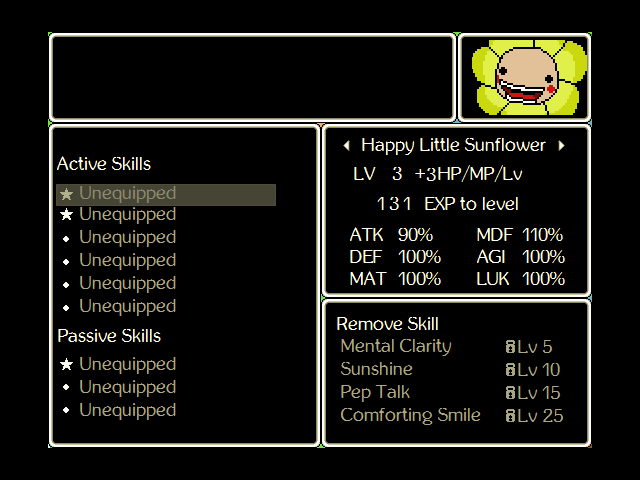 I forgot to screenshot the stats until after my playing was done, though. Anyway, the Happy Little Sunflower, as the fight indicates, is very much meant to be a support. Its stats are pretty humdrum overall, although every level of Happy Little Sunflower does award +3 HP and MP, making it a good investment for anyone hoping to extend their resources longer. And really, isn't that what healing is all about? Quote:
Quote:
Quote:
Quote:
Quote:
Quote:
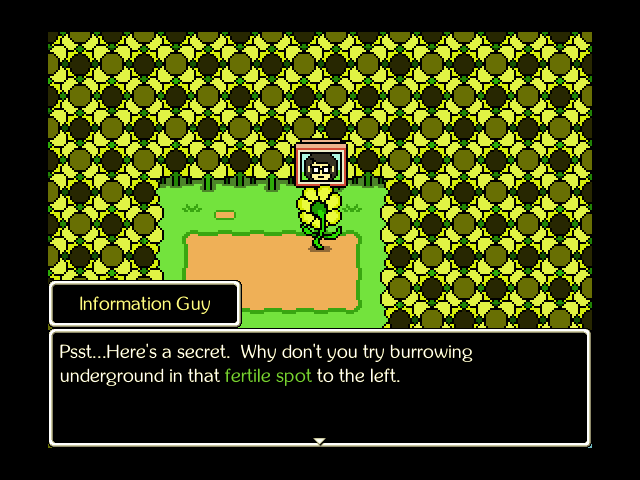 As for the field ability... 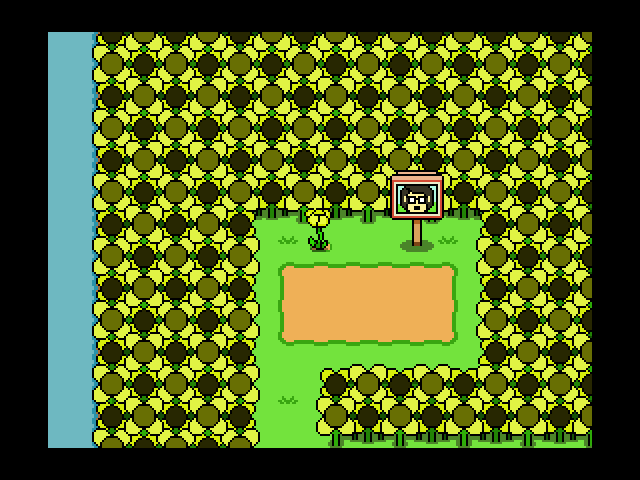 We can burrow into the ground anywhere we want! 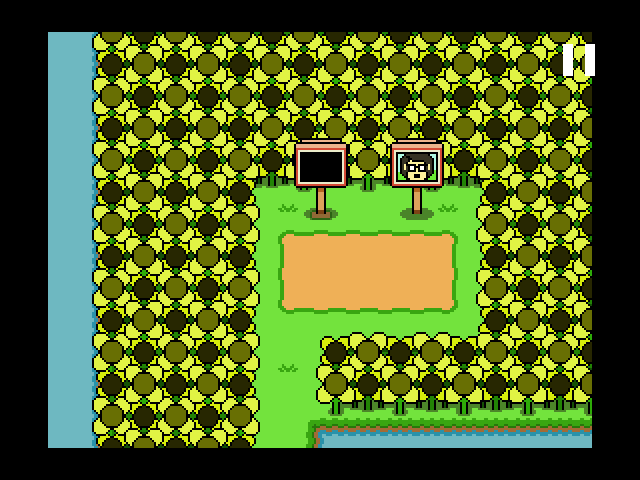 Doing this in the marked spots can reveal Secrets!  This is a dumb secret, though. |
|
#17
10-25-2019, 05:32 PM
|
||||
|
||||
 But we can put this to use in Giant Garden easily, opening up the shortcut to the entrance with tunnel #2, and reaching tunnel #4 for the first time.  As for tunnel #4...  Music: Let's Color Today That leads to the path out. But there's still one thing I want to take care of in Giant Garden.  But first: this.  This is the Clubhouse, where we can finally put all that furniture we've been going for to use. 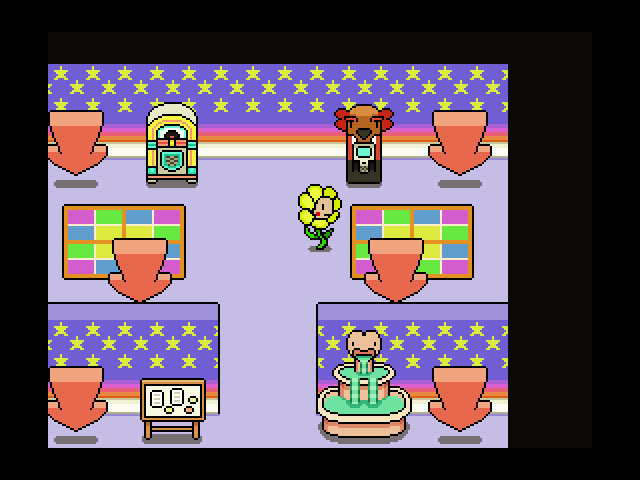 There's always a healing fountain, ATM, jukebox, and noteboard available in the Clubhouse. The noteboard tracks what furniture sets you have. All those arrows, though? Those indicate places where we can put furniture! 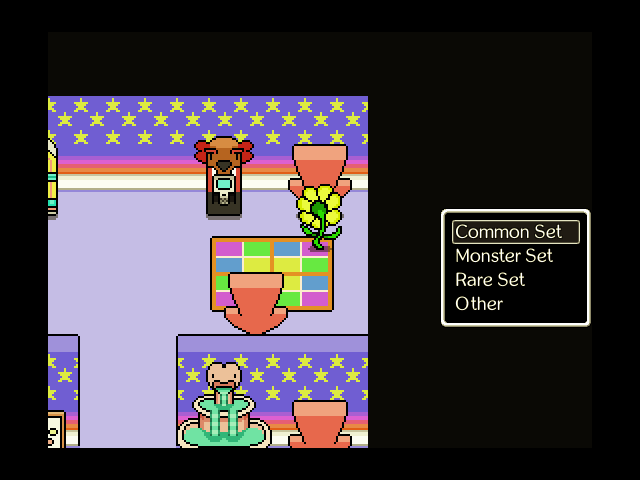 There's four categories of furniture we can obtain.  Quote:
 Quote:
 Quote:
 Quote:
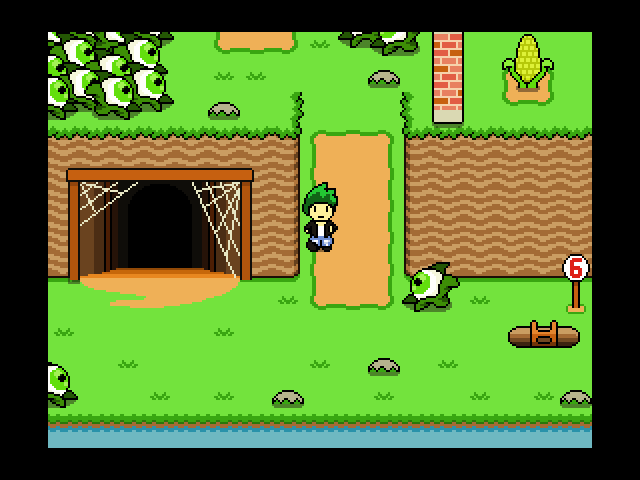
Sets are very hard to complete, since they're spaced out through most of the game in almost every case except for the common sets. So if you just want big huge stats, feel free to just throw down all your favorite rare junk for ridiculous stat boosts. 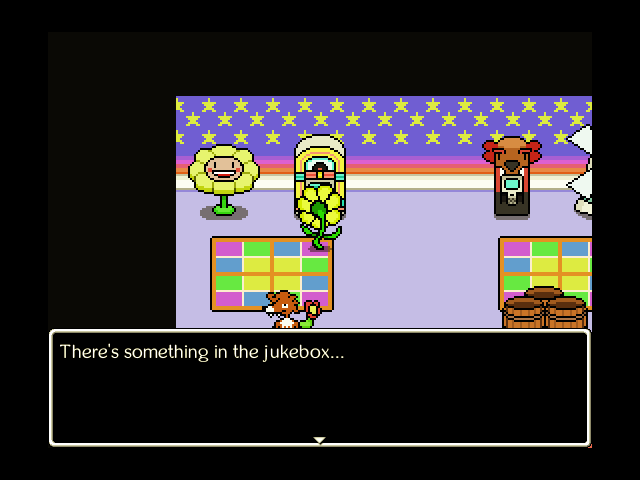 The first time you check this jukebox, it'll give you the track Let's Color Today. After that...  You can set the music that plays in the Clubhouse using any of the tracks you've found in the game! You can find or buy almost every track out there, too: only a scant few side areas don't allow their tracks to be obtained ingame that I'm aware of. (The music in the dark cave under Giant Garden is one of these.) I set it to Adventuring for Beginners because I like it. I'll change it to my favorite taking-it-easy song later, when we unlock it.  The Wilted Lands are just over to the left, but we've got to get something else from Giant Garden first. 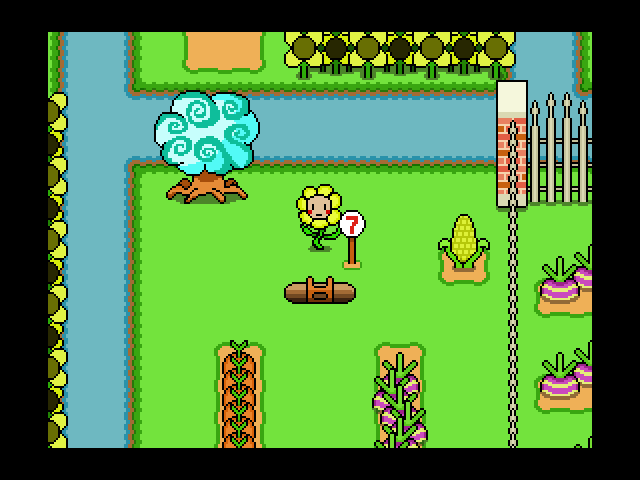 Music: Adventuring for Beginners North of the very first scarecrow is tunnel #7's other entrance, which is basically worthless to us, but hey, good to have that nailed down. This takes us right across from tunnel #8... 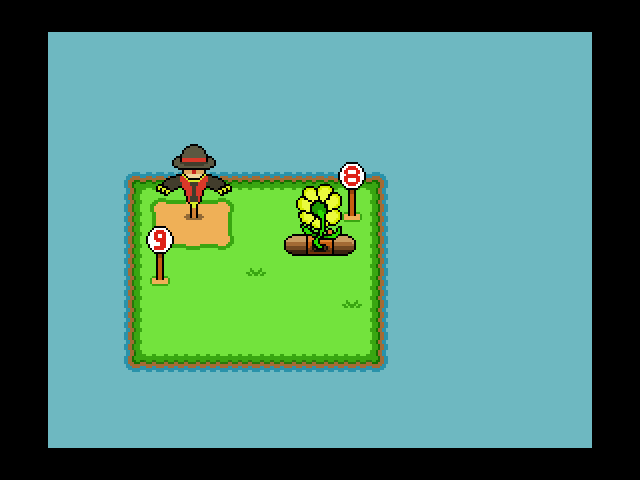 Which takes us here. Tunnel #9 isn't completed yet, I think we need to clear the Wilted Lands first. 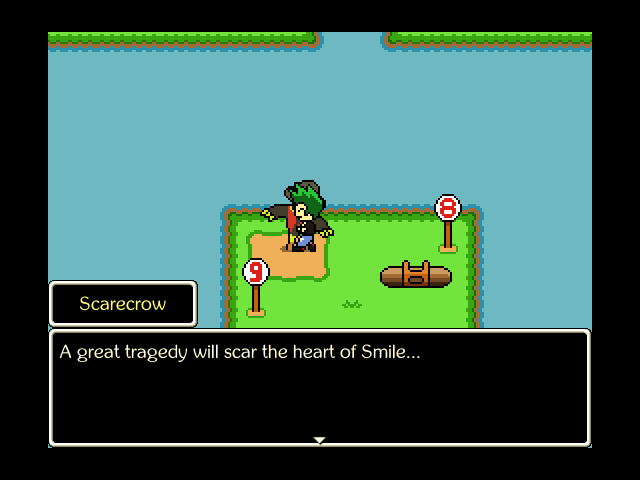 I didn't come here to talk to you, jerk! 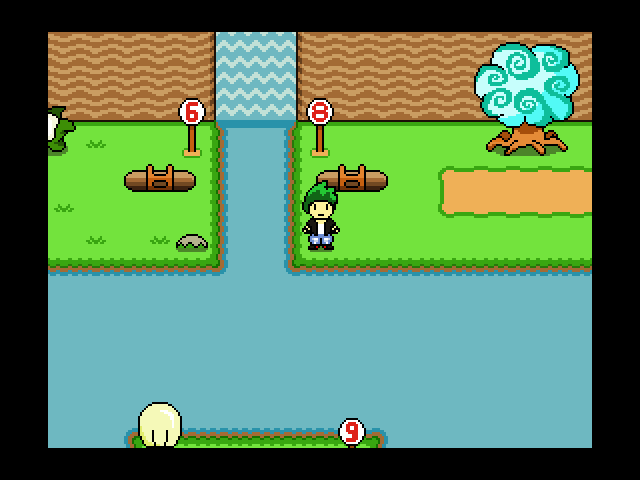 We can see where Tunnel #9 will eventually end up, though. I see a weird giant lightbulb over there, too. 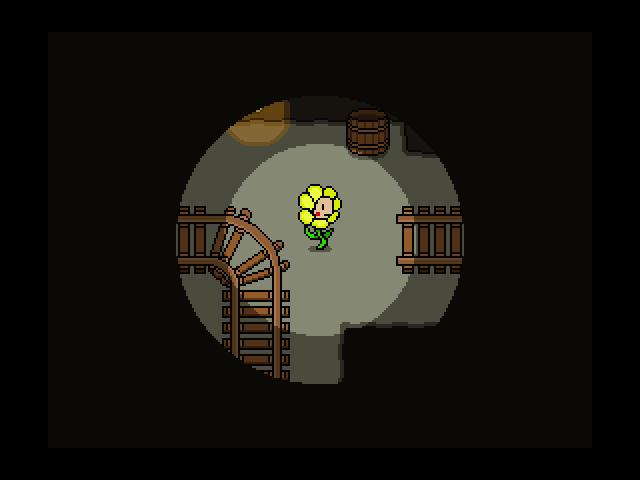 Music: Sarcastic Applause from the Darkness I finally have the sense of mind to go right at the dark tunnel's end instead of left, revealing that there's an entire area over here. 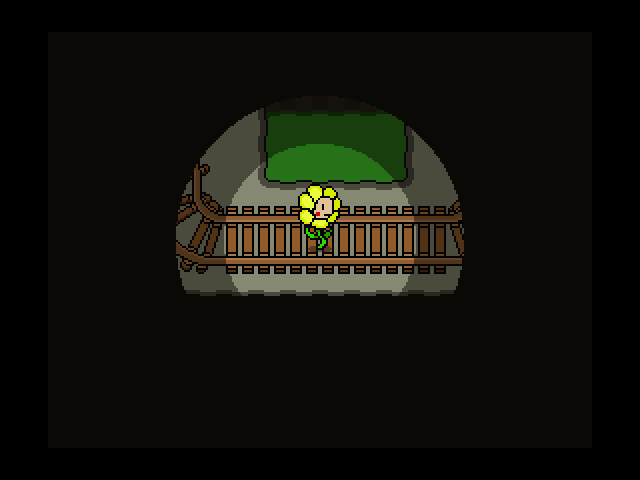 The path goes on for a while, following a new set of tracks.  It gets darker as we progress, too. 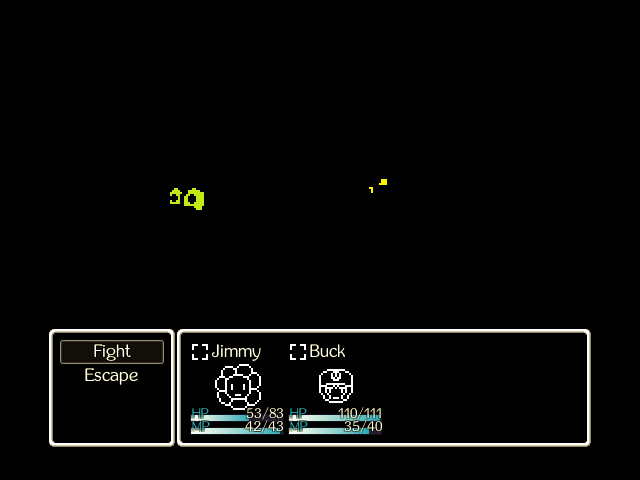 Fights in this area don't use Motion Sickness for the theme, but keep Sarcastic Applause from the Darkness going. They also keep all the enemies in the dark for one turn, although their eyes and wallet contents give them away. Note that Bad Weather can occur as a random encounter down here! 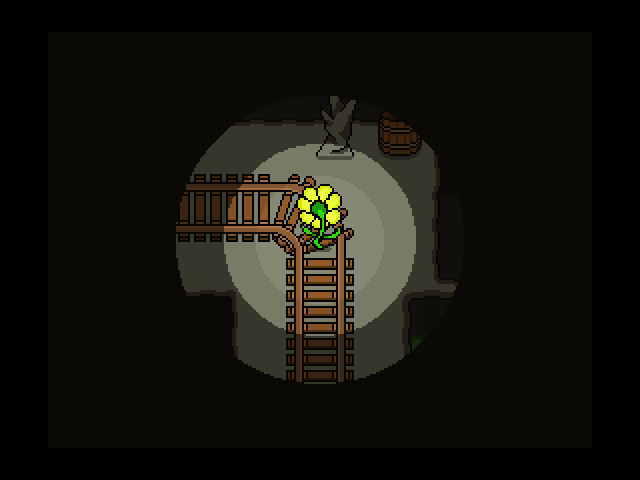 Anyway, going up and then turning left. 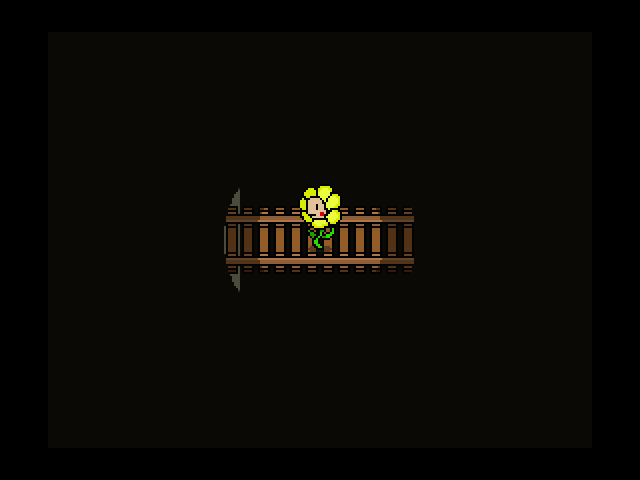 Over this long, dark chasm...  ...Hm. That's a little alarming. The encounters don't change, though. Last edited by Kalir; 10-28-2019 at 09:46 AM. |
|
#18
10-25-2019, 05:32 PM
|
|||
|
|||
 There's a few... eggs, maybe? A handful hatched, some not.  Our goal is off the beaten track to the left, just as we're about to complete our circuit through the cave. 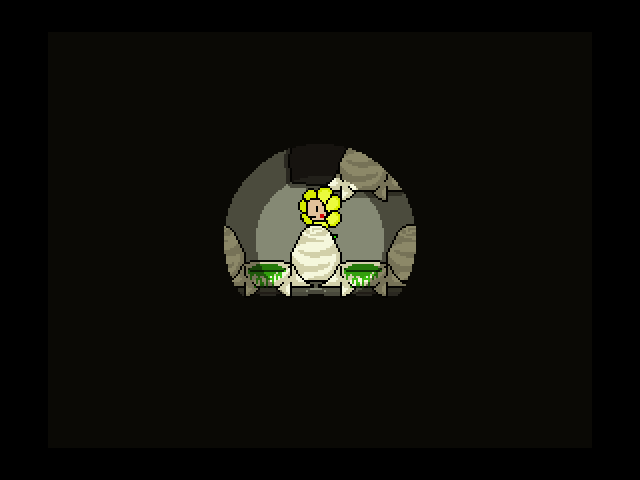 Yeah, this looks right. 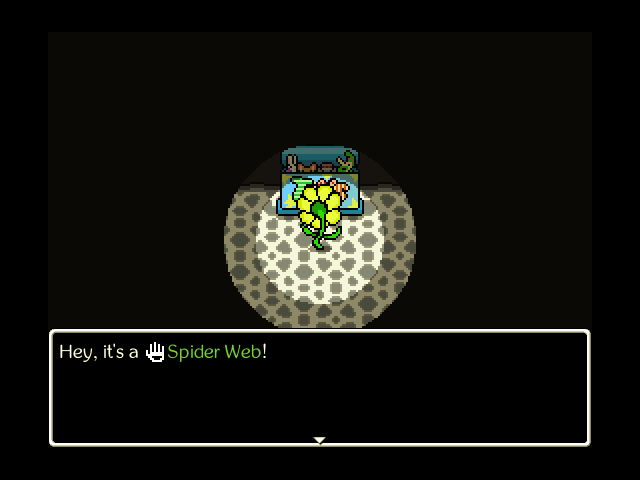 Quote:
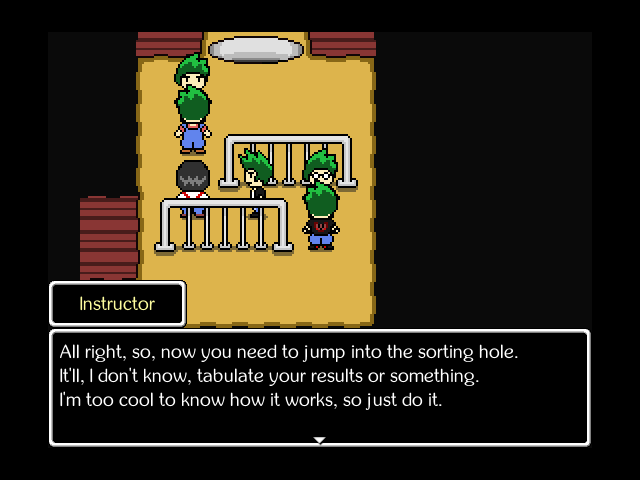
 An especially thick web prevents us from progressing further. We're not coming back here for a LONG time, but we'll be back eventually.  And here's a helpful shortcut to do so with! Next Time: All right, so, now you need to jump into the sorting hole. It'll, I don't know, tabulate your results or something. |
|
#19
10-25-2019, 09:34 PM
|
|||
|
|||
|
JIMMY GAME!
|
|
#20
10-26-2019, 07:16 PM
|
||||
|
||||
 Music: Adventuring for Beginners Hey, remember that content warning for body horror I gave in the first post? Just gonna bring that up again, especially as we get to the end of the update today. 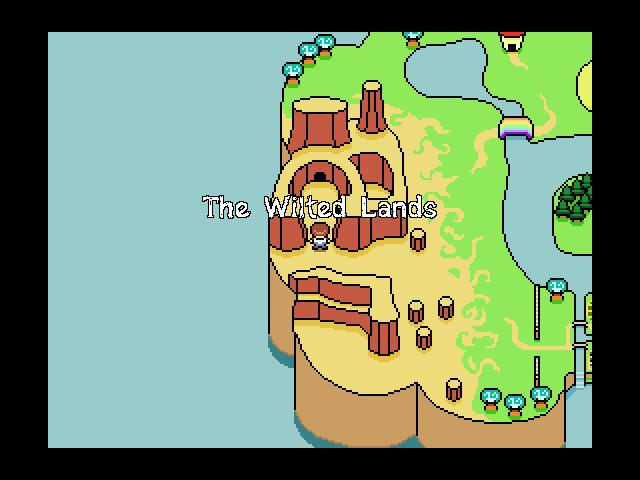 Music: Let's Color Today For now, though, we're just going to the Wilted Lands. They're all right. 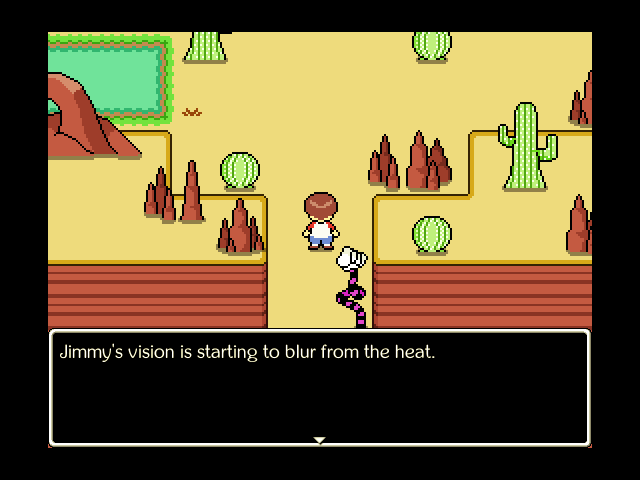 Music: Fortress of Nitwits As you'd expect from the name and terrain, the Wilted Lands are your average desert badlands mesa whatevers. 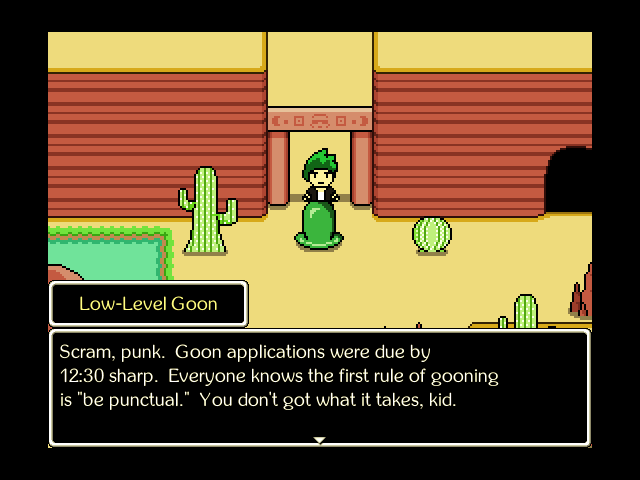 They're also the site of the Petty Thugs' home turf. Let's see if they'll let me in if I demonstrate my goon credentials. 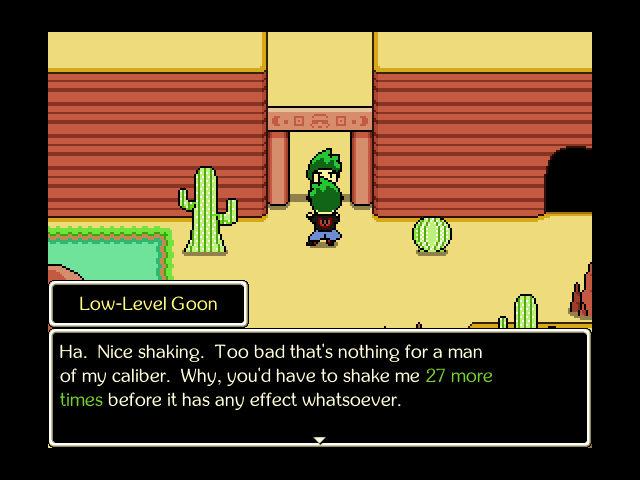 Terms accepted.  As is befitting a Low-Level Goon, he's at least 60% talk.  Gnarly, dude.  So yeah, you can skip the actual dungeon part of the dungeon. I don't recommend this for reasons.  Normally, you gotta sneak in through this way.  There's lots of Extremely Earthbound Tunnels in this area.  The what now with the what now? 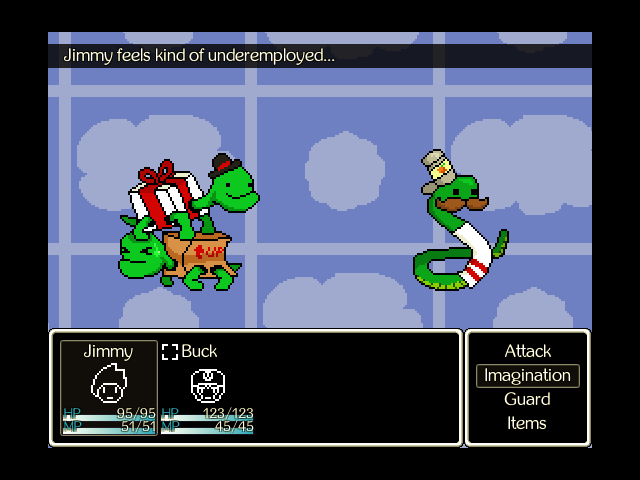 Music: Motion Sickness Quote:
 Quote:
 Music: Fortress of Nitwits Hey, we take those. 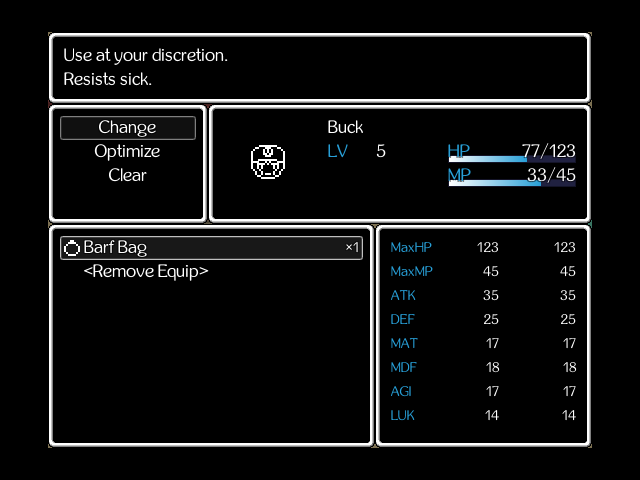 The toybox also contains a Barf Bag, which does exactly what it says above and not one iota more. Pretty nice this early! I give it to Buck since he can cure the status on Jimmy.  Jimmy's thoughts on the area change depending on whether he's in the caves or not. 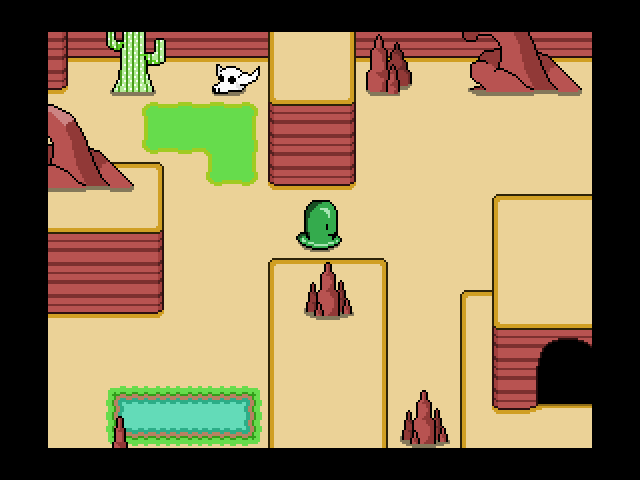 Anyway, going past the information terminal. 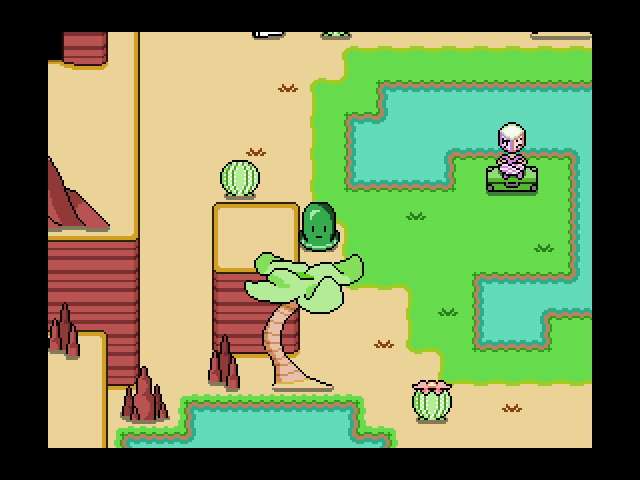 We find a curious individual with a rapidly rotating head. 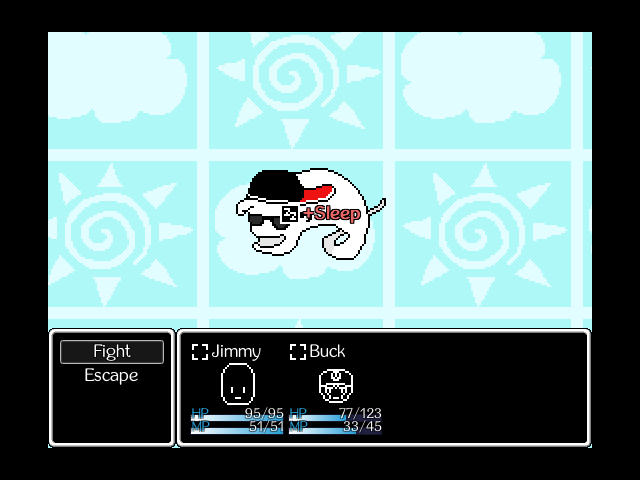 Music: Motion Sickness Quote:
 The Rad Ghost resist physical attacks, but I'd like to think Buck's Magnificent Combo could drop one. Sunshine is more than enough for the job as well, since Rad Ghosts are, naturally, weak to light attacks as undead. 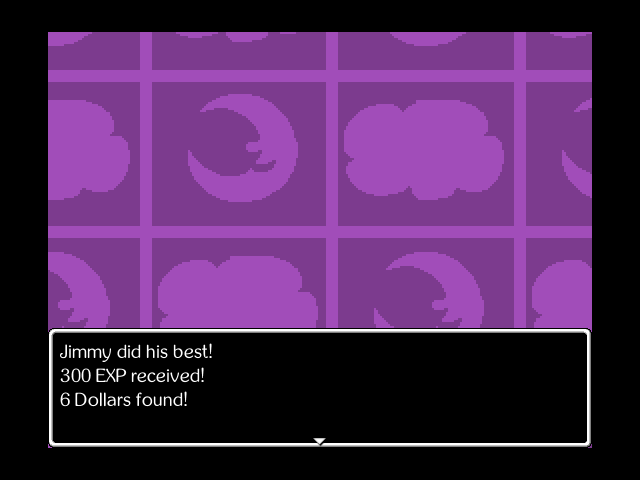 This gives us nearly as much XP as the boss for the next area would grant. It's the Good Stuff, but unless you catch one of these guys napping or have way too much AGI for this point in the game, just ignore them. Or better yet, make a Clean Getaway from the encounter so they don't Ennui you and prevent you from getting XP. 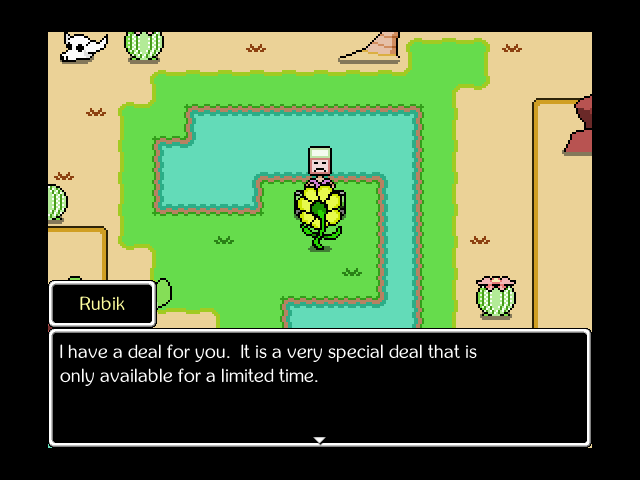 Music: Fortress of Nitwits Anyway, spinny head guy. This is Rubik, a traveling merchant. They'll usually have a pretty unique bargain for the area, often with unique conditions, such as... 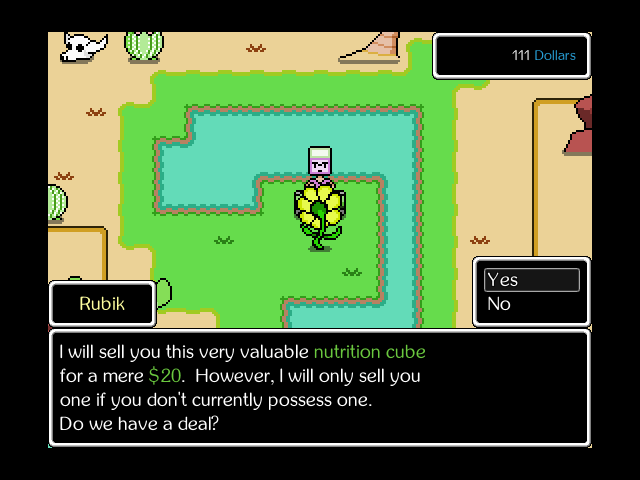 This. Which is entirely acceptable to us, so we do it. 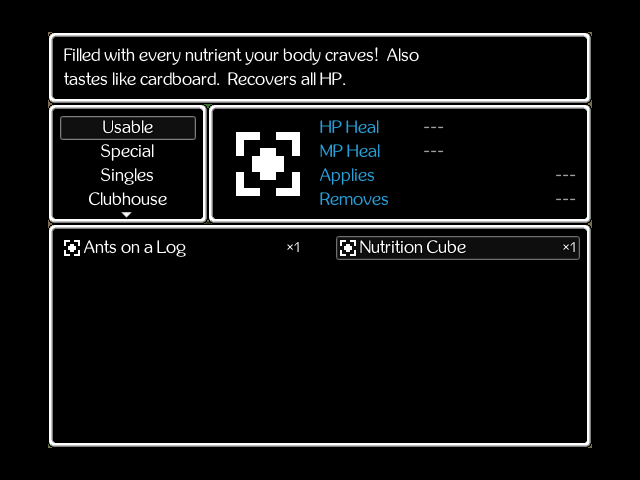 Bit early for a full-heal item, but hey, it's there. No complaints from me.  Music: Motion Sickness Quote:
|
|
#21
10-26-2019, 07:18 PM
|
|||
|
|||
 Quote:
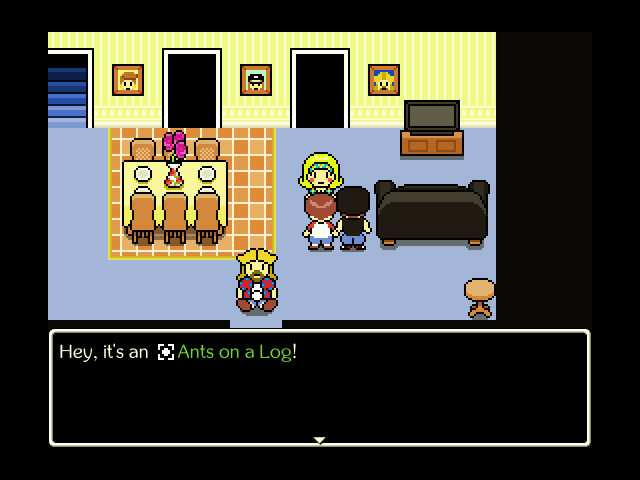
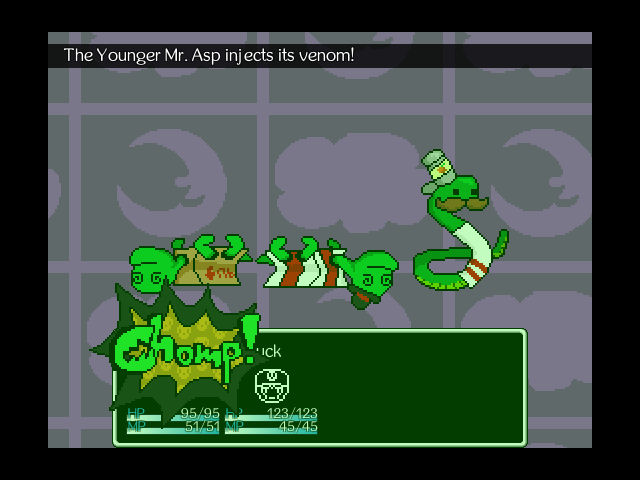
 Music: Fortress of Nitwits Defeating them gets us to level 5 of Low-Level Goon, which finally unlocks an ability for use in other forms. Now Jimmy can Bully his enemies no matter what he imagines himself as! ...Good? 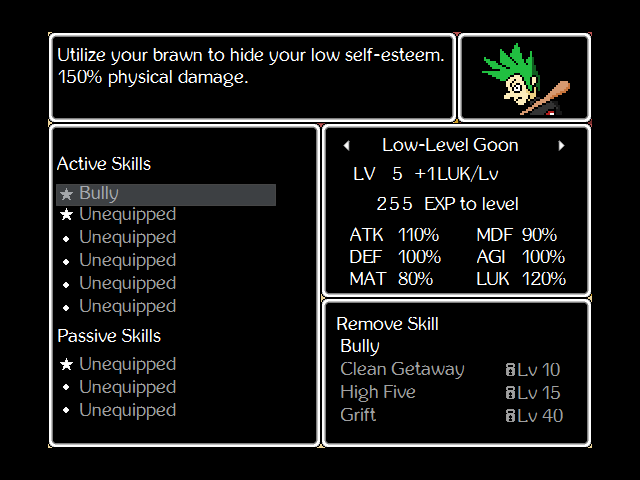 To recap: the starred slots for skills on the left mean Jimmy can use that skill in any form. All the unstarred ones represent skills he can only use in his default Jimmy form. My immediate goal for the future is to get Revolting Blob to at least level 10 so that I can get Antibodies, but I'll use whatever forms I like, really. No strategy in mind yet, all of his forms are pretty good (although this early on, Low-Level Goon is probably the best).  Anyway, we can progress by going north of Rubik's oasis.  The cave forks shortly in. To reach the Petty Thugs, you head south. To reach important secrets, head east.  We'll go to the Petty Thugs first, although there's not much reason to until you've done everything else you need to do in the Wilted Lands, or need to back out to heal up. Guess which one I am.  What a tough, edgy logo. 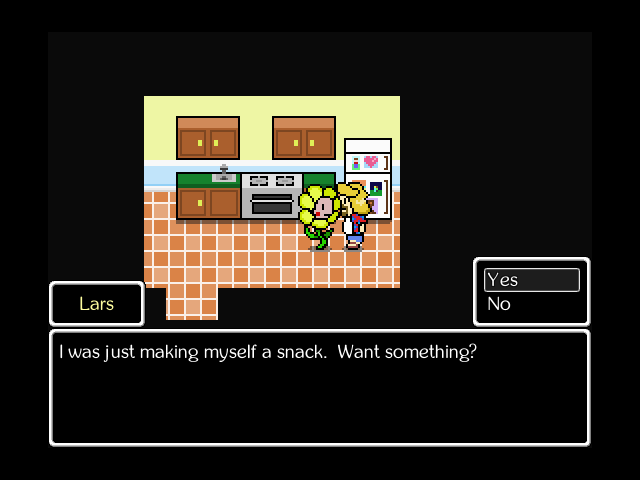 Music: An Open Window We go check in on Lars for our two free Ants-on-a-Log, since our reserves are exhausted and we aren't spending the Nutrition Cube this early.  Music: Cloud Sundae We also pop back into Cloudy Hill. Armed with the powers of the Happy Little Sunflower, we can circumvent Mr. Beaver's handiwork, although many overworld areas can just be walked through once cleared. No need to actually enter the area again. 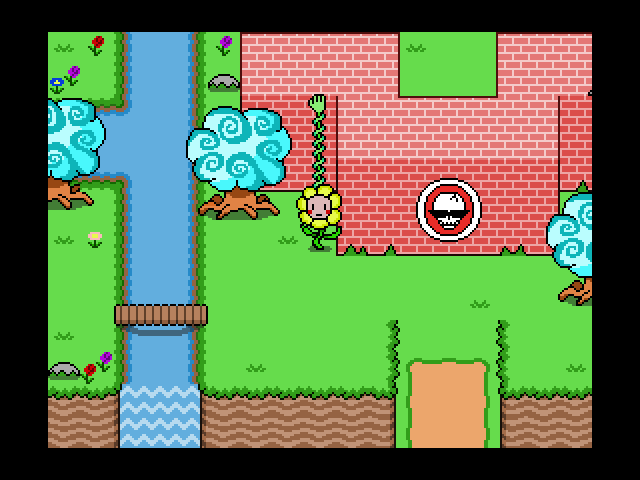 Still, shortcuts are nice, and there's still more to be found here.  We can get this toybox that eluded us at the start now! 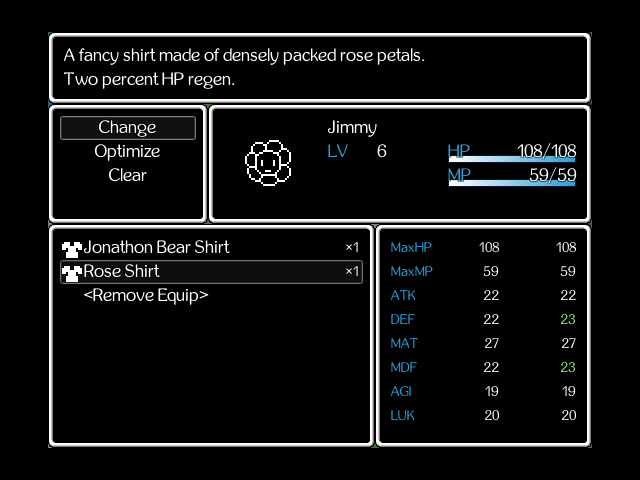 The Rose Shirt (+5 DEF/MDF) is slightly sturdier than the Overalls you can buy from Ms. Robin, and the regen benefits Jimmy if he's doing a lot of Blob form stuff. That said, it loses usefulness pretty quickly, so I'm picking this up now while it's still good. 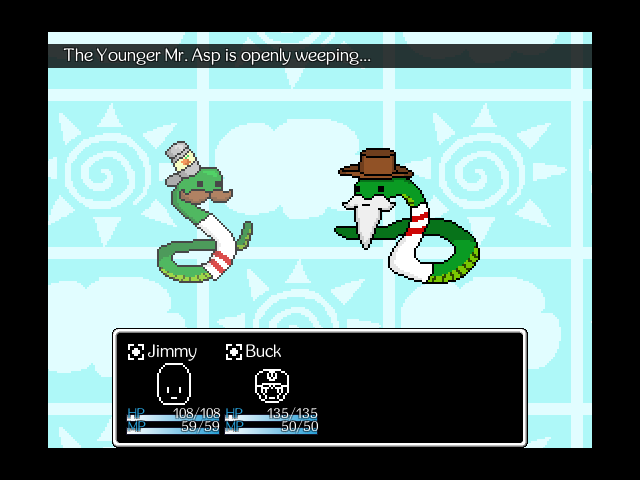 Music: Motion Sickness We've covered all of the enemy types for the Wilted Lands, but there is a unique interaction if you get into an encounter with both Mr. Asps. 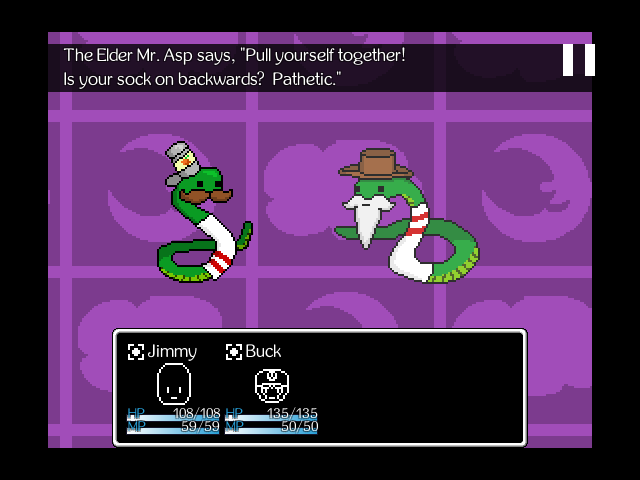 Basically, both of them will spend their turns demonstrating a pretty unhealthy filial relationship. So there's that.  Music: Fortress of Nitwits Anyway, back on track. We've now headed east towards important secrets. 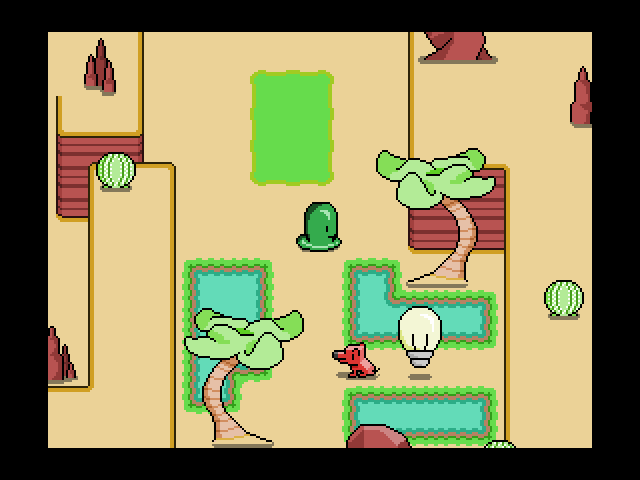 We've discovered a weird dog and another lightbulb. 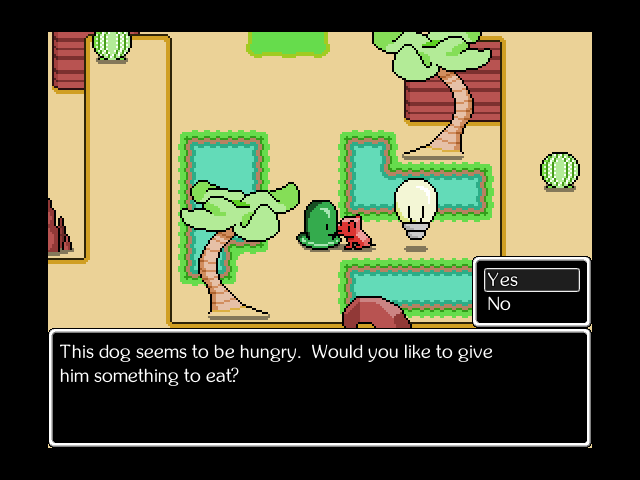 YES 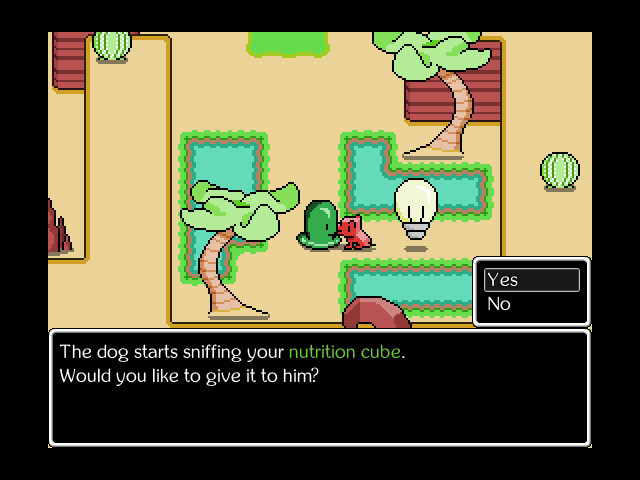 THEY'RE ON SALE DOUBLE YES 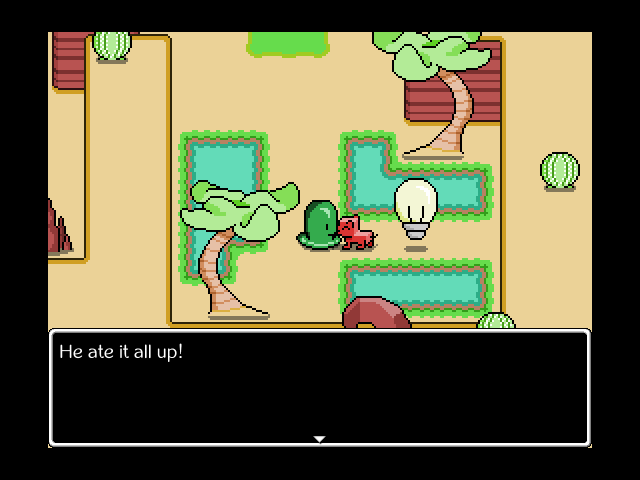 GOOD 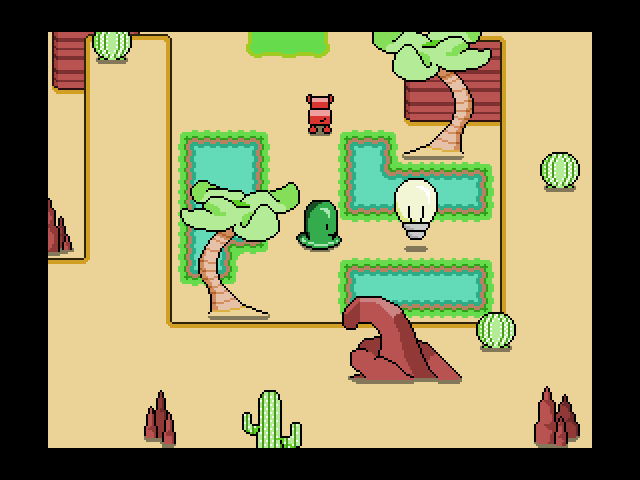 And with that, the dog has been fed and we can access the lightbulb. 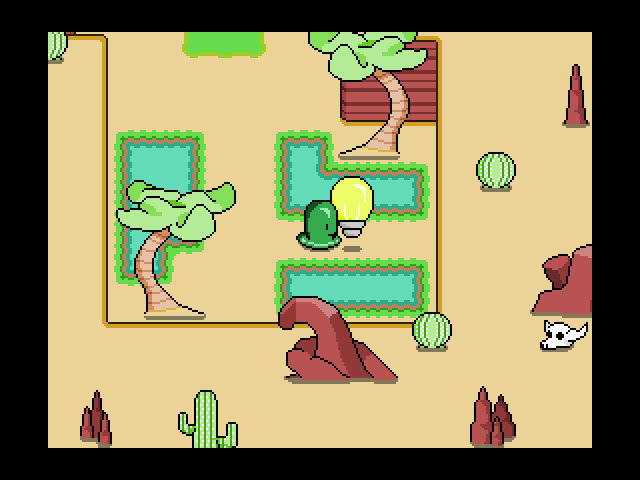 We turn it on. This has no discernible extra effect.  If we go back and head south in the same area as the dog and lightbulb... 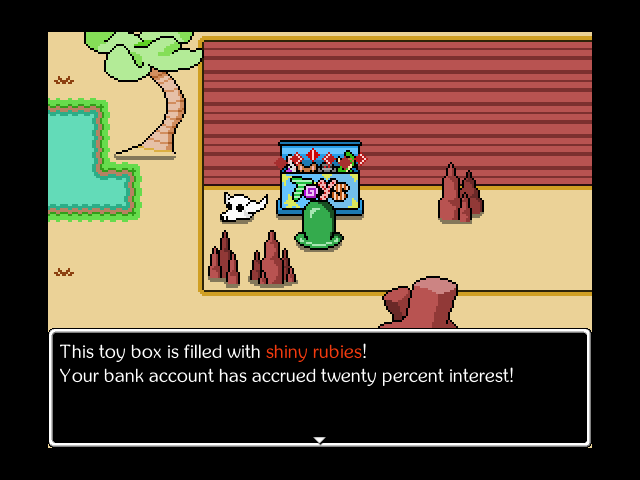 Ah, should've deposited while I was out. Oh well. 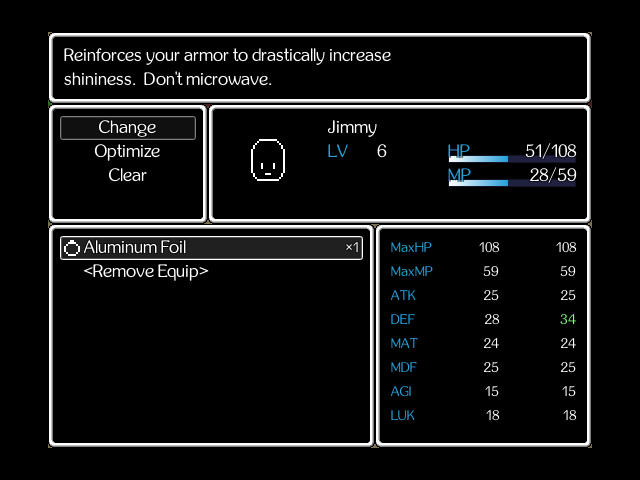 At least we get Aluminum Foil (+5 DEF) out of it. The extra point is due to the passive modifiers of Blob form. 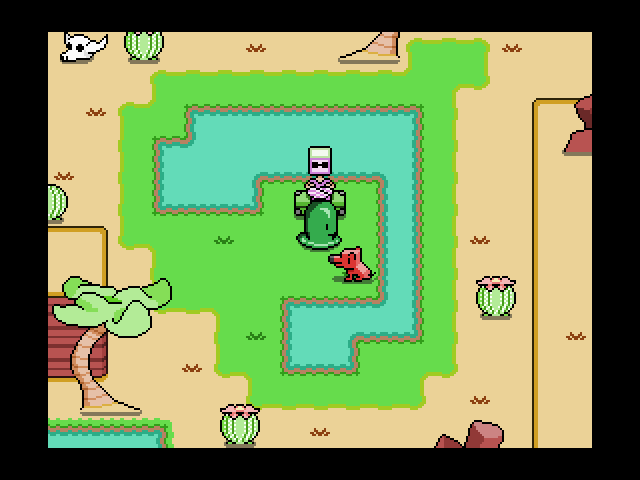 When we return to Rubik in search of a new Nutrition Cube, we find the dog has also followed the scent. |
|
#22
10-26-2019, 07:21 PM
|
||||||
|
||||||
 MAXIMUM GOOD 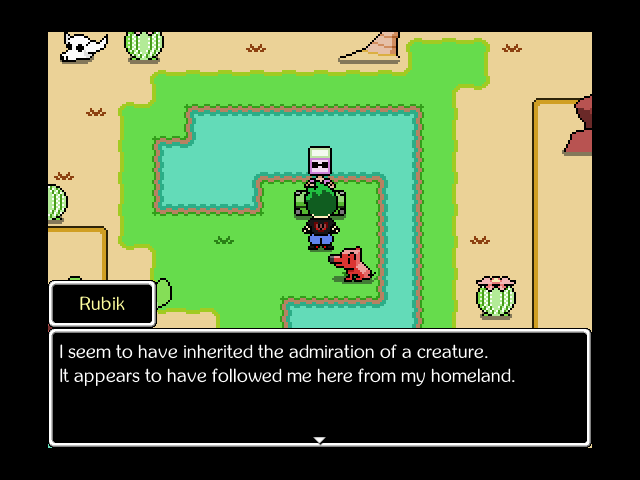 Maybe we'll see that homeland someday!  Music: Adventuring for Beginners Quote:
 Music: Fortress of Nitwits Anyway, enough pointless dungeon. Now we go infiltrate the hideout of the Petty Thugs! 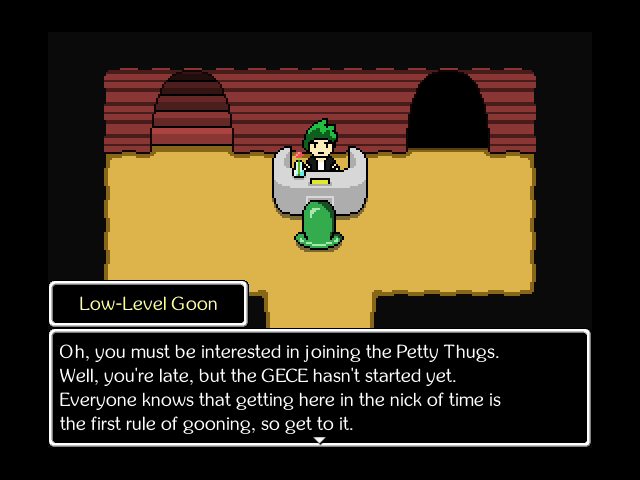 Nailed it. Knew that guy at the front was just trying to act tough. 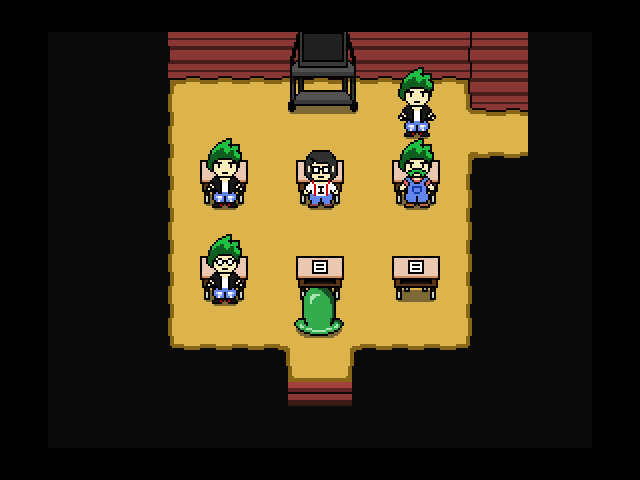 ...Uh. Hi, we're the new student? 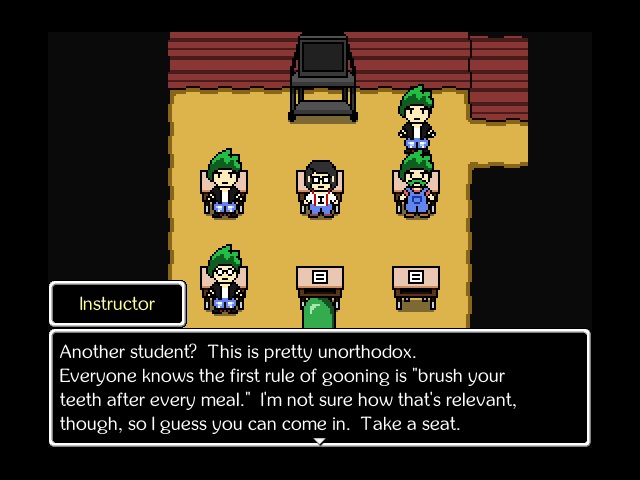 Music I... see. 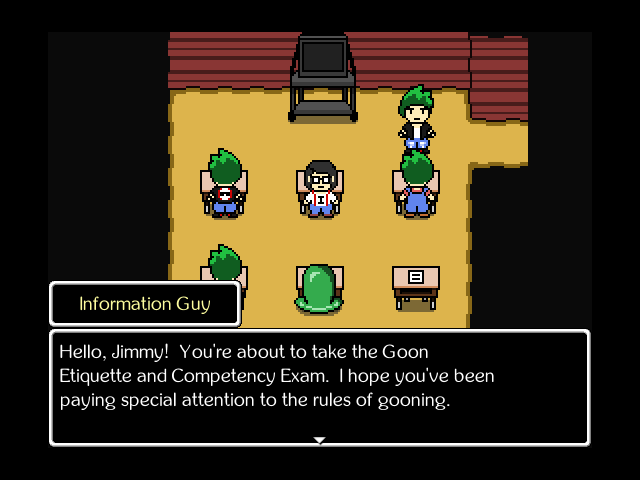 Quote:
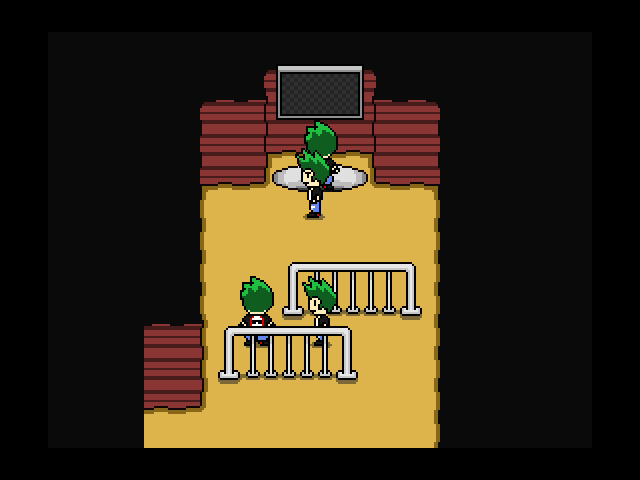
 Anyway, instructor turns on the TV... 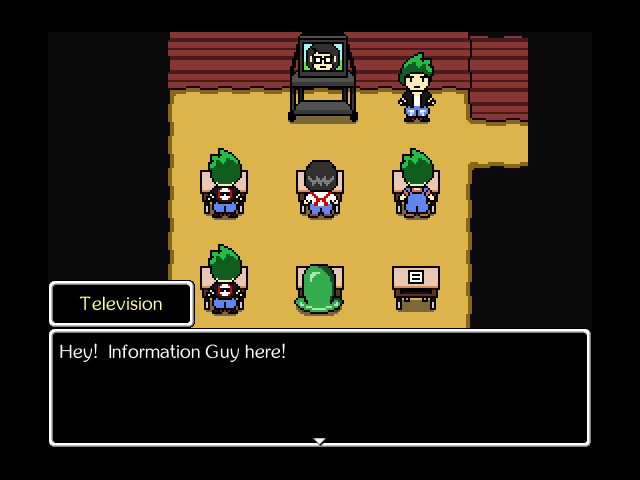 Quote:
 Anyway the instructor turns off the tape before we get to the rules.  This feels entirely apt for the position. 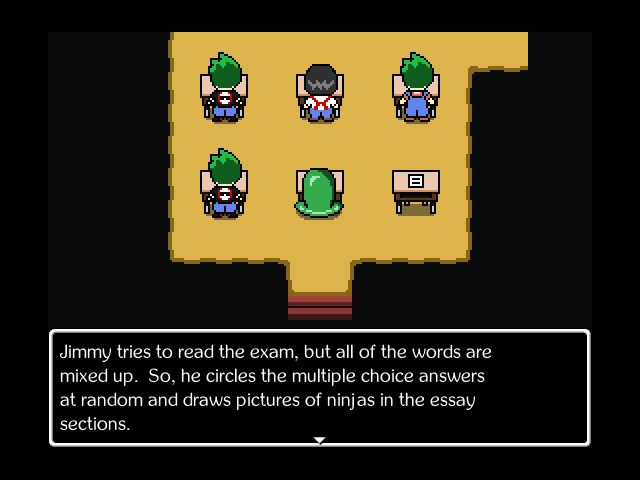 I think that's as realistic an answer as most of these wannabe goons are putting forth. 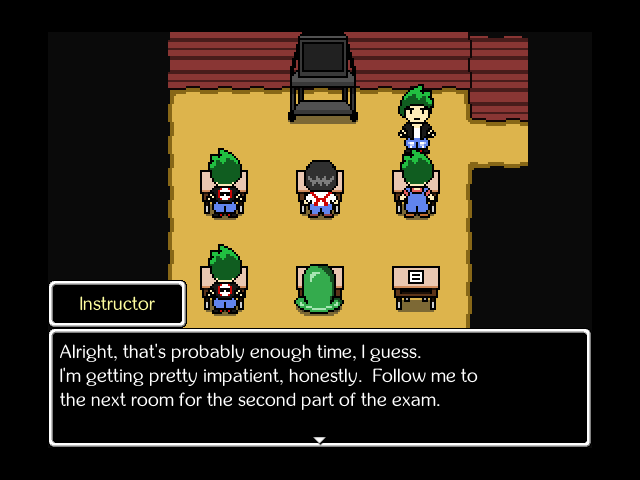 We finished anyway, it's fine. 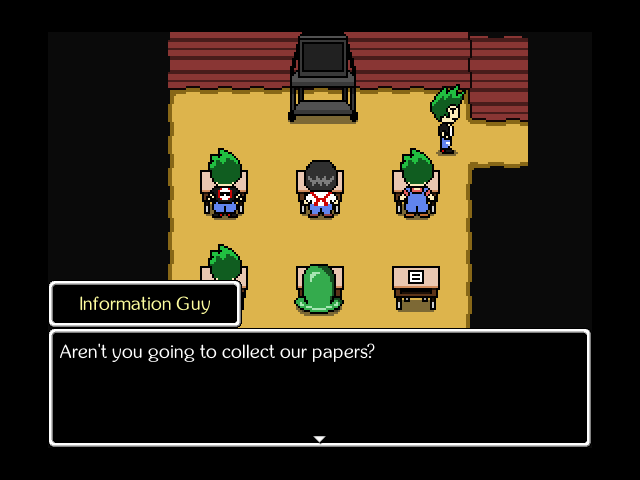 Quote:
 Anyway, everyone files into the next room.  Music: Fortress of Nitwits Guess this is part two. Well, everyone knows the first rule of gooning is that waiting in your place is for suckers, so OUTTA MY WAY 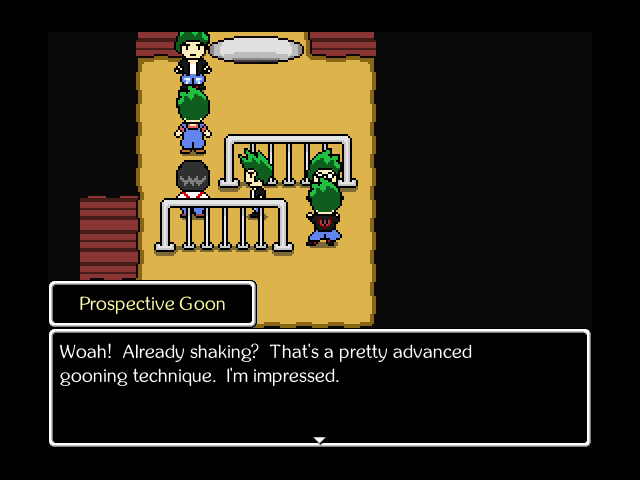 Dang, he saw that coming. Guess we'll wait like everyone else. 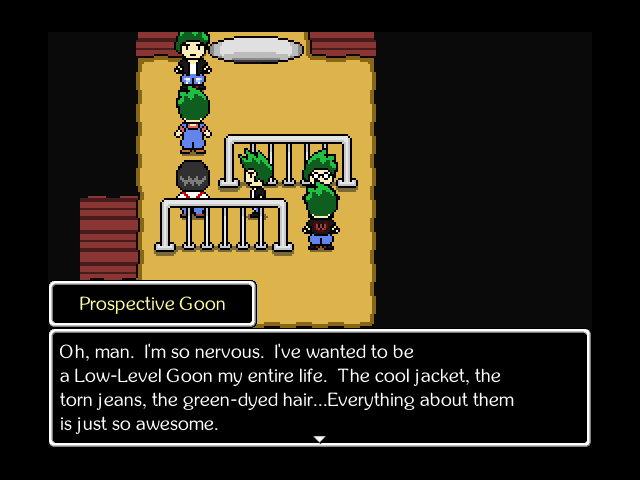 Quote:
 Sure, okay.  Overalls is up first, and goes in immediately. 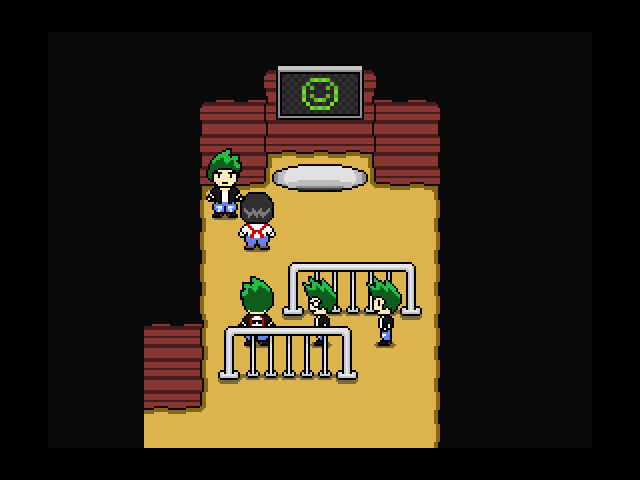 Guess he passed that part. 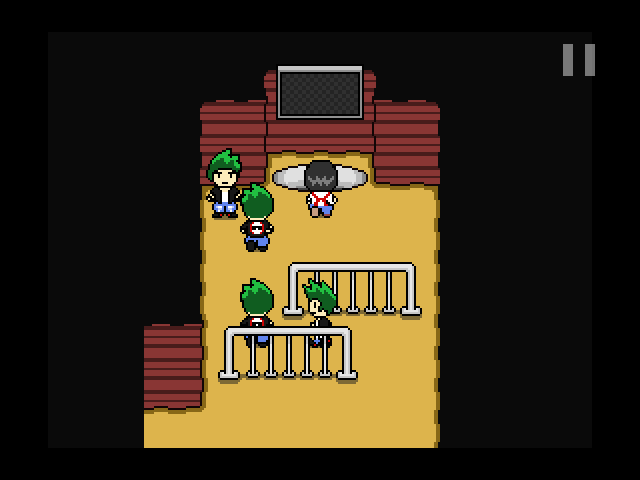 Information Guy goes next... 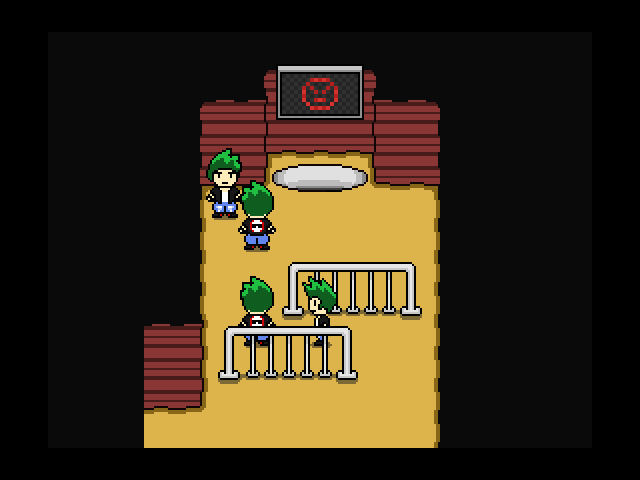 Called it.  Quote:
|
|
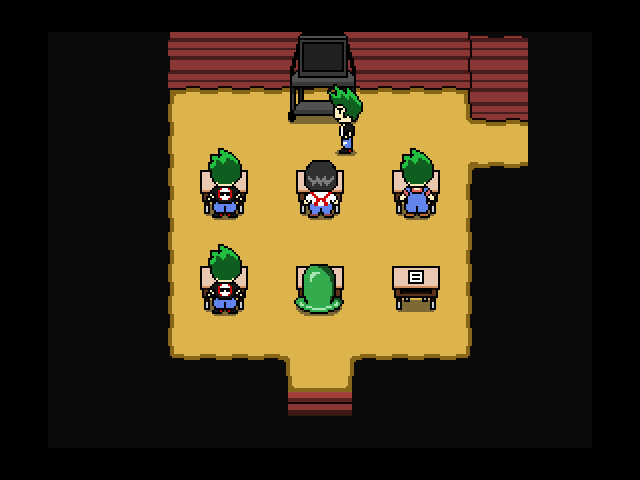
#23
10-26-2019, 07:22 PM
|
|||
|
|||
 The instructor drags the cheater into the hole...  Wow, that guy is good at this.  The fanboy also passes, which just leaves Jimmy. 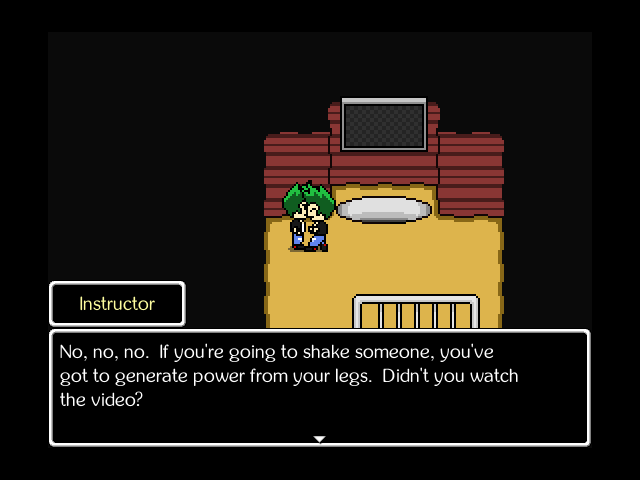 GOIN' FOR EXTRA CREDIT  If you enter the hole as a non-Goon form, you fail the test, but Information Guy will help you get back in. But we passed, because we can think exactly like a Low-Level Goon. 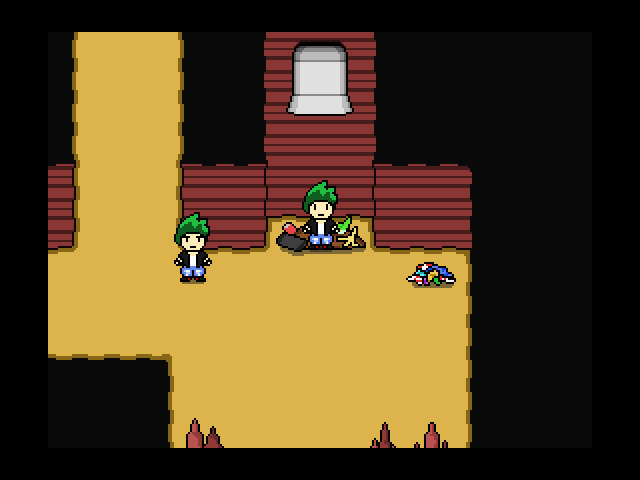 Music: Worm Party And with that, we're in.  I dunno man you tell me. 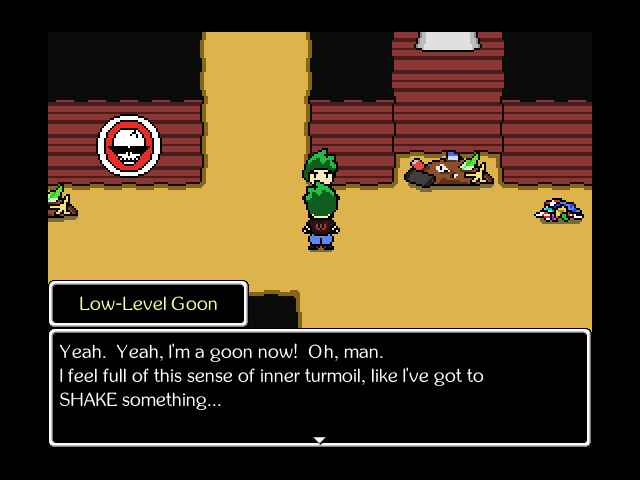 I feel the same way. Here, let me show you.  Awesome. Anyway, let's check out the HQ. 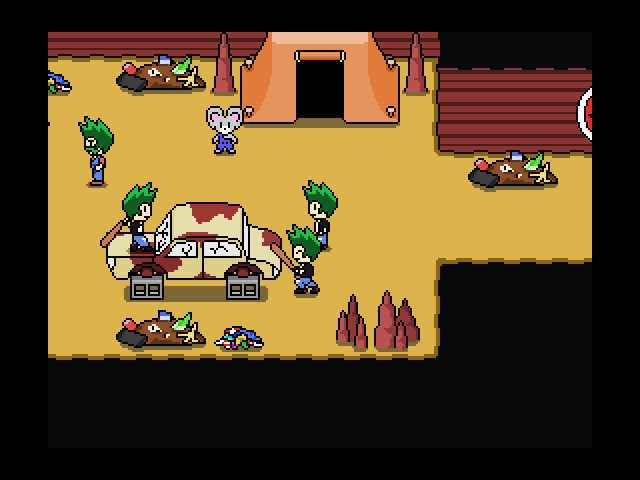 Aha. I see that they're getting down to what really matters in life.  Um. Beg pardon?  Hey, be cool, man. First rule of gooning: you're all low level, so don't judge.  Ms. Robin sells the last two pieces of the Rustic Set here but otherwise has unchanged inventory, so we'll pick those up and set them up after this area's done. If I was smart, I'd buy consumables. I'm not smart, very frequently.  Quote:
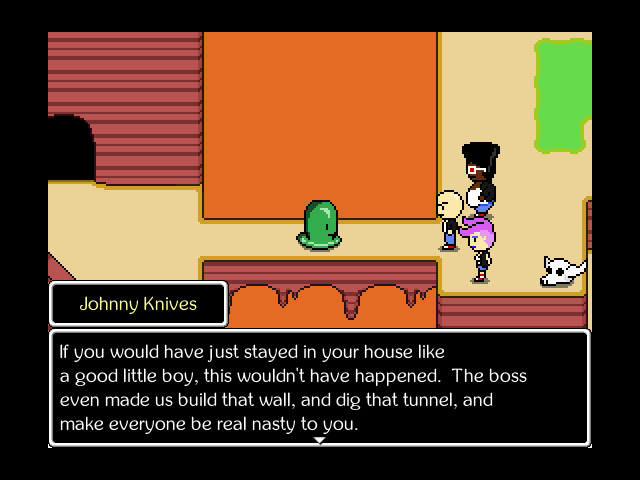
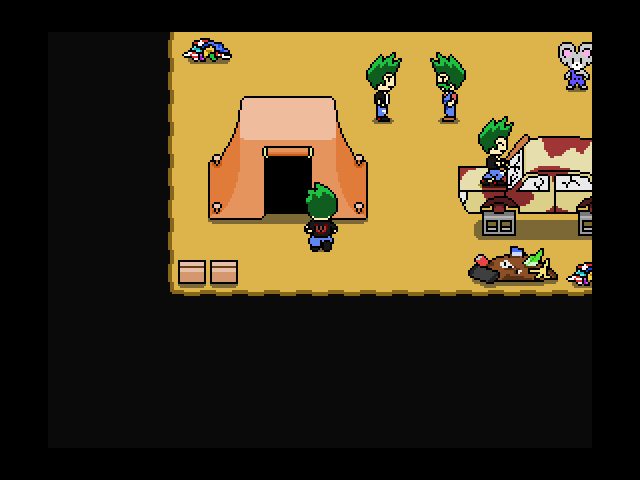 Anyway, let's check out the tents. 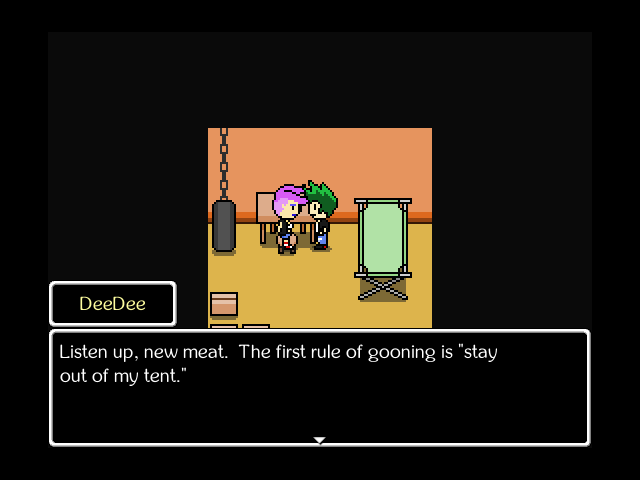 Huh, unique goon. Perhaps someone who outranks mere goons? Anyway, DeeDee will have no truck with us, so we'll leave her be. 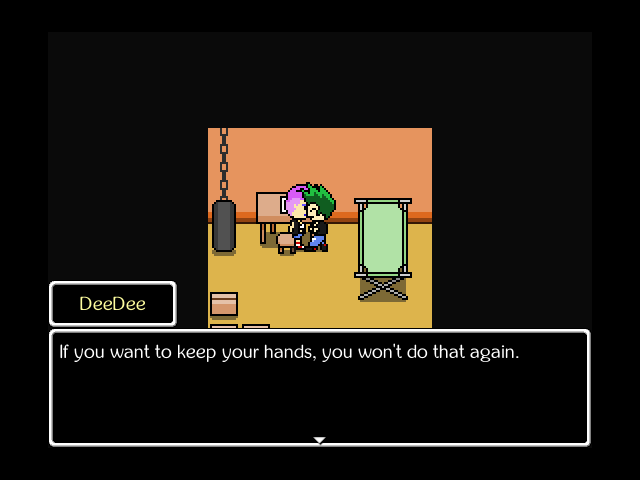 After a bad idea. 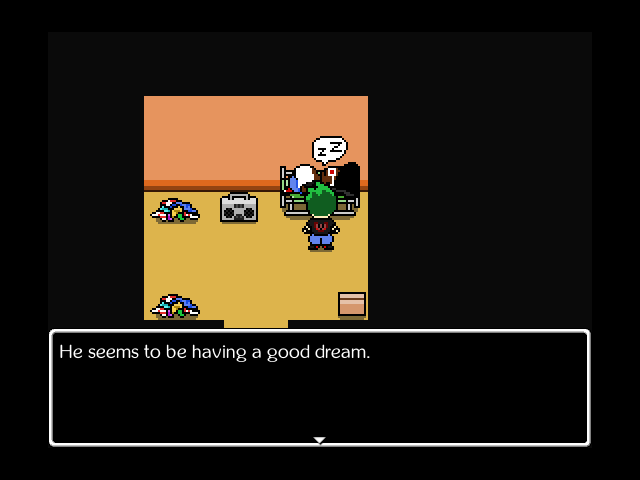 In here is Big Enormous. You can shake him to drag him out of bed, but that's mean, I like him, and also that gets you into a fight with him, so we won't do that. 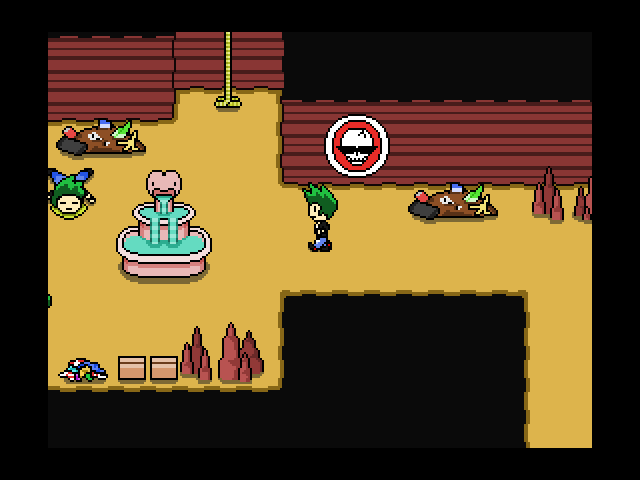 Heading up the path past the first goon takes us to a healing fountain and a rope to climb higher.  You knew what you were signing up for. 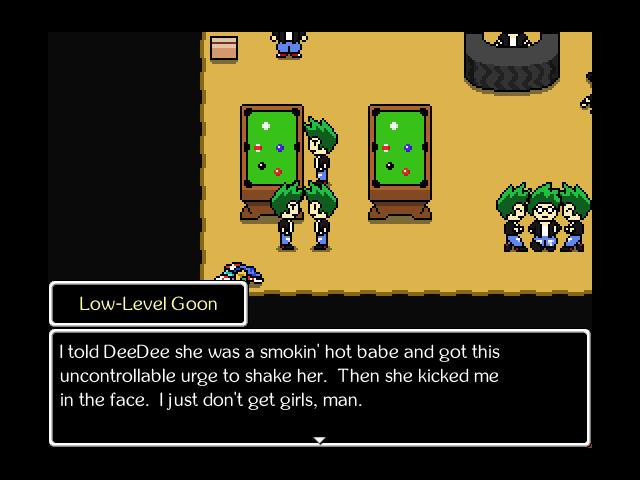 Ah, so we're lucky, then. 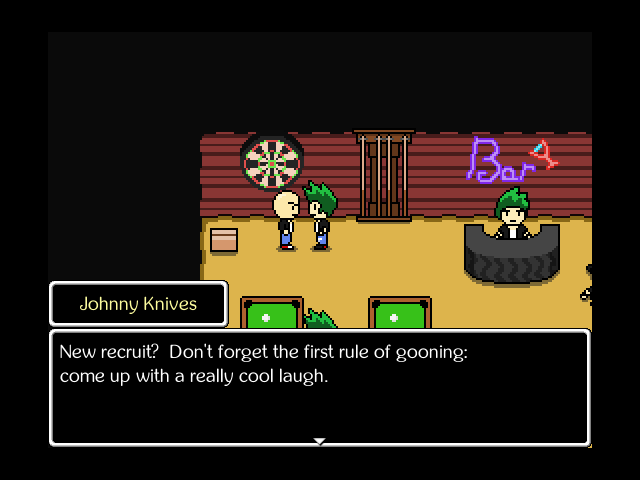 Guess this is another bigshot. Wonder why they call him Johnny Knives. 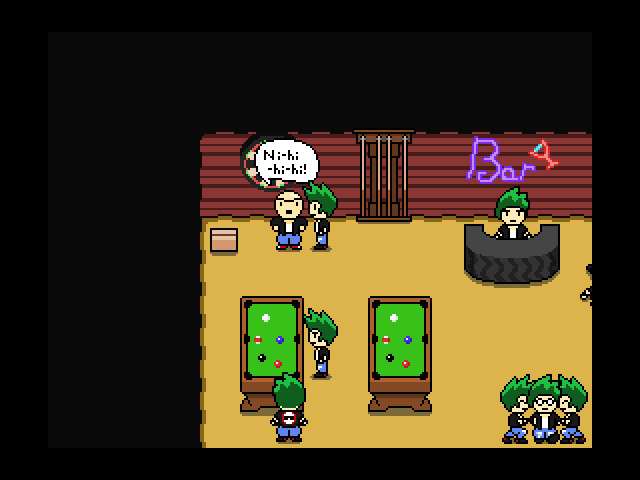 Maybe because his laugh is like getting stabbed in the ear. 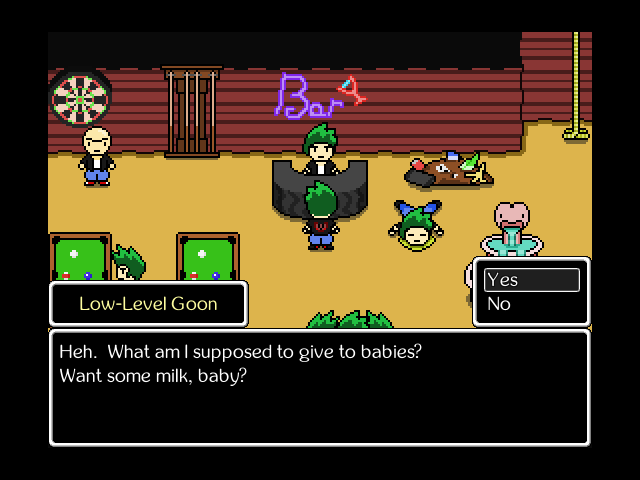 Honestly it's pretty hot outside so yeah that sounds good. 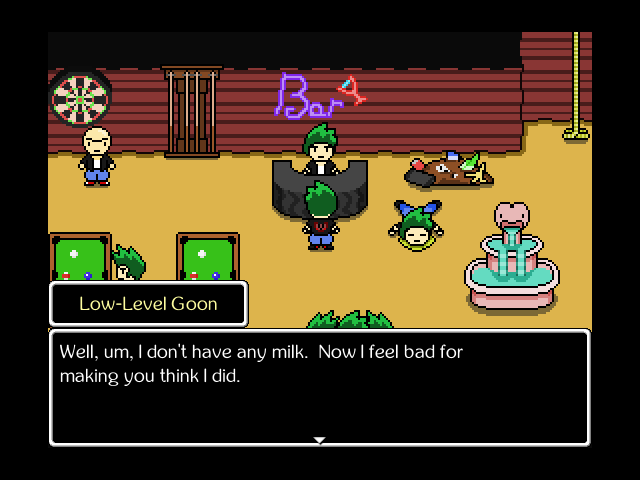 Lame. |
|
#24
10-26-2019, 07:24 PM
|
||||||||
|
||||||||
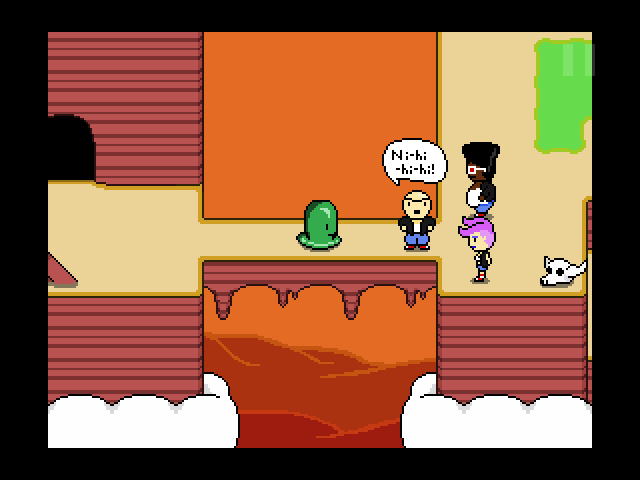
 Quote:
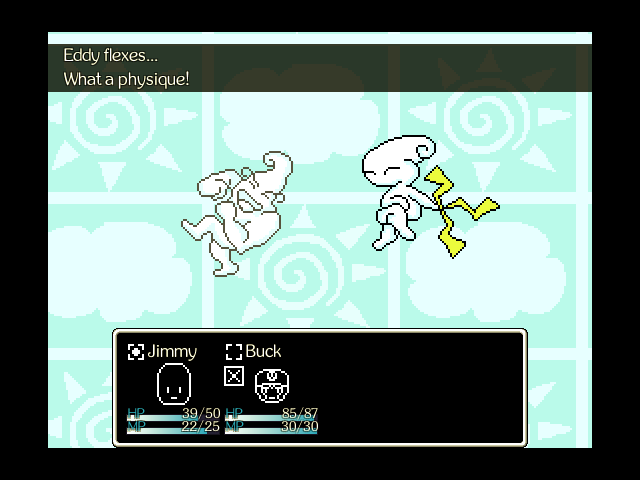
 And even though he's a jackass big brother...  He does NOT tolerate people aside from him picking on Jimmy. 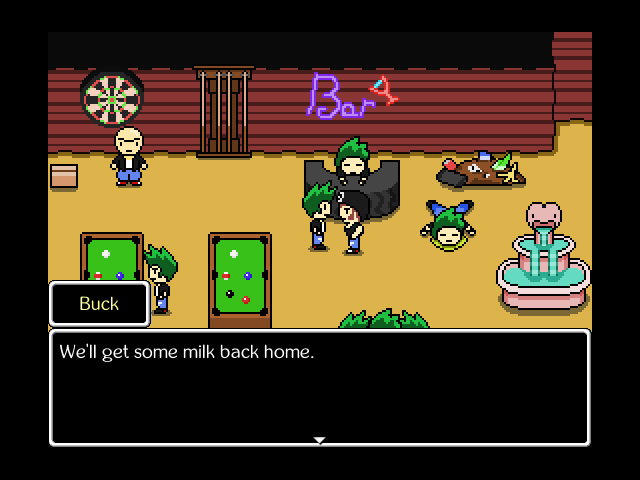 Uh. Thanks.  Kay that was fun, now what?  Music: Fortress of Nitwits Oh. 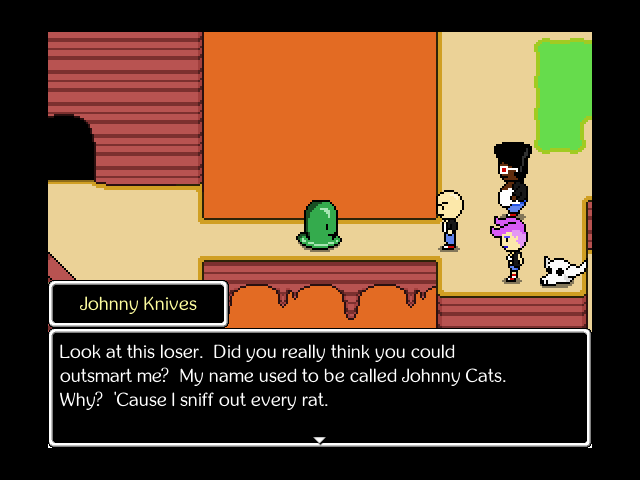 Quote:
 Music Quote:
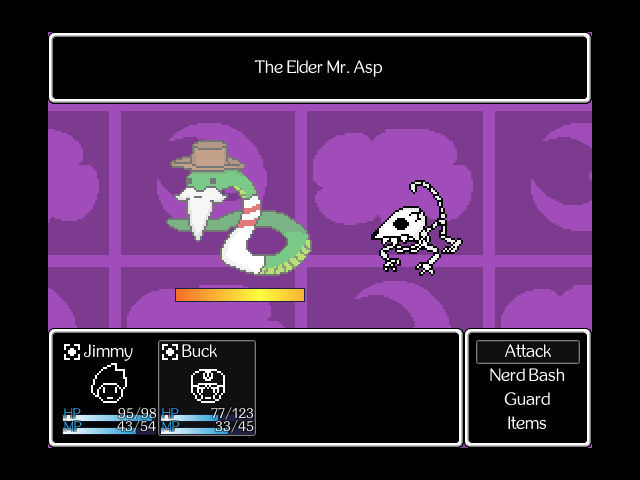
 Area boss for the Wilted Lands: Music: Motion Sickness The Petty Thugs: so petty they don't even get their own battle music. Each of the three handles slightly differently, and it's up to you which order you deal with them. DeeDee is the fastest member of the team, and can either do a normal attack or a leg sweep that Startles. Big Enormous is slower, but much hardier, and has a versatile moveset including a basic attack, a cranked-up boombox tune that Motivates everyone, and a bear hug that Grasps one character. It only lasts for two turns, but characters that are Grasped can't do anything. You can Startle Big Enormous to end the effect early, but it's not really that pivotal to do so since maintaining the hold takes up his turns. As for Johnny Knives, he's got a good balance of speed and power, and can either attack, flail to attack everyone, or cackle maniacally, which telegraphs a triple attack next turn. If you Grift his Knives away, he turns into Johnny No-Knives, sharply impacting his offense and changing his moveset to either attack normally or toe the dirt. Usually, my strategy goes how you see here: Grift the Knives away, take down DeeDee, then Big Enormous, then Johnny No-Knives. These guys aren't especially dangerous, but you don't want to overextend against them, and if Jimmy gets stunlocked by DeeDee and Big Enormous before he can Grift the knives away, Johnny Knives can really do some damage. And if things are really giving you trouble, then fight Big Enormous by shaking him out of bed earlier, and he won't participate in this fight.  Music Quote:
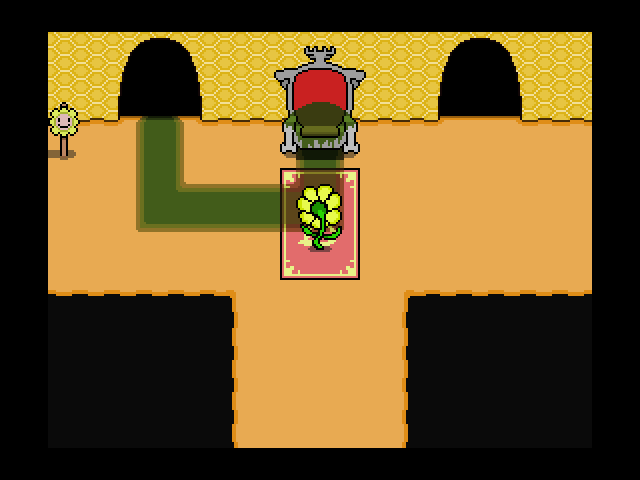
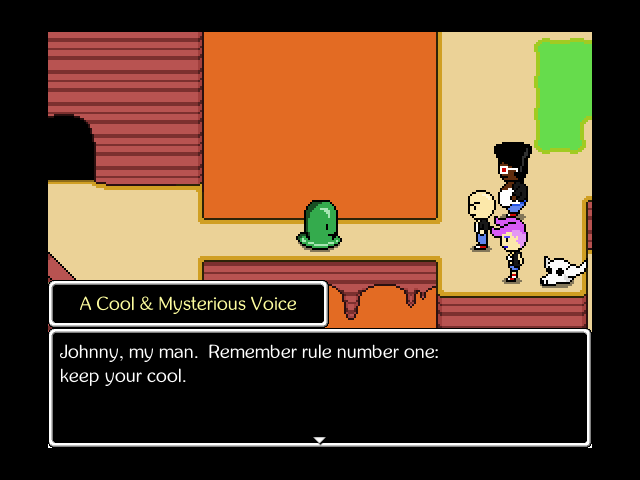 Oh my, a cool and mysterious voice!  Music: Knuckle Sandwich and Ladyfingers It's the leader of The Petty Thugs! 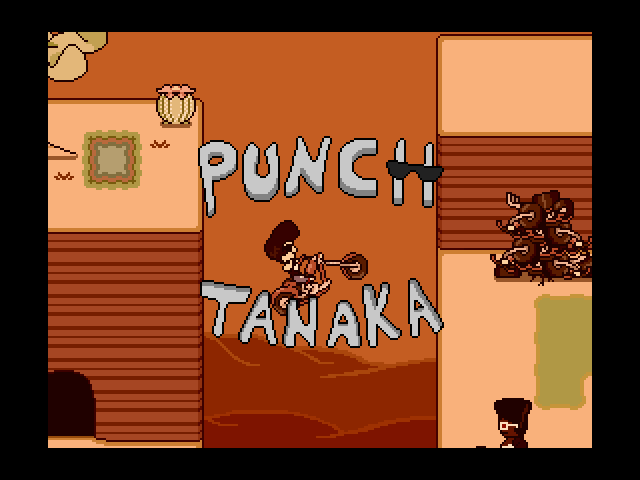 That's right, it's Punch Tanaka! 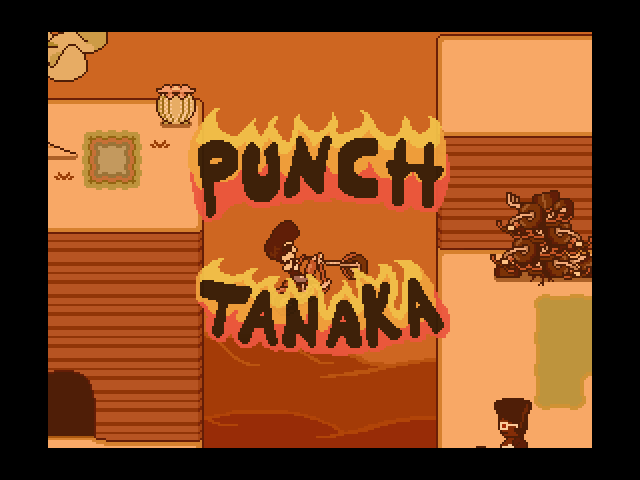 He is by far the coolest, baddest dude around. 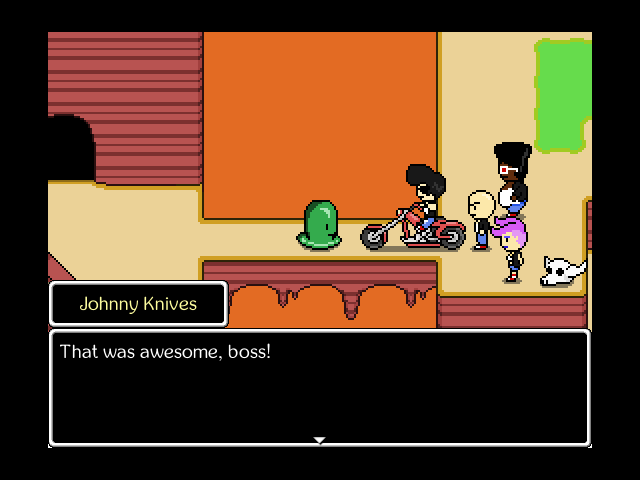 Quote:
 Hey, a cool entrance like that takes practice. 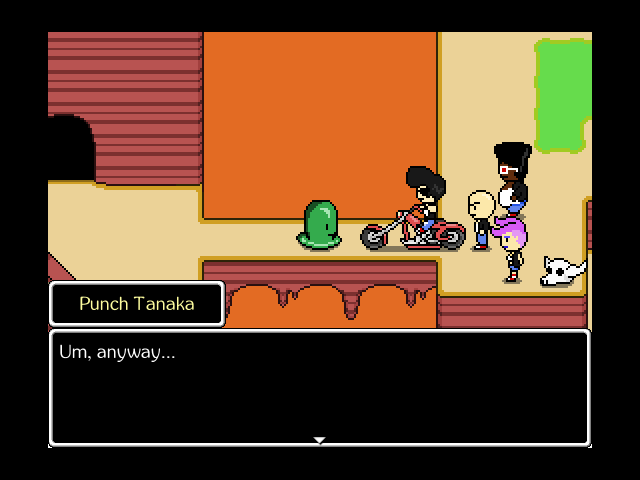 Quote:
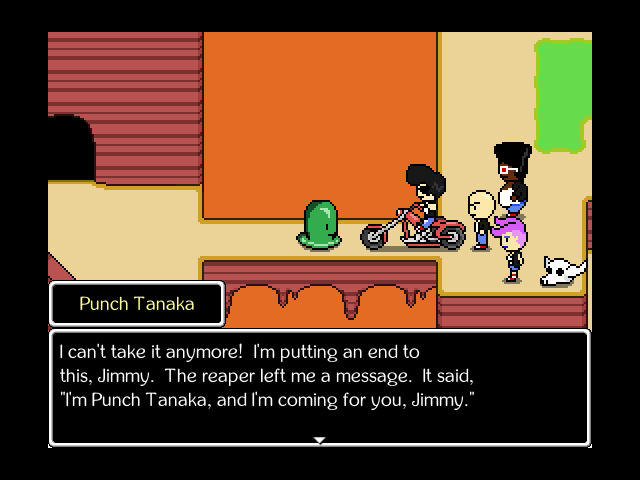 Anyway, here's the second boss of the Wilted Lands! Music: Beach Volleyball Massacre Punch Tanaka takes us on, and brings an actual boss theme with him. Thankfully, this fight is manageable even after fighting the rest of The Petty Thugs. In addition to a normal attack, Punch Tanaka can telegraph either a Magnificent Combo next turn when he lifts his shades, or a counterattack if he gets out a mirror to check himself out. Neither move is fun to handle, but the good ol' Sticky + Insult combo can shutter either move without issue. At half health, he also brings the Bully move into play. And if you bring him down to a fifth of his max health, he'll bust his own version of a Clean Getaway out, denying you that extra XP or the (non-unique) item drop he has. I misplayed just badly enough that I messed that part up (if Buck did Insult on that last turn, Jimmy would've had time for an extra Bully) but considering I got to snipe the Rad Ghost earlier, I'm content with this result. That snafu aside, this was a pretty mild encounter with Punch Tanaka. 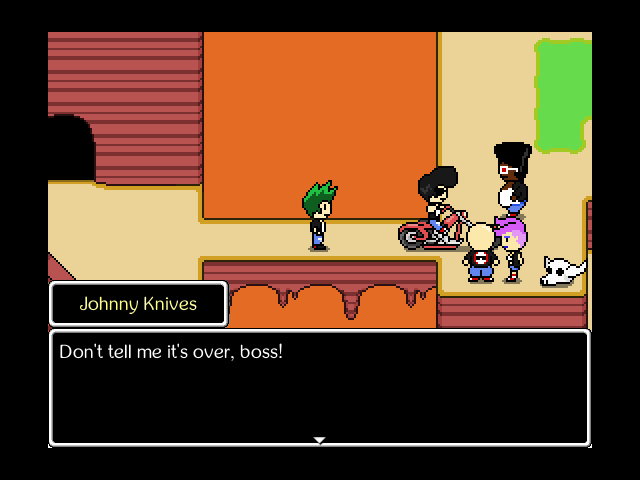 Music: Knuckle Sandwich and Ladyfingers Quote:
 Music But as we leave, Punch has one more thing to say. 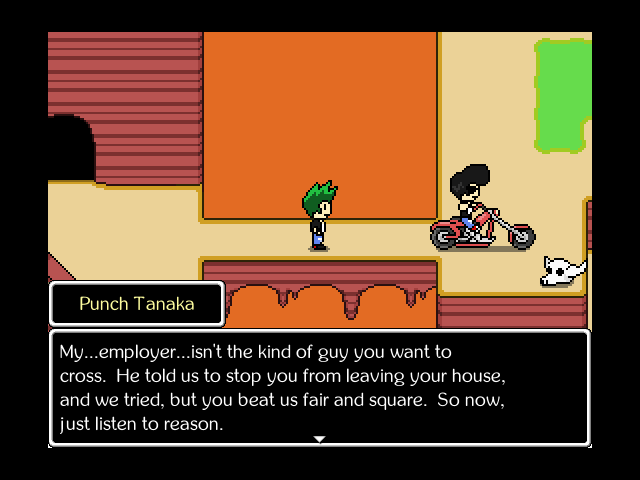 Music: Skin Thieves Quote:
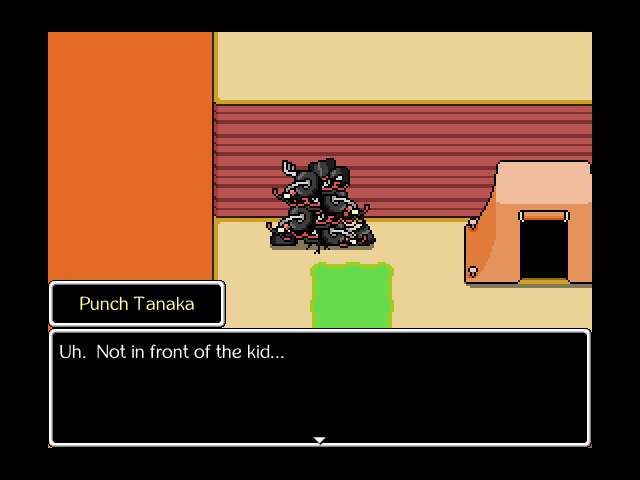
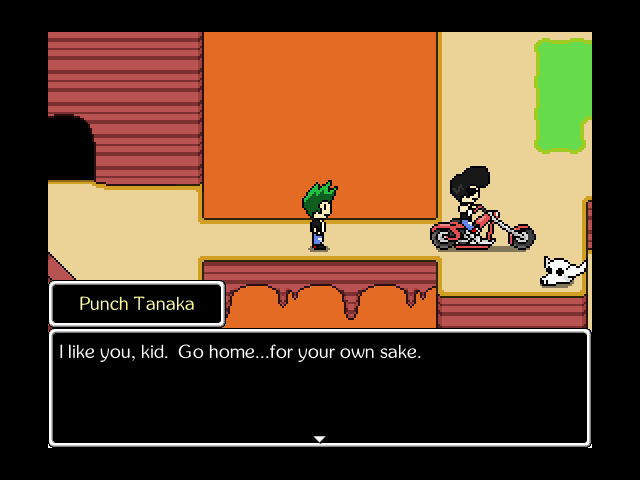 Music Punch Tanaka might be a self-absorbed idiot, but I don't think he's a bad guy. 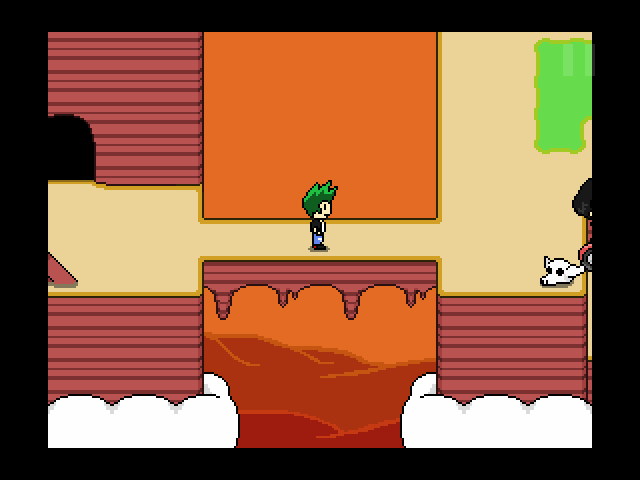 And off he goes. 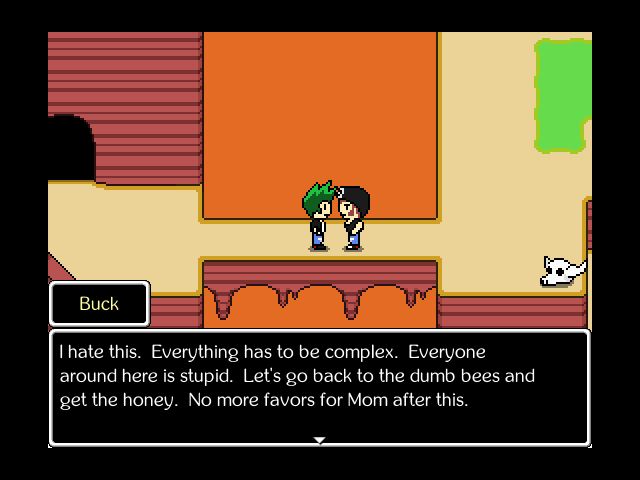 It's not that hard, Buck. We get the honey and we're done. 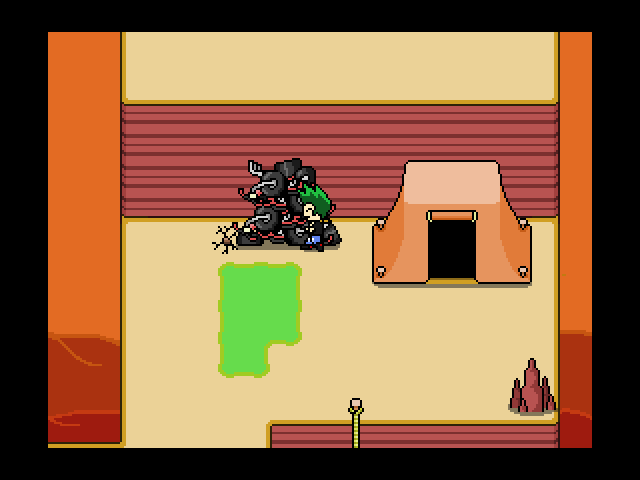 Music: Fortress of Nitwits Now that we're done, we can uncover a secret if we pull aside the pile of wrecked motorcycles. We're not going there until after we tackle the next full area, though. It's just a hair tougher down there. Last edited by Kalir; 10-27-2019 at 01:26 PM. |
|
#25
10-26-2019, 07:25 PM
|
||||
|
||||
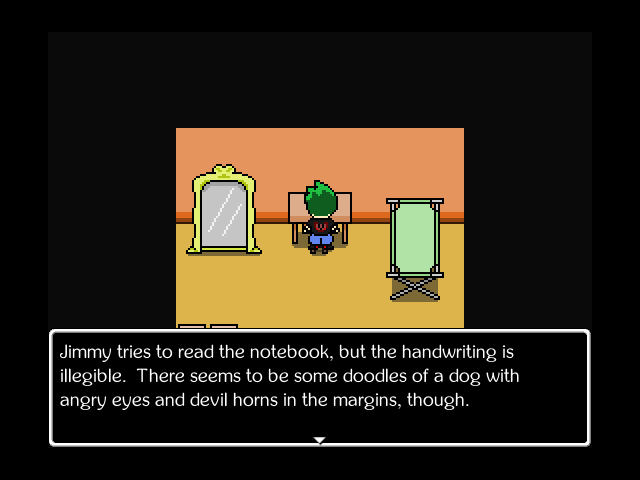 This is all that's in Punch Tanaka's tent. Just this journal and the mirror, which... 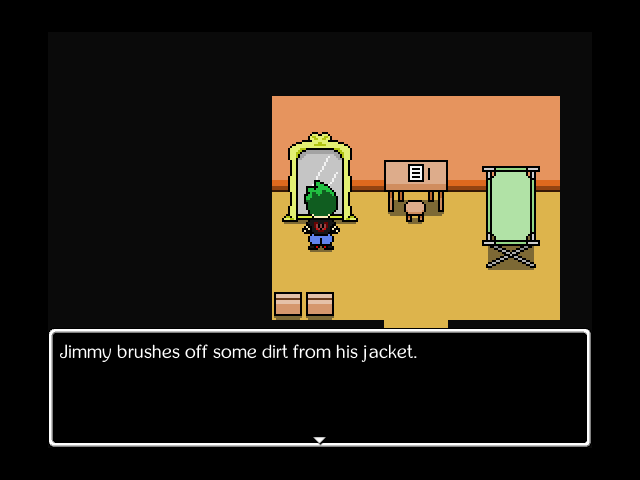 Nice. The text for the mirror varies depending on form:
 Let's wrap today up, go get the honey, and call it. 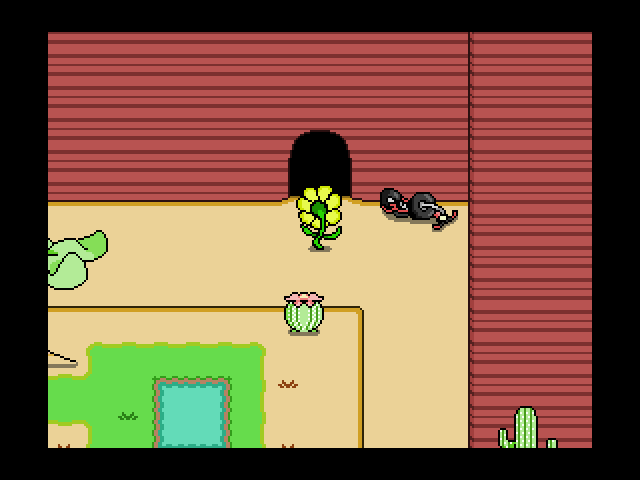 I see Punch immediately wrecked this motorcycle too.  Going in the tunnel next to the motorcycle gets us the last toybox of the area. 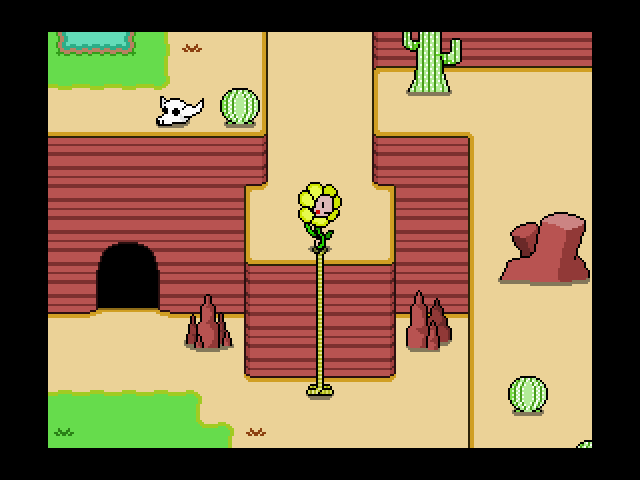 And we have a rope tossed down as a shortcut back to the summit for later. We will be using it, naturally. 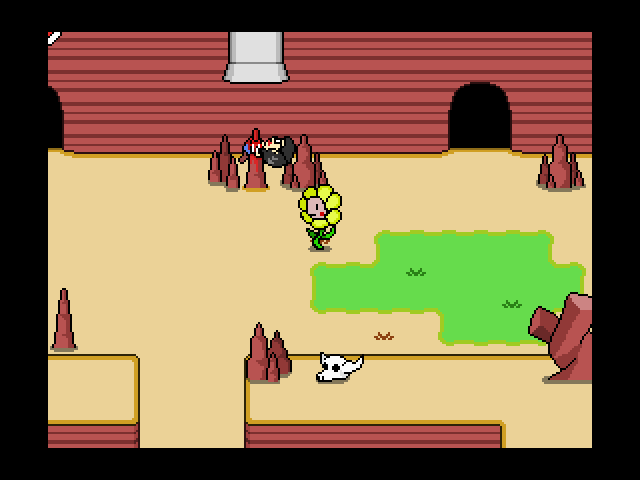 Eugh. Glad we didn't fail the exam, I guess. We'd probably just land on him rather than the crags, but even so.  Music: Adventuring for Beginners Right, new furniture. We've got the Boring Table (+1 MDF, 1/4 of the Rustic Set): Quote:
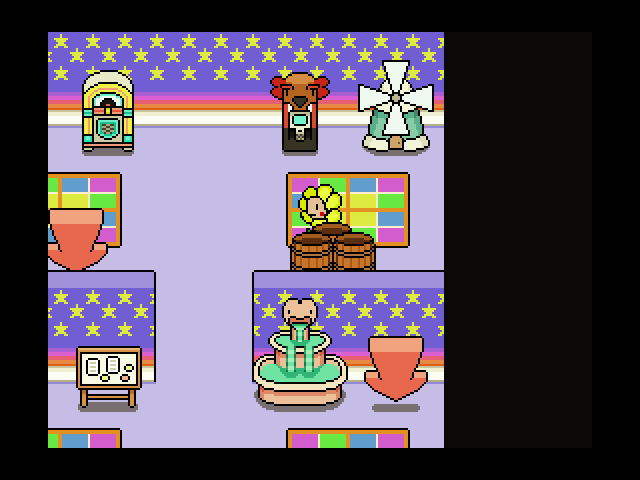
Quote:
 Which completes the Rustic Set. Remember that furniture applies to everyone in your party, so completed sets are really powerful. All of the Common Sets are +5 to a single stat, with one exception, so they're not that competitive with a bunch of high end stuff in the long run, but early on it's nice. They also take fewer slots than other sets and tend to have set pieces sold in very close proximity, so it's very easy to get two Common Sets going. 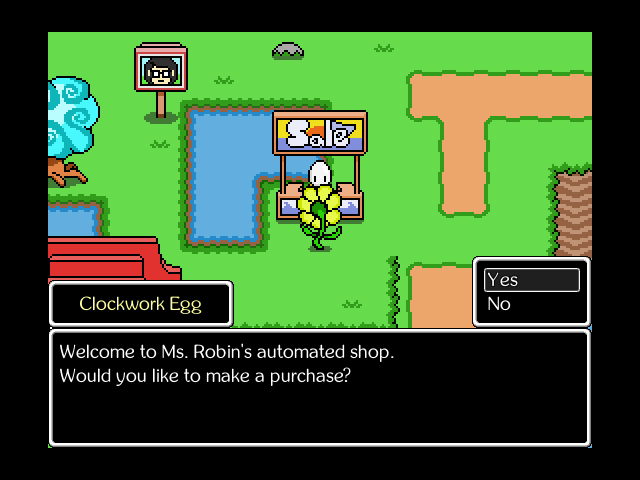 Music: My Animal Friends Whenever Ms. Robin sets up shop somewhere, she leaves behind a clockwork egg to keep selling things at that spot once she's left. Convenient! 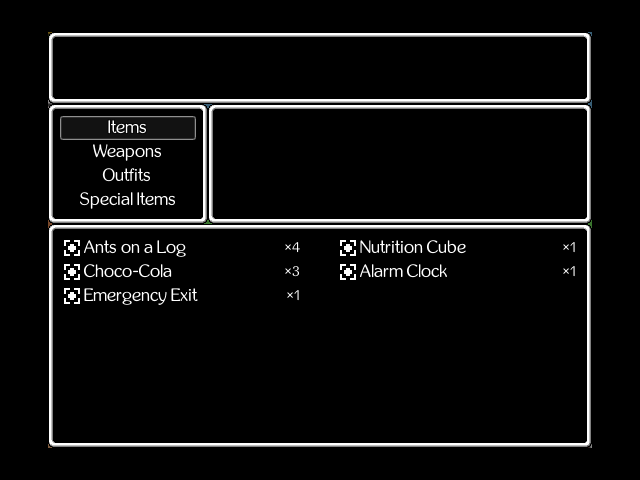 I pick up some extra snacks to complement the cake. 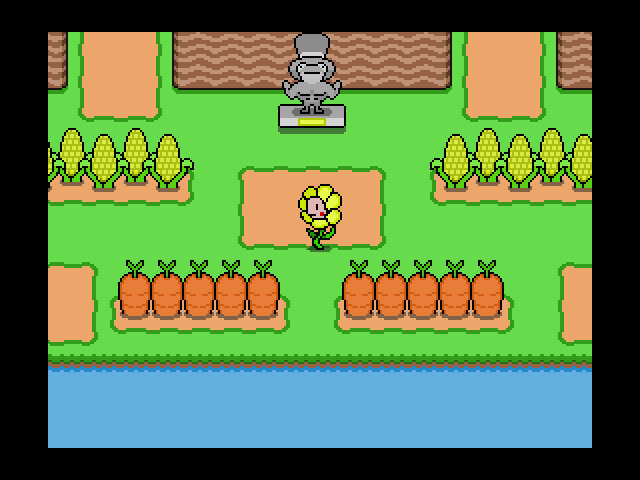 Music: Adventuring for Beginners Looks like Mr. Marvelous has taken off, too.  Probably means Ms. Mole is done with her last tunnel! 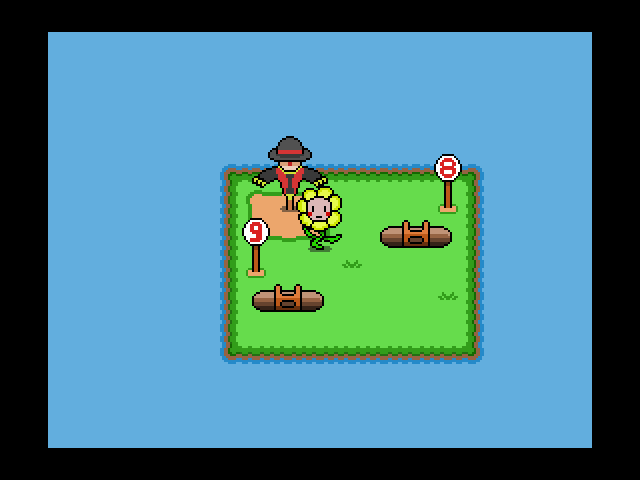 Nice. 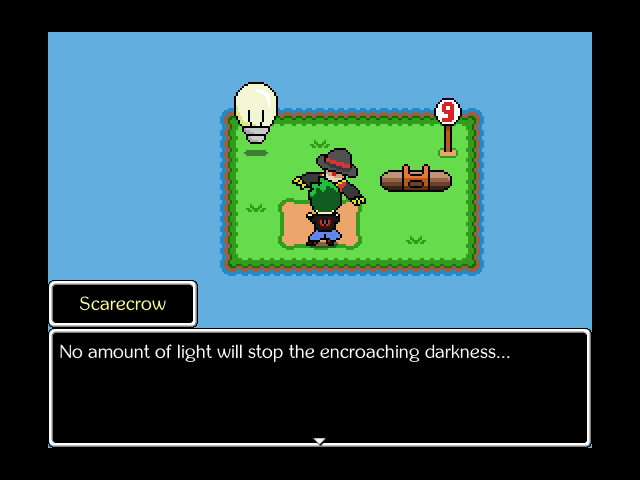 We turn on the lightbulb at the end of tunnel #9 just to spite the scarecrow. 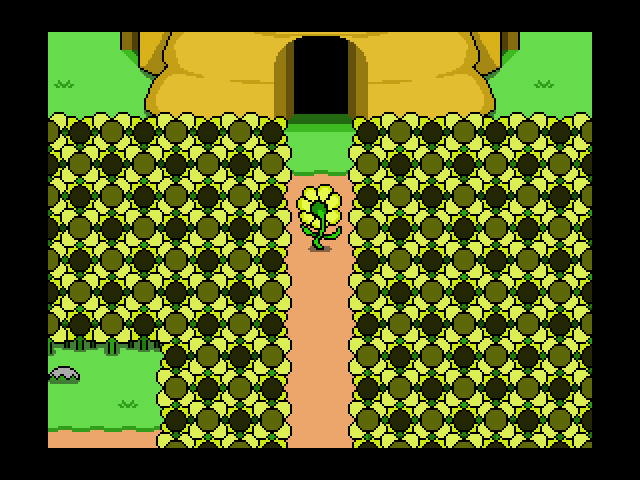 All right, buddy bees, we took down The Petty Thugs! We're ready for that honey!  Music: Cacophony of Bees What 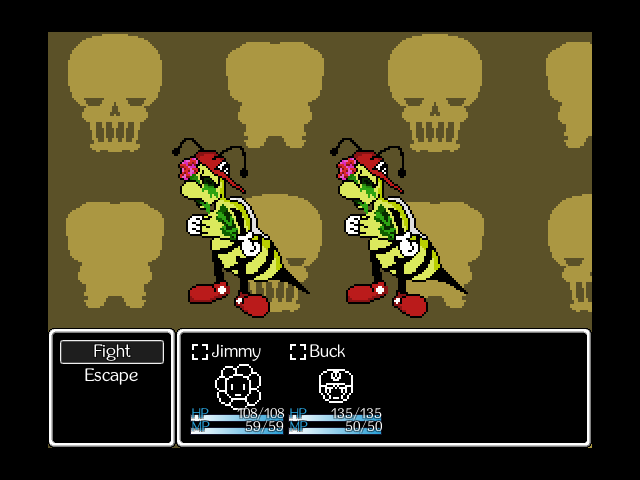 Quote:
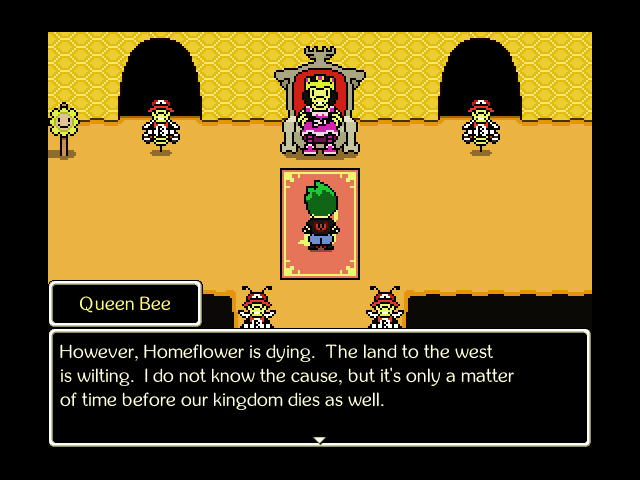
 What the hell happened here? Next Time: Everything stinks here, Jimmy. Everything hurts here, Jimmy. |
|
#26
10-26-2019, 07:45 PM
|
|||
|
|||
|
I love shaking that low-level goon guard. What an incredibly good joke.
Also the cheater passing the goon test because a goon would cheat. Also literally everything about Punch Tanaka. Jimmygame is so good. |
|
#27
10-27-2019, 08:59 AM
|
|||
|
|||
|
Quote:
|

|
#28
10-27-2019, 01:33 PM
|
|||
|
|||
|
Quote:
 No update today. Trying to build a backlog and I keep underestimating how long it takes, because this game is so dang fun. |
|
#30
10-28-2019, 03:15 PM
|
|||
|
|||
 Music: Cacophony of Bees Let's head this way first. Somehow I'd rather not follow that trail of... whatever that is immediately.  The tunnels outside the main foyer are dark.  Before long, we come across a Buddy Bee in a locker room. 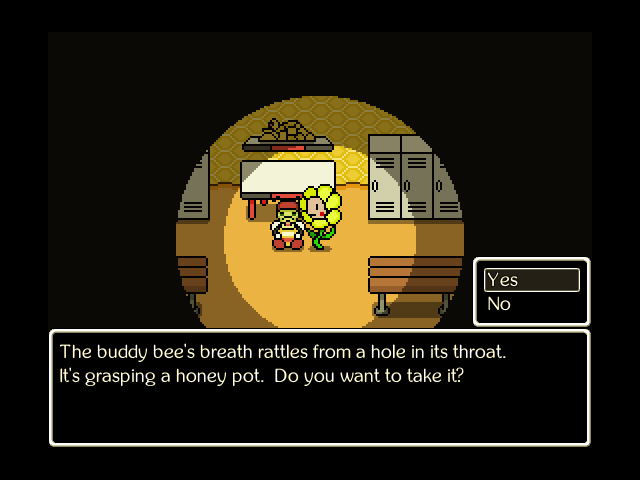 I don't especially WANT to, but I get the feeling these guys won't give us any honey willingly, and I don't think we have a way to help them. 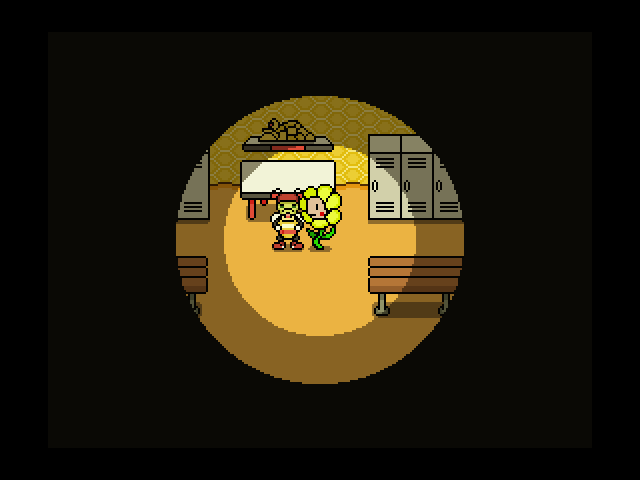 It stands up with an ear-splitting screech and attacks!  The Buddy Bees have a lot of health, but attack so infrequently that we're at little risk if we just mash the basic attack move ourselves. 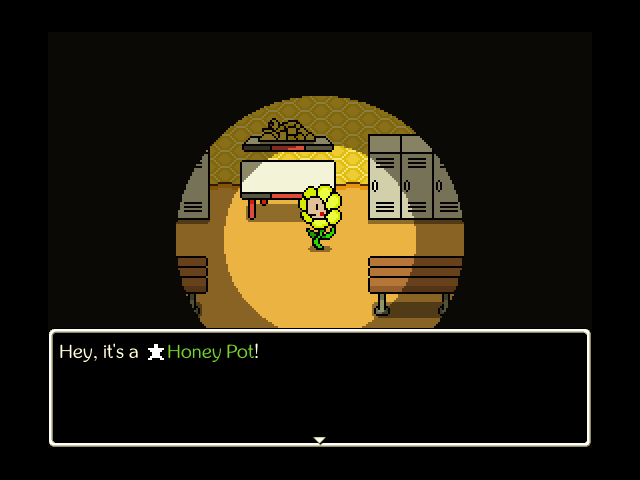 Nothing else is in this dead-end. 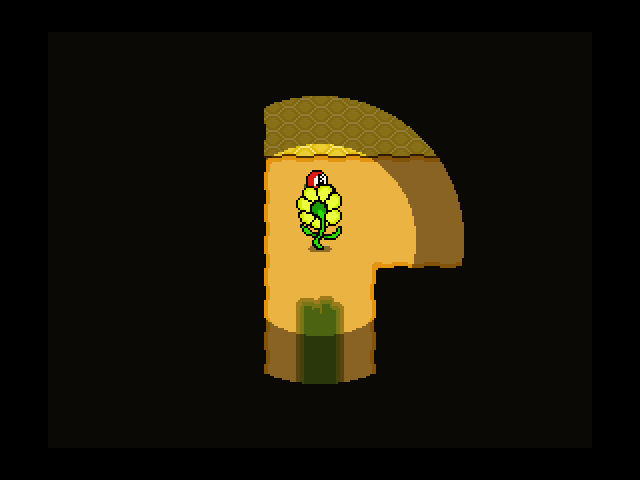 The slime trail ends quickly, but this path will be a lot longer.  Still have no idea what could've done this.  Guess we've got the only intact Honey Pot, all the others are smashed beyond repair. 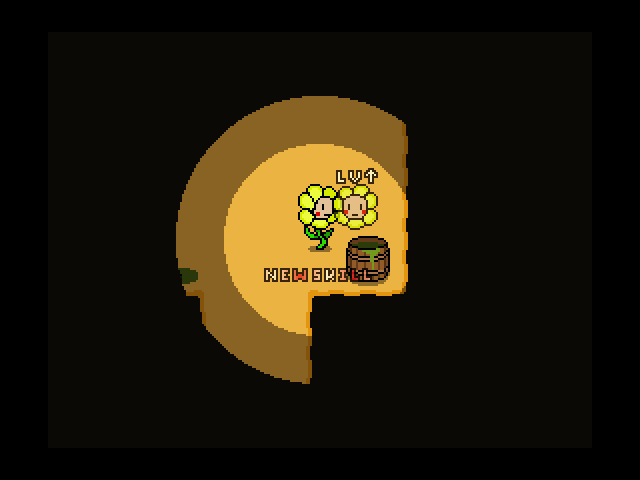 Good time to pick up the Mental Clarity skill.  Not far ahead, we encounter what used to be a member of the Royal Guard. 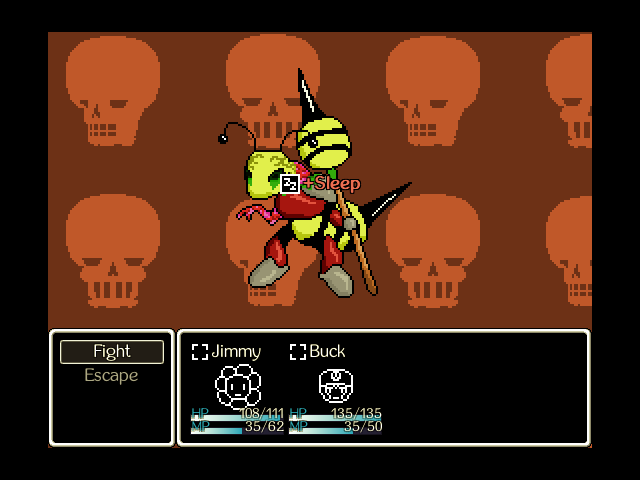 Quote:
Royal Guards are appropriately statted to fight as minibosses, and have a normal attack, a stinger attack that can Startle the party (but not much speed to use it with), and can tense up in a combat stance to telegraph a really powerful slam attack next turn. Like the Buddy Bees, they're considered undead and therefore weak to Sunshine. 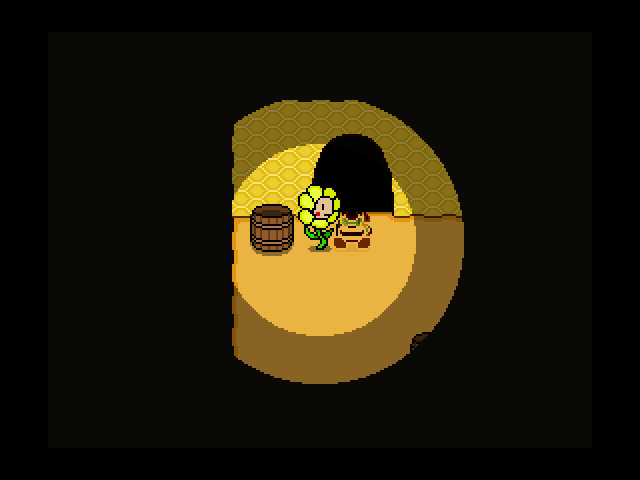 They're tough, but not especially threatening. More taxing than anything, mentally for sure. 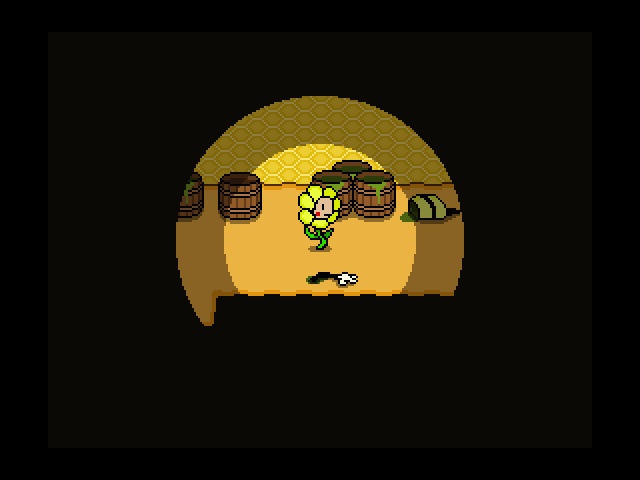 In the next tunnel, things get worse. 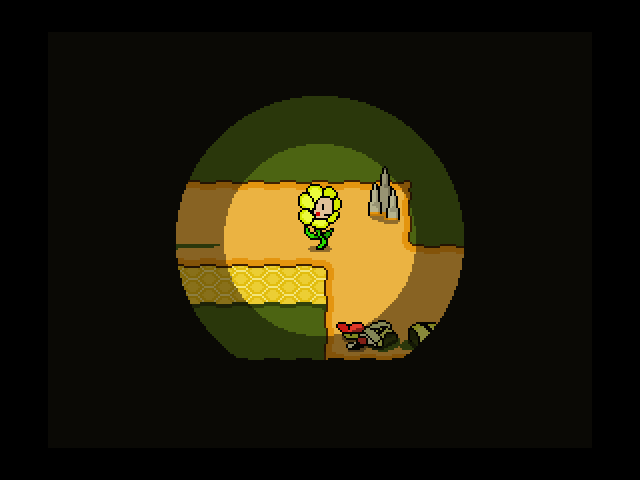 Most of the honey we'd normally see this far down is rotted beyond salvage. 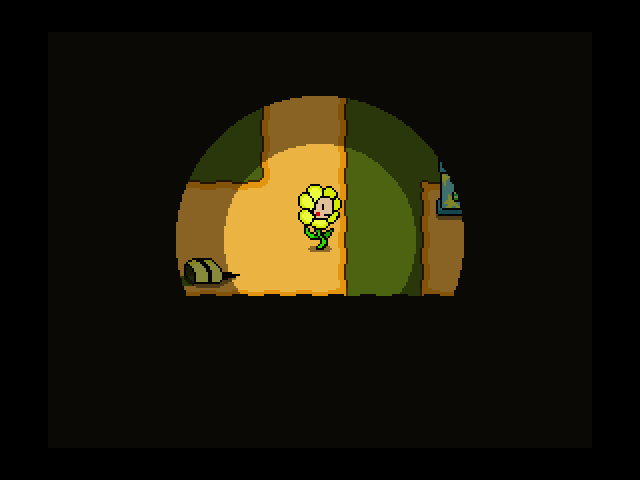 There's some valuables here, but not many. 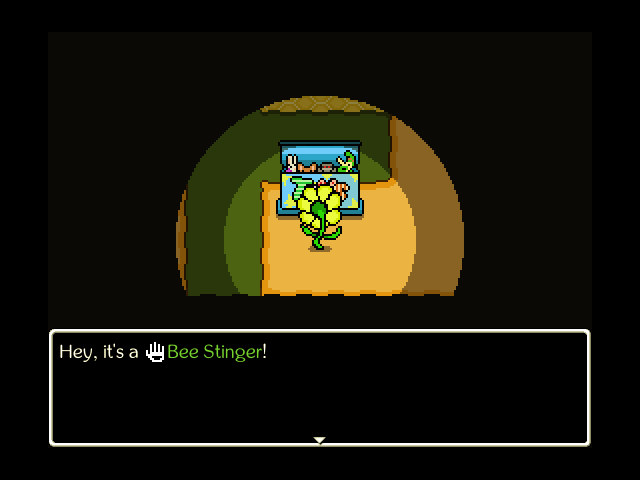 Quote:
 Back to the main path. 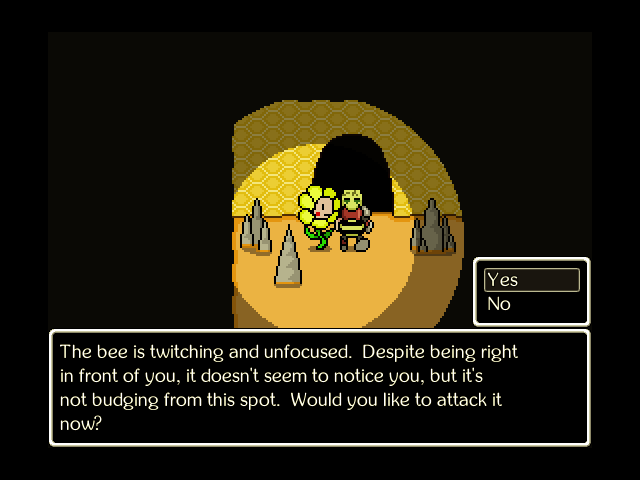 Time for the next Royal Guard. 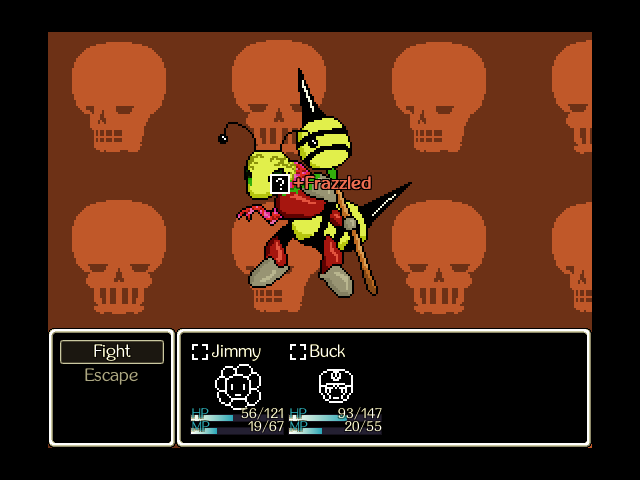 This one is Frazzled, and can attack itself as well as us. It is still a giant wall of health. 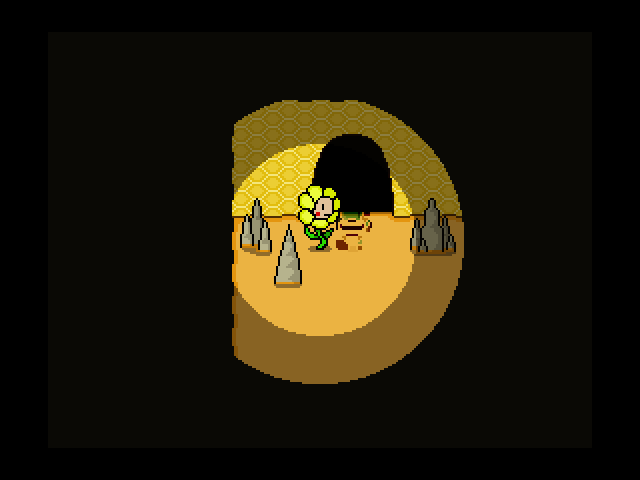 One more down. 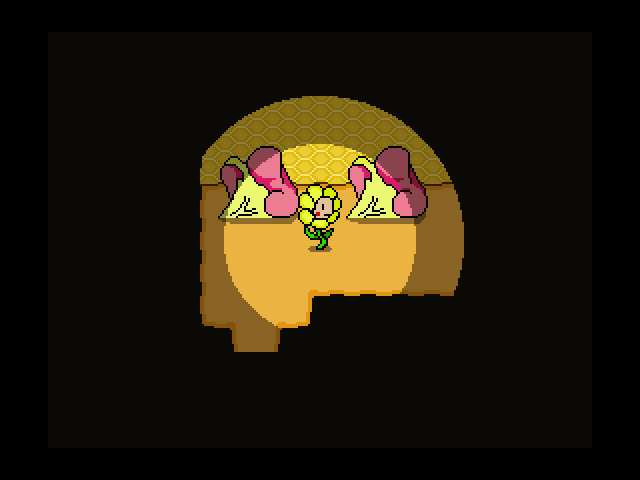 Further down and things are somehow getting even worse. 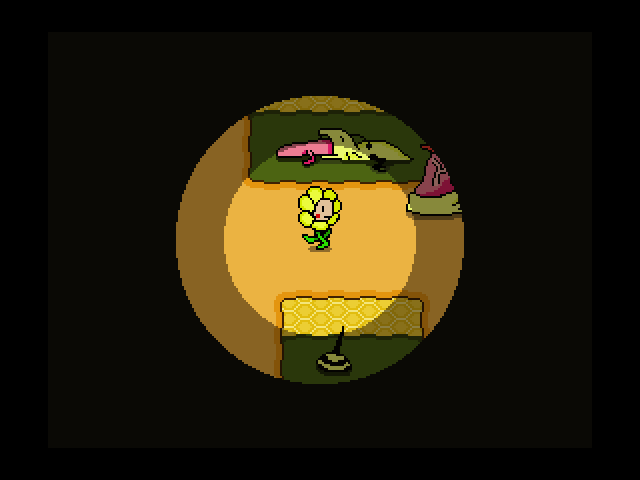 Some of these bees have mutated so hard that they've broken themselves in the process.  It's beyond description. |